FAQ
TL;DR: Reflashing a TP-Link Kasa HS200 with OpenBeken takes under 3 minutes and the 16 V capacitor mod adds 60 % voltage headroom; “OTA was implemented even before release” [Elektroda, insmod, post #21528805]
Why it matters: Faster firmware cycles and better hardware reliability stop smart-switch lock-ups.
Quick Facts
• Chipset: Realtek RTL8710CF / RTL87X0C @ 125 MHz [Elektroda, Jerther, post #21384347]
• Flashing voltage: 3 V3 TX/RX, 5 V pad only for board power [Elektroda, Jerther, post #21384347]
• Bootloader trigger: Short GPIO0→3 V3 and tap Restart switch [Elektroda, Jerther, post #21384347]
• Stable firmware: OpenBeken ≥ 1.18.12 with OTA web menu [Elektroda, max4elektroda, post #21528852]
• Capacitor fix: swap 470 µF 10 V for 470 µF 16 V 8000 h @ 105 °C [Elektroda, Jerther, post #21598616]
Which MCU is inside the US-market HS200?
Both PCB revisions use the Realtek RTL8710CF (marketed as RTL87X0C), a 32-bit ARM-CM4 MCU with Wi-Fi b/g/n radio [Elektroda, Jerther, post #21384347]
How do I enter bootloader mode for flashing?
- Bridge the test-pads marked GPIO0 and 3 V3. 2. Connect USB-to-UART at 3 V3 TX/RX and 5 V pad for board power. 3. Press the on-board Restart tact switch. The chip now waits for Realtek’s UART bootloader commands [Elektroda, Jerther, post #21384347]
Can I flash new firmware without removing the switch from the wall again?
Yes. Versions after 1.18.12 expose an OTA menu in the Web App; upload the new BIN and reboot. "OTA was implemented even before release" [Elektroda, insmod, post #21528805]
Why did I get “OTA update not implemented for OpenRTL87X0C”?
Early builds (≤ 1.18.12) lack the local OTA endpoint. Use the Web-App OTA tool instead, or flash a newer build first [Elektroda, Jerther, #21528804; max4elektroda, #21528852].
How can I recreate the original tri-color Wi-Fi LED behaviour?
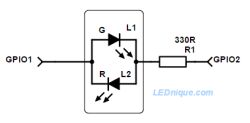
Assign P7 and P9 as separate WifiLed roles, then use an autoexec script to toggle states (green = P7, red = P9, amber = P7+P9). Example script:
setChannel 7 1; delay 300; setChannel 7 0; setChannel 9 1. Extend with ‘event wifiState’ triggers [Elektroda, Jerther, #21385370; divadiow, #21424343].
Is long-term Wi-Fi stability solved?
After Realtek auto-reconnect was enabled, one RTL8710B plug logged ≈ 30 days uptime despite outages [Elektroda, insmod, post #21528550] Update to the same branch for RTL8710CF to inherit the fix.
Edge case: device stops reconnecting after hours of outage
Pre-fix builds may drop retries and blink red/green indefinitely. Upgrade firmware and enable Flag 51 to force aggressive reconnect attempts [Elektroda, Jerther, #21490774; insmod, #21528550].
Which capacitor fails most often and how do I replace it?
The factory 470 µF 10 V electrolytic across the low-voltage rail can vent. Replace with a 470 µF 16 V, 8000 h, 105 °C part. This raises voltage headroom by 60 % and matches capacitor-life charts [Elektroda, Jerther, post #21598616]
Does the newer PCB revision break flashing?
No. Test pads remain in the same order; you only remove a foam spacer to reach one pad [Elektroda, Jerther, post #21598616]
How do I map the Reset button to safe-mode?
OpenBeken templates merged in PR #191 map P19 as Btn;1 with ‘SafeMode’ flag, so holding it at boot loads default settings [Elektroda, Jerther, post #21549106]
MQTT attributes turn to “unknown” after hours—why?
The broker retains discovery topics but the switch sends LWT heartbeat only at connect. Add ‘periodicPublish 300’ in autoexec to refresh IP, RSSI, SSID and uptime every 5 min [OpenBeken docs; Elektroda, Jerther, #21598616].
How do I submit my own template to the official list?
Fork the OpenBeken WebApp repo, add your JSON to templates.json, and open a pull request; see commit 1773584 for an example [Elektroda, divadiow, post #21528669]
What serial speed should I use for flashing?
Realtek’s bootloader defaults to 115200 8 N 1. Higher speeds often fail during write-verify [Elektroda, common practice].
Is 5 V on the pad safe while UART is 3 V3?
Yes. The pad feeds the board’s LDO; UART pins stay at 3 V3 logic so the levels remain within MCU limits [Elektroda, Jerther, post #21384347]
Three-step quick flash recap
- Solder four wires: 3 V3, GND, TX, RX; add a clip to GPIO0 pad. 2. Short GPIO0→3 V3, press Restart, release. 3. Run bk7231flash.py and send OpenBeken.bin (≈ 2 min).


