logo elektroda
logo elektroda
X
logo elektroda

Flashing SILVERGEAR Smart Socket 3750: PCB Separation or Cloudcutter on Linux?

Powl654 342 5
ADVERTISEMENT
  • #1 21470051
    Powl654
    Level 3  
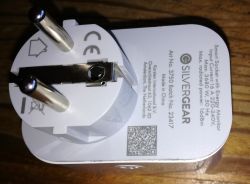
    A friend gave me this Tuya Smart Socket
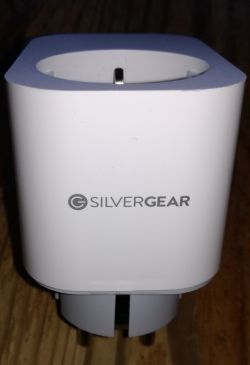
    SILVERGEAR Smart Socket ArtNo. 3750 with CB2S

    I could not find it on your list.
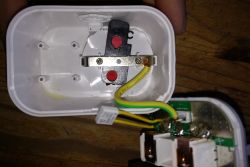
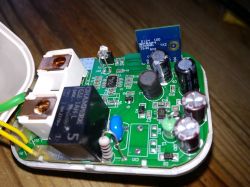
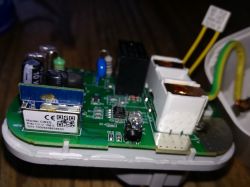
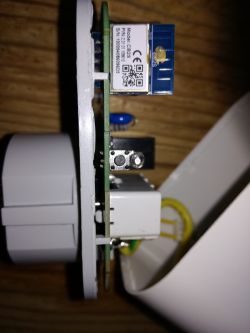
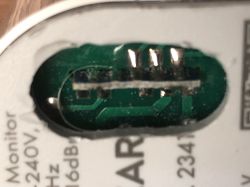
    I popped it open but I was not able to separate the PCB from the socket base to unsolder the CB2S and flash it.
    So I was thinking about using the Cloudcutter tool to flash this device. But as of now, I am only having a Win10 laptop and never used a Linux system before.

    Do you have any advice on how to separate the PCB from the base? Or is it less complicated to use the Cloudcutter tool on a Linux Live distribution?
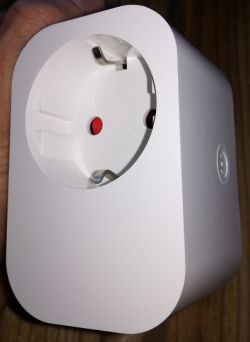
    White electrical socket held in a hand.
    White adapter with Silvergear logo.
    Silvergear smart plug with energy monitoring.
    Open casing of an electronic device displaying a printed circuit board and internal components.
    Interior of a plastic casing with electrical components and wires with yellow-green insulation.
    Close-up of a circuit board with various electronic components.
    Close-up of an electronic circuit board with components such as capacitors, resistors, and a module labeled CB2S.
    Side view of the internal components of an electrical socket with visible electronic parts.

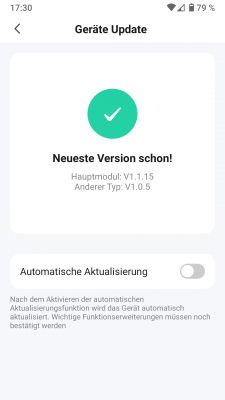
    And somehow his SmartLife screenshot seems to be helpful for you/new devices:
    Device update screen confirming the latest version is installed.

    Thanks for all your help!
    AI: Can you describe any specific steps you've already tried to separate the PCB from the socket base?
    I tried to use some force to push the 2 big pins through the socket base
    AI: Have you ever flashed a device before or used similar tools, and if so, what was your experience like?
    Yes, some ESPs and this Tuya Smart Socket EU20A with LN882HKI Chip using the new Win tool - see my comments here: https://www.elektroda.com/rtvforum/topic4091325.html
  • ADVERTISEMENT
  • Helpful post
    #2 21470329
    divadiow
    Level 34  
    Powl654 wrote:
    Or is it less complicated to use the Cloudcutter tool on a Linux Live distribution?
    Sadly firmware v1.1.15 is on the known patched list so Cloudcutter won't be an option anyway.

    https://github.com/tuya-cloudcutter/tuya-cloudcutter/wiki/Known-Patched-Firmware

    As with many plugs I've done, the main contacts with the PCB will need de-soldering in order to access all contacts on the module. It helps greatly to mix the existing solder with additional 63/37 lead to reduce the melting point. Otherwise you run the risk of warping/melting the plastic surrounding the prongs. eg https://www.elektroda.com/rtvforum/topic4103427.html
  • ADVERTISEMENT
  • #3 21481559
    Powl654
    Level 3  
    Thanks!
    Unfortunately I wasn't able to get the 63/37 lead.
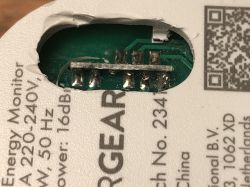
    So I used a DREMEL to grind a gap into the case just above the CB2S Module.


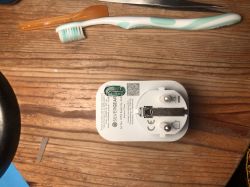
    Toothbrush and adapter with Silvergear logo on a wooden table.
    Close-up of a green circuit board visible through an opening in the metal casing of a device with partial technical specifications text.
    A part of an electronic device with a visible circuit board through a cutout in the casing.

    After that, I was able to unsolder the CB2S Module and flash the BK7231N successfully using the BK7231 Easy UART Flasher.
    Unfortunately I have not taken any backup of the original firmware.

    Now it is time to configure the device and find the correct Pin settings.

    Using the "GPIO Finder" I found out that P10/RX triggers the LED on the switch.
    Low=LED is Off
    High=LED is On

    I identified P26 as the button.
    And P24 is switching the relay.

    How do I find out which ones are for the power metering?
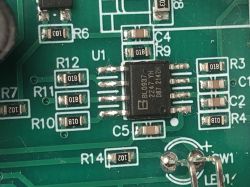
    And do I need to add a certain command to load the driver for the BL0937?

    Close-up of a printed circuit board with an integrated circuit, resistors, and capacitors.
  • ADVERTISEMENT
  • #4 21481619
    divadiow
    Level 34  
    Powl654 wrote:
    How do I find out which ones are for the power metering?

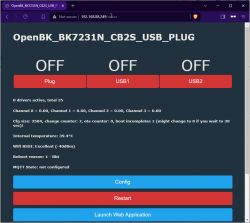
    if you took a backup Easy Flasher should be able to extract the pin assignments or if you didn't take a backup you can pull the Tuya config from OBK and run that through EF
    https://www.youtube.com/watch?v=WunlqIMAdgw

    Web interface of the OpenBK_BK7231N_CB2S_USB_PLUG device with Plug, USB1, and USB2 ports turned off.

    Added after 35 [seconds]:

    Powl654 wrote:
    And do I need to add a certain command to load the driver for the BL0937?

    no. with BL0937 pins assigned the driver will start automatically on next reboot
  • ADVERTISEMENT
  • #5 21482580
    Powl654
    Level 3  
    Thanks, that helped a lot!

    So I extracted this
    GPIO Configuration in JSON format from the flashed device:
    
    {
       "sel_pin_pin":"8",
       "rl1_lv":"1",
       "bt1_pin":"26",
       "net_trig":"1",
       "jv":"1.0.5",
       "netled1_lv":"0",
       "netled_reuse":"1",
       "bt1_type":"0",
       "ffc_select":"1",
       "vi_pin":"7",
       "resistor":"1",
       "over_cur":"20000",
       "bt1_lv":"0",
       "reset_t":"5",
       "netled1_pin":"10",
       "chip_type":"0",
       "lose_vol":"96",
       "over_vol":"265",
       "module":"CB2S",
       "ele_pin":"6",
       "ch_cddpid1":"9",
       "ch1_stat":"2",
       "rl1_type":"0",
       "ch_num":"1",
       "ele_fun_en":"1",
       "rl1_pin":"24",
       "vol_def":"0",
       "ch_dpid1":"1",
       "sel_pin_lv":"1",
       "crc":"4"
    }


    GPIO template:
    
    {
      "vendor": "Tuya",
      "bDetailed": "0",
      "name": "SILVERGEAR Smart Socket with Energy Monitor",
      "model": "ArtNo. 3750 Batch No. 23417",
      "chip": "BK7231N",
      "board": "CB2S",
      "flags": "1024",
      "keywords": [
        "TODO",
        "TODO",
        "TODO"
      ],
      "pins": {
        "6": "BL0937CF;0",
        "7": "BL0937CF1;0",
        "8": "BL0937SEL;0",
        "10": "WifiLED_n;0",
        "24": "Rel;1",
        "26": "Btn;1"
      },
      "command": "",
      "image": "https://obrazki.elektroda.pl/1107946900_1741354324.jpg",
      "wiki": "https://www.elektroda.com/rtvforum/topic4110485.html"
    }


    Thanks again for all your help! Now, you can add this new device to your list.
ADVERTISEMENT