logo elektroda
logo elektroda
X
logo elektroda

[BK7231N/CB2S] Elworks smart dual socket - teardown, CB2S, BL0937

snusken 2433 10
ADVERTISEMENT
  • Bought a Tuya based dual smart socket here in Denmark for approx. 15 €, somewhat the same price as on Aliexpress.
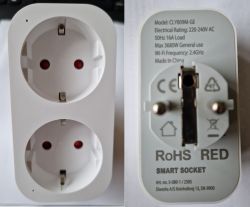
    Double smart socket with front and back views shown in the image.

    Quite easy to separate top and bottom parts with a hobby knife and a small screwdriver:
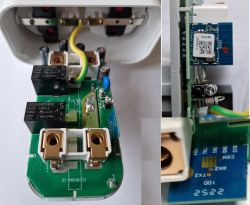
    Close-up of the interior of a Tuya smart socket with visible electronic circuit components.

    To flash the BK7231N I needed to separate the plug part from PCB in order to reach 3V3, GND, RX1, TX1 and CEN on the CB2S module:
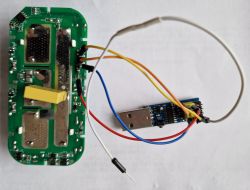
    Connected PCB module of a dual smart socket.

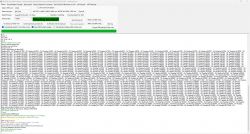
    I used the BK flasher with the following setup:
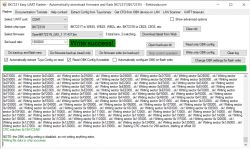
    Screenshot of BK7231 Easy UART Flasher software during sector 0xD000 writing.

    The flash program was able to extract the Tuya parameters from the original firmware,
    and from the "Launch Web application" page, I got the nice {json} script:

    Code: JSON
    Log in, to see the code

    --.-.-.-.-.--

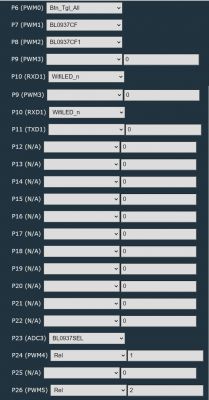
    Screenshot showing PWM connections configuration with assigned functions.

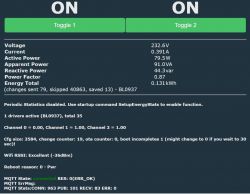
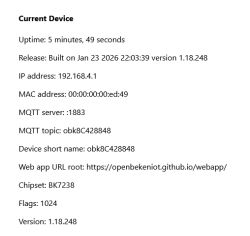
    Screenshot of the software interface for a dual smart socket.

    Cool? Ranking DIY
    About Author
    snusken
    Level 3  
    Offline 
    snusken wrote 3 posts with rating 4. Been with us since 2024 year.
  • ADVERTISEMENT
  • #2 20948347
    p.kaczmarek2
    Moderator Smart Home
    Thank you for submitting the template. It seems you've forget about the device model - CLY809M-GE - but I've added it for you.
    Device should be soon live at:
    https://openbekeniot.github.io/webapp/devicesList.html
    Helpful post? Buy me a coffee.
  • ADVERTISEMENT
  • #3 21368754
    ChrCphDk
    Level 3  
    @snusken I have a Nedis WIFIP141FWT double smart plug, which looks identical to yours when opened, so I'm thinking your work applies, and would like to test it out. Thanks for your write-up.
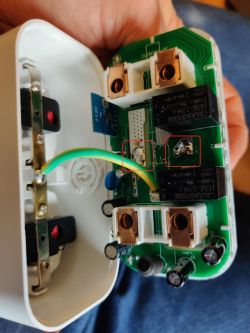
    Did you have to unsolder the connection to the 230V power-legs? It looks like two big solder spots are locking the PCB onto the power-legs, and hindering the removal of the PCB, or did you just some force to break of the PCB?
    Interior of the Nedis dual smart plug with visible electronic components.
    Best regards
    Chris (a fellow Dane) :)
  • #4 21368780
    snusken
    Level 3  
    Hello Chris,

    As far as I remember, I used my old 100 W Weller solder gun

    and some solder wick to free the input mains pins from the PCB.

    best regards, Erik ( living place Sønderborg :) )
  • #5 21369249
    ChrCphDk
    Level 3  
    >>21368780
    Thanks. I won't have time today, but hopefully after new years eve :)
  • ADVERTISEMENT
  • #6 21389717
    ChrCphDk
    Level 3  
    Hi again.

    When trying to just read out the firmware, using BK7231GUIFlashTool, it starts reading as soon as I trigger CEN for a short perioed, but then, at what seems as a random time later, it hangs, and after a while the tool displays: "Reading failed":

    Screenshot of BK7231 Easy UART Flasher software with Reading failed message visible.

    If I'm very fast to start reading as soon as 3V gets connected I can read more data before it hangs, or so it seems.

    I see some guides also mentioning adding 5V to AMS1117, maybe I missing that, or am I doing some other rookie mistake here?
    Or can anyone help me get a full read, to see everything is good, before attempting any write?

    My USB flasher is: USB TTL converter UART module CH340G 3.3V 5V switch: (aliexpress dot com/item/32668866076.html), and works with Tasmotizer.
  • #7 21389861
    p.kaczmarek2
    Moderator Smart Home
    Are you sure about that high speed baud setting? Such high speeds never worked reliably for me.
    Helpful post? Buy me a coffee.
  • #8 21389918
    ChrCphDk
    Level 3  
    >>21389861
    Thank you for taking your time to answer.
    I tried lowering it to 912600, but then got nothing, and from snuskens image of the flasher, he also had 1500000 set.
    But it might as well be bad soldering on my part.
    First I tried designing a 3D printable jig, but since that didn't work, I soldered directly to the CB2S module's legs, but I'm out of flux and the soldering is questionable. So I think I should fix that first, try at a lower baud rate, before taking up anymore of peoples time on here.
    Just got frustrated that it seemed to work, and then again not, and thought there may be something simple I was missing :)

    Best regards
    Chris
  • ADVERTISEMENT
  • #9 21391121
    ChrCphDk
    Level 3  
    Took the PCB with me to work, and had a friendly colleague solder some wires on.
    Lowered the baud rate to 921600, but it still stopped half way, but at least it got something.
    Lowered it to 115200, and bingo everything read out nicely:

    Easy UART Flasher program interface displaying reading success messages.

    Will try to write next.

    Added after 1 [hours] 31 [minutes]:

    It's working. Thank you so much for your work @snusken and all involved with OpenBK.
    Another device freed from Tuya!

    @p.kaczmarek2 please add the Nedis WIFIP141FWT double smart plug to the list with a link to this guide
  • #10 21391309
    p.kaczmarek2
    Moderator Smart Home
    Good job!
    Sure, can you share Nedis template in JSON format, as copied from Web App?
    Helpful post? Buy me a coffee.
  • #11 21391319
    ChrCphDk
    Level 3  
    This is from the web-app's Config menu, when accessing the device through: IP/app
    {
      "vendor": "Tuya",
      "bDetailed": "0",
      "name": "Full Device Name Here",
      "model": "enter short model name here",
      "chip": "BK7231N",
      "board": "TODO",
      "flags": "0",
      "keywords": [
        "TODO",
        "TODO",
        "TODO"
      ],
      "pins": {
        "6": "Btn_Tgl_All;0",
        "7": "BL0937CF;0",
        "8": "BL0937CF1;0",
        "10": "WifiLED_n;0",
        "23": "BL0937SEL;0",
        "24": "Rel;2",
        "26": "Rel;1"
      },
      "command": "",
      "image": "https://obrazki.elektroda.pl/YOUR_IMAGE.jpg",
      "wiki": "https://www.elektroda.com/rtvforum/topic_YOUR_TOPIC.html"
    }


    I have a different JSON from the flashing tool, let me know if that is also of interest.

Topic summary

The discussion revolves around the teardown and flashing of the Elworks smart dual socket, which is based on the Tuya platform. The user successfully disassembled the device to access the BK7231N chip on the CB2S module, allowing for flashing via a BK flasher. The original firmware parameters were extracted, and a JSON script detailing the device's specifications was generated. The model number CLY809M-GE was confirmed and added to the device list for future reference.
Summary generated by the language model.
ADVERTISEMENT