Hello
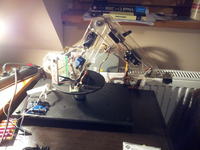
After a long time, I finally gathered myself to collect all the photos and videos of my project in one place and publish it on the forum. The construction is about two years old. I did the job when I was in the 3rd class of technical secondary school in mechatronics profile. Let me mention at the beginning that this is my second project of this type. The previous robot was made of plexiglass, controlled by arduino, and the actuating mechanisms were servos. Below is a photo of the previous project:
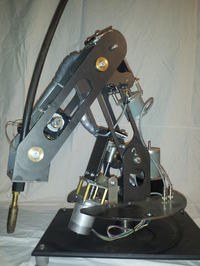
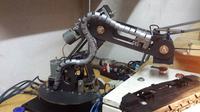
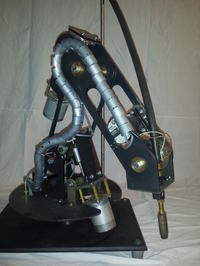
But getting to the point. The robot that I have built, and in fact I am still building (although I have not done anything with it for a year, I do not consider this project finished) was not created for any specific purpose. As I mentioned earlier, I did something similar for the Olympics in the 2nd class of technical school and it caught me so much that another construction was created and I have another one in my head. Basically, not knowing why, I did not follow any robot.
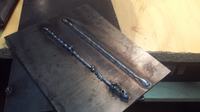
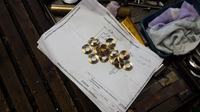
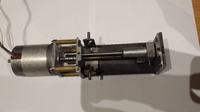
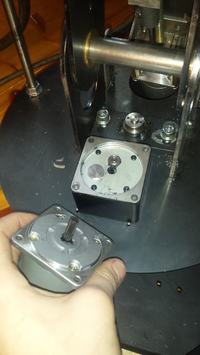
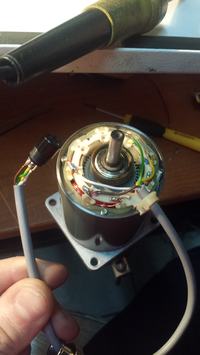
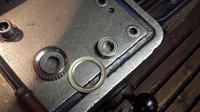
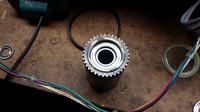
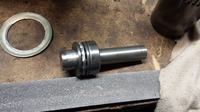
All the mechanisms that are there are recovered, and more specifically in the junkyard, I found used medical equipment from which I twisted out the more interesting elements and replaced it with a few old burnt power tools. Due to the lack of any large resources, everything was rather done as it was.
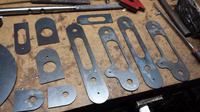
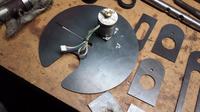
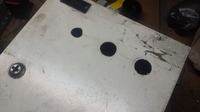
The whole structure was created so that as many elements as possible could be ordered to be burned on the laser.
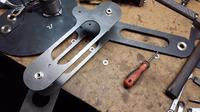
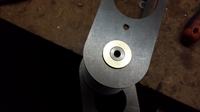
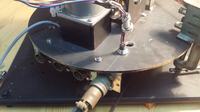
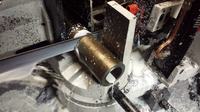
All moving parts are mounted on ball bearings, thrust bearings or bronze bushings and it is possible to replace them.
The robot has 4 degrees of freedom, and the possibility of expanding to 7 if I add another controller and currently two relay outputs. As I did not have elementary knowledge of inverse kinematics at that time, the whole thing is controlled on the Teach In principle. The robot is controlled by the Mach 3 program. After starting the whole operation, drive each axis to the limit switch and reset the readings in Mach 3. Then we drive to the desired points one by one and enter their coordinates with GCODU.
I know that this is not a professional control, but the only one I was able to handle and adjust at that time.
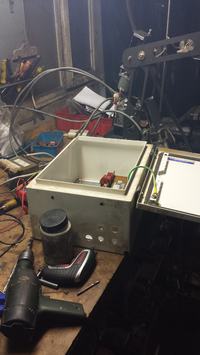
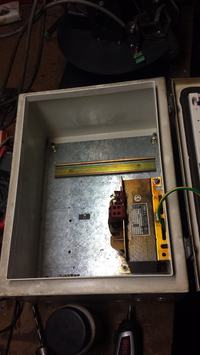
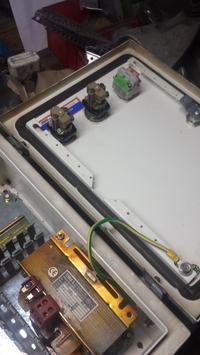
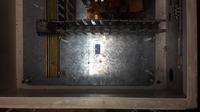
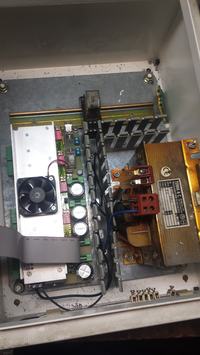
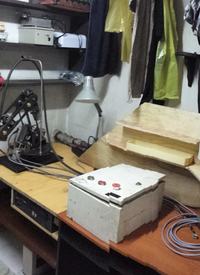
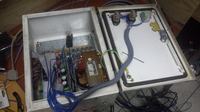
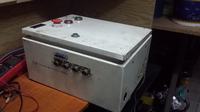
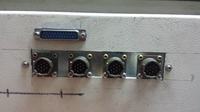
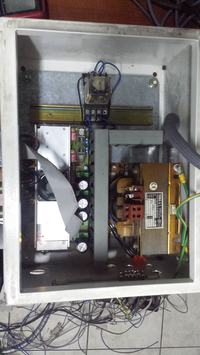
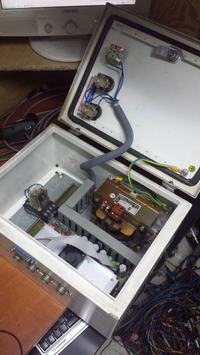
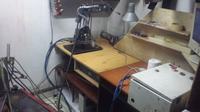
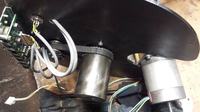
As for the control system, I use a PC for this purpose. It is connected to an electrical box with a transformer, a 4-axis CNC controller, and a start-stop contactor relay system. Then, by means of high-class shielded cables, the whole is connected to the manipulator.
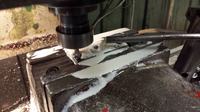
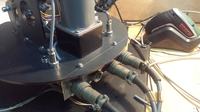
The structure is quite complex, so it is impossible to describe the whole in just one elaborate. I am happy to answer any questions. Currently, I am a student of Automation and Robotics, so I am planning another construction in which the programming interface itself will be much more user-friendly. In addition, I have an idea for several improvements, such as automatic maintenance of the welding tip during operation as well as the systems for detecting "sticking" of the welding wire in the tip. The welding tip itself is a manual holder that has been reworked (shortened). The robot works with any MIG welding machine equipped with a Euro connector. So far, I have not done any serious welding tests with it because, as I wrote, it is more of a hobby work.
Here is a photo of the first welding trials:
And a video from one of the robot's exhibitions. He then welded several dozen samples without any failure. Since I did it once, I had to fix one February and that's it.
[movie: 4204f6cd01]
https://filmy.elektroda.pl/33_1456778198.mp4 [/ movie: 4204f6cd01]
This work was presented to many different interesting competitions and it took quite good places, but I know that it is not yet the top of the technology, so I would like to hear criticism and good advice;


Comments
Hello, I am full of admiration when it comes to the idea and execution, but I have a question, are you not afraid that bare wires may be damaged during welding - e.g. by splinters? [Read more]
The idea is cool, especially that when welding with a robot, the weld accuracy is higher (from what I saw, the presented sample looks quite professional) I think an interesting idea for the future would... [Read more]
As for that, I had it in mind, although the robot is not used for any works as I wrote, only exhibitions and presentations. Of course, if he was to work at a welding station, it would be necessary because... [Read more]
Very nice designed, but if not it was easier and cheaper to try to drive wiper motors connected directly to the axis of rotation. It is very easy to convert such a motor into a servo drive. The system... [Read more]
Nobody would despise such a construction, certainly not me. In my opinion, the design is flawless. The welds are of average quality, but it's probably too fast arm movements. [Read more]
The welds you see there are just a sample of his first welding test. I was able to sort it out later. However, the problem with the structure is the lack of proper control, which means that the movement... [Read more]
Instead of Arduino, I would use Texas Instruments launchpad in the next version. The price does not deter much larger options. You can program in an environment identical to Arduino. There are models that... [Read more]
http://www.elektroda.pl/rtvforum/topic469611.html - Arm on wiper motors. Here's a great description http://homofaciens.de/technics-base-circuits-encoder-disc_en_navion.htm Worth seeing from 27:00 ... [Read more]
I have seen this project for a long time. However, there is no question of any accuracy here. It's once. Two are the same DC motors and encoders okay but not from the wipers in my opinion. The accuracy... [Read more]
You are probably a bit confusing the concepts, a servo based even on wiper gears can be quite accurate. The precondition, however, would be a more precise encoder. The rotor obviously doesn't stop... [Read more]
All in all, you are probably right. However, as I wrote, the main goal was to use what I have to minimize costs. I had the controller at home, and so did the motors. Another thing is that when I was building... [Read more]
You're wrong, buddy. The accuracy depends on the encoder. The Mach backlash resetting option is used to "resetting the gear backlash". [Read more]
Like I said, I have never had the opportunity to work with servo drives. How does something like this come out? Is it possible to build only the actuators by yourself, as with a good drive based on stepper... [Read more]
Let go of the welded function. This is such a complex topic that you won't get it. [Read more]
Congratulations on your project. Have you ever had contact with professional 6-axis robots such as fanuc or abb? Maybe you can see something in the way of control and construction. I recommend the maintenance... [Read more]
Nice design, but when welding you need the ability to rotate the welding torch so that it can reach the welded material at different angles. Therefore, the last member in the robots is rotatable (about... [Read more]
Congratulations on the project. I have a few questions. What does your coordinate system look like? Do you have any idea (program) to generate gcodes or do you write them by hand? [Read more]
Cool design by the way very similar to my previous years http://www.elektroda.pl/rtvforum/viewtopic.php?p=7534225#7534225 [Read more]
Something more? Is it just not because no? I have a fairly large understanding of welding and I am well aware that it is a very complex technological process, but the robot is built more for fun and the... [Read more]