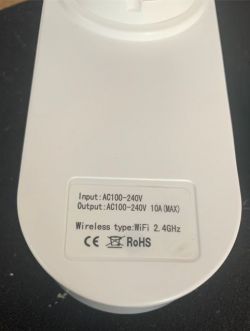
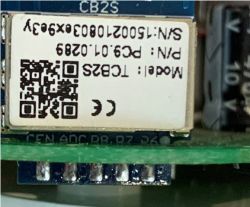
I was hoping to buy the sockets that were ESP based so bought two different versions at very different prices, however these had CB2S modules, after some searching I found this site and the excellent work on OpenBK7231N.
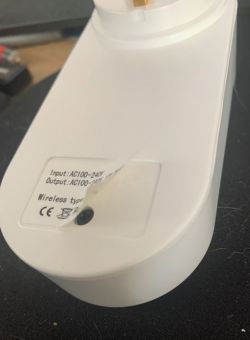
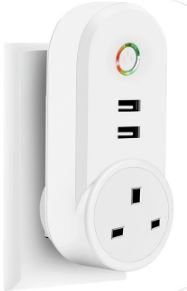
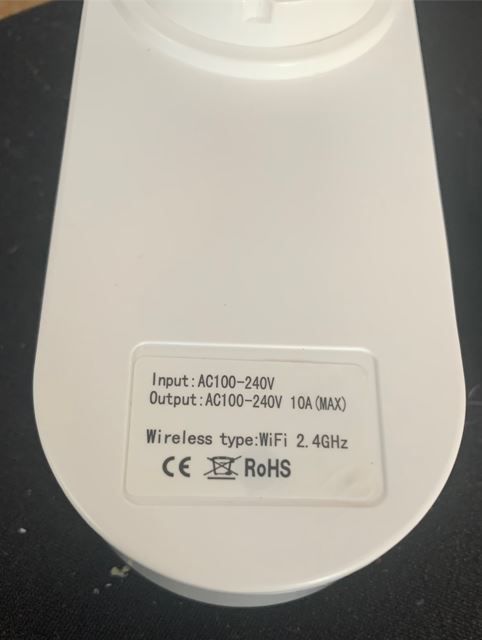
These are the sockets - both look exactly the same inside and out - even the boxes are the same

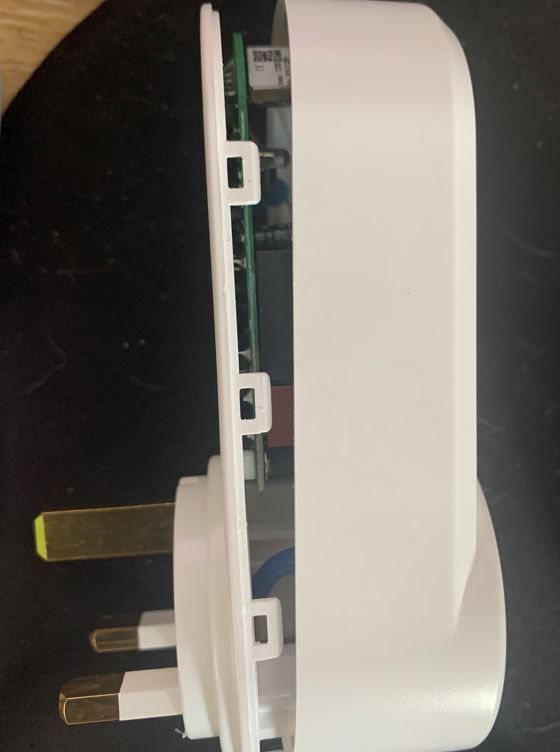
So I opened them up, no glue is used, only plastic clips and one fixing screw - when removing the cover you need to push on the power socket to help release the cover.
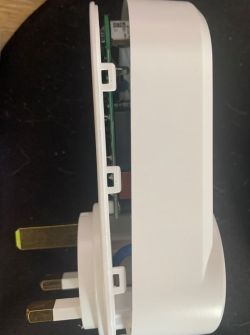
Next remove the two PCB retaining screws - marked with red lines.
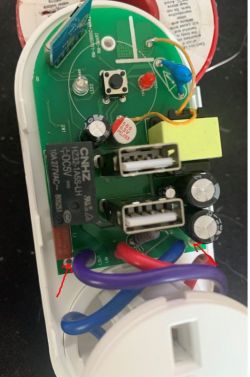
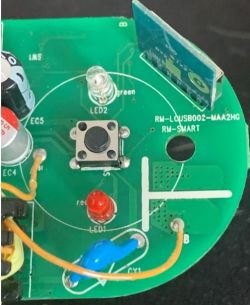
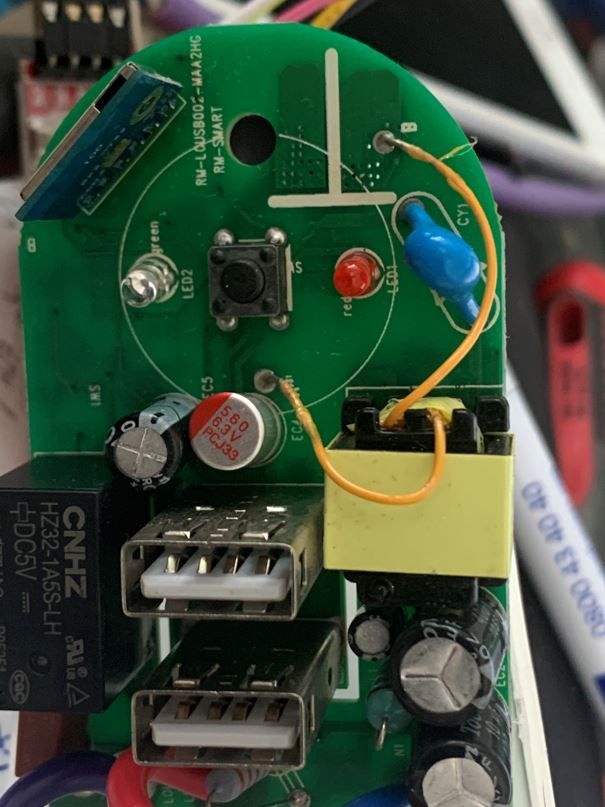
Few shots of the PCB LEDs etc.


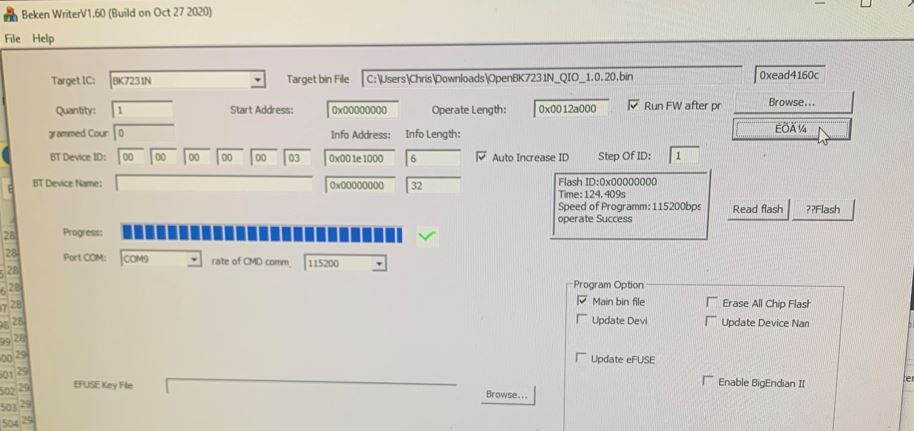
Now time to program - success, at first I thought I had bricked it because the LEDs came on, checked wifi and there it was, now setup wifi and the rest is easier from a PC once connected to your wifi


On the first unit I programmed I clicked on the "Erase All Chip Flash" it seemed to have failed so I then flashed without checking that box, all went OK. setup MQTT and see it sending in to the MQTT server. Homeassistant didn't know about it as still more to setup in HA.
The second one was a different story, I pulled it open done the flashing without clicking on the "erase all" box, put it all back together (15mins) went through the setup and this one popped up as a Tuya device in HA, but I don't have Tuya cloud, this must have been due to me not doing an "erase all"
So Instead of pulling it open I decided to do an OTA back to OpenBK7231N_QIO_1.0.0.rbl - it obtained a new IP address and was up and running - I restarted my test instance of HA and no discovery this time. Done another OTA with OpenBK7231N_1.0.20 this time to bring it back to latest and all good, no annoying discovery now - will move on to configuring HA later.
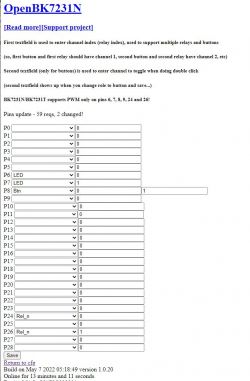
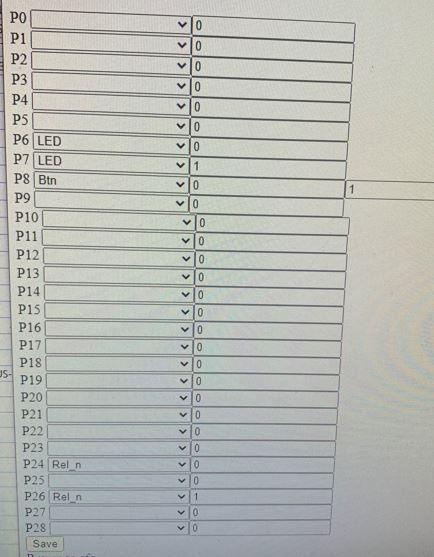
With my pin assignments - as the switch only has one button I have set it up so that 1 quick press toggles the power socket and 2 quick presses toggle the USB sockets - you can see the second entry across on the P8 line.
Only issue is that when you plug it in both LEDS will illuminate but the sockets are off, if you do a single and double press it will then have correct status, Another way would be to publish /0/set 100 and /1/set 100 when the socket comes online.
It may be possible to configure the "change startup control test" but I haven't played with this yet.
Hope this is of use to some of you.


Comments
Good job! Thank you for using my firwmare. I added a template for your device called "BK7231N CB2S 13A Aliexpress socket": https://github.com/openshwprojects/OpenBK7231T_App/commit/4c0da359b4a2f7a3fdca55d53b5c5a747dbfce2b ... [Read more]
@ p.kaczmarek2 I really appreciate your contribution to the development of dedicated software. For several years, I have not been able to start any ESP-based system. Perhaps I will change to Beken because... [Read more]
Thank you @arturavs, every zloty counts, even if every tenth reader paid PLN 1, I would already have collected for a few new devices for testing. However, I would like to emphasize here that my goal... [Read more]