Hello,
In this post, I will share teardown of Tuya Smart switch for boiler water heater and flashing it with
OpenBK7231N.
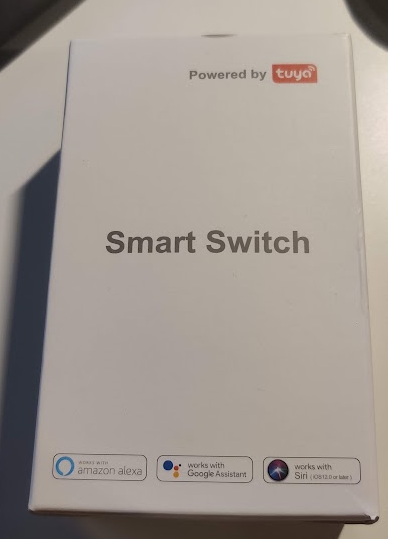
The switch was bought on
Aliexpress, the major reason to buy this device is it’s advertised high power, 20A 4400W !! (I have very bad experience with cheap Sonoff 16A switches that nearly burned my entire house after few weeks of operation).
after discovering this forum... i had to give Tuya a try

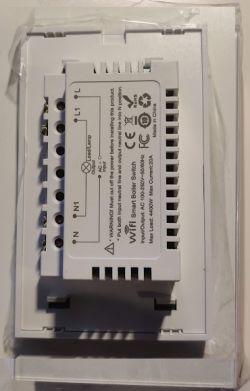
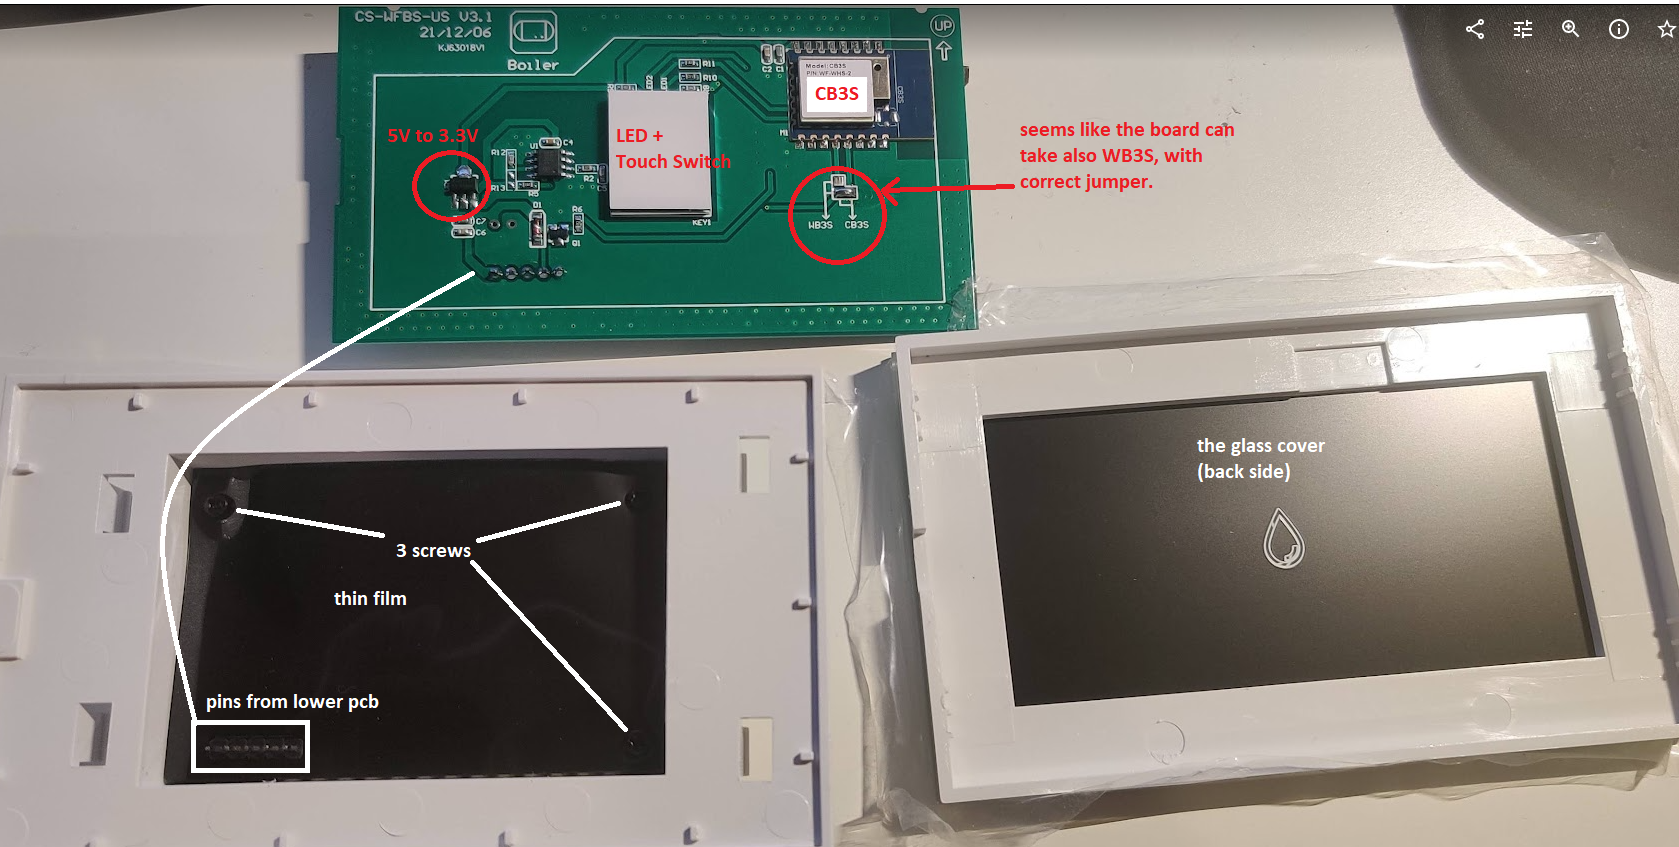
I was really hoping to get an old device with either ESP chip or at least WB2S, however the switch came with CB3S and BK2731N, which made the process a bit more educational (aka complicated).
Teardown:
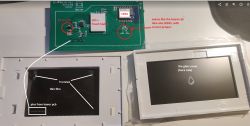
The front glass cover is easily removed, and the 1st PCB layer with the LED and CB3S module are exposed.
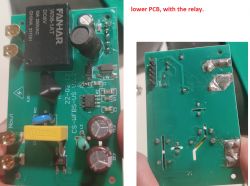
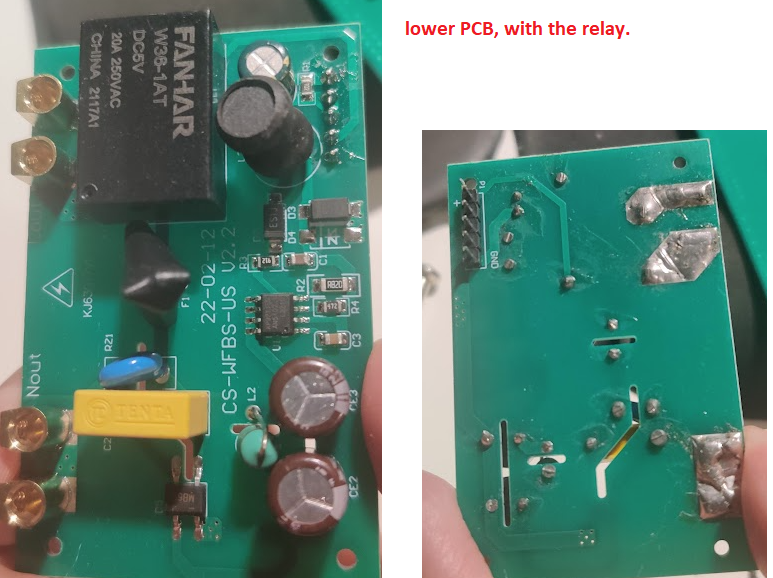
This PCB is connected with 4 pins socket to a 2nd PCB which contains the relay and power circuit. In between there is a thin film layer (like in other switches from Tuya).
For the firmware upgrade there is no need to disassemble the 2nd PCB. Just remove the 1st PCB from its housing.
CB3S:
for the firmware upgrade we need to work with the following pins,
(complete table is here)

| PIN | Description | |
| 1 | RESET | need to short to ground for ~1sec. when flashing begins. |
| 8 | VCC-3.3V | DC 3.3v |
| 9 | GND | Ground (DC -) |
| 15 | RXD1 | UART1_RXD (user serial interface), which corresponds to P10 of the IC. |
| 16 | TXD1 | UART1_TXD (user serial interface), which corresponds to P11 of the IC. |
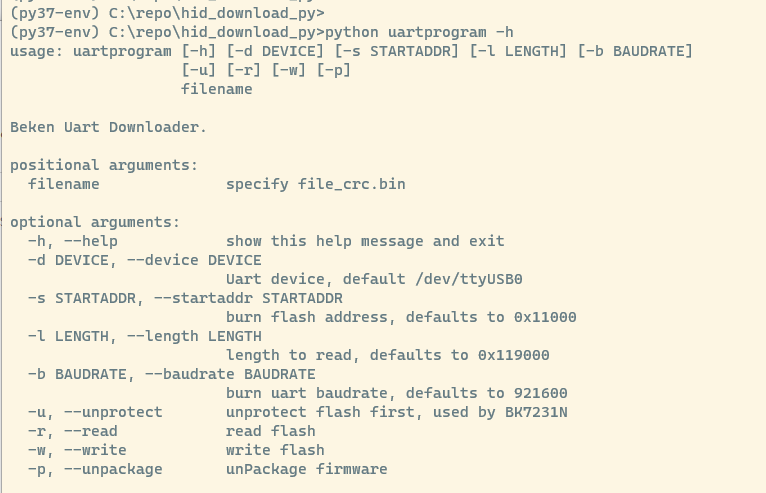
Prepare to flash on windows:
1. install python3 (i used 3.7)
2. get
hidapi from
https://github.com/libusb/hidapi/releases, extract it to somewhere in windows %PATH%
3. git clone
hid_download_py repo
4. create virtual env, and activate it.
C:\repoo\hid_download_py>python -m venv c:\repoo\hid_download_py\py37-3nv
C:\repoo\hid_download_py>py37-env\Scripts\activate
5. run install
6. test installation
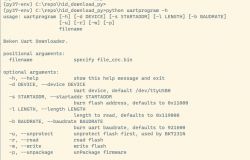
7. Download the latest bin firmware file from
https://github.com/openshwprojects/OpenBK7231T_App/releases, I used
OpenBK7231N_QIO_1.12.44.bin
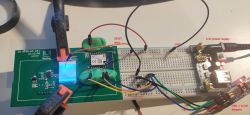
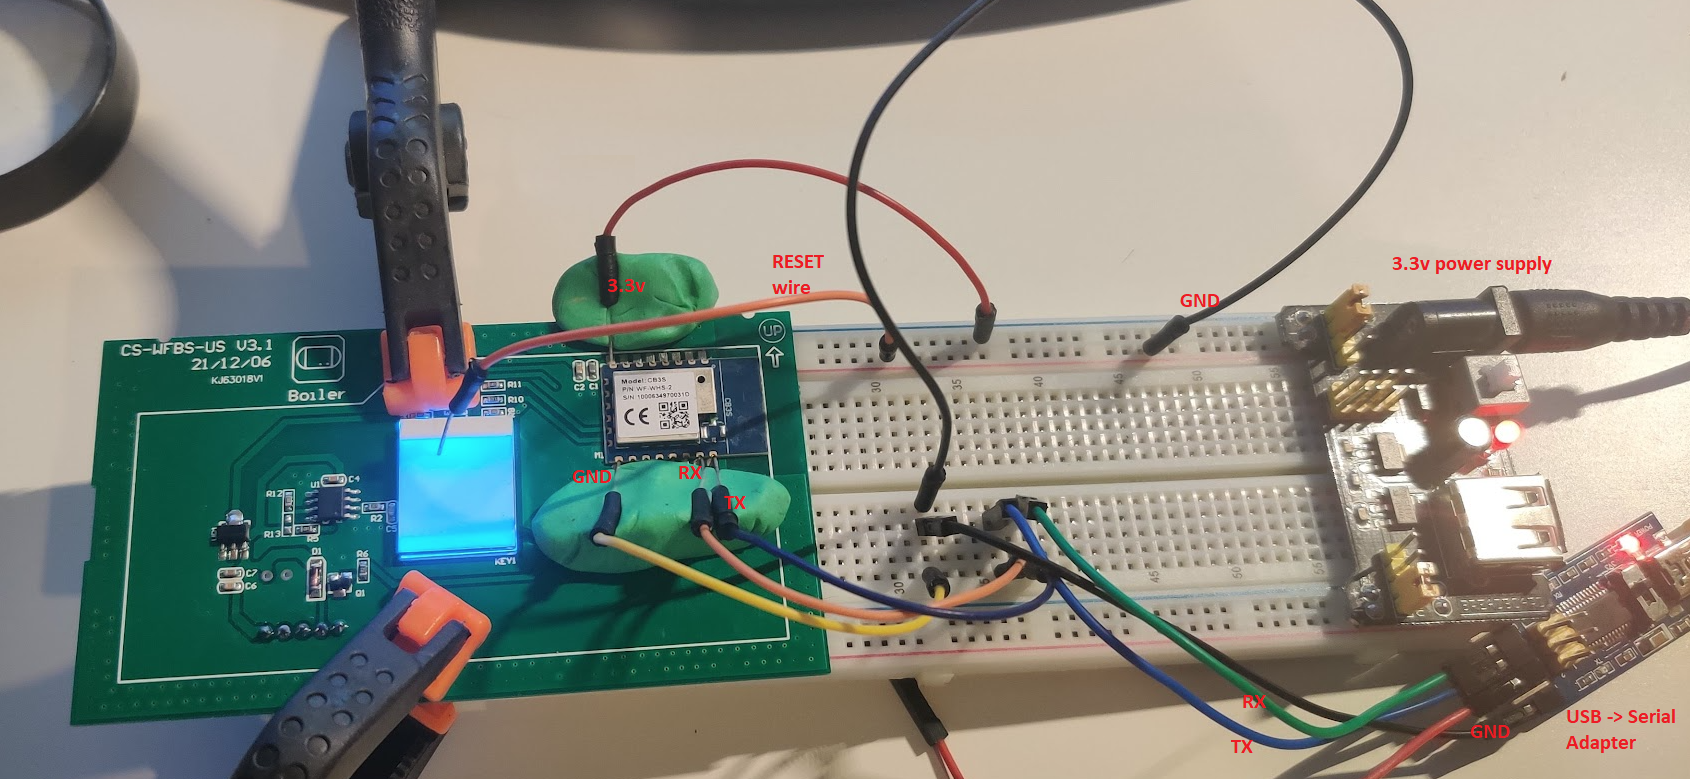
Prepare to flash hardware:
1. Breadboard with few cables
2. A 3.3v power supply
3. USB to serial adapter
FT232RL FTDI
4. FIMO clay or soldering iron...
To avoid soldering, I’ve used some FIMO clay to hold breadboard cable pins right on the chip. This method requires some practice to make sure the pins actually touch the board at the correct position, and make sure that the cables don’t move while flashing.
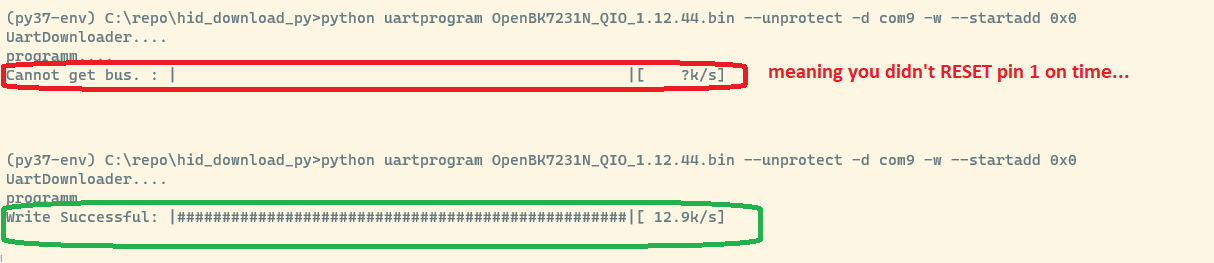
 Flashing:
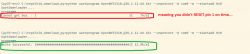
so, after wiring everything, and double checking that all connections are correct, it's time to run the flashing!
when running the flashing command, you need to reset the chip by grounding pin 1 (that's the 'free' orange wire in the picture). if all goes well, you will get a successful msg!
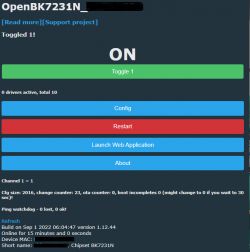
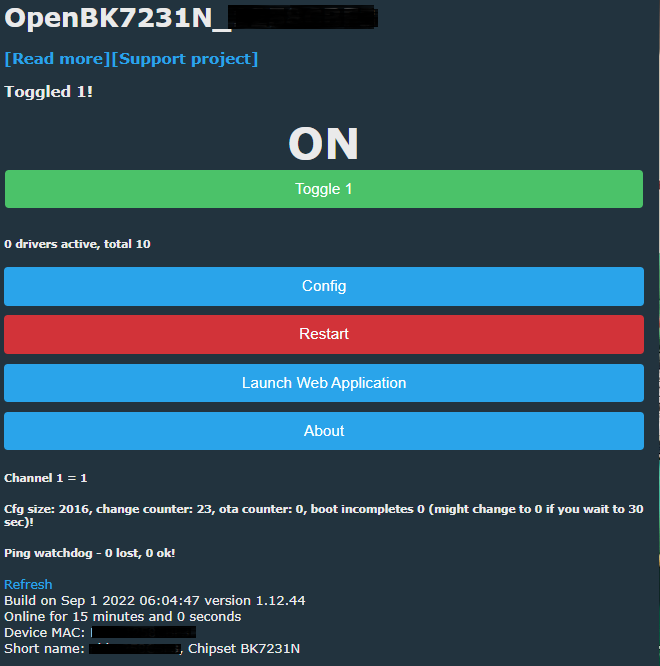
 OpenBK7231N config:
by now you should see a new wifi AP from the switch, something like OpenBK7231N_#######.
connect to this wifi, and setup access to your home wifi.
in the configuration menu, setup:
| pin | type | value |
| p6 | Rel | 1 |
| p7 | LED | 1 |
| p24 | Btn | 1 |


Comments
Thank you very much for the presentations! I am curious if the relay will be durable and if it can switch 4400W. [Read more]
That's a very interesting device. Thank you for posting the teardown. I am especially intrigued by that WB3S/CB3S switch. I have looked at the Tuya documentation to check the difference: https://obrazki.elektroda.pl/9493080700_1662393472_thumb.jpg... [Read more]
thank you for this framework! - this part scares me the most! i hope this device is more reliable than Sonoff 16A... (i was lucky to be at home when it started burning) https://obrazki.ele... [Read more]
it's terrifying [Read more]
Have you considered using a contactor as an actuator that would be driven by sonoff? [Read more]
I used the Gosund SP111 socket for the 3kW 1F heater, it did not get extremely hot, but I did not use the disconnection too much, more of energy consumption monitoring. https://obrazki.elektroda.... [Read more]
In my Sonoff Dual the relay that controlled the 2kW heater stuck together. This is what it looks like after the conversion: https://obrazki.elektroda.pl/6552012600_1662572037_thumb.jpg https://obrazki.elektroda.pl/9555959000_1662572050_thumb.jpg... [Read more]
Anything else you need to do find the pin for button? I have a similar tuya 20a switch (UK size standard) with wb3s, found the relay and led, tested remaining pins but still couldn’t get button... [Read more]
Well, there are two approaches for finding the button. First is to try each pin one by one (set it to btn role In config and try pressing button and see if relays switches) and second option is to follow... [Read more]
Well, do not expect that you will pull what is written on the Chinese relay. You have to divide it into 2 or better into 3. [Read more]
and there is a 3rd option, to try one of the pre configured "quick config". i tried the 4 gang switch and then removed the none-working buttons. https://obrazki.elektroda.pl/9624129000_1663497439_t... [Read more]
Please note that those hardcoded configs are obsolete, now we are using online devices database, here: https://obrazki.elektroda.pl/6434841100_1663497817_thumb.jpg [Read more]
אהבתי את השיטה עם הפלסטלינה! [Read more]