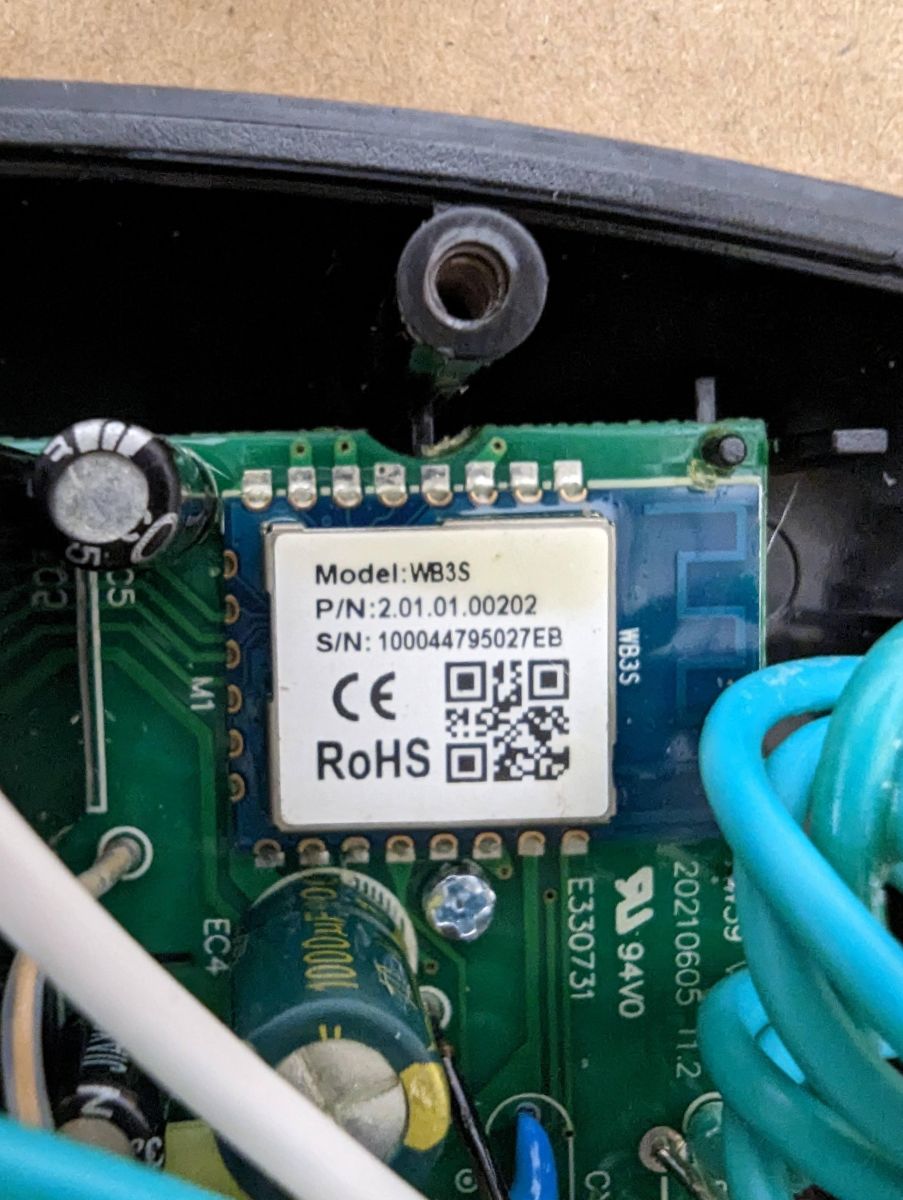
POWRUI Smart Power Strip with 4-Outlet Extender, sold as an Outdoor Smart Plug, now ships with a WB3S module instead of the older ESP chip.
Flashing worked by erasing the chip in Windows, then writing OpenBK7231T firmware from a Mac using a 3.3V USB-TTL adapter and soldered serial pads.
The useful pin map lists Pin 6 for Relay 4, Pin 8 for Led_N, Pin 9 for Relay 1, Pin 24 for Relay 3, and Pin 26 for Relay 2.
Flashing succeeded with GND, 3.3V, TXD, and RXD connections, using the chip's top-view orientation to identify the solder points.
The button still does not work, and mains-powered flashing failed and was considered dangerous.
Summary generated by AI based on the discussion content.
Sorry I didn't take many pictures. Amazon started to ship this with a WB3S when it used to have an ESP chip, so I found this forum. Thanks for all the hard work.
At first I tried while it was mains powered (dangerous) but it didn't work, so I used my USB-TTL adapter at 3.3V. My poorly-soldered GND, 3.3V, and TXD, and RXD points were enough to get flashing working.
Those numbers assume left to right if you are looking at the front of the device.
I haven't yet been able to figure out how to get the button to work, but that was less important to me than using a 3rd party, open-source firmware. Hope this helps someone, and any ideas on the button would be appreciated.
Thanks for the teardown, we will add it to templates database.
Regarding button, I can write a script for you later, but if you want just a simple behaviour "toggle All" then you could use Btn_Tgl_All:
... [Read more]
Cucumber8174
28 Aug 2023 01:09
I ended up getting another one of these, and managed to irreparably damage the RX trace on the WB3S chip.
Luckily I found https://github.com/tuya-cloudcutter/tuya-cloudcutter which worked great for... [Read more]
Cucumber8174
24 Nov 2023 18:55
Just wanted to add one more detail that the button is indeed PIN 14. Here's the full config for anyone who needs it.
{
"vendor": "POWRUI",
"bDetailed":... [Read more]
p.kaczmarek2
24 Nov 2023 19:13
Why do you have so strange channel indexes?
I have submitted the template:
https://github.com/OpenBekenIOT/webapp/commit/5f8934156185a7f8a2ceec13efea004fc2bd65a0 [Read more]
Cucumber8174
24 Nov 2023 20:02
Yeah that was a mistake - fixed in a subsequent edit.
Thanks! [Read more]
Which GPIO pins control the relays, LED, and button?
Relays: Pin 9-Relay1, 26-Relay2, 24-Relay3, 6-Relay4. Power LED (active-low): Pin 8. Front button: Pin 14, mapped to Btn_Tgl_All in OpenBeken [Elektroda, Cucumber8174, post #20831410]
Can I flash OpenBeken without opening the enclosure?
Erase flash with bkwriter, then write OpenBK firmware.
Reboot module and configure pins in Web UI.
Which firmware versions work with Tuya Cloudcutter?
Firmware 1.1.2 is confirmed. Older or newer builds may vary; test first. A forum user reported zero failures on ten attempts (100 %) [Elektroda, Cucumber8174, post #20711077]
No. The attempt in the thread failed and carries electrocution risk. Always isolate the board and use a 3.3 V USB-TTL adapter [Elektroda, Cucumber8174, post #20328948]
Why did I see odd channel indexes in the JSON template?
Comments
Thanks for the teardown, we will add it to templates database. Regarding button, I can write a script for you later, but if you want just a simple behaviour "toggle All" then you could use Btn_Tgl_All: ... [Read more]
I ended up getting another one of these, and managed to irreparably damage the RX trace on the WB3S chip. Luckily I found https://github.com/tuya-cloudcutter/tuya-cloudcutter which worked great for... [Read more]
Just wanted to add one more detail that the button is indeed PIN 14. Here's the full config for anyone who needs it. { "vendor": "POWRUI", "bDetailed":... [Read more]
Why do you have so strange channel indexes? I have submitted the template: https://github.com/OpenBekenIOT/webapp/commit/5f8934156185a7f8a2ceec13efea004fc2bd65a0 [Read more]
Yeah that was a mistake - fixed in a subsequent edit. Thanks! [Read more]