
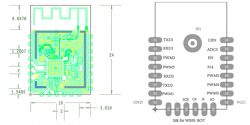
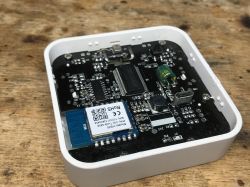
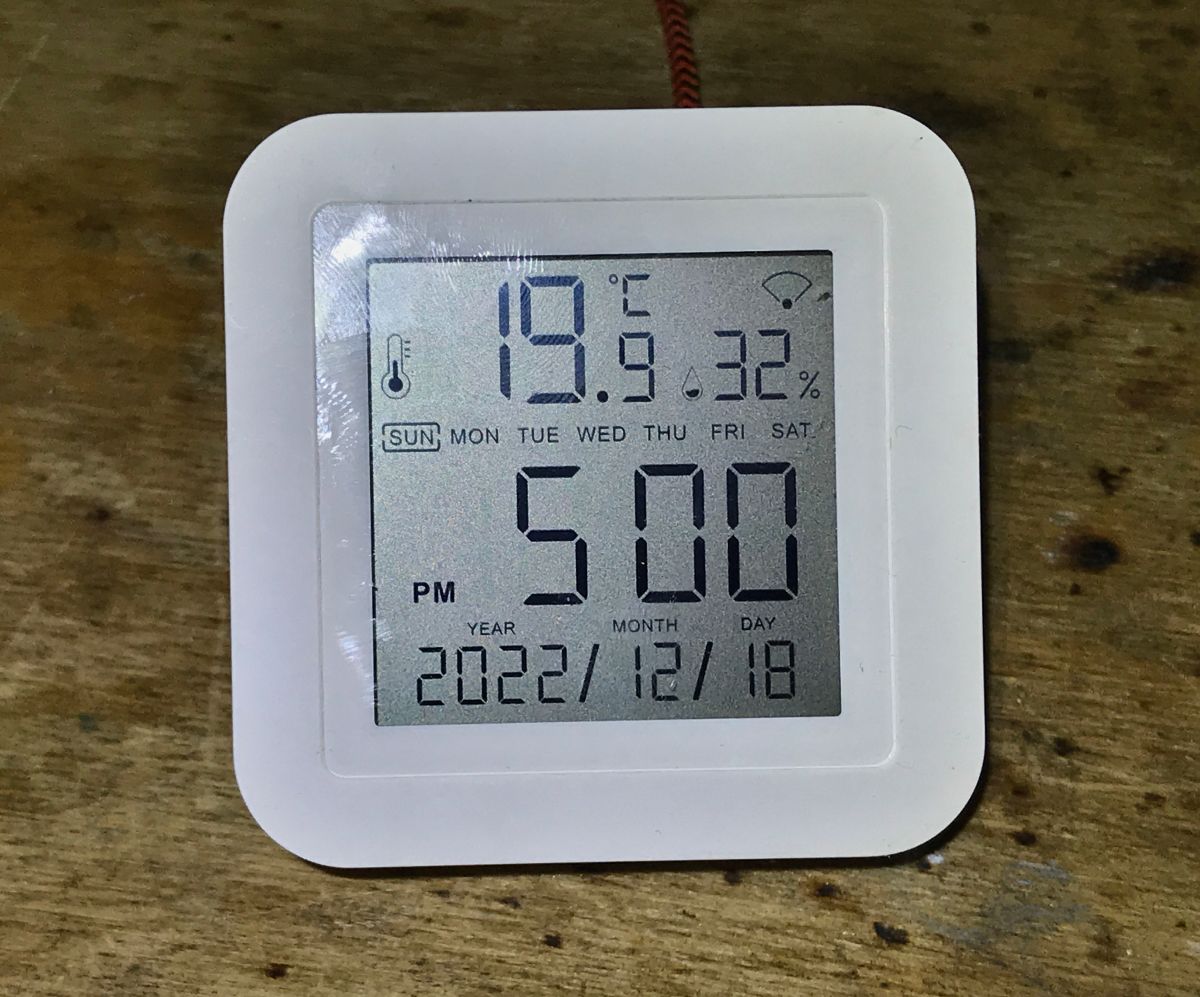
I will show you how to connect a calendar/thermometer/hygrometer model TH06 with the Home Assistant LCD. This calendar is based on the WB3S/BK7231T WiFi module connected to an additional microcontroller that communicates with the WiFi module via the TuyaMCU protocol. The WiFi module is responsible for providing the microcontroller with the current time from the Internet (obtained via NTP) and for receiving temperature and humidity measurements from it.
In order to connect to Home Assistant, we will change the BK7231T firmware - we will upload it
OpenBeken . At OpenBeken, we will properly configure the TuyaMCU and NTP driver so that it works with the calendar.
An older topic about the TH06 calendar I have discussed this product before, but I did not change its firmware:
The inside of the TH06 clock/thermometer/hygrometer and reverse engineering its protocol This was before I even started OpenBeken and I knew the BK7231 was programmable with free tools. I recommend reading this topic.
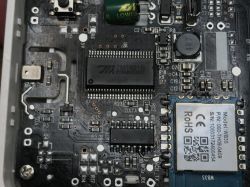
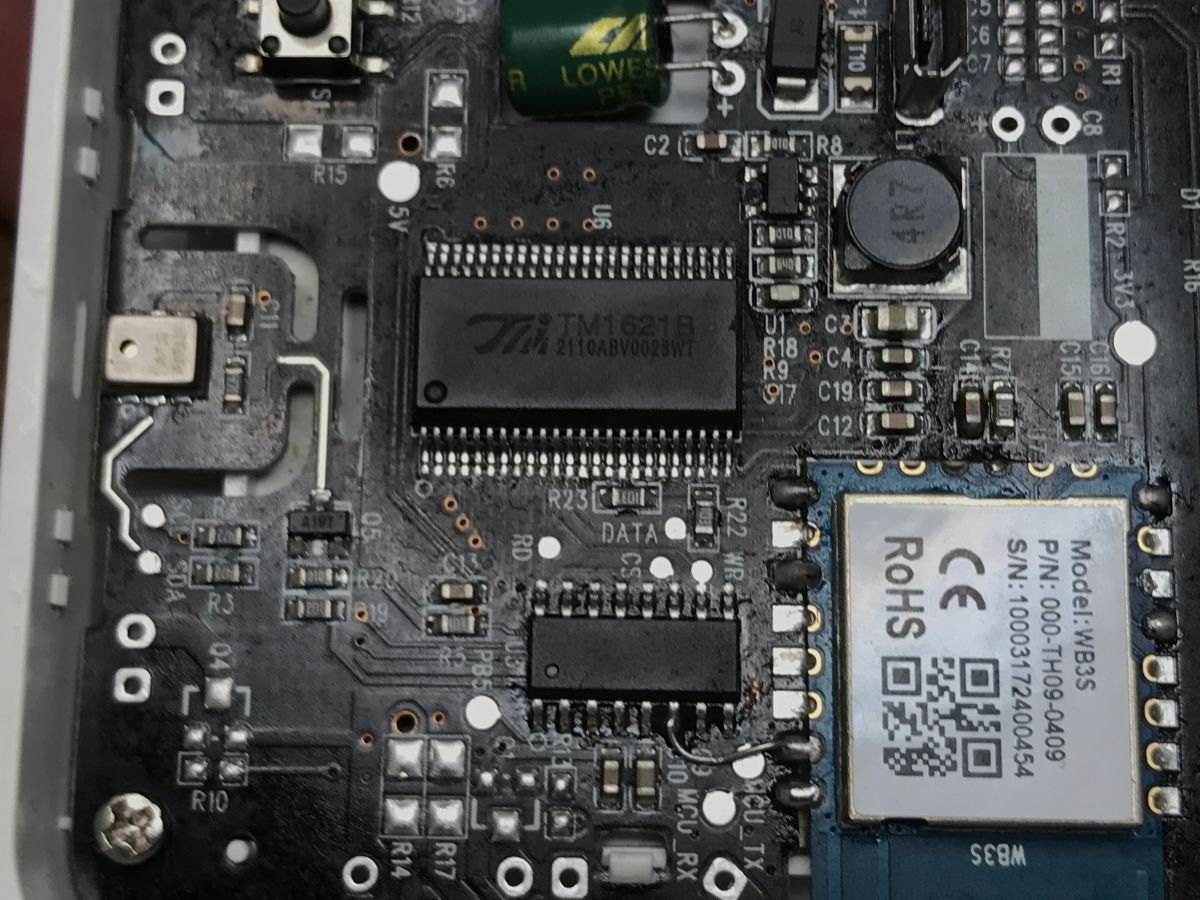
TH06 programming This calendar, like other devices using TuyaMCU, connects to the microcontroller through the same UART port (TXD1, RXD1) that is used for programming. In order to change the firmware, you need to cut off the paths going to the MCU, then you can normally change the batch through bkWriter 1.60, as in similar topics from the series.
 Photos before the operation and a description of the plate are in the previous topic, previously linked.
 This is what mine looks like after surgery:

I did the programming as follows:
- cut off RX/TX from MCU
- I connected my USB to UART converter to TXD1 and RXD1, additionally I connected its mass
- in bkWriter 1.60 I started writing the batch
- when bkWriter 1.60 was waiting for the module to reboot, I cut off and connected it to the power supply through its USB connector
- the batch has been uploaded correctly
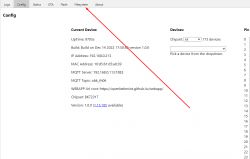
OpenBeken configuration I assume that the reader already knows how to configure WiFi and MQTT passwords.
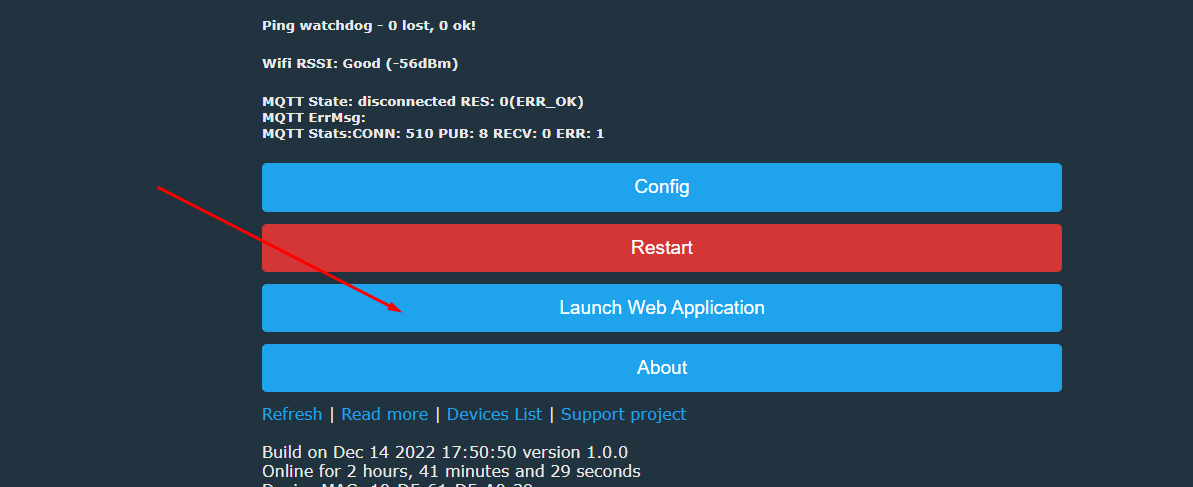
In OpenBeken, we open the Web Application (the second WWW panel):

In it, the FileSystem tab:
There CreateFile to create autoexec.bat:
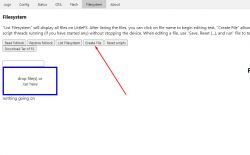
Paste the contents of the script, save:
startDriver TuyaMCU
startDriver NTP
// dpID 1 is tempererature div 10
setChannelType 1 temperature_div10
linkTuyaMCUOutputToChannel 1 val 1
// dpID 2 is % humidity
setChannelType 2 Humidity
linkTuyaMCUOutputToChannel 2 val 2
We are rebooting.
But we will explain the script step by step.
-
startDriver TuyaMCU - starts the TuyaMCU driver
-
startDriver NTP - starts the NTP driver (network time)
-
setChannelType 1 temperature_div10 - sets the type of channel 1 (selected freely) to temperature times 10 (i.e. 23.5C written as 235 integer, as this notation is used by Tuya), thanks to which OpenBeken knows how to display its value on the panel
-
linkTuyaMCUOutputToChannel 1 val 1 - maps dpID from TuyaMCU (variable identifier) 1 to channel 1, value type. In this particular device, dpID 1 is temperature. dpID roles vary by device
-
setChannelType 2 Humidity - sets channel 2 type to humidity
-
linkTuyaMCUOutputToChannel 2 val 2 - as before, here dpID 2 is humidity
Additionally, you can add - ntp_timeZoneOfs [Number of Hours] - time zone offset.
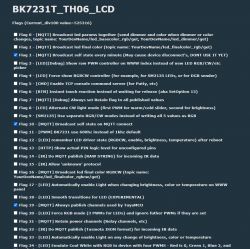
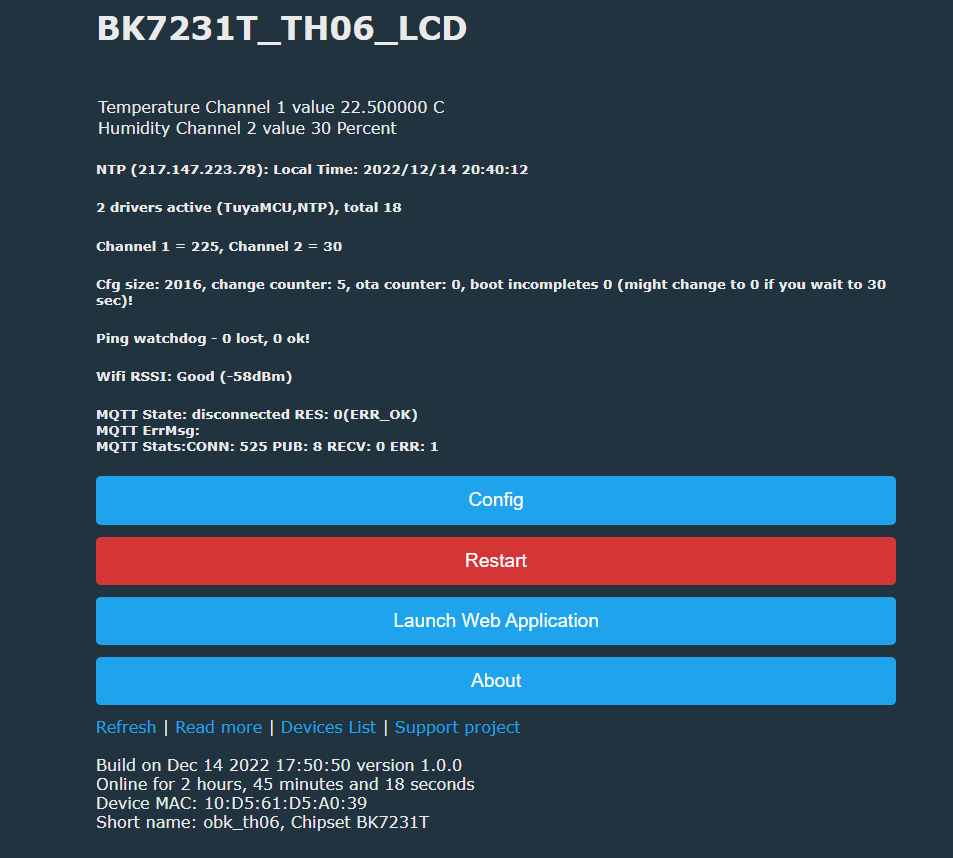
After reboot we get:
 I will improve the display of these variables even further. Connection with Home Assistant
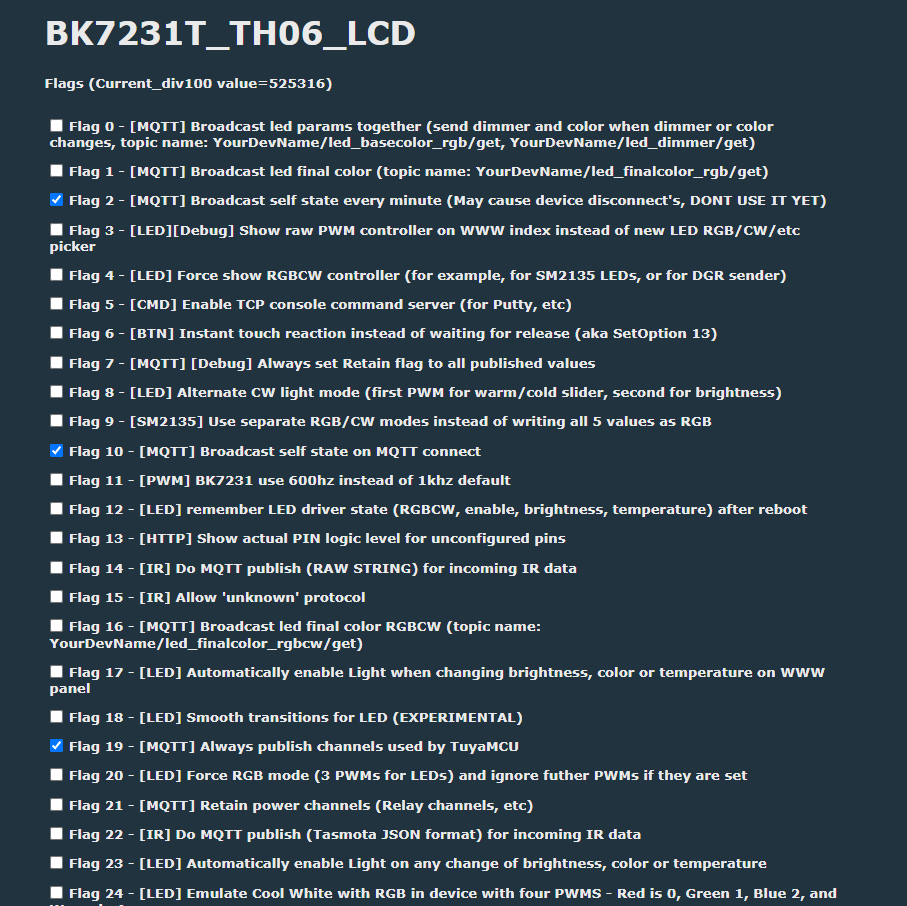
 Before writing Yaml, it is worth enabling additional publishing of MQTT variables, which is disabled by default - that is, periodically publishing full status and publishing full status on connection. In addition, we will enable full publishing of TuyaMCU variables - just as a rule. It's possible that some of these flags will turn on automatically in future versions, but for now it's worth checking to make sure they're checked. In Options->General/Flags:
Then, in Home Assistant, we write the YAML code:
Indexes 1 and 2 here are the indexes of the channels to which we have mapped the TuyaMCU variables. Nothing is "rigid" here - the same procedure allows you to get to other values from TuyaMCU, dimmer, battery value and so on.
In addition, there is also a correction of the value - replacing the internal representation of the TuyaMCU temperature (an integer, temperature multiplied by 10) to the normal temperature - hence the multiplication by 0.1. Round rounds to one decimal place.
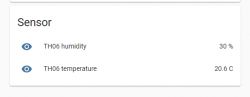
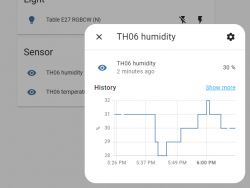
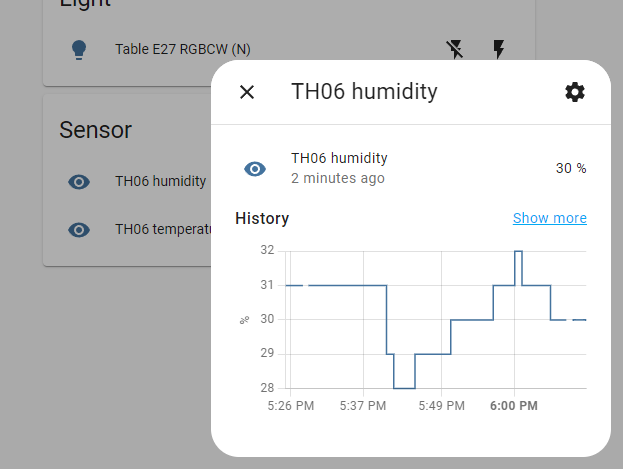
In this way, we get a full history of measurements in HA:
 Summary
 I like this calendar very much - one of its advantages is that it is powered via USB. No problem with changing the battery.
The disadvantages of this product include the inability to change the time display to 24-hour mode - that is, we will always have AM/PM.
In addition, the display is not very clear from certain angles, especially when it is not well lit.
What more could you do with this calendar?
It could be used as an IR receiver - the WB3S has free pins, just solder three connections (ground, power and signal) and you can mount an additional IR receiver outside, perhaps recovered for free from electro-waste. Then, in OpenBeken, it could be scripted so that it reacts to the remote control selected by us and, for example, controls other IoT devices (through Home Assistant automation, or through the Tasmota Device Group, or by sending a GET request to a given address).
After changing the firmware to open, the possibilities are really big...


Comments
- a hygrometer would be useful to me, a thermometer possibly also - how do you assess the accuracy of these measurements? - probably that's why there are 2 different 24H/12H versions available separately. ... [Read more]
You will find the answer here - paragraph "Measurements comparison" https://www.elektroda.pl/rtvforum/viewtopic.php?t=3806108&highlight= Jumper from the resistor leg, the picture shows at least one... [Read more]
May be someone from this post could help me: Hi, nice post. I have a new version with the infrared stuff. But I did a big error. I desoldered the WB3S IC before trying to find this info. I have... [Read more]
Hello, I have replied to you in this topic: https://www.elektroda.com/rtvforum/topic3819498.html Please keep discussion there. [Read more]
Hello. I have the same device in 24 hour version. I have flashed it with OpenBeken version Build on Feb 12 2023 19:36:28 version 1.15.440 and everything works fine, except that it disconnects and reconnects... [Read more]
@spin55 probably related: https://github.com/openshwprojects/OpenBK7231T_App/pull/722 but it's already merged.... Does it reconnect/disconnect because the MCU resets WiFi module? [Read more]
Updated to Build on Mar 14 2023 20:31:25 version 1.15.592 and it is now stable. And now you don't need the tuyaMcu_sendRSSI command in autoexec.bat [Read more]
Wow, that's a good news. That fix worked for you! If you have a Github account, please also write in that issue that it helped in your case as well. [Read more]
Anything to comment on in this thread?: https://www.elektroda.com/rtvforum/topic3937723-30.html [Read more]
Calibration discussion moved to: How to calibrate OpenBeken sensor on TuyaMCU device? [Read more]