I want to thank all the hard working developers and those that write documentation on code. I could not have figured this out without your extensive effort!


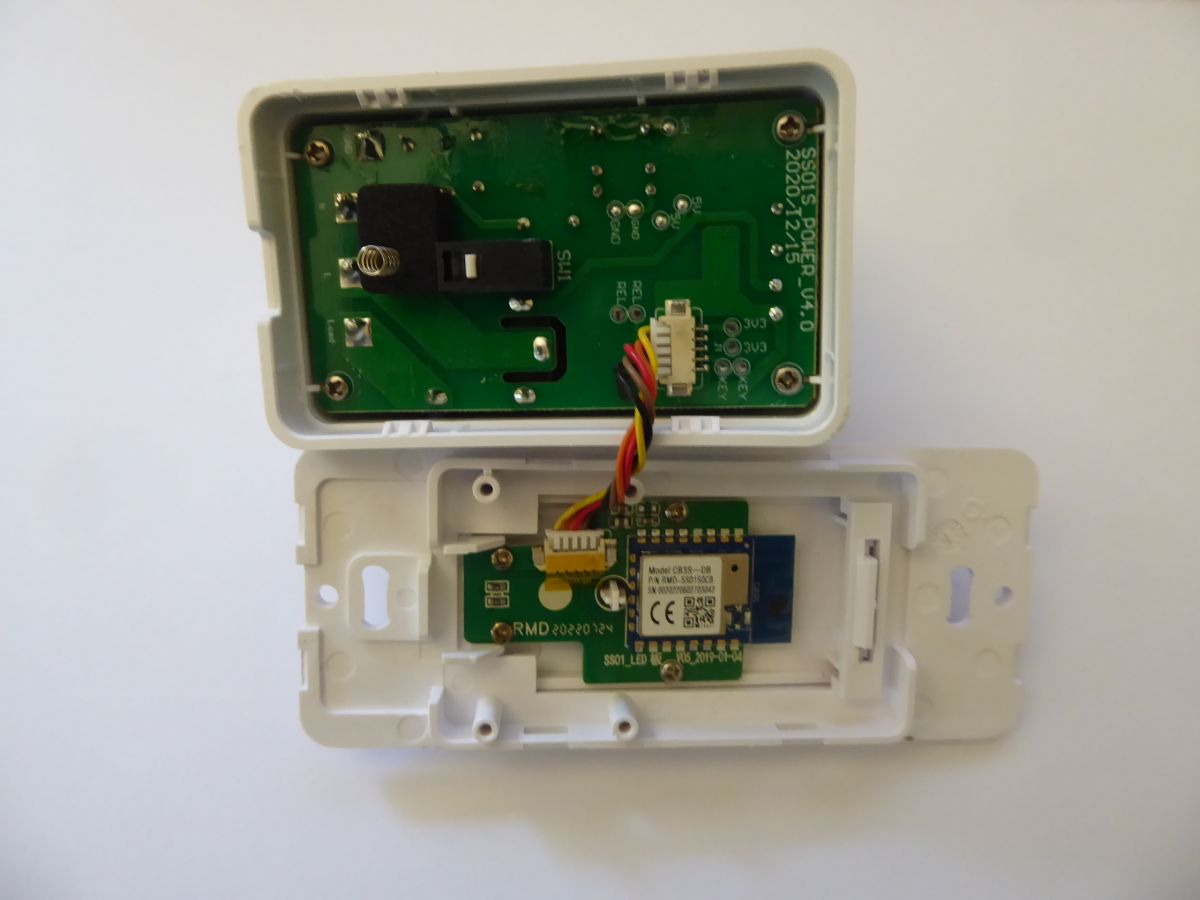
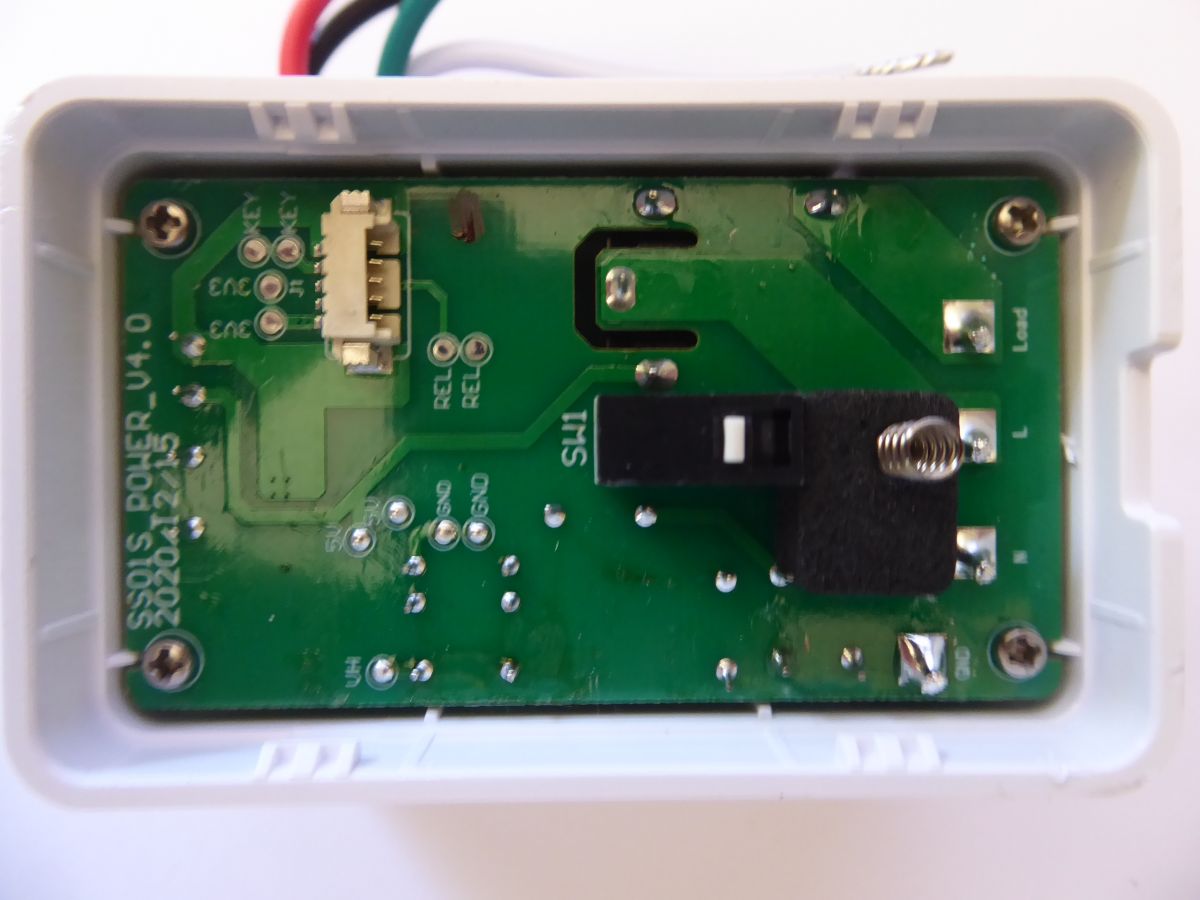
This Treatlife SS01S switch has been available for a while but this version bought July 2023 has the CB3S module with BK7231N chip which does not appear to be supported in tuya-cloudcutter.
Rear label info:
- Model: SS01S
- Input: AC 100V-240V, 50/60Hz
- Output: 10A Maximum Resistive Load, 5A Incandescent
- Wireless Standard: IEEE802.11b/g/n
- Wireless Frequency: 2.4GHz
- FCC ID: 2ANIFSS01S
- IC: 24572-SS01S
- ETL US Listed
- Intertek 5012525
- Conforms to UL. STD. 60730-1
- Conforms to UL. STD. E60730-1
- Wires: Load, Live, Neutral, Ground
Tuya app info:
- Main: v1.1.0
- MCU: v1.1.0
Tuya-CloudCutter Info:
The switch would not flash using the existing Treatlife SS01S profile stating that the exploit failed. I tried multiple profiles and finally successfully flashed to ESPHome Kickstart using interactive mode with the following:
- Start CloudCutter Interactive mode
- 2) Flash 3rd Party Firmware
- > By Firmware version and name
- > 1.1.0 - BK7231N / oem_bk7231n_dctrl_switch
- > ESPHome-Kickstart-v23.04.28_bk7231n_app.ota.ug.bin
- Provide power to switch.
- Hold main button until LED starts flashing quickly which took about 7s
- Let go of main button for 1s
- Hold main button until LED starts flashing slowly which took another 7s
- CloudCutter detects AP and performs exploit, asks to reboot device, Red LED turns on constant
- Disconnect power from switch for 1s and apply power again
- Repeat main button hold 7s , release 1s , Hold 7s until LED is flashing slow again
- CloudCutter detects again and configures WiFi
- Do not do anything. LEDs turn off and switch reboots after ~30s.
- Connects to CloudCutter AP after additional 30s and installs firmware
- Wait about 45s and look for ESPHome Kickstart AP. If it does not show up then remove power from switch and apply after 1s. Wait another 45s.
- Connect to the ESPHome Kickstart AP. Should direct you to config page at http:192.168.4.1
- Select or enter your Wifi Login info and click save.
- Disconnect from ESPHome Kickstart AP (makes it reboot faster)
- Wait 60s as it reboots and connects
- Should see it on router, If not check if ESPHome Kickstart AP is still which probably means login info was wrong.
Configure Switch in ESPHome - LibreTiny
You must use the LibreTiny version of ESPHome. Thankfully an addon repository exists that makes it easy to install in HomeAssistant. Thanks greatly!
- Click button "+ New Device" bottom right
- Click button "Continue"
- Input a friendly name that can contain lower/upper alphanumeric and spaces. Do not use special characters. I like to use the position of the device in the house such as "Master Bathroom Ceiling". Do not add "Light", "Switch", "Fan" to the end as these will be added by ESPHome.
- Click "LibreTiny"
- Scroll to section "Tuya Inc." and click on "CB3S WiFi Module". Click "Next" button.
- Ignore Encryption Key and click "Skip" button.
- Click "Edit" button on the new device with the name you just entered.
- This will display editor with YAML like:
esphome:
  name: master-bathroom-ceiling
  friendly_name: Master Bathroom Ceiling

libretiny:
  board: cb3s
  framework:
    version: dev

# Enable logging
logger:

# Enable Home Assistant API
api:
  encryption:
    key: "5LLyz69iXxwxFzFhQPxlh2dHKZXVz3jpYNyb5GiSrk8="

ota:
  password: "3a9e7fba5a0b147176db985bc07b45be"

wifi:
  ssid: !secret wifi_ssid
  password: !secret wifi_password

  # Enable fallback hotspot in case wifi connection fails
  ap:
    ssid: "Master-Bathroom-Ceiling"
    password: "cDu5z715FLWk"
I will leave it up to you to configure the above code to suit your needs. To get the basic light switch working you need to add the following under the code:
binary_sensor:
  - platform: gpio
    id: button
    name: Button
    internal: True
    pin:
      number: P6
      mode: INPUT_PULLUP
      inverted: True
    on_multi_click:
      # Single press for normal operation
      - timing:
        - ON for at most 1s
        - OFF for at least 0.1s
        then:
          - light.toggle: light_relay

output:
  - platform: gpio
    id: relay
    pin:
      number: P24
      inverted: True

light:
  - platform: binary
    name: Light
    id: light_relay
    output: relay
The
VERY IMPORTANT part is that you need to find the IP address of the device you want to flash as it will probably not be discovered automatically. You only need to do this once. In the ESPHome YAML config file you need to add the IP:
wifi:
  ssid: !secret wifi_ssid
  password: !secret wifi_password
  use_address: 192.168.1.162 # example IP to flash from kickstart - replace with your actual device IP
Now that you have that set you can click the "Install" button top right. You should see the firmware compile and install. Note that device hostname will change and most probably the IP will also change after flashing so your will have to find the new info. Look at your router overview/status page for the new info.
If you want to get more out of the switch then you can use the following YAML:
# Report the WiFi Signal strength
sensor:
  - platform: wifi_signal
    name: WiFi Signal
    update_interval: 60s
    filters:
      - delta: 0.01
      - throttle: 300s

# Provide switches to restart device in normal and Safe modes.
switch:
  - platform: restart
    name: "Restart"
    id: restart_normal
  - platform: safe_mode
    id: restart_safe
    name: "Restart (Safe Mode)"

binary_sensor:
  # This is the physical button button pressed on switch
  - platform: gpio
    id: button
    name: Button
    internal: True
    pin:
      number: P6 # GPIO24
      mode: INPUT_PULLUP
      inverted: True
    # Using timed clicks to perform various operations
    on_multi_click:
      # Single press for normal operation On/Off operation
      - timing:
        - ON for at most 1s
        - OFF for at least 0.1s
        then:
          - light.toggle: light_relay
      # Long press 10s start flashing red LED slow to show that it will restart device
      - timing:
        - ON for at least 10s
        then:
          - repeat:
              count: 5
              then:
              - light.turn_on: led_red
              - delay: 500ms
              - light.turn_off: led_red
              - delay: 500ms
      # Long press 10 to 15s restart the device
      - timing:
        - ON for 10s to 15s
        - OFF for at least 0.1s
        then:
          - switch.toggle: restart_normal
      # Long press 15s start flashing red LED fast to show it will restart in safe mode
      - timing:
        - ON for at least 15s
        then:
          - repeat:
              count: 10
              then:
              - light.turn_on: led_red
              - delay: 250ms
              - light.turn_off: led_red
              - delay: 250ms
      # Long press 15 to 20s restart the device
      - timing:
        - ON for 15s to 20s
        - OFF for at least 0.1s
        then:
          - switch.toggle: restart_safe

output:
  - platform: gpio
    id: relay
    pin:
      number: P24 # GPIO24
      inverted: True
  - platform: gpio
    id: led_white_output
    pin:
      number: P8
      inverted: True

light:
  - platform: binary
    name: Light
    id: light_relay
    output: relay
    # Optionally turn the white LED on and off when the main light state changes.
    on_turn_on:
    - light.turn_on: led_white
    on_turn_off:
    - light.turn_off: led_white
  - platform: binary
    id: led_white
    output: led_white_output
    internal: True
  - platform: status_led
    name: "Switch state"
    id: led_red
    internal: True
    pin:
      number: P7 # GPIO6
      inverted: True
If you hold the main button for 10s it will flash an LED slowly to let you know you cant restart the device in normal mode after 10s. Release the button when it flashes slowly to do a normal restart. If you hold the button longer it will cancel the normal restart. Hold it for 15s and it will start blinking quickly. Release button when its blinking quickly and it will restart in safe mode. Hold it longer, when it stops flashing and it will do nothing.
Happy flashing to all! Let me know if I missed some valuable info.


Comments