Room thermostat HY609-WE with WiFi - manual, app, interior, TuyaMCU protocol
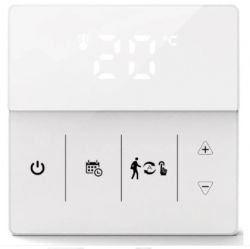
Today I invite you to a brief analysis of the interior of a rather expensive product - a room thermostat with touch buttons and LED temperature display, also offering control via WiFi. This product can be found in stores under the model name KHY609 or HY609-WE, it is available in two colors (white and black) and a variant with Zigbee communication is also on sale. Here, however, I will focus on its WiFi version, briefly test it in the Tuya application and then analyze its interior, including details of the TuyaMCU protocol used inside. Here I will show examples of the packets it exchanges over the UART and define the roles of the dpIDs used, which are TuyaMCU variables.
Purchase HY609-.EC and contents of the kit
Thermostats of this series were installed at the home of my friend, and I was temporarily given one piece just for a few days to test and play with. The thermostat itself can be purchased from various places on the web, both in our country and directly from China:
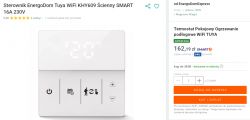
The product is quite expensive, 160 zloty for the WiFi version, and I've seen Zigbee versions even a hundred zloty more expensive. Let's see what the seller himself wrote about them:
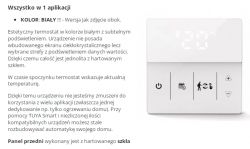
I wouldn't praise the Tuya cloud so much, if you can change the firmware you will gain even more possibilities, but that's in another topic.
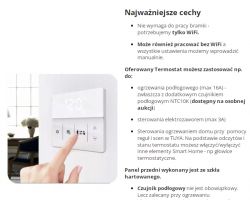
The possibility of connecting an external NTC10K is always a good option.
Offered capabilities, that is, what you can set in the Tuya app:

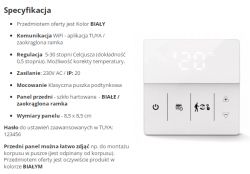
Well, the specifications:
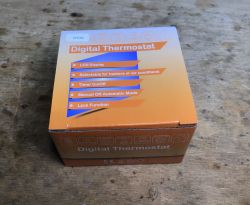
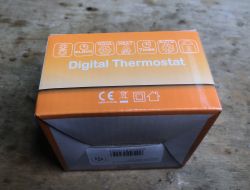
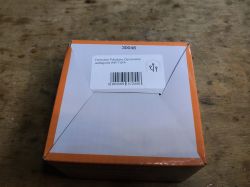
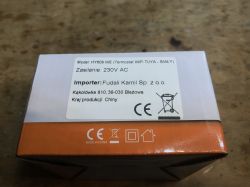
That's a lot of theory, now let's see how it looks in practice. Markings on the packaging:
 .
. 
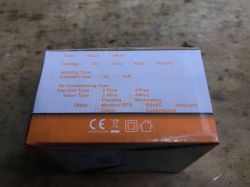
Contents (thermostat, mounting screws, instructions):
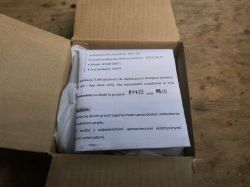
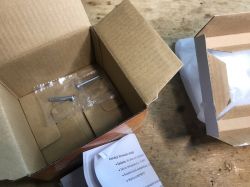
Instructions (I won't rewrite it to the subject, please enlarge the photo if you need to):
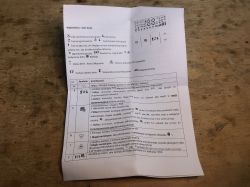
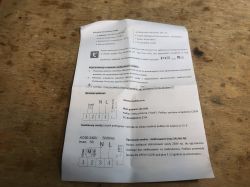
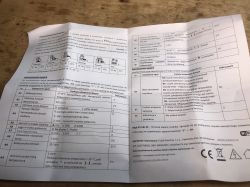
Manual mode, automatic mode... advanced options, vacation mode ... some of these options are there. I guess you need to keep this manual in a prominent place in the apartment.
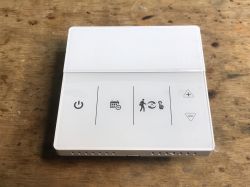
Well, and the thermostat itself:
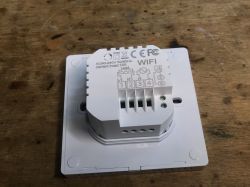
Tuya app As a rule, I don't describe the Tuya app anymore, because I'm going to cut these devices off from the cloud and change their firmware anyway, but here the device was unusual enough, but I decided to do a short test with what the manufacturer offered us.
We put the device into a pairing state and gave the location of our WiFi, all without problems, details in the instructions:
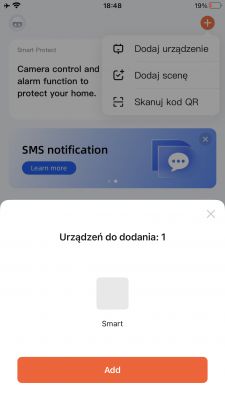
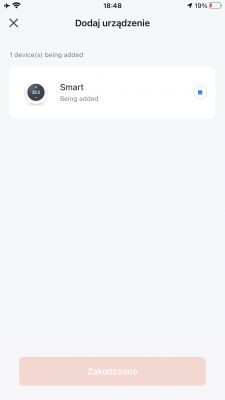

The main panel of the device allows us to view the current temperature (here from the built-in sensor), the one set, and its operating status:
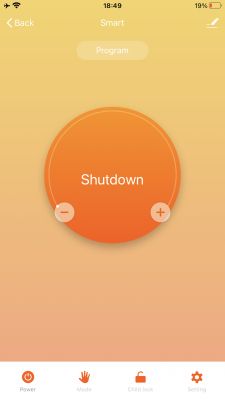
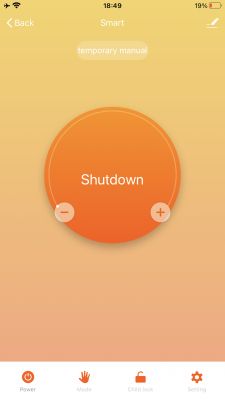
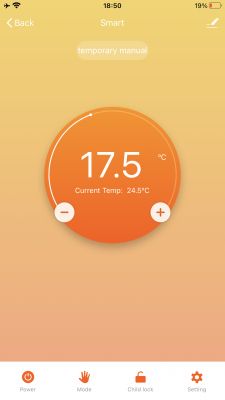
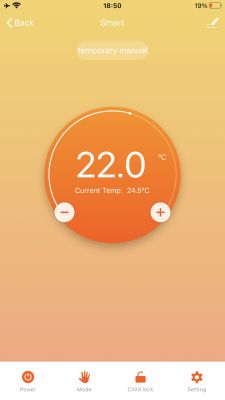 You can select one of three operating modes, it was already mentioned in the manual:
- automatic (according to the schedules we set)
- manual
- holiday (holiday, thermostat completely off)
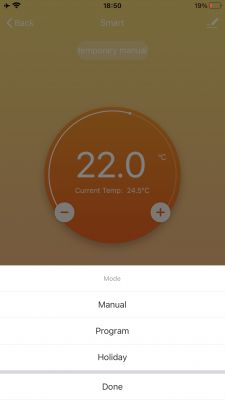
It is in the settings that it gets more complicated:
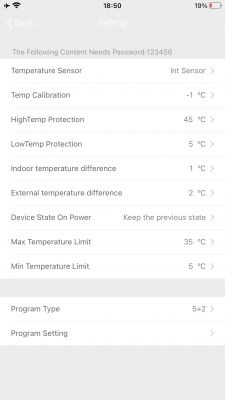
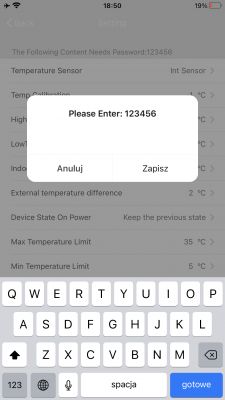
There operations must be approved with this password, which was also given by the seller. With each change you have to enter the password. It's very inconvenient...
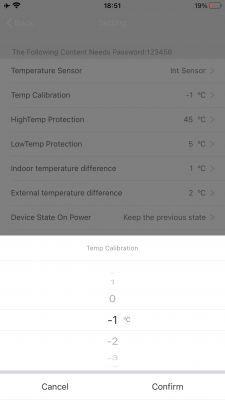
This is, for example, the temperature calibration:
Yes the program selection (these 5+2, 6+1, 7 days, etc. refers to the days of the week, as someone works, for example. on weekdays, then you can program the thermostat differently for them):
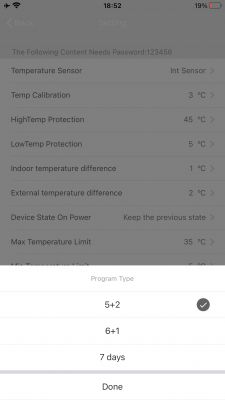
Further settings - there are even notifications that the device becomes offline:
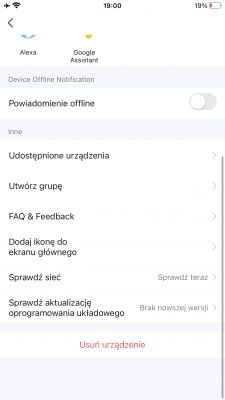
Firmware versions, which reveal the fact that there is a WiFi module and TuyaMCU inside separately:
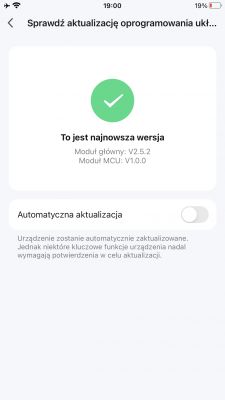
Internal of the thermostat
Let's remove the front cover to see how the thermostat is built.
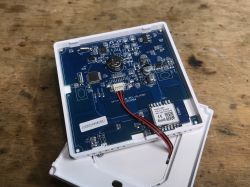
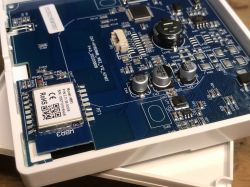
Inside is the WBR3 module, my OpenBeken doesn't officially support it yet, but work is underway.
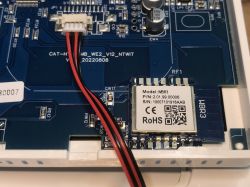
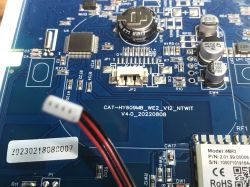
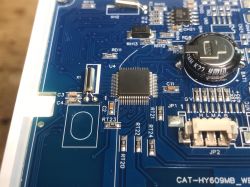
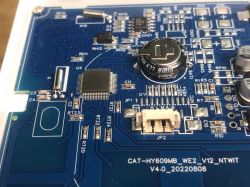
PCB designation: CAT-HY609MB_WE2_V12_NTWIT V4.0_20220808
2022 08 08 is the design date, I think, and production is (according to the sticker next to it) 2023 02 18:
In the 3.3V power block for the WiFi module and MCU, I see that there is both a step-down inverter and an AMS1117-3.3V:
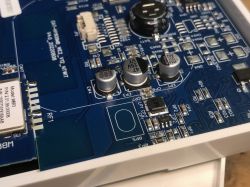
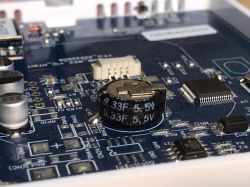
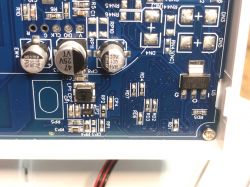 I also see something that looks to me like a supercapacitor for time keeping:
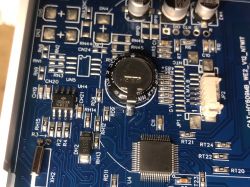
Capacitance 0.33F, voltage 5.5V:
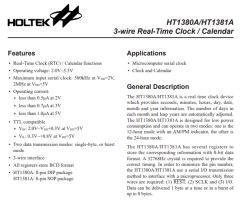
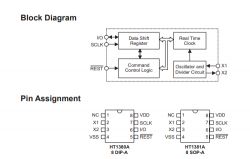
Also visible HT1381A is the RTC clock:

Main MCU, second clock oscillator:
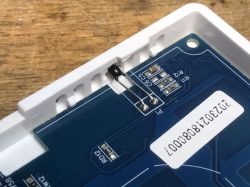
Temperature sensor (the built-in one):
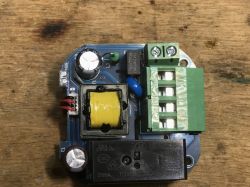
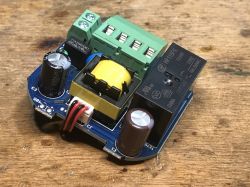
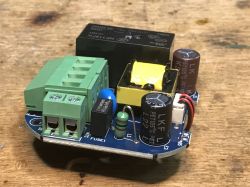
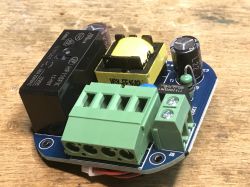
In terms of firmware changes it's less important, but let's also look at the board from the power supply:
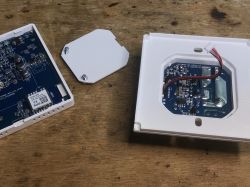
Power supply PCB designation: HY08PW-WE-V220-1R 20200722 V1.3
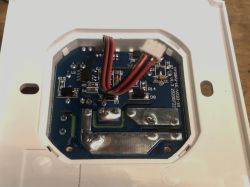
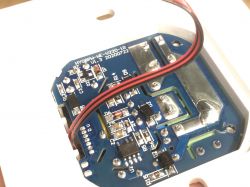
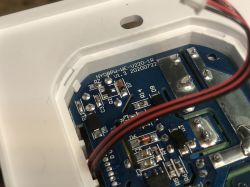 This is rather standard. There is a visible fuse and varistor. I don't see any additional filters.
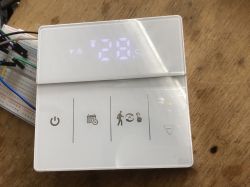
Display readability The display is slightly more readable, than it might appear but there is still some room left for improvement here. Below are pics from me from the table, maybe it looks better on the wall:
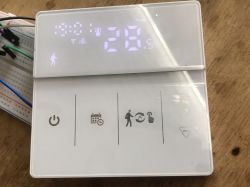
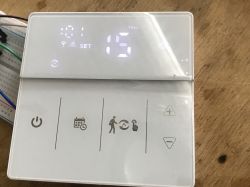
[size=18] Details of the TuyaMCU protocol used As I mentioned above, this device consists of a WiFi module and a microcontroller, the WiFi module takes care of communication with the cloud and the MCU takes over the rest of the duties.
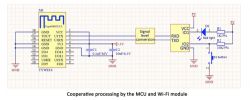
The very idea of this protocol I described in this topic:
TuyaMCU protocol - communication between microcontroller and WiFi module The protocol itself on different devices is the same, but the content and roles of variables, so-called. dpID.
To find out about them, I performed UART captures with my analyzer:
https://github.com/openshwprojects/TuyaMCUAnalyzer
TuyaMCU analyzer - UART packet decoder for Tuya devices - dpID detector
Here are some of the more interesting captured packets along with their interpretations.
Moment of pairing:
Received packet:
55 AA	03	00		00 01	01	04
HEADER	VER=03	Heartbeat		LEN	01	CHK

Received packet:
55 AA	03	07		00 05	01 01 00 01 00 		11
HEADER	VER=03	State		LEN	fnId=1 Bool V=0	CHK

Received packet:
55 AA	03	07		00 08	02 02 00 04 00000096 		AF
HEADER	VER=03	State		LEN	fnId=2 Val V=150	CHK

Received packet:
55 AA	03	07		00 08	03 02 00 04 000000F5 		0F
HEADER	VER=03	State		LEN	fnId=3 Val V=245	CHK

Received packet:
55 AA	03	07		00 05	04 04 00 01 01 		18
HEADER	VER=03	State		LEN	fnId=4 Enum V=1	CHK

Received packet:
55 AA	03	07		00 05	06 01 00 01 00 		16
HEADER	VER=03	State		LEN	fnId=6 Bool V=0	CHK

Received packet:
55 AA	03	07		00 05	0C 05 00 01 00 		20
HEADER	VER=03	State		LEN	fnId=12 Bitmap V=0	CHK

Received packet:
55 AA	03	07		00 05	65 01 00 01 00 		75
HEADER	VER=03	State		LEN	fnId=101 Bool V=0	CHK

Received packet:
55 AA	03	07		00 05	66 01 00 01 00 		76
HEADER	VER=03	State		LEN	fnId=102 Bool V=0	CHK

Received packet:
55 AA	03	07		00 08	67 02 00 04 00000000 		7E
HEADER	VER=03	State		LEN	fnId=103 Val V=0	CHK

Received packet:
55 AA	03	07		00 08	68 02 00 04 00000001 		80
HEADER	VER=03	State		LEN	fnId=104 Val V=1	CHK

Received packet:
55 AA	03	07		00 08	69 02 00 04 0000000F 		8F
HEADER	VER=03	State		LEN	fnId=105 Val V=15	CHK

Received packet:
55 AA	03	07		00 05	6A 01 00 01 01 		7B
HEADER	VER=03	State		LEN	fnId=106 Bool V=1	CHK

Received packet:
55 AA	03	07		00 05	6B 01 00 01 01 		7C
HEADER	VER=03	State		LEN	fnId=107 Bool V=1	CHK

Received packet:
55 AA	03	07		00 05	6C 01 00 01 00 		7C
HEADER	VER=03	State		LEN	fnId=108 Bool V=0	CHK

Received packet:
55 AA	03	07		00 08	6D 02 00 04 FFFFFFF6 		77
HEADER	VER=03	State		LEN	fnId=109 Val V=-10	CHK

Received packet:
55 AA	03	07		00 08	6E 02 00 04 0000000A 		8F
HEADER	VER=03	State		LEN	fnId=110 Val V=10	CHK

Received packet:
55 AA	03	07		00 08	6F 02 00 04 00000002 		88
HEADER	VER=03	State		LEN	fnId=111 Val V=2	CHK

Received packet:
55 AA	03	07		00 08	70 02 00 04 0000002D 		B4
HEADER	VER=03	State		LEN	fnId=112 Val V=45	CHK

Received packet:
55 AA	03	07		00 08	71 02 00 04 00000005 		8D
HEADER	VER=03	State		LEN	fnId=113 Val V=5	CHK

Received packet:
55 AA	03	07		00 08	72 02 00 04 00000023 		AC
HEADER	VER=03	State		LEN	fnId=114 Val V=35	CHK

Received packet:
55 AA	03	07		00 08	73 02 00 04 00000005 		8F
HEADER	VER=03	State		LEN	fnId=115 Val V=5	CHK

Received packet:
55 AA	03	07		00 05	74 04 00 01 00 		87
HEADER	VER=03	State		LEN	fnId=116 Enum V=0	CHK

Received packet:
55 AA	03	07		00 05	75 04 00 01 00 		88
HEADER	VER=03	State		LEN	fnId=117 Enum V=0	CHK

Received packet:
55 AA	03	07		00 05	76 04 00 01 00 		89
HEADER	VER=03	State		LEN	fnId=118 Enum V=0	CHK

Received packet:
55 AA	03	07		00 0D	77 00 00 09 06001408000F0B1E0F 		FF
HEADER	VER=03	State		LEN	fnId=119 Raw V=06 00 14 08 00 0F 0B 1E 0F	CHK

Received packet:
55 AA	03	07		00 0D	78 00 00 09 0D1E0F91000F16000F 		96
HEADER	VER=03	State		LEN	fnId=120 Raw V=0D 1E 0F 91 00 0F 16 00 0F	CHK

Received packet:
55 AA	03	07		00 0D	79 00 00 09 06001408000F0B1E0F 		01
HEADER	VER=03	State		LEN	fnId=121 Raw V=06 00 14 08 00 0F 0B 1E 0F	CHK

Received packet:
55 AA	03	07		00 0D	7A 00 00 09 0D1E0F11000F16000F 		18
HEADER	VER=03	State		LEN	fnId=122 Raw V=0D 1E 0F 11 00 0F 16 00 0F	CHK

Received packet:
55 AA	03	00		00 01	01	04
HEADER	VER=03	Heartbeat		LEN	01	CHK
Received packet:
55 AA	03	07		00 08	03 02 00 04 00000113 		2E
HEADER	VER=03	State		LEN	fnId=3 Val V=275	CHK

Received packet:
55 AA	03	07		00 08	67 02 00 04 00000000 		7E
HEADER	VER=03	State		LEN	fnId=103 Val V=0	CHK

Received packet:
55 AA	03	07		00 08	6D 02 00 04 00000014 		98
HEADER	VER=03	State		LEN	fnId=109 Val V=20	CHK
Received packet:
55 AA	03	07		00 08	03 02 00 04 0000011D 		38
HEADER	VER=03	State		LEN	fnId=3 Val V=285	CHK

Received packet:
55 AA	03	07		00 08	67 02 00 04 00000000 		7E
HEADER	VER=03	State		LEN	fnId=103 Val V=0	CHK

Received packet:
55 AA	03	07		00 08	6D 02 00 04 0000001E 		A2
HEADER VER=03 State LEN fnId=109 Val V=30 CHK Received packet:
55 AA 03 07 00 08 02 02 00 04 00000091 AA
HEADER VER=03 State LEN fnId=2 Val V=145 CHK
Received packet:
55 AA 03 07 00 05 04 04 00 01 03 1A
HEADER VER=03 State LEN fnId=4 Enum V=3 CHK
Received packet:
55 AA 03 00 00 01 01 04
HEADER VER=03 Heartbeat LEN 01 CHK On the main menu - setting 30.5 temp:
Received packet:
55 AA	03	07		00 08	02 02 00 04 00000131 		4B
HEADER	VER=03	State		LEN	fnId=2 Val V=305	CHK

Received packet:
55 AA	03	07		00 05	04 04 00 01 03 		1A
HEADER VER=03 State LEN fnId=4 Enum V=3 CHK Received packet:
55 AA 03 07 00 05 66 01 00 01 01 77
HEADER VER=03 State LEN fnId=102 Bool V=1 CHK
Received packet:
55 AA	03	07		00 05	01 01 00 01 00 		11
HEADER	VER=03	State		LEN	fnId=1 Bool V=0	CHK

Received packet:
55 AA	03	07		00 05	01 01 00 01 01 		12
HEADER	VER=03	State		LEN	fnId=1 Bool V=1	CHK

Received packet:
55 AA	03	07		00 05	01 01 00 01 00 		11
HEADER	VER=03	State		LEN	fnId=1 Bool V=0	CHK

Received packet:
55 AA	03	07		00 05	01 01 00 01 01 		12
HEADER VER=03 State LEN fnId=1 Bool V=1 CHKReceived packet:
55 AA 03 07 00 08 70 02 00 04 0000002C B3
HEADER VER=03 State LEN fnId=112 Val V=44 CHK
55 AA	03	07		00 08	71 02 00 04 00000006 		8E
HEADER VER=03 State LEN fnId=113 Val V=6 CHK 55 AA 03 07 00 05 75 04 00 01 00 88
HEADER VER=03 State LEN fnId=117 Enum V=0 CHK
Received packet:
55 AA	03	07		00 08	02 02 00 04 00000032 		4B
HEADER	VER=03	State		LEN	fnId=2 Val V=50	CHK

Received packet:
55 AA	03	07		00 05	76 04 00 01 01 		8A
HEADER VER=03 State LEN fnId=118 Enum V=1 CHK Received packet:
55 AA 03 07 00 08 02 02 00 04 00000032 4B
HEADER VER=03 State LEN fnId=2 Val V=50 CHK
Received packet:
55 AA 03 07 00 05 76 04 00 01 00 89
HEADER VER=03 State LEN fnId=118 Enum V=0 CHK Changing program type to 7:
Received packet:
55 AA	03	07		00 08	02 02 00 04 00000032 		4B
HEADER	VER=03	State		LEN	fnId=2 Val V=50	CHK

Received packet:
55 AA	03	07		00 05	76 04 00 01 02 		8B
HEADER VER=03 State LEN fnId=118 Enum V=2 CHK Received packet:
55 AA 03 07 00 08 6E 02 00 04 0000000F 94
HEADER VER=03 State LEN fnId=110 Val V=15 CHK 55 AA 03 07 00 08 02 02 00 04 000000FA 13
HEADER VER=03 State LEN fnId=2 Val V=250 CHK
Received packet:
55 AA 03 07 00 05 04 04 00 01 00 17
HEADER VER=03 State LEN fnId=4 Enum V=0 CHK Received packet:
55 AA 03 07 00 08 02 02 00 04 00000096 AF
HEADER VER=03 State LEN fnId=2 Val V=150 CHK
Received packet:
55 AA 03 07 00 05 04 04 00 01 01 18
HEADER VER=03 State LEN fnId=4 Enum V=1 CHK Changing mode to Holiday:
Received packet:
55 AA	03	07		00 08	02 02 00 04 00000096 		AF
HEADER	VER=03	State		LEN	fnId=2 Val V=150	CHK

Received packet:
55 AA	03	07		00 05	04 04 00 01 02 		19
HEADER	VER=03	State		LEN	fnId=4 Enum V=2	CHK
I will deal with the firmware change itself only in the future.
Summary
A very interesting product, although I didn't like a few things. Those typing the password with each configuration change is not convenient. The display could be more readable, a little lack of contrast for me, I think the color green or red would fit more. Well, and this device in such a form is connected to the cloud, only then will we deal with the potential change of the batch, although the ground for this I have already prepared by capturing TuyaMCU packages.
Although, the manufacturer can be praised here for several things. The 0.55F 5.5V supercapacitor inside is certainly a plus, because in case of a power outage, the hour certainly won't get lost. It will also be interesting to see if this thermostat will remember its program when there is temporarily no internet access. Another plus could be the ability to connect an external sensor, which is also quite optional, as the built-in temperature sensor is also available. I also liked the fact that there are actually a bit of these options. Although this manual calibration is a nice addition.
However, I haven't tested this thermostat in the long term, so I'll ask - does anyone have these types of products installed at home? How do they perform, do they work faultlessly? .[/size]


Comments
Hi. Have you come across this type of thermostats, but ones that can wirelessly turn on a gas central heating furnace? The thing is that I have two wires connected to my thermostat from the furnace, which... [Read more]
It depends on how much it is supposed to cooperate. You can approach the topic a little differently and use any thermostat that works with HA and create an event in the HA itself that, based on the set... [Read more]
@hiv_sick if you use Home Assistant, there should be no problem with automation. It depends on whether a given thermostat offers "reading" of the heating status, because I've seen that it doesn't...... [Read more]
WBR3 are now flashable. See tutorial: WBR2, WBR3, WBRU, W701-VA2-CG pinout, datasheet, flashing for Home Assistant [Read more]