logo elektroda
logo elektroda
X
logo elektroda

DIY Weller WMRP and WMRT soldering station

hacker_ice 19971 35
ADVERTISEMENT
Treść została przetłumaczona polish » english Zobacz oryginalną wersję tematu
  • DIY Weller WMRP and WMRT soldering station
    Hello.
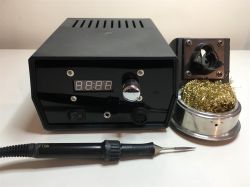
    I would like to present a soldering station compatible with Weller WMRP and WMRT handles. The controller is based on the PIC16F1788 chip and the program occupies approximately 1/4 of its memory space. All control is done via one knob, behind which there is an Alps EC12E2424407 encoder. The display is Lite-On LTC-4627JR, or Youngsun ATA3492BR-1 can also be used.
    The most important features:
    - Possibility to use only Weller WMRP tips, which have a connection via a 3.5mm jack;
    - Very fast heating;
    - Supports original Weller holders including PTC reading for thermocouple cold end compensation and reading when the flask is in the holder;
    - Setback, setback delay, standby, offset temperature settings as in the original Weller station;
    - Possibility to set the temperature step and change the temperature scale between °C and °F;
    - Diagnostic menu for two thermocouples in case of WMRT, cold end compensation, WMRT or WMRP handle identification or no NC;
    - Uses the microcontroller's internal reference voltage;
    - All functions controlled by just one knob.

    Construction:
    The PCBs were ordered in DirtyPCB
    If someone uses the link provided, I advise you to choose the quantity as a protopack, personally they gave me 11 tiles. That's why I made 11 controllers and bought all the elements 11 times to have enough for all of them. I will provide the cost estimate at the very end.
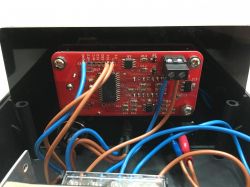
    DIY Weller WMRP and WMRT soldering station
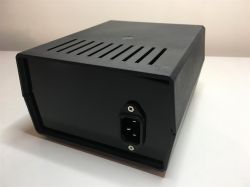
    The case was ordered from eBay measuring 180mm x 150mm x 90mm. The front and rear panels were cut on a laser exactly for the housing and the mounting plate and sockets. I could only do this after measuring the original panels that came with the casing - they are matte and so is the entire casing. However, the ones I got from a company that cuts with a laser are mirror-like, which look better than matte ones.
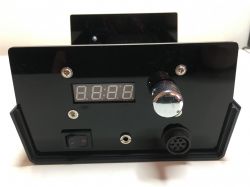
    DIY Weller WMRP and WMRT soldering station DIY Weller WMRP and WMRT soldering station
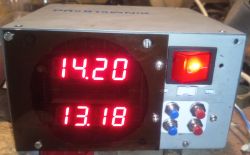
    As for questions about why such a large casing could be accommodated in a smaller one, it was only to put my second station for large tips on it, and now there is also a sound card for YouTube. This is what it looks like on my desk:
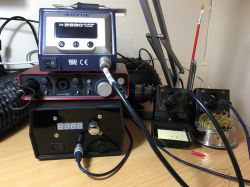
    DIY Weller WMRP and WMRT soldering station
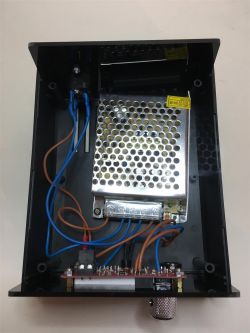
    The power supply is provided by the cheapest switching power supply, which is offered as a power supply for 12V/5A LED strips. Dimensions 110mm x 79mm x 37mm. Perfectly sufficient for use with WMRP. Thanks to the holes in the housing, it was possible to screw on the power supply without drilling.
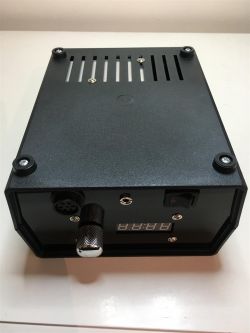
    DIY Weller WMRP and WMRT soldering station DIY Weller WMRP and WMRT soldering station
    The stock was made of a stock from the Zhaoxin soldering station. I didn't want to use a tip plugged into the 3.5mm jack extension only, because it wasn't comfortable for me, and the tip itself was stuck in the holder stand. The stock is a little shorter because I had to cut it down until the hole was large enough to attach the end of the jack extension in a way that allows for easy replacement of points like in the original stock. Extensionglued with hot glue after proper adjustment to the inside of the stock, so that it cannot slide out over time due to changes in the tips.
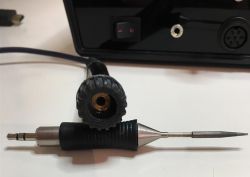
    DIY Weller WMRP and WMRT soldering station DIY Weller WMRP and WMRT soldering station
    Programming:
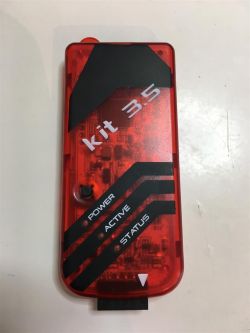
    To program the PIC, I used my PicKit clone marked with the number 3.5. On the board we can see fields called X1 - this is where you need to connect a special 6-pin cable for quick PIC programming. Unfortunately, it is definitely too expensive to invest in it, so I soldered each connection with the cable that came with the programmer. For programming, you need to use software called MPLAB IDE and select the option to power the system through the programmer. Otherwise, it will display an error about connection to the microcontroller.
    DIY Weller WMRP and WMRT soldering station
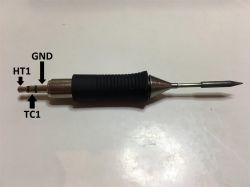
    To use only the WMRP tip for the station, you need to connect it as shown in the photo and enable the poor option in the station menu.
    DIY Weller WMRP and WMRT soldering station
    List of the entire menu below and the operation of the station in the author's video:


    Station menu:
    Code: Text
    Log in, to see the code

    Cost estimate approximately in Polish zlotys I paid $ or ?:
    PCB boards - 11 pieces when shipped by DHL? approximately PLN 120 / 11 = PLN 11 / 1 piece
    Housing -PLN 35
    DC power supply - PLN 34
    Chrome knob - PLN 15
    Programmer - PLN 68
    Electronic parts, cables, screws, sockets, laser cutting, jack extension - about PLN 200-250.
    Mainsail for WMRP about PLN 100 each.
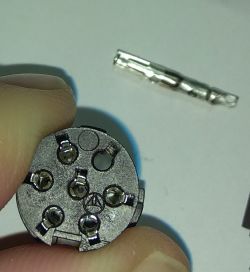
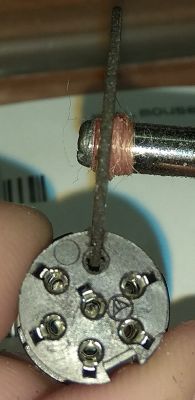
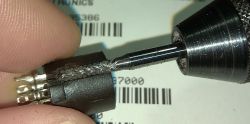
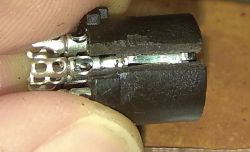
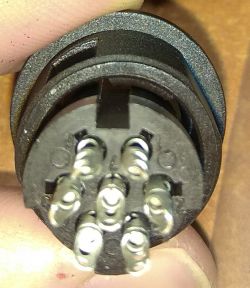
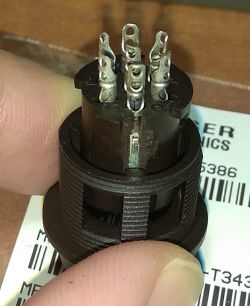
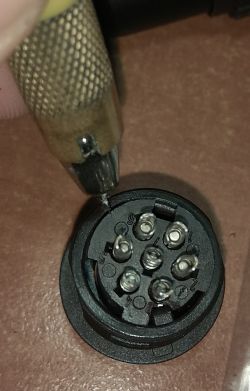
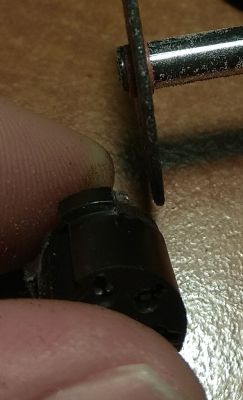
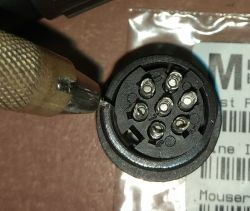
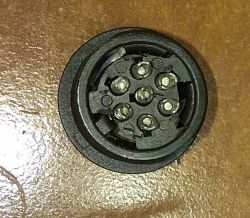
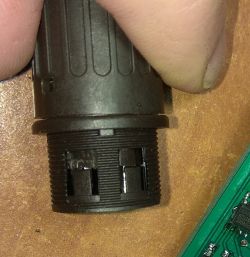
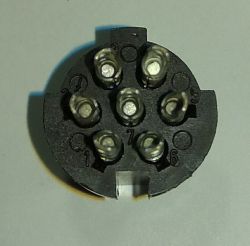
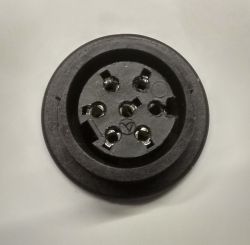
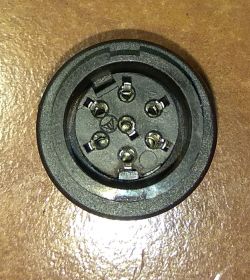
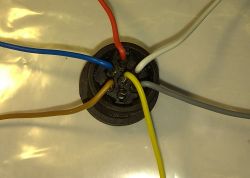
    The connector for the original Weller flasks is a modified Amphenol T 3437 000. The modification involves pulling out the center of the connector and moving it to the appropriate side to fit the Weller plug.
    The main author of the station is Jaakko Kairus
    Project page: Link
    Below are the attachments, input to the station, documentation, parts list, assembly, compatible tips with a 3.5mm WMRP plug.

    Cool? Ranking DIY
    About Author
    hacker_ice

    Level 24  
    Offline 
    hacker_ice wrote 871 posts with rating 101, helped 36 times. Live in city Częstochowa. Been with us since 2005 year.
  • ADVERTISEMENT
  • #2 16976556
    ghost666
    Translator, editor
    Did you only buy the tips, without the handles? This is probably a moderately accurate temperature measurement, right?
  • #3 16976610
    Kajox
    Level 18  
    There is some protection against short circuit. Nothing will happen if the Jack connector is turned on and the soldering iron falls out?
  • #4 16976847
    hacker_ice

    Level 24  
    ghost666 wrote:
    Did you only buy the tips, without the handles? This is probably a moderately accurate temperature measurement, right?


    You don't need the original handles because the thermocouple and heater are in the cave. There is only a magnetic sensor in the flask to sense when it is in the holder and then it goes to sleep or reduces the temperature in accordance with the settings entered in the flask. setb . However, you can use the knob, just press it and then the station will also go to sleep, so you don't have to spend money on the original stock.

    Kajox wrote:
    There is some protection against short circuit. Nothing will happen if the Jack connector is turned on and the soldering iron falls out?


    Apart from the fact that the tip will be hot, nothing will happen. The tip has never fallen out on its own and is only plugged into the mini jack socket. The tip replacement is also performed when the station is turned on, then a message is displayed NC and that's it. This type of tip is heated by alternating temperature and heating readings. This means that heating occurs at one moment and then the temperature is read. If the station does not record the temperature, I assume that the tip is not there and does not send heating.
  • #5 16976880
    Kajox
    Level 18  
    A short circuit occurs when inserting or removing the plug. I once had a problem with this when I was wiring these plugs for a heated jacket.
  • #6 16976929
    hacker_ice

    Level 24  
    Here it is solved by sampling whether the plug is present or not, so that nothing happens :)
  • ADVERTISEMENT
  • #7 16977014
    Kajox
    Level 18  
    Ok, so even plugging in halfway will not damage the system. I like this solution. Regards
  • #8 16977023
    ghost666
    Translator, editor
    hacker_ice wrote:
    ghost666 wrote:
    Did you only buy the tips, without the handles? This is probably a moderately accurate temperature measurement, right?


    You don't need the original handles because the thermocouple and heater are in the cave. There is only a magnetic sensor in the flask to sense when it is in the holder and then it goes to sleep or reduces the temperature in accordance with the settings entered in the flask. setb . However, you can use the knob, just press it and then the station will also go to sleep, so you don't have to spend money on the original stock.


    Thanks for the info. I always thought there was a second thermocouple there to compensate for the cold junction.
  • #9 16977138
    rxone
    Level 10  
    Where did you buy your spearheads?
  • #10 16977203
    hacker_ice

    Level 24  
    rxone wrote:
    Where did you buy your spearheads?


    The tips are purchased here, where I live in the UK, in the RS Components store.
  • #11 16977262
    rxone
    Level 10  
    OK thanks. One more question... what is the model of the tweezers tip/head?
  • #12 16977287
    hacker_ice

    Level 24  
    rxone wrote:
    OK thanks. One more question... what is the model of the tweezers tip/head?


    The tips for the mini jack socket where the original stock is not needed are in the "Weller tips" attachment, but if you want to have thermotweezers, it is the WMRT model and you have to have the original stock and connect it to the normal socket, not the 3.5mm one. The mains for WMRT are RTW1, RTW2, RTW3 etc. respectively.
  • ADVERTISEMENT
  • #14 16987032
    michal82
    Level 12  
    ghost666 wrote:
    hacker_ice wrote:
    ghost666 wrote:
    Did you only buy the tips, without the handles? This is probably a moderately accurate temperature measurement, right?


    You don't need the original handles because the thermocouple and heater are in the cave. There is only a magnetic sensor in the flask to sense when it is in the holder and then it goes to sleep or reduces the temperature in accordance with the settings entered in the flask. setb . However, you can use the knob, just press it and then the station will also go to sleep, so you don't have to spend money on the original stock.


    Thanks for the info. I always thought there was a second thermocouple there to compensate for the cold junction.


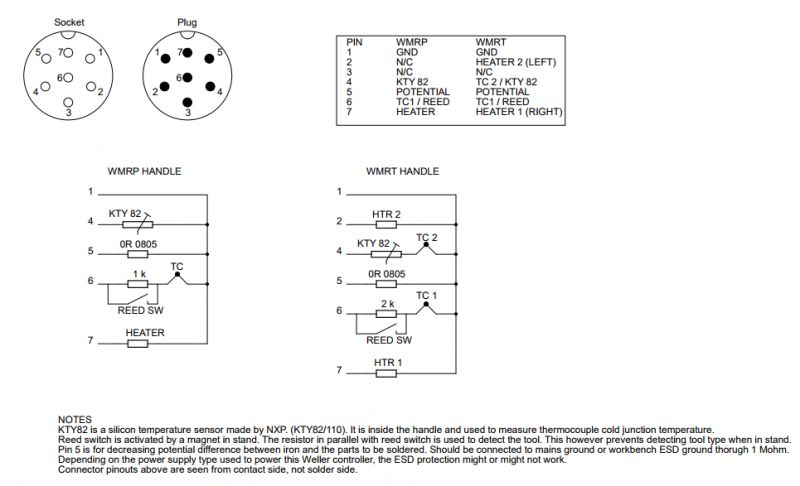
    You thought right, Weller also thought about temperature compensation of the cold junction for this one, in addition to the magnetic sensor, the handle also has a KTY 82 resistive temperature sensor.
    DIY Weller WMRP and WMRT soldering station

    There are two options in the soldering iron menu that allow you not to have this sensor:
    Quote:
    cold - Compensation of the cold end of the thermocouple, PTC temperature
    poor - enable if we use only the tip via the 3.5mm connector without the original WMRP holder.


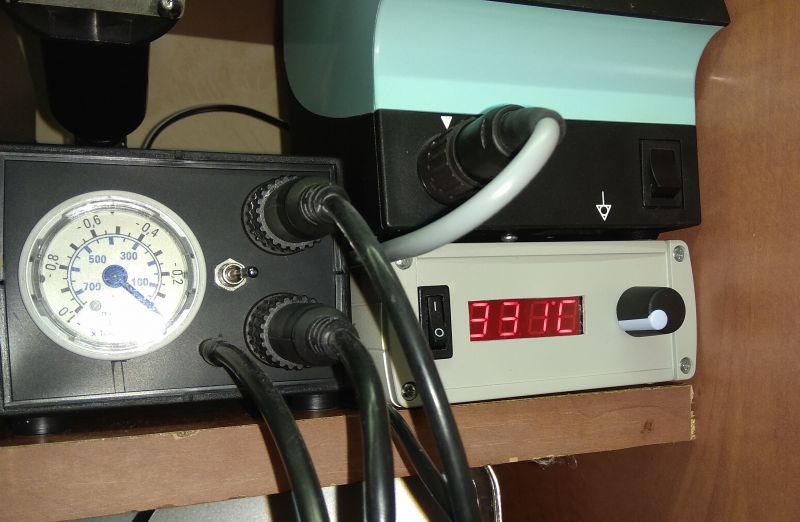
    Hacker_ice, could I ask you to measure the temperature of the tip of the tip with a thermocouple meter and provide information about the stability of the temperature reading on the display.

    below is a photo of my station based on the project http://kair.us/projects/weller/index.html
    DIY Weller WMRP and WMRT soldering station
  • #15 16987146
    yogi009
    Level 43  
    Very interesting idea, good execution. However, putting together a project from modules (especially Chinese ones) always arouses philosophical reflections in me. The big advantage here is the use of Weller's elements, but it is also a plus, it certainly increases the work culture.
  • #16 16987188
    ghost666
    Translator, editor
    michal82 wrote:
    ghost666 wrote:
    hacker_ice wrote:
    ghost666 wrote:
    Did you only buy the tips, without the handles? This is probably a moderately accurate temperature measurement, right?


    You don't need the original handles because the thermocouple and heater are in the cave. There is only a magnetic sensor in the flask to sense when it is in the holder and then it goes to sleep or reduces the temperature in accordance with the settings entered in the flask. setb . However, you can use the knob, just press it and then the station will also go to sleep, so you don't have to spend money on the original stock.


    Thanks for the info. I always thought there was a second thermocouple there to compensate for the cold junction.


    You thought right, Weller also thought about temperature compensation of the cold junction for this one, in addition to the magnetic sensor in the handle there is also a resistive temperature sensor KTY 82
    DIY Weller WMRP and WMRT soldering station

    There are two options in the soldering iron menu that allow you not to have this sensor:
    Quote:
    cold - Compensation of the cold end of the thermocouple, PTC temperature
    poor - enable if we use only the tip via the 3.5mm connector without the original WMRP holder.


    I knew there was something like that there. I'm also curious how stable and accurate the temperature is without compensation.
  • #17 16992158
    hacker_ice

    Level 24  
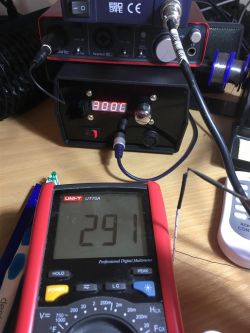
    Sorry for the long response time, but I was away. I did a test today and there was a 9°C difference between the station indication (the tip itself) and the thermocouple of the meter. Below is a photo.

    DIY Weller WMRP and WMRT soldering station
  • #18 16992170
    Slawek K.
    Level 35  
    In this case, a few degrees of deviation does not matter at all.

    Regards
  • #19 16992207
    hacker_ice

    Level 24  
    If it was 30-40°C, that would be something, and as for the temperature, when I measured it, the oscillation was only 1-2°C, but that was probably only due to the movement of my hand.
  • #20 16996066
    michal82
    Level 12  
    In total, I made two stations based on this design and in both cases the temperature was too low, I didn't have time to figure it out further, so I inserted two multi-turn potentiometers in the amplifier feedback loop and manually adjusted the temperatures.
    Depending on the tip or thermo tweezers, the measurements differ by 10C. Now I wonder whether the Weller has a D-type thermocouple as it was done in this program or maybe something else.
    A table of D-type thermocouple voltages is attached
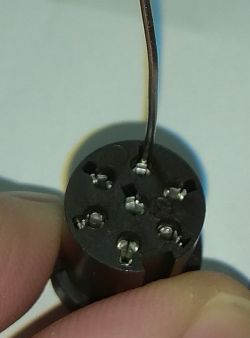
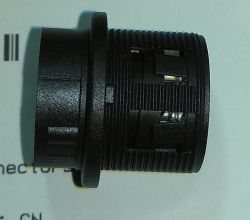
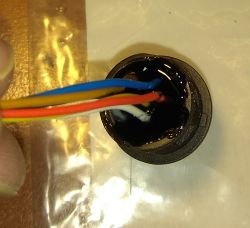
    and a mini tutorial on how to modify the socket to fit the original Weller connectors.
    DIY Weller WMRP and WMRT soldering station
    DIY Weller WMRP and WMRT soldering station
    DIY Weller WMRP and WMRT soldering station
    DIY Weller WMRP and WMRT soldering station
    DIY Weller WMRP and WMRT soldering station
    DIY Weller WMRP and WMRT soldering station
    DIY Weller WMRP and WMRT soldering station
    DIY Weller WMRP and WMRT soldering station
    DIY Weller WMRP and WMRT soldering station
    DIY Weller WMRP and WMRT soldering station
    DIY Weller WMRP and WMRT soldering station
    DIY Weller WMRP and WMRT soldering station
    DIY Weller WMRP and WMRT soldering station
    DIY Weller WMRP and WMRT soldering station
    DIY Weller WMRP and WMRT soldering station
    DIY Weller WMRP and WMRT soldering station
    DIY Weller WMRP and WMRT soldering station
    DIY Weller WMRP and WMRT soldering station
    DIY Weller WMRP and WMRT soldering station
  • #21 17001455
    michal82
    Level 12  
    Descriptions of activities in file names were removed when adding them to the server, so for those interested, photos with descriptions:

    As for the availability of the display, it seems to me that there is another one in TME that matches the diagram

    in LTC4627 L3 (dot symbolizing degrees) is connected between Pins 4 and 13
    they are connected in parallel in the diagram with 10 and 9, i.e. L3 for TDCR1050M, so both can be used
  • #23 17516840
    EXEN___
    Level 10  
    Hello, please let me know what Kolbe stand you use for the Weller station? I understand that the stand has a built-in magnet to put the soldering iron to sleep?
  • #24 17518537
    hacker_ice

    Level 24  
    Currently I turn off the stock by pressing the encoder. I am in the process of designing a holder for the stock and the thermotweezers used by Weller, but for much less money. I'll let you know the results when I finish it.
  • #25 17551309
    Toze1711
    Level 5  
    Even though I have a soldering station, I must say that it's very nicely done, you certainly put a lot of work into it, best regards
  • ADVERTISEMENT
  • #26 17906252
    tupax3
    Level 8  
    A description of how to make a Weller handle and a file for a 3D printer to make it have appeared on Kair.us.
  • #27 17906424
    hacker_ice

    Level 24  
    WMRT pliers prototype - see the performance test. I just need to refine the aesthetics and it will be ready :)


  • #28 17907637
    tupax3
    Level 8  
    So I'm waiting for the final version. Did you solder any components on iPhone boards with these pliers? I wonder how these pliers compare to JBC pliers. I found this video https://www.youtube.com/watch?v=syjEbtffkag. Is the plug from the original pliers or did you make your own?
  • #29 17908758
    hacker_ice

    Level 24  
    I just saw this video and JBC makes even smaller tips for them, I will also make stations, one prototype works.

    As for Weller, the guy shows a 0.4 mm tip, I do everything with a 0.2 mm tip and everything is OK. I make paths under the system, etc. I made a long screw in 5S with a 1 mm tip, so everything is possible.

    The plug for these pliers is made so that it fits both my station and the original Weller. The socket in my station is modified, so the original pliers and cash also fit without any problems.

    Generally, I don't know when the final version will be available, I don't have much time and people already want these pliers. The first prototype from the film found a home in a service center in Poland right after the film and the new owner is happy with them, even though they look like they do, but as he says, they do the job :).

    Regards
  • #30 19002760
    Asedio
    Level 13  
    Hello.
    I ordered a PCB. We'll see how much I get. If there are more, I will let you know. Maybe someone will be interested.
    There is a problem with the display. There are none described. There are no replies either (TME) and I can't find them. :(

Topic summary

A DIY soldering station compatible with Weller WMRP and WMRT handles was developed using a PIC16F1788 microcontroller, controlling temperature via a single Alps EC12E2424407 rotary encoder and displaying data on a Lite-On LTC-4627JR or Youngsun ATA3492BR-1 display. The station supports original Weller tips with 3.5mm jack connections, enabling fast heating and features such as PTC thermocouple cold junction compensation, flask presence detection via a magnetic sensor, temperature setback, standby modes, offset adjustments, and selectable temperature units (°C/°F). The design samples plug presence to prevent short circuits during tip insertion/removal. Thermotweezers (WMRT) require original holders connected to standard sockets, while WMRP tips use the mini jack socket without original handles. Temperature stability tests showed a typical 9°C difference between station reading and external thermocouple, with oscillations of 1-2°C. Calibration adjustments were made using multi-turn potentiometers in the amplifier feedback loop. The station uses D-type thermocouples, with firmware updates available (version 9.1). Mechanical improvements include using threaded 3.5mm sockets with aluminum bushings for better tip stability. Community members shared resources such as pinout modifications, thermocouple voltage tables, and 3D printable handle designs. Some users reported issues with tip recognition ("NC" message) and incorrect reference voltage (VREF), which were resolved by verifying connector pinouts and system calibration. The project emphasizes compatibility with Weller components while offering cost-effective alternatives and modular design for soldering and thermotweezers applications.
Summary generated by the language model.
ADVERTISEMENT