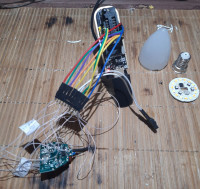
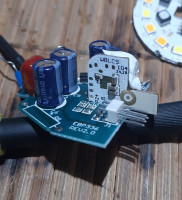
My humble contribution.
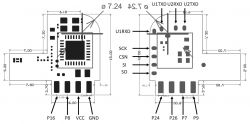
https://developer.tuya.com/en/docs/iot/wblc9-module-datasheet?id=K9hgglry2jp5h
Homework tonight:
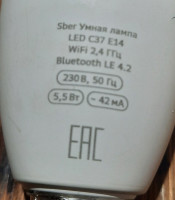
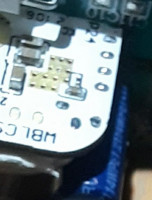
Package and marking:
disassembly:
Excellent result:
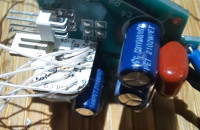
connect external power
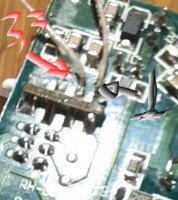
We solder the contacts of the TP
Next are two options:
save a backup and be able to rollback or just flash
Create and save a flash memory backup. You need a programmer SPI memory, for example
inexpensive CH341A.
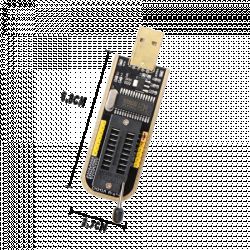
Firmware through any UART port available to you with 3.3v levels (for example)
We transfer the programmer CH341A to serial mode, remove the jumper (or any other, which is available)
run the program for the firmware (download the program and the latest firmware )
specify your file with the program and your com port
Next, we connect to the access point, go to the address 192.168.4.1 and make settings
The main ones related to the lamp and the chip:
Configure module:
P24 BP1658CJ_DAT
P26 BP1658CJ_CLK
Configure General
set Flag4 ( restore on power and flag12 )
Change Startup command text::
BP1658CJ_Map 2 1 0 4 3
Setting up MQTT ( ip, topic, username, password )
Home assistaint (configuration.yaml ):
Good luck!

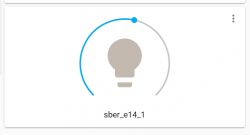
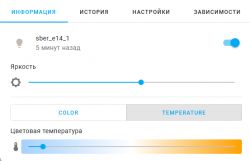
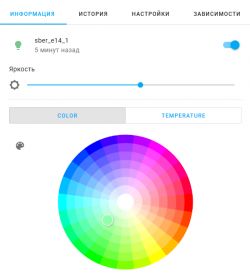
P.S.
Huge thanks to btsimonh and Refuhr for their help!
P.S.S
(RUS version) and sorry for bad english

https://developer.tuya.com/en/docs/iot/wblc9-module-datasheet?id=K9hgglry2jp5h
Homework tonight:
Package and marking:
Spoiler:
disassembly:
Spoiler:
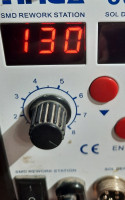
We heat up
And with both hands, just gently break it in half. The main thing is not to damage your hands, eyes, body, as well as the lamp body and the ceiling.
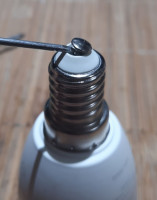
remove pimpochka
With a blunt knife, gently move the base in a circle
cut off white snot
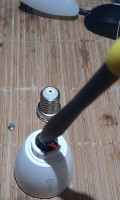
with a thin but strong screwdriver, push the disk out with LEDs
We heat up
Spoiler:
And with both hands, just gently break it in half.
Spoiler:
remove pimpochka
Spoiler:
With a blunt knife, gently move the base in a circle
Spoiler:
cut off white snot
Spoiler:
with a thin but strong screwdriver, push the disk out with LEDs
Spoiler:
Excellent result:
connect external power
We solder the contacts of the TP
Next are two options:
save a backup and be able to rollback or just flash
Create and save a flash memory backup. You need a programmer SPI memory, for example
inexpensive CH341A.

Spoiler:
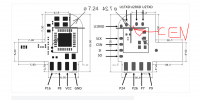
connect the SPI bus in CEN
connect the programmer. Be careful. TC can be damaged by jerks on the wires
Software NeoProgrammer, Asprogrammer
NeoProgrammer download
Drivers download
Script for transferring the chip to memory access mode
1. Press CEN in gnd, Execute script & release CEN
wait 15701 in log
repit in err (id 00000)
2.Press "Detect" Chip
select EN25Q16
3. Press Read IC
Wait:
Currently selected: EN25QH16 [3.3V] 16 Mbits, 2 Mbytes
---------------------------------------------------------------------------
Current programmer: CH341 Black
21:19:22
Reading memory... Main Memory
Success
Execution time: 00:00:17.072
CRC32 = 0x********
4.Press File & Save
Great. you can always return to this state if you do not break the board
connect the SPI bus in CEN
connect the programmer. Be careful. TC can be damaged by jerks on the wires
Software NeoProgrammer, Asprogrammer
NeoProgrammer download
Drivers download
Script for transferring the chip to memory access mode
Spoiler:
{$ INIT_AND_READ_FLASH_ID}
begin
  ID:= CreateByteArray(4);
  RESP:= CreateByteArray(250);
  if not SPIEnterProgMode(_SPI_SPEED_MAX) then LogPrint('Error setting SPI speed');
  LogPrint ('Read JEDEC ID');
    // init SPI
  for i:=0 to 250 do
  begin
    SPIWrite (0, 1, $D2);
    ProgressBar(1);
  end;
    // read response
  SPIRead(1, 3, ID);
    // logprint('RESP: ' + inttohex((GetArrayItem(RESP, 0)),2)+ inttohex((GetArrayItem(RESP, 1)),2));
    // read ID to test installation
  SPIWrite (0, 4, $9F, $00, $00, $00);
  SPIRead(1, 4, ID);
  logprint('CHIP ID: ' + inttohex((GetArrayItem(ID, 2)),2) + inttohex((GetArrayItem(ID, 1)),2)+ inttohex((GetArrayItem(ID, 0)),2));
  LogPrint ('End read JEDEC ID');
  SPIExitProgMode ();
end
1. Press CEN in gnd, Execute script & release CEN
wait 15701 in log
repit in err (id 00000)
2.Press "Detect" Chip
select EN25Q16
3. Press Read IC
Wait:
Currently selected: EN25QH16 [3.3V] 16 Mbits, 2 Mbytes
---------------------------------------------------------------------------
Current programmer: CH341 Black
21:19:22
Reading memory... Main Memory
Success
Execution time: 00:00:17.072
CRC32 = 0x********
4.Press File & Save
Great. you can always return to this state if you do not break the board
Firmware through any UART port available to you with 3.3v levels (for example)
We transfer the programmer CH341A to serial mode, remove the jumper (or any other, which is available)
run the program for the firmware (download the program and the latest firmware )
specify your file with the program and your com port
python uartprogram С:\test\OpenBK7231T_UA_1.12.103.bin -d com8 -w
Next, we connect to the access point, go to the address 192.168.4.1 and make settings
The main ones related to the lamp and the chip:
Configure module:
P24 BP1658CJ_DAT
P26 BP1658CJ_CLK
Configure General
set Flag4 ( restore on power and flag12 )
Change Startup command text::
BP1658CJ_Map 2 1 0 4 3
Setting up MQTT ( ip, topic, username, password )
Home assistaint (configuration.yaml ):
mqtt:
  light:
  - unique_id: "Name_Id"
    name: "Name"
    rgb_command_template: "{{ '%02x%02x%02x' | format(red, green, blue)}}"
    rgb_state_topic: "obkMAC/led_basecolor_rgb/get"
    rgb_command_topic: "cmnd/obkMAC/led_basecolor_rgb"
    rgb_value_template: "{{ value[0:2]|int(base=16) }},{{ value[2:4]|int(base=16) }},{{ value[4:6]|int(base=16) }}"
    command_topic: "cmnd/obkMAC/led_enableAll"
    state_topic: "obkMAC/led_enableAll/get"
    availability_topic: "obkMAC/connected"
    payload_on: "1"
    payload_off: "0"
    brightness_command_topic: "cmnd/obkMAC/led_dimmer"
    brightness_scale: 100
    brightness_state_topic: "obkMAC/led_dimmer/get"
    brightness_value_template: "{{value}}"
    color_temp_command_topic: "cmnd/obkMAC/led_temperature"
    color_temp_state_topic: "obkMAC/led_temperature/get"
    retain: true
Good luck!


P.S.
Huge thanks to btsimonh and Refuhr for their help!
P.S.S
(RUS version) and sorry for bad english
Cool? Ranking DIY


