logo elektroda
logo elektroda
X
logo elektroda

[BK7231T/WB3S] LgowithU Smart Water Valve template/configuration, Steren Valvula Valve (SHOME-150)

p.kaczmarek2 2796 6
ADVERTISEMENT
  • [BK7231T/WB3S] LgowithU Smart Water Valve template/configuration, Steren Valvula Valve (SHOME-150)
    Here is a teardown submited by OpenBeken user, who didn't yet register on Elektroda. I am posting it here per his request.

    Hi! I've just finished to make a smart water valve to work with your OpenBeker firmware; (...) I'd like to share what I achieved.
    I'd like to share that valve model first: https://www.amazon.it/dp/B092ZRNJK3?psc=1&ref=ppx_yo2ov_dt_b_product_details
    [BK7231T/WB3S] LgowithU Smart Water Valve template/configuration, Steren Valvula Valve (SHOME-150)
    [BK7231T/WB3S] LgowithU Smart Water Valve template/configuration, Steren Valvula Valve (SHOME-150)
    You can also buy whole set for this device:
    [BK7231T/WB3S] LgowithU Smart Water Valve template/configuration, Steren Valvula Valve (SHOME-150)
    which I believe is a newer revision or rebrand of this tasmotable one here: https://templates.blakadder.com/steren_SHOME-150.html
    [BK7231T/WB3S] LgowithU Smart Water Valve template/configuration, Steren Valvula Valve (SHOME-150)
    the basic difference is the newer one comes with a WB3S chip instead.
    whit that said, here below my tested and working configuration I've grabbed from the related web-app:

    Quote:

    Current Device:
    UpTime: 2918s

    Build: Build on Mar 21 2023 09:42:03 version 1.15.621

    IP Address: 192.168.1.-------------------

    MAC Address: -------------------------------

    MQTT Server: --------------------------

    MQTT Topic: SmartWaterValve

    WEBAPP Url root: https://openbekeniot.github.io/webapp/

    Chipset: BK7231T

    Flags: 1028

    Version: 1.15.621


    Code: JSON
    Log in, to see the code
    [/i]

    Cool? Ranking DIY
    Helpful post? Buy me a coffee.
    About Author
    p.kaczmarek2
    Moderator Smart Home
    Offline 
    p.kaczmarek2 wrote 11967 posts with rating 9997, helped 572 times. Been with us since 2014 year.
  • ADVERTISEMENT
  • #2 20684106
    VanMak
    Level 4  
    I just flashed a similar device so I thought I'd add my config here.

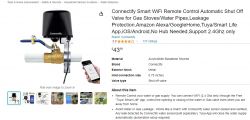
    I purchased it here: https://www.amazon.ca/gp/product/B08GG7H5CP
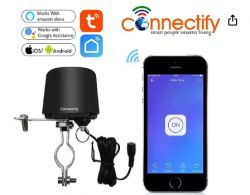
    The image shows a Connectify Smart WiFi Remote Control Shut Off Valve system.
    Connectify Smart WiFi Remote Control device with a smartphone app.

    Here's the template:


    Code: JSON
    Log in, to see the code


    I haven't determined how to add it to HA yet, but I believe I need an entry in mqtt in my configuration.yaml

    I just watched this video which explains how to get HA to discover it.
  • ADVERTISEMENT
  • #3 20684108
    p.kaczmarek2
    Moderator Smart Home
    Hello, can you also share Tuya config partition?
    See how to get it here: https://www.youtube.com/watch?v=WunlqIMAdgw&ab_channel=Elektrodacom

    Regarding HA, it should be possible to use our automatic HASS discovery for that, but it may not specify a custom icon for you, so if you want some special handling for the valve device then you can indeed write your own YAML.
    HASS Automatic Discovery guide: https://www.youtube.com/watch?v=pkcspey25V4&ab_channel=Elektrodacom

    EDIT: I see you've found the video yourself while I was writing the post, nice. Let us know if it works for you.
    Helpful post? Buy me a coffee.
  • ADVERTISEMENT
  • #4 20684110
    VanMak
    Level 4  
    Sure thing, I had backed it up prior to flashing:

    {
    	"rl1_lv":"1",
    	"netled_lv":"1",
    	"bt_type":"0",
    	"bt1_pin":"24",
    	"mxcl_led_m":"0",
    	"led1_pin":"9",
    	"rand_dpid":"18",
    	"net_trig":"2",
    	"led_dp":"15",
    	"jv":"2.0.2",
    	"backlit_select":"0",
    	"md":"0",
    	"random":"0",
    	"wfb64":"1",
    	"stat":"0",
    	"token":"null",
    	"region":"null",
    	"reg_key":"null",
    	"dns_prio":"00{uuid",
    	"psk_key":"eo5in5GdSEDJCcNNcO1qsyPWzF7yrlb0kU098",
    	"auth_key":"VM48puAAU7tnOow1jNbeatAQxl3Q3kDV",
    	"ap_ssid":"SmartLife",
    	"ap_passwd":"null",
    	"country_code":"CN",
    	"bt_mac":"null",
    	"bt_hid":"null",
    	"prod_test":"false }ety_led",
    	"netled_pin":"1",
    	"total_stat":"0",
    	"bt1_lv":"0",
    	"reset_t":"5",
    	"ch_flag1":"1",
    	"inch_dp":"19",
    	"module":"WB3S",
    	"dctrl_select":"0",
    	"ch_cddpid1":"7",
    	"init_conf":"14",
    	"led1_lv":"0",
    	"zero_select":"0",
    	"backlit_dp":"16",
    	"cyc_dpid":"17",
    	"ch_num":"1",
    	"reuse_led_m":"0",
    	"rl1_pin":"6",
    	"netn_led":"1",
    	"ch_dpid1":"1",
    	"crc":"15",
    	"}{xBgw_di{abi":"0",
    	"id":"null",
    	"swv":"1.0.7",
    	"bv":"40.00",
    	"pv":"2.2",
    	"lpv":"3.3",
    	"pk":"key7axydcvmea3x9",
    	"firmk":"key7axydcvmea3x9",
    	"cadv":"1.0.2",
    	"cdv":"1.0.0",
    	"dev_swv":"1.0.7",
    	"s_id":"null",
    	"dtp":"0",
    	"sync":"0",
    	"attr_num":"0",
    	"mst_tp_0":"0",
    	"mst_ver_0":"null",
    	"mst_tp_1":"0",
    	"mst_ver_1":"null",
    	"mst_tp_2":"0",
    	"mst_ver_2":"null",
    	"mst_tp_3":"0",
    	"mst_ver_3":"null",
    	"dminfo_name":"null",
    	"dminfo_code":"null",
    	"dminfo_report_code":"null",
    	"dminfo_sn":"null }{nc_tp",
    	"ssid":"null",
    	"passwd":"null",
    	"lckey":"null",
    	"h_url":"null",
    	"h_ip":"null",
    	"hs_url":"null",
    	"hs_ip":"null",
    	"hs_psk":"null",
    	"hs_psk_ip":"null",
    	"mqs_url":"null",
    	"mqs_ip":"null",
    	"mq_url":"null",
    	"mq_ip":"null",
    	"ai_sp":"null",
    	"mq_psk":"null",
    	"mq_psk_ip":"null",
    	"time_z":"null",
    	"s_time_z":"null",
    	"wx_app_id":"null",
    	"wx_uuid":"null",
    	"dy_tls_m":"0",
    	"cloud_cap":"0 }8Asave_off_stat0power"
    }


    Added after 16 [minutes]:

    After running that converter, I applied a new config. I also set the startup value of Channel 1 to the value -1 so that it wouldn't close the valve upon reboot or power cycle, here's the current config:

    {
      "vendor": "Tuya",
      "bDetailed": "0",
      "name": "Full Device Name Here",
      "model": "enter short model name here",
      "chip": "BK7231T",
      "board": "TODO",
      "flags": "1024",
      "keywords": [
        "TODO",
        "TODO",
        "TODO"
      ],
      "pins": {
        "1": "WifiLED_n;0",
        "6": "Rel;1",
        "9": "LED;1",
        "24": "Btn;1"
      },
      "command": "",
      "image": "https://obrazki.elektroda.pl/YOUR_IMAGE.jpg",
      "wiki": "https://www.elektroda.com/rtvforum/topic_YOUR_TOPIC.html"
    }


    The only change is the value of pin 1.

    Even after setting the startup value mentioned above, the motor still activates momentarily, but at least it doesn't close the valve now.
  • #5 20684236
    p.kaczmarek2
    Moderator Smart Home
    Thanks, your template should be now live at:
    https://openbekeniot.github.io/webapp/devicesList.html

    Regarding Tuya JSON - I wanted to verify that all required settings are imported and it seems that they are. For example, here's how Tuya defines Relay pin:
    
    	"rl1_pin":"6",
    

    Thanks to this users can get GPIO settings without guessing/investigating PCB.
    Helpful post? Buy me a coffee.
  • ADVERTISEMENT
  • #6 21018171
    VanMak
    Level 4  
    I've noticed that whenever we have a power outage, once the power comes back on, this valve closes. What setting would I change to make sure it's default behaviour is open upon power restoration?
  • #7 21018195
    p.kaczmarek2
    Moderator Smart Home
    Assuming that you just want to retain the value of the channel between reboots, then you just need to go to "Configure startup" and enter a -1 value for a given relay channel.
    Helpful post? Buy me a coffee.

Topic summary

A user shared a teardown of a smart water valve compatible with OpenBeken firmware, specifically the Steren Valvula (SHOME-150) model. They provided links to the valve and a newer version with a WB3S chip. Another participant contributed a configuration template for a similar device (model SM-AW713, chip BK7231T) and discussed integration with Home Assistant (HA) using MQTT. The conversation included requests for Tuya configuration details and solutions for retaining relay states after power outages, suggesting a setting adjustment to ensure the valve defaults to open upon power restoration.
Summary generated by the language model.
ADVERTISEMENT