logo elektroda
logo elektroda
X
logo elektroda

Miboxer FUT036w and CB3s Issues: Flashing Firmware, WiFi Connectivity, and Button Control

mplum 8562 61
Best answers

How can I make a Miboxer FUT036W work with OpenBeken on a CB3S, including direct MOSFET control, the local button, and custom long-press dimming behavior?

You can either reverse-engineer the TuyaMCU UART protocol, or bypass the TuyaMCU and wire the CB3S directly to the MOSFETs, WiFi LED, and button; if you do the latter, make sure at least one chosen GPIO is PWM-capable, and if both MOSFETs are tied to the same output they are simply increasing current capability [#20521194] [#20527576] For the button, the simplest fix is to remove the physical pull-up resistor on the PCB, because OpenBeken already provides an internal pull-up and the smart button expects the switch to short GPIO to GND [#20521194] If the smart button does not wake the lamp from off, update firmware because a later fix was added so the button hold behavior works with flag 17 as expected [#20535602] You can tune hold speed with `SetButtonTimes` (values are in 100 ms units), so lowering the repeat value makes dimming faster [#20535602] For custom dimming logic, use event handlers such as `OnClick`, `OnHoldStart`, `OnRelease`, and `OnDblClick`, and use `DimmerDelta` to change the dimming step size [#20550761] If you want multiple PWM outputs to mirror one channel, that was fixed in a later build, so one channel can drive both outputs directly [#20527576]
AI summary based on the discussion. May contain errors.
ADVERTISEMENT
  • Dual MOSFETs and button pull-up behavior on FUT036w

    #1 20521163
    mplum
    Level 3  
    Posts: 34
    Hi,
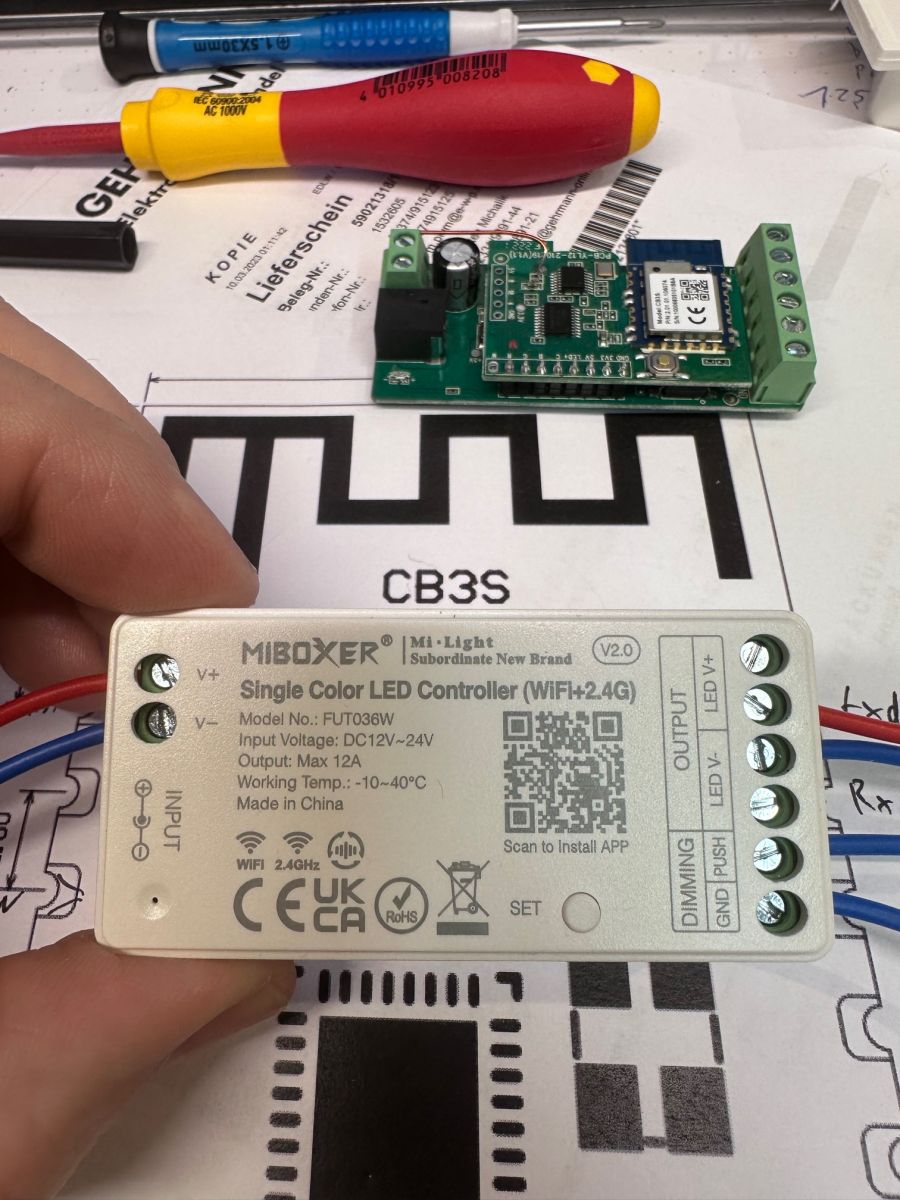
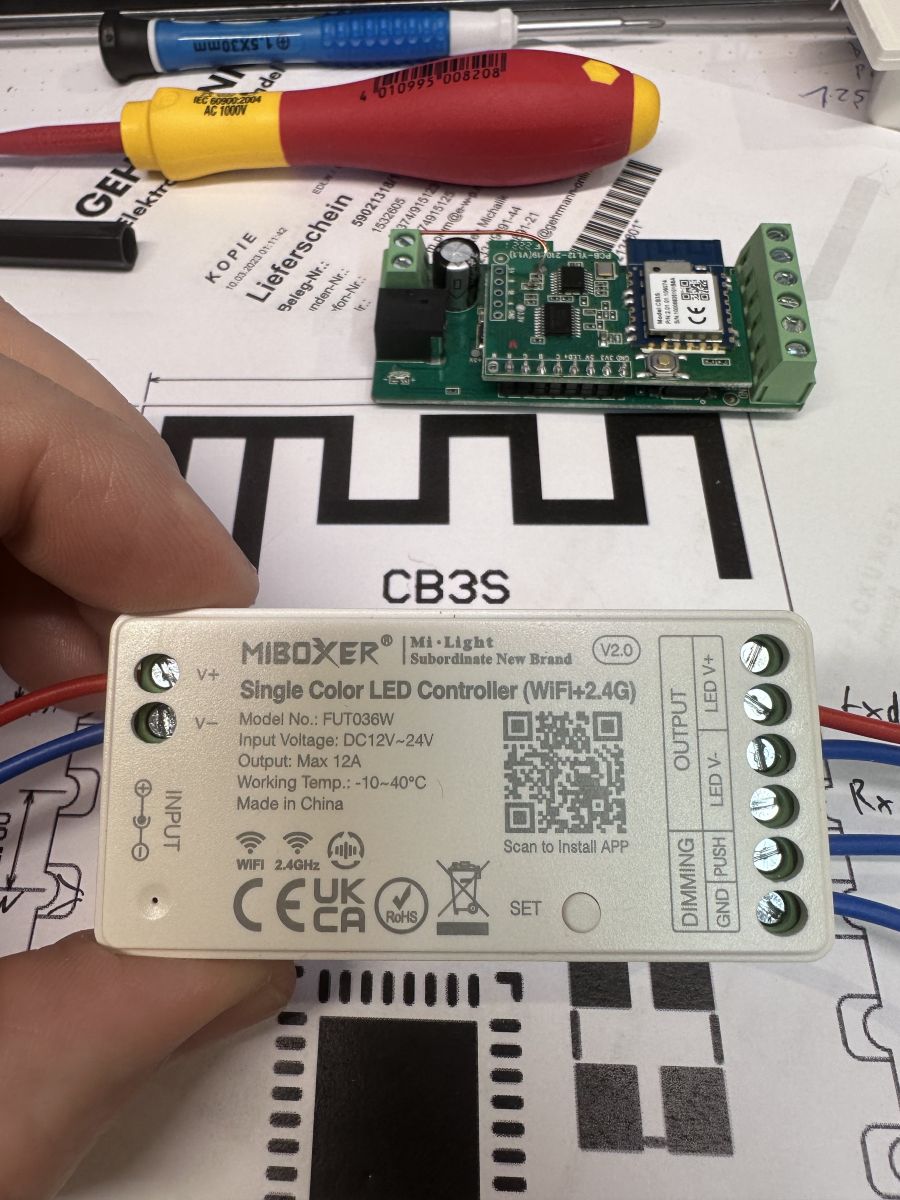
    Hello, I have the LED controller Miboxer Fut036w with WiFi and 2.4GHz.
    I have flashed with the ObenBK Firmware.
    The flashing and the CRC is OK.
    CRC matches 0x4ACF98A4!
    Writing file data to chip success.
    When I connect the power I can see the WiFi.
    Then I can connect to my home WiFi.
    I can connect to MQTT.
    But I can't control it via the web.
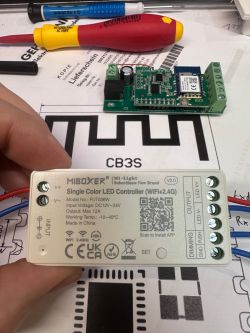
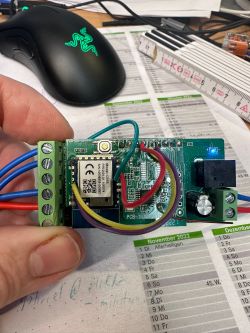
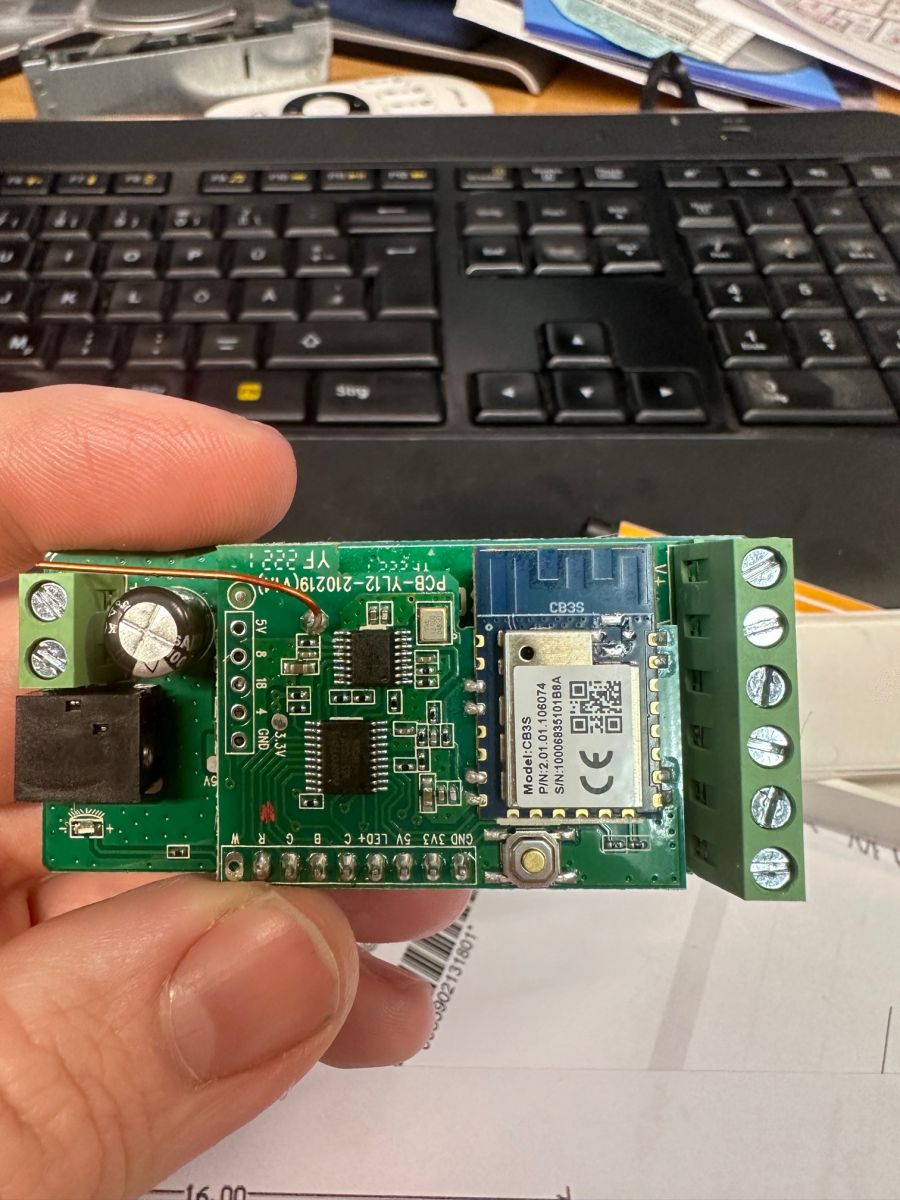
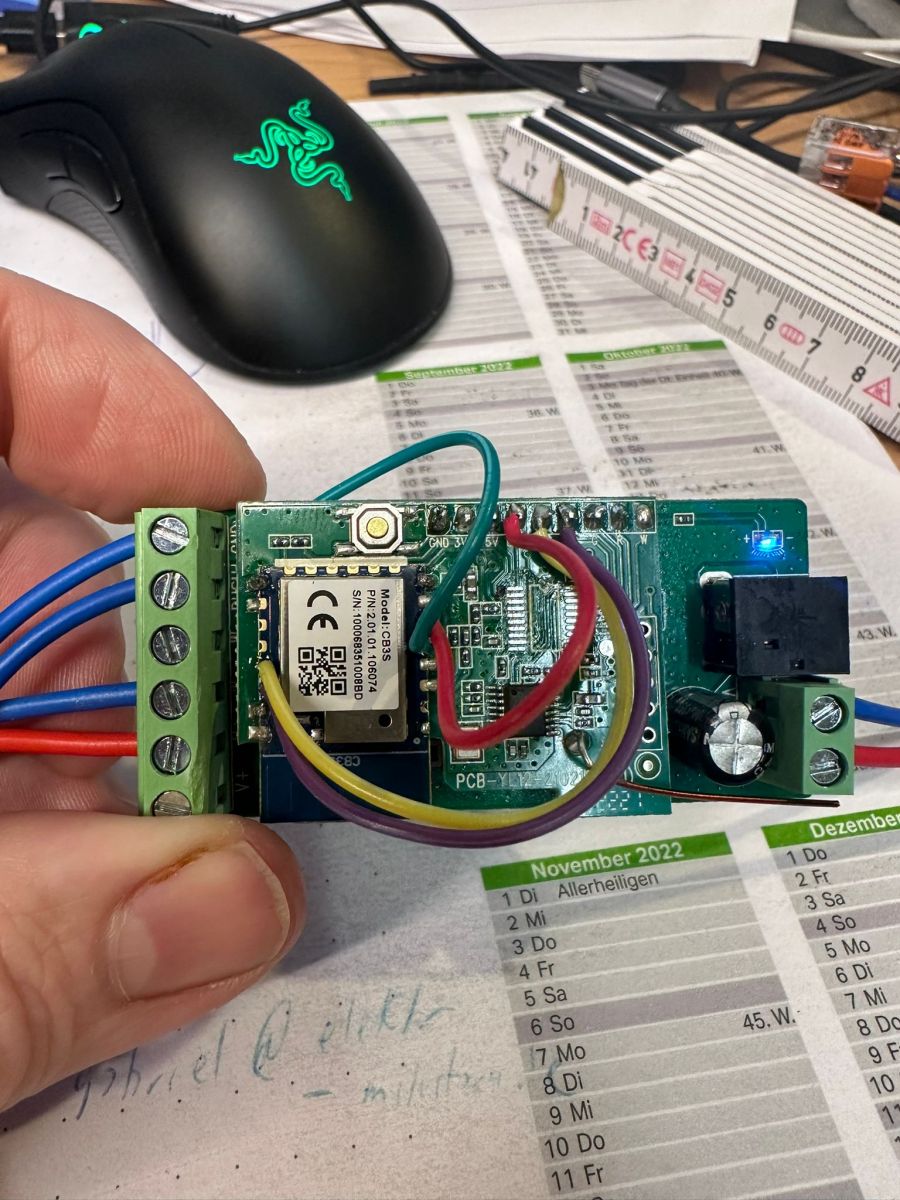
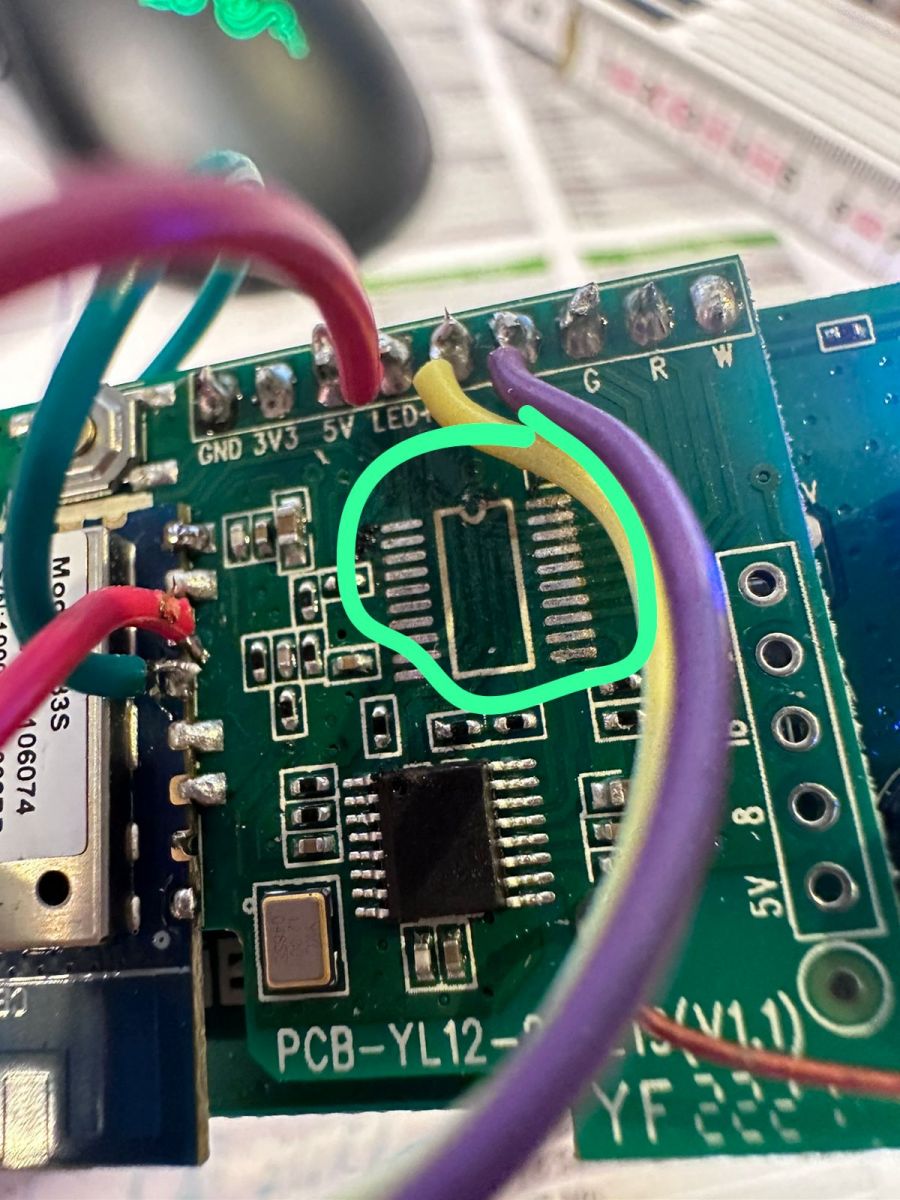
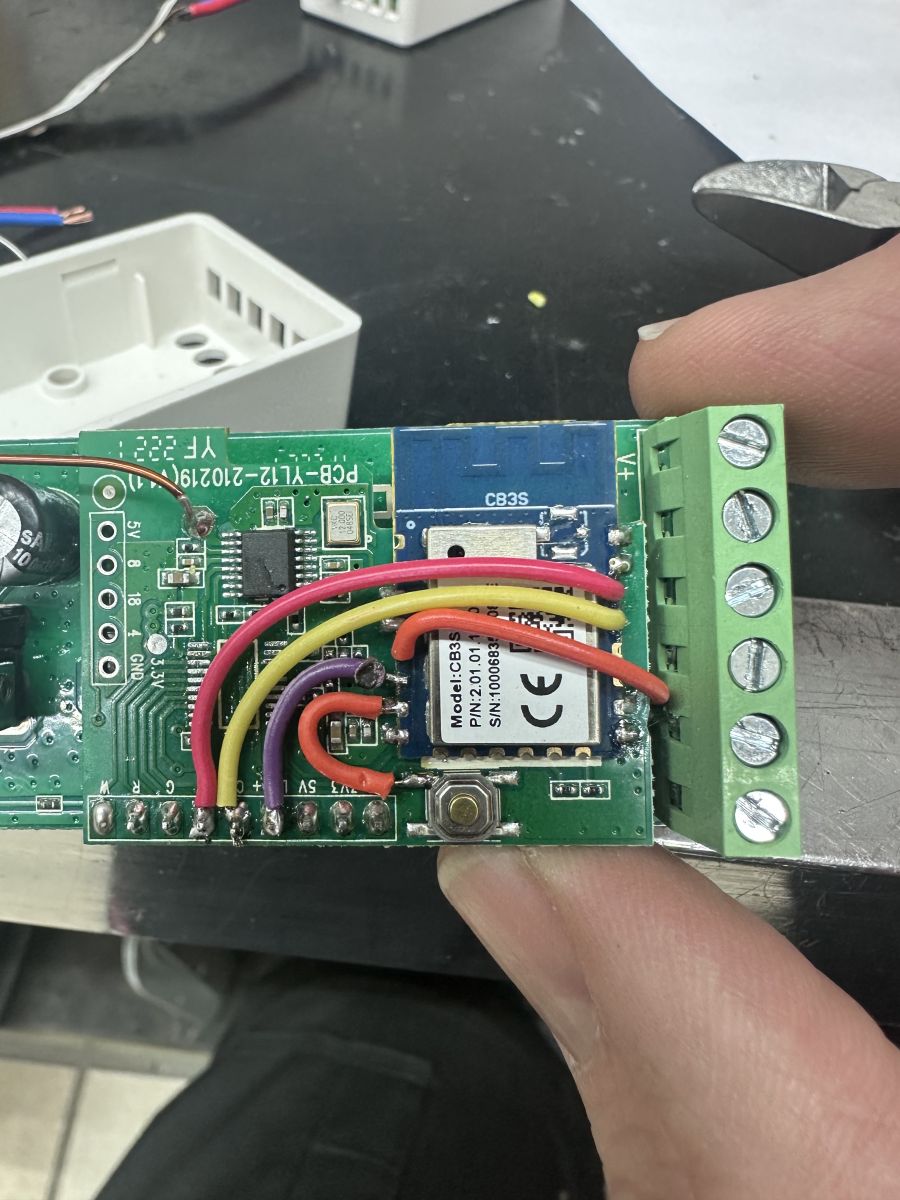
    Then I have seen that there is another µC. So I have dismounted it and have connected the pins from the CBS to the MOSFET, the WiFi LED, and the button.

    WiFi LED is working good.

    On the PCB, there are 2 MOSFETs, and there is both the same LED. It is only a backup when one MOSFET is damaged or is it for more power?
    The FUT036w is built for 12-24V 13A LED.

    The button I have some questions too.
    The layout has a pull-up. So I have 3.3V on the pin and when I press the button then I have 0V.
    But when I select button or smart button, the internal pull-up is active and it's not working.
    When I select Dinput_No_PullUp then I can use it. But then I can't use the smart button.
    Is it possible to make a script and can someone give me a tip on where I need to look?
    And the second, when I use the smart button you can switch on/off and increase the PWM. I will change it so that you can dim to the maximum and then wait. And when you press the button again long, you will decrease the value to the minimum (but not zero).
    Here I need also help to change the program.
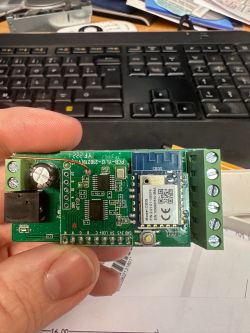
    Miboxer FUT036w and CB3s Issues: Flashing Firmware, WiFi Connectivity, and Button Control

    Miboxer FUT036w and CB3s Issues: Flashing Firmware, WiFi Connectivity, and Button Control

    Miboxer FUT036w and CB3s Issues: Flashing Firmware, WiFi Connectivity, and Button Control

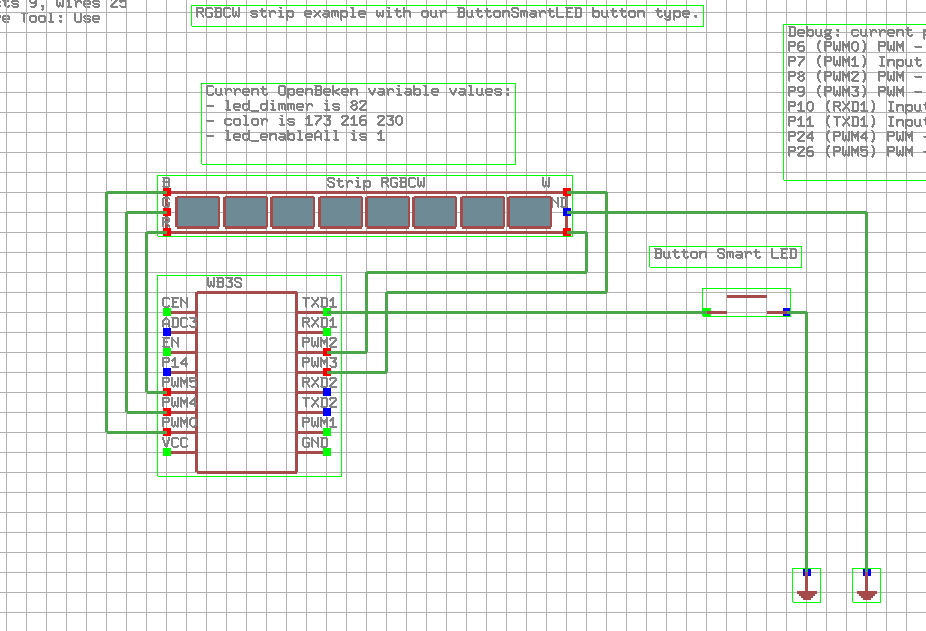
    Here I have dismounted the other µC and quick and dirty a new connection for the CB3S.
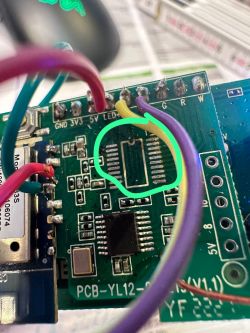
    Miboxer FUT036w and CB3s Issues: Flashing Firmware, WiFi Connectivity, and Button Control
  • ADVERTISEMENT
  • PCB pull-up resistor blocks Smart Button mode

    #2 20521194
    p.kaczmarek2
    Moderator Smart Home
    Posts: 14711
    Help: 658
    Rate: 12780
    Hello, I have seen that device recently. It is indeed a bit more complicated version of an average LED strip controller.

    mplum wrote:

    Then i have see that there is an another µC.

    This is called TuyaMCU. The TuyaMCU is communicating with WiFi module via a simple UART protocol. TuyaMCU is supported by OpenBeken, but each TuyaMCU device has a device-specific packet types which we must first capture and analyze in order to support them.

    mplum wrote:

    So ih have dismount it und have connect the Pins from the CBS to the Mosfet, the Wifi LEd and the Button.

    This is an alternate solution and it's also a good approach. It should work, but please remember to connect one of PWM pins to MOSFET, because BK7231 has PWM only on 6 chosen GPIOs, and if you choose non-PWM GPIO, you won't get smooth control of light.

    mplum wrote:

    On the PCB there are 2 Mosfets, and there are both an the Same LED. It is only a Backup, when one Mosfet is damaged= or is sit for more Power?
    The FUT036w is build für 12-24V 13A LED .

    If they are connected together, then they are used to increase the current capability, more power.

    Keep in mind that you can sometimes get a strip where a MOSFET is left unused and not connected, and then you can repurpose such device to drive one extra colour channel.


    mplum wrote:

    The Layout have a Pull up. So i have 3,3V on the Pin and whe i press the Button then i have 0V.
    But when i select Button or Samrt Button the the internal pull up is active and its not working.
    Whe i select Dinput_No_PullUp then i can use it. But then i canßt use the samrt button.

    Really? Btn_SmarLED is not working because of pull up resistor on PCB?
    Well, the quickest solution would be to remove the pull up resistor from PCB.
    We don't need pull ups on PCB, OpenBeken GPIO has internal pull up resistors.
    Btn_SmartLED should work as long as it is connected between GPIO and GND. Pressing button shorts GPIO to GND.

    mplum wrote:

    And the Secon.d When i use Smart Button you can switch on/off and increase the PWM. i will change it, that you can dimm to the maximum. and then Wait.

    I am sorry but I am not sure if I understand correctly what you are trying to achieve. Can you be more clear and rephrase your question in I way that I can understand?
    The Btn_SmartLED should give you full LED control you need, as shown on our videos:
    https://www.youtube.com/watch?v=vDh8Y_NDrb4
    https://www.youtube.com/watch?v=e1xcq3OUR5M
    Btn_SmartLED, once setup, should allow you to:
    - turn on and off device
    - adjust brightness
    - scroll list of a predefined colours
    - toggle between 3 temperature modes: warm, cool, mixed

    mplum wrote:

    And when you press again long the button you will decrease the value to the minimum(but not zero)

    This is a desired behaviour, because holding button decrease brightness (not to zero), if you want to turn off device (0 brightness), then just click Smart Led Button once.
    Helpful post? Buy me a coffee.
  • Smart button pull-up conflict on CB3s GPIOs

    #3 20521241
    mplum
    Level 3  
    Posts: 34
    p.kaczmarek2 wrote:
    mplum wrote:
    On the PCB there are 2 Mosfets, and there are both on the Same LED. It is only a Backup, when one Mosfet is damaged or is it for more Power?
    The FUT036w is built für 12-24V 13A LED .

    If they are connected together, then they are used to increase the current capability, more power.

    OK, can I use one PWM to control both mosfet? when I select 2 Pins with PWM1, then the second pwm channel is the color.
    I know that I can only use the 6 PWM pins.

    p.kaczmarek2 wrote:
    mplum wrote:
    The Layout has a Pull up. So I have 3.3V on the Pin and when I press the Button then I have 0V.
    But when I select Button or Smart Button the internal pull up is active and it's not working.
    When I select Dinput_No_PullUp then I can use it. But then I can't use the smart button.

    Really? Btn_SmartLED is not working because of pull up resistor on PCB?
    Well, the quickest solution would be to remove the pull up resistor from PCB.
    We don't need pull ups on PCB, OpenBeken GPIO has internal pull up resistors.
    Btn_SmartLED should work as long as it is connected between GPIO and GND. Pressing button shorts GPIO to GND.

    When I switch to button or do BTN_smart the internal Pull up is active. Then I need only switch the button to GND.
    But with the original Layout I have 3.3V on the Signal and when I press the Button it goes to zero. But when I connect the wire to the Pin, it is not going to zero.
    In my opinion there is now a double pull up. But is it possible to deactivate the internal Pull up of the CB3s when I use the BTN_SmartLED??


    p.kaczmarek2 wrote:
    mplum wrote:
    And the Second When I use Smart Button you can switch on/off and increase the PWM. I will change it, that you can dim to the maximum. and then Wait.

    I am sorry but I am not sure if I understand correctly what you are trying to achieve. Can you be more clear and rephrase your question in a way that I can understand?


    I know when you press short you can directly switch on and off. but when I press long I will increase until the value is max 100.
    Now when I hold the button longer, the value goes to zero and starts again to increase.
    I want that the increase stops at 100. then I need to press again the button for long. and then the value will decrease.
    In my opinion, it is easier to find the maximum value. now you press long and see the brightness going up and up and up. but you don't know when you have the 100. But when the value stops at the maximum you can see that the brightness is not increasing. When you are at 50% and you press long the value will increase to 60. Then I see that the value will increase. So I stop pushing the button and press again long the button and the Value will decrease until the minimum value is reached. When you decrease to zero and you switch on and off the led is off. When you have a minimum for example 5, the led is always on when you switch on and off.
    You know what I mean.

    Sorry for my English, I am from Germany

    Do you have a different model for me which is easier to use? I need only 1 PWM Channel and one button for local switching.
  • Proposed button logic to stop at brightness limits

    #4 20521323
    p.kaczmarek2
    Moderator Smart Home
    Posts: 14711
    Help: 658
    Rate: 12780
    mplum wrote:

    OK, can i use one PWM to contol both mosfet? when i selecct 2 Pins with PWM1, then the second pwm channel is the color.
    i know that i can only use the 6 PWM pins.

    If you have two use one PWM to control two MOSFETs you can try connecting both MOSFETs to that PWM, but everything depends on the specs of the MOSFETs. It should be also possible to set two PWM pins to a single channel and they will both mimic value from this channel.

    mplum wrote:

    When i switch to button or du BTN_smart the internal Pull up is active. Then i need only switch the button to gnd.
    But with the original Layout i have 3,3V on the Signal and when i press the Button is go to zero. But when i connect the wire the the Pin. is not ggoing to zero.
    in my oppinion there is now a double pull up. But it is possible to deactivate the interal Pull up of the CB3s when i use the BTN_SmartLED??

    In my opinion it still should go to zero. It is possible to change the code Btn_SmartLED and add extra role: Btn_SmartLED_noPullUp, but still, maybe you can try removing the physical resistor (pull up) from the board, if you think it breaks the button mechanism?


    mplum wrote:

    i now when you press short you can directly switch on and off. but when i press long i will increase until the value is max 100.
    Now when i hold the button longer, the value goes to zero and start again to increase.
    I will that the increase stopp at 100. then i need to press again the button for long. and then the value will be decrease.
    in my opinion is easier to find the maximum value. now you press long and see the brightness going up and up and up. but you dont know when you have the 100. But when the value will be stopp at the maximum you can see that the brightness is not increase. When you are at 50% and you press long the value will increase to 60. Than i see that the value will increase. So i stop push the button and press again long the button and the Value will decrease until the minimum value is reched. When you decrease to thero and you switch on and off the led is off. When you have a minimum for exampel 5, the led is always on when you switch on and off.
    You know what i mean.

    Now I understand. I can try looking into it. Maybe it indeed is a better idea.

    mplum wrote:

    have you a different modell for me which is easyer to use? I need only 1 PWM Channel and one button for lokal switching.

    Well, any non-TuyaMCU would be faster to convert, but you have already figured out all the important things so I think your model is ok. Connecting PWMs and removing MCU can be a good solution.
    Helpful post? Buy me a coffee.
  • BTN_SmartLED pull-up and long-press behavior fix

    #5 20521347
    mplum
    Level 3  
    Posts: 34
    p.kaczmarek2 wrote:
    mplum wrote:
    OK, can I use one PWM to control both MOSFET? When I select 2 Pins with PWM1, then the second PWM channel is the color. I know that I can only use the 6 PWM pins.
    If you have to use one PWM to control two MOSFETs you can try connecting both MOSFETs to that PWM, but everything depends on the specs of the MOSFETs. It should be also possible to set two PWM pins to a single channel and they will both mimic value from this channel.


    OK and what I need to do? I have enough Ports. So I can use one port for one MOSFET. But then I select PWM with both number one then I can see on the web the slider for cold and warm white.

    p.kaczmarek2 wrote:
    mplum wrote:
    When I switch to button or do BTN_smart the internal Pull up is active. Then I need only switch the button to GND. But with the original Layout I have 3.3V on the Signal and when I press the Button it goes to zero. But when I connect the wire to the Pin, it is not going to zero. In my opinion there is now a double pull up. But is it possible to deactivate the internal Pull up of the CB3s when I use the BTN_SmartLED??
    In my opinion it still should go to zero. It is possible to change the code Btn_SmartLED and add extra role: Btn_SmartLED_noPullUp, but still, maybe you can try removing the physical resistor (pull up) from the board, if you think it breaks the button mechanism?
    Yes I will connect directly to the CB3s and disconnect the pullup.
    p.kaczmarek2 wrote:
    mplum wrote:
    I know when you press short you can directly switch on and off. But when I press long I will increase until the value is max 100. Now when I hold the button longer, the value goes to zero and starts again to increase. I want that the increase stops at 100. Then I need to press again the button for long. And then the value will decrease. In my opinion it is easier to find the maximum value. Now you press long and see the brightness going up and up and up. But you don't know when you have the 100. But when the value will stop at the maximum you can see that the brightness is not increasing. When you are at 50% and you press long the value will increase to 60. Then I see that the value will increase. So I stop pushing the button and press the button long again and the value will decrease until the minimum value is reached. When you decrease to zero and you switch on and off the LED is off. When you have a minimum for example 5, the LED is always on when you switch on and off. You know what I mean.
    Now I understand. I can try looking into it. Maybe it indeed is a better idea.
    OK super.

    Thank you.
  • PWM pin counting bug affects UI selection

    #6 20521355
    p.kaczmarek2
    Moderator Smart Home
    Posts: 14711
    Help: 658
    Rate: 12780
    mplum wrote:

    OK and what i need to do? i have enough Ports. So i can use one port for one Mosfet. But then i select pwm with both number one then i can see n the web the slider for cold and warm white.

    Sorry, it seems I was wrong! There is a little bug currently that counts a number of pins with PWM ignoring channels. So maybe the "just connect one PWM to two MOSFETs" method is better, for now. Just do a jumper with solder and wire.

    I will try to fix that issue as well, I was not aware about that. The code must be counting a number of PWM pins to determine the kind of UI to be shown.
    Helpful post? Buy me a coffee.
  • #7 20521436
    mplum
    Level 3  
    Posts: 34
    ok thank you.

    it is possible to connect 1-wire sensors to the CB3s?? for example
    DS1820??
    i need to measure a temperature and then i will regulate a fan with pwm
  • ADVERTISEMENT
  • #8 20521459
    p.kaczmarek2
    Moderator Smart Home
    Posts: 14711
    Help: 658
    Rate: 12780
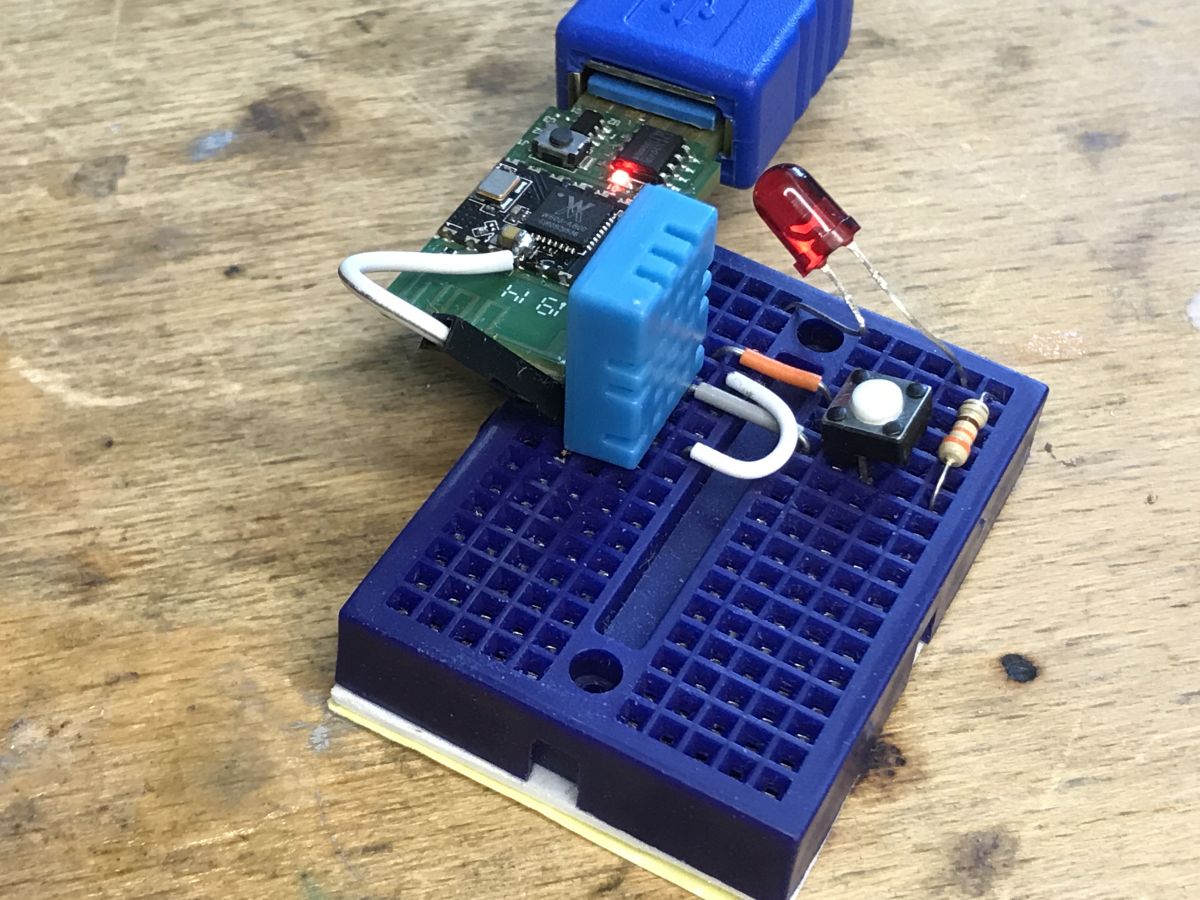
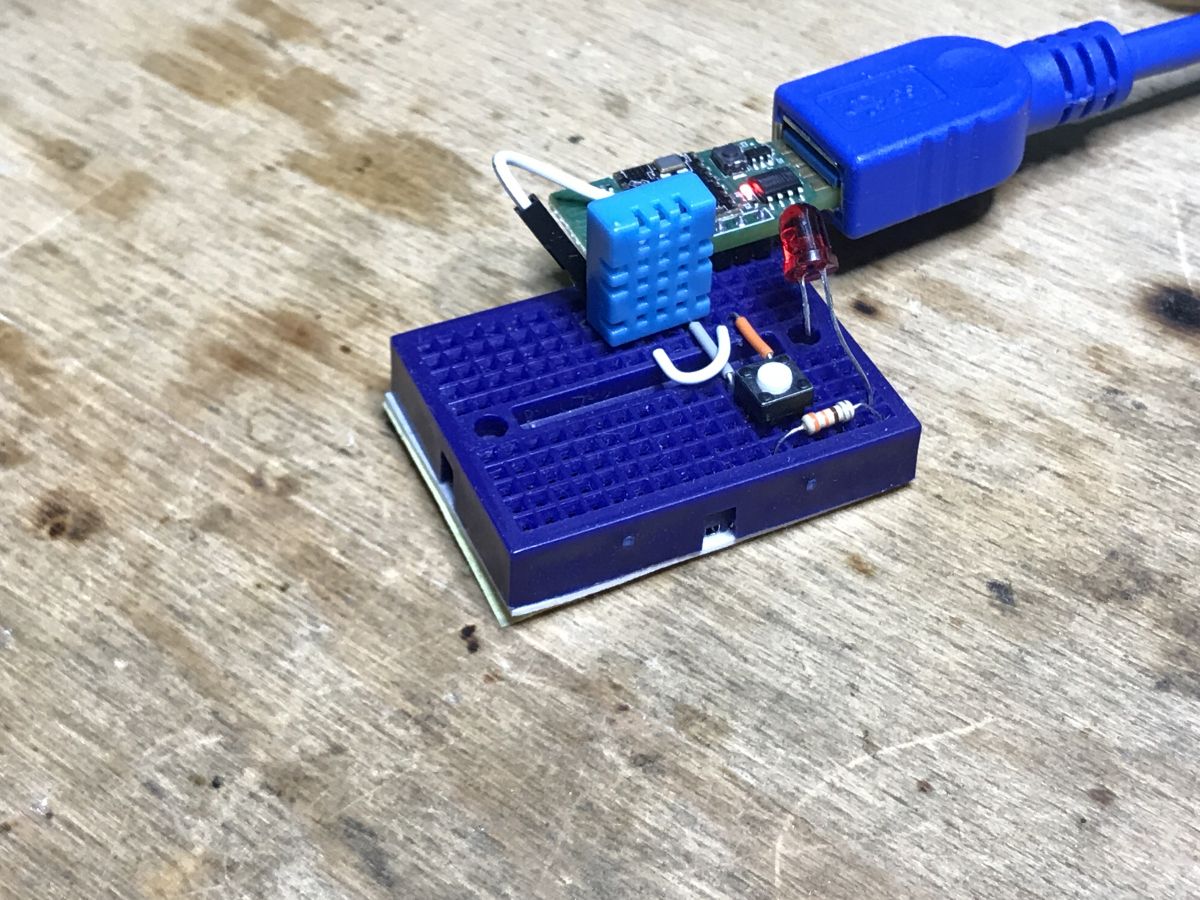
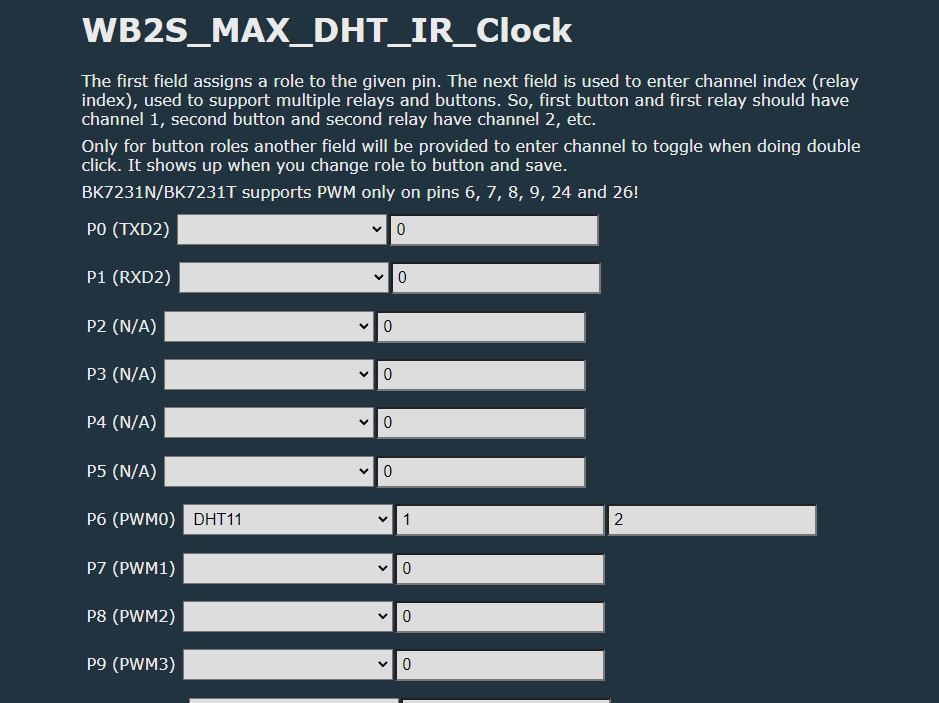
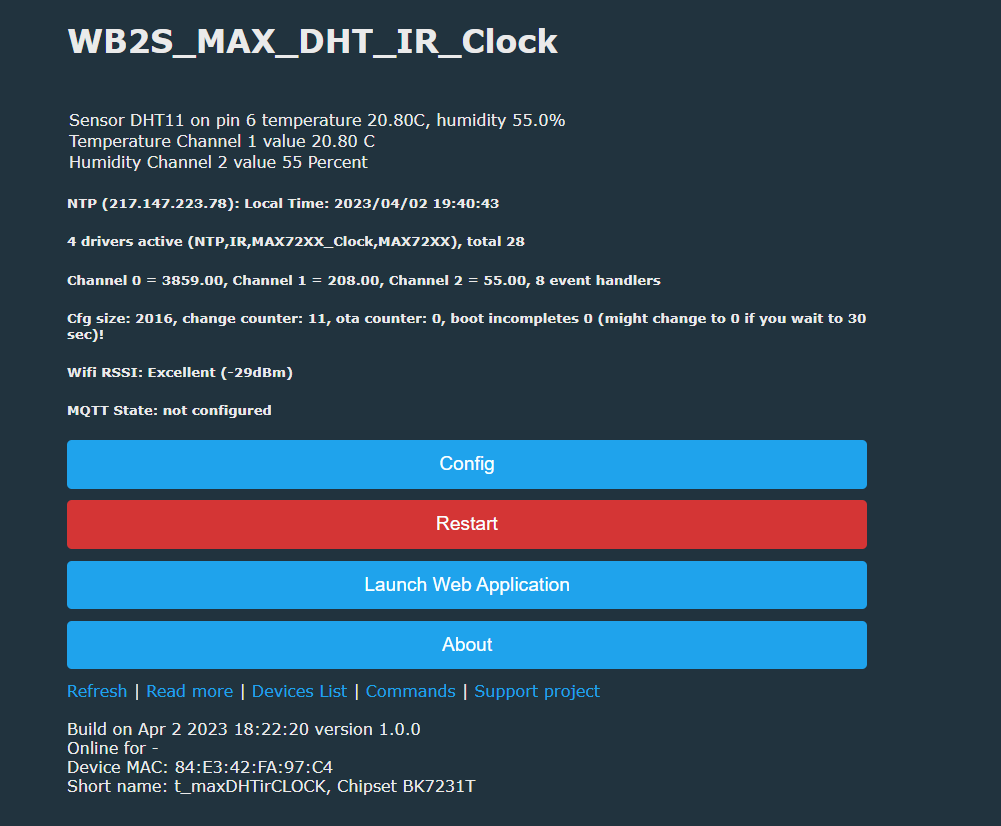
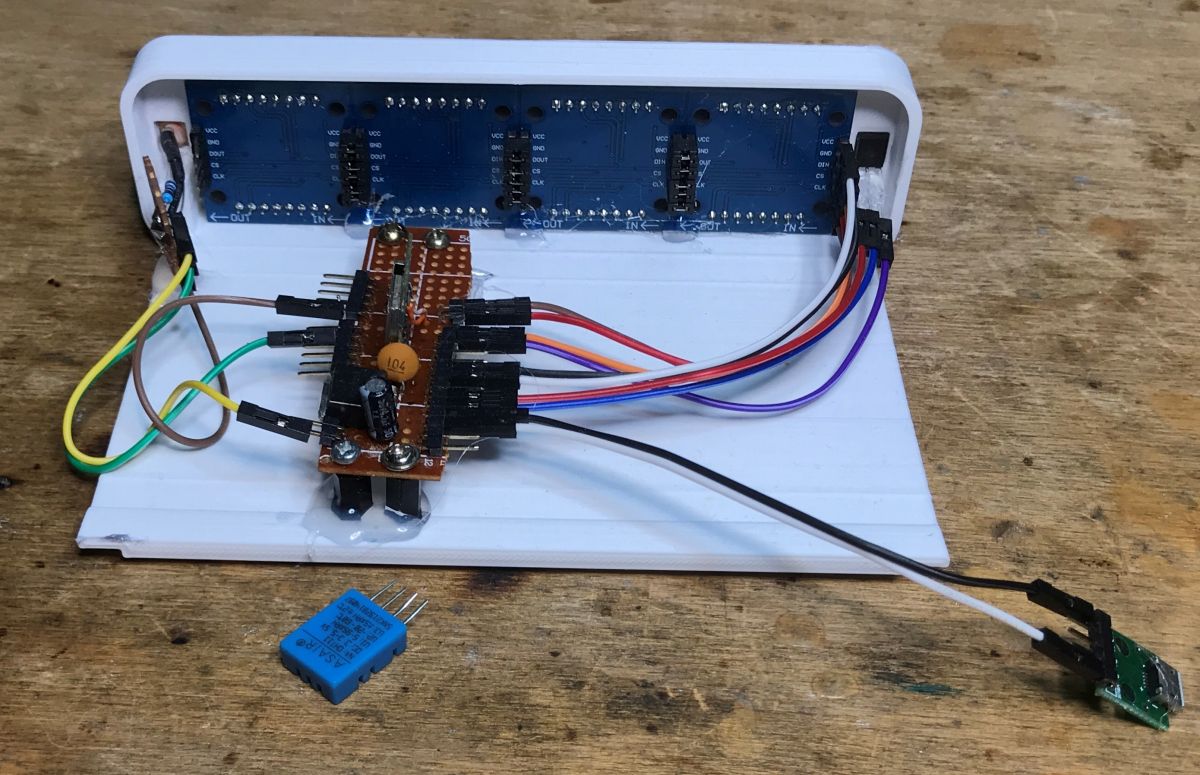
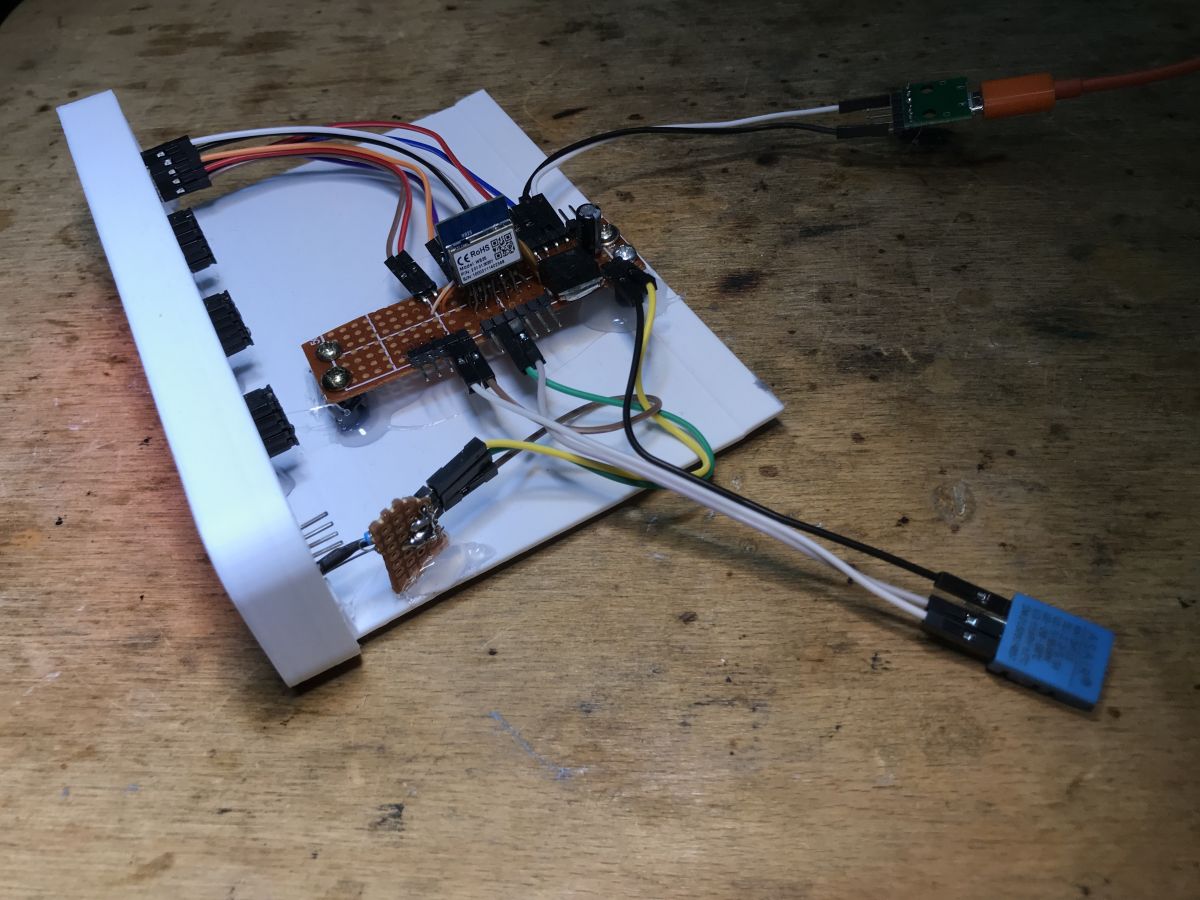
    Currently we are supporting DHT family of sensors, I am playing with one on W600 platform (OBK runs on many platforms):
    Miboxer FUT036w and CB3s Issues: Flashing Firmware, WiFi Connectivity, and Button Control Miboxer FUT036w and CB3s Issues: Flashing Firmware, WiFi Connectivity, and Button Control
    The DS18B20 is on TODO list.
    Helpful post? Buy me a coffee.
  • #9 20521591
    mplum
    Level 3  
    Posts: 34
    ok. then I will buy some dht11. the dht11 is still working?
  • ADVERTISEMENT
  • #10 20521627
    p.kaczmarek2
    Moderator Smart Home
    Posts: 14711
    Help: 658
    Rate: 12780
    Yes it is:
    Miboxer FUT036w and CB3s Issues: Flashing Firmware, WiFi Connectivity, and Button Control
    Miboxer FUT036w and CB3s Issues: Flashing Firmware, WiFi Connectivity, and Button Control
    Why wouldn't it?
    Miboxer FUT036w and CB3s Issues: Flashing Firmware, WiFi Connectivity, and Button Control
    Miboxer FUT036w and CB3s Issues: Flashing Firmware, WiFi Connectivity, and Button Control Miboxer FUT036w and CB3s Issues: Flashing Firmware, WiFi Connectivity, and Button Control Miboxer FUT036w and CB3s Issues: Flashing Firmware, WiFi Connectivity, and Button Control
    Helpful post? Buy me a coffee.
  • #11 20523906
    mplum
    Level 3  
    Posts: 34
    It is possible that Single click controls the led. And Double click sends only a value to the mqtt? I have only a White led Band and need only the Single Click. And the Long click.
    With the Double Click I will switch central off.
  • ADVERTISEMENT
  • #12 20524147
    p.kaczmarek2
    Moderator Smart Home
    Posts: 14711
    Help: 658
    Rate: 12780
    Yes, it is possible with events. I have added an example for you:
    https://github.com/openshwprojects/OpenBK7231T_App/blob/main/docs/autoexecExamples.md
    Please scroll down to: Simple example showing how to do MQTT publish on button event (double click, etc). It also includes button hold event to adjust dimmer.
    Helpful post? Buy me a coffee.
  • Level shifting needed for 5 V MOSFET gate drive

    #13 20525549
    mplum
    Level 3  
    Posts: 34
    in the moment i have the problem with the mosfet. before with the tuyaMCU the mosfet get 5V. The CB3s only have 3,3V. So i have connect a level converter to switch from 3,3V to 5V. The voltage was ok. but now my Mosfets are broken. it is possible because i have connect both mosfets with one signal?
    you say the TuyaMCU is possible to use. What i need to do?
    At the beginning i have only dismount the tuyaMCU and connect the pins. all was working. but not with the right voltage, so its possible that the mosfets not complete open and going to be hot.
    i will build 10 pieces in my new caravan. but i don#t want to burn. so it is better when we use the tuya MCU? when i can use the tuya mcu i don`t need to change something on the PCB.
  • #14 20527025
    mplum
    Level 3  
    Posts: 34
    >>20524147

    it is also possible in the autoexec.bat. that i can read pwm channel 0 for example and set pwm channel 1 with the same value like channel 0?
  • Firmware fix for multiple PWM outputs on one channel

    #15 20527576
    p.kaczmarek2
    Moderator Smart Home
    Posts: 14711
    Help: 658
    Rate: 12780
    mplum wrote:
    p.kaczmarek2 wrote:
    mplum wrote:
    OK, can i use one PWM to contol both mosfet? when i selecct 2 Pins with PWM1, then the second pwm channel is the color.
    i know that i can only use the 6 PWM pins.

    If you have two use one PWM to control two MOSFETs you can try connecting both MOSFETs to that PWM, but everything depends on the specs of the MOSFETs. It should be also possible to set two PWM pins to a single channel and they will both mimic value from this channel.


    OK and what i need to do? i have enough Ports. So i can use one port for one Mosfet. But then i select pwm with both number one then i can see n the web the slider for cold and warm white

    It is fixed now.
    Having multiple PWM outputs on a single channel should work now.
    https://github.com/openshwprojects/OpenBK7231...mmit/568c7fdbf1b051ffa0bd62419887694470077762

    mplum wrote:

    it is also possible in the autoexec.bat. that i can read pwm channel 0 for exampel and set pwm channel 1 with the same value like channel 0?

    Yes but it's not needed now, as said above, I submitted a firmware fix to support your use case. Can you check?

    mplum wrote:

    i will build 10 peaces in my new caravan. but i don#t wont to burn. so it is better when we use the tuya MCU?

    I haven't fully reverse engineered the TuyaMCU protocol of that device yet, so it might require a bit of more advanced knowledge. It would be more easy to just use any other LED strip, that is not a TuyaMCU based and uses PWM to control MOSFETs directly, without external MCU.
    Helpful post? Buy me a coffee.
  • #16 20528448
    mplum
    Level 3  
    Posts: 34
    Hi. Ok thank you for the Update. I will Test it. But I don't know when. I am on Holiday for 1.5 Weeks.
    I
  • #17 20528469
    p.kaczmarek2
    Moderator Smart Home
    Posts: 14711
    Help: 658
    Rate: 12780
    There is no hurry, I can help you when you come back. Still, why do you want to use that Miboxer device exactly?

    I have tested many LED strip controllers and this is first one with TuyaMCU. This is especially problematic device.
    Helpful post? Buy me a coffee.
  • Need a low-cost LED controller with local push button

    #18 20528650
    mplum
    Level 3  
    Posts: 34
    I Need a led Controller with Lokal Push Button. I will use this in my caravan. So I can use the Original Switch, Cable and so on to control the lights. And in the Moment is only on off. Then I can dimm it. And with the wifi I will use extra funktions. For example central on. Central off.
    And this led Controller was Not so expansiv. 16€.
    Have you a Suggestion for me? Is easier to use a led Controller who don't need a rebuilding.
    For me is Important that I can use the original connections and Push Button connector.
    Miboxer FUT036w and CB3s Issues: Flashing Firmware, WiFi Connectivity, and Button Control Miboxer FUT036w and CB3s Issues: Flashing Firmware, WiFi Connectivity, and Button Control
  • #19 20528776
    p.kaczmarek2
    Moderator Smart Home
    Posts: 14711
    Help: 658
    Rate: 12780
    I don't have specific controller in mind but maybe there is another model with a button but that has PWM control used directly? Without extra MCU? I don't know where are you buying...

    You did good job with routing wires to MOSFET drivers but there are controllers that have it already done.
    Helpful post? Buy me a coffee.
  • Webfront temperature slider forces channel 0 to zero

    #20 20529544
    mplum
    Level 3  
    Posts: 34
    Is working. When you set Both pwm Channel to the Same number Then both Channels have the Same value.

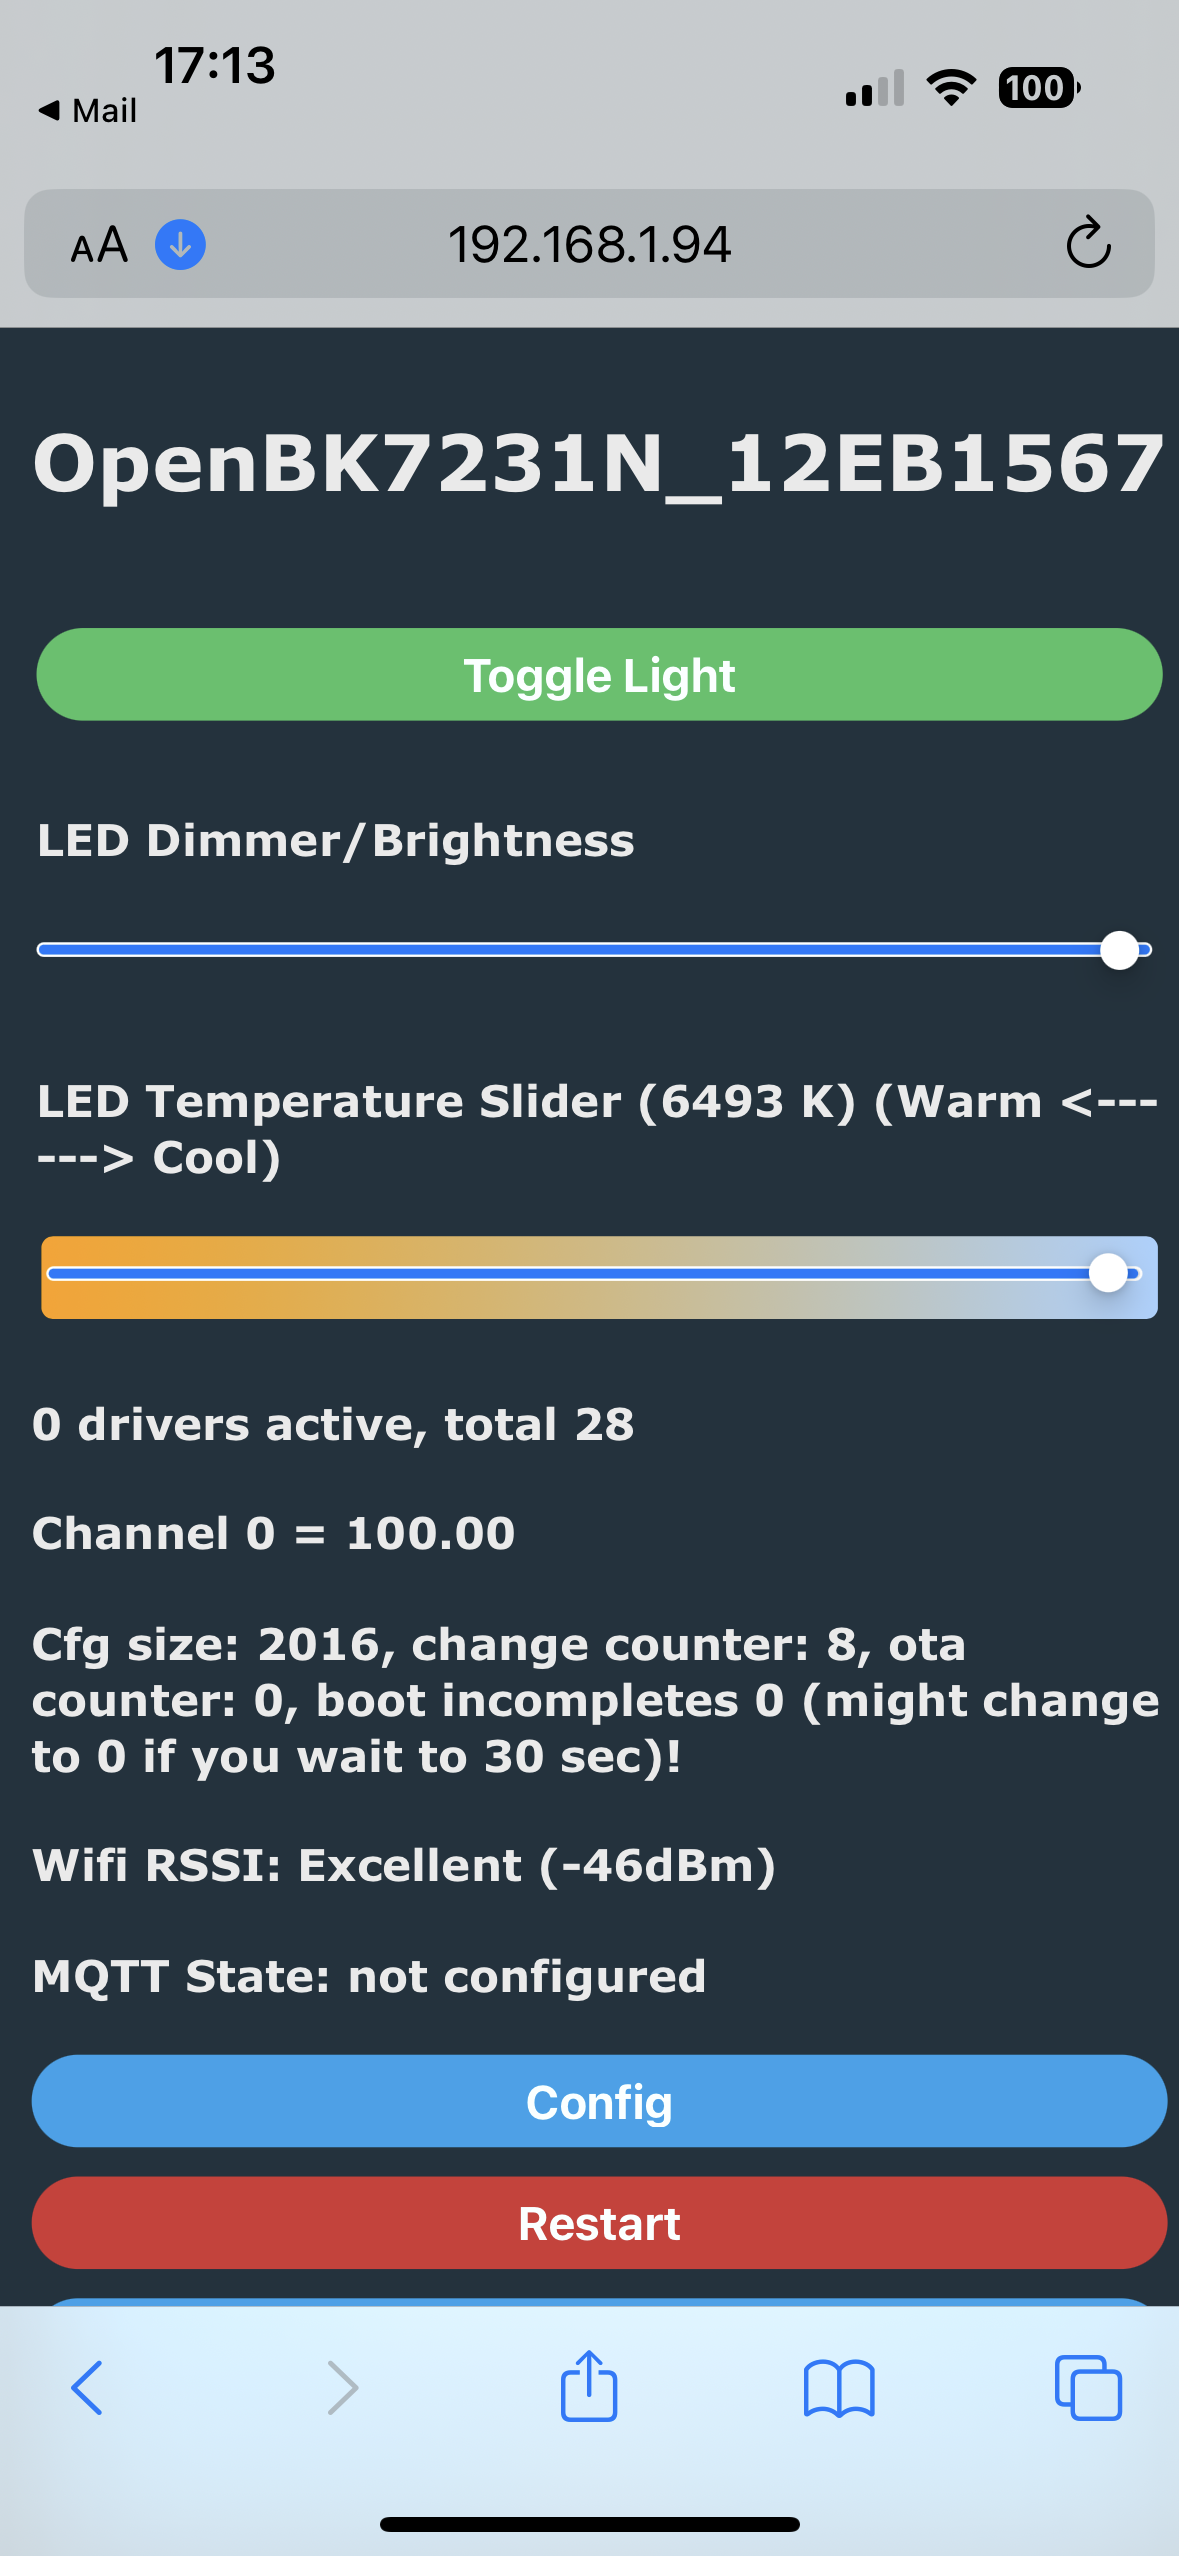
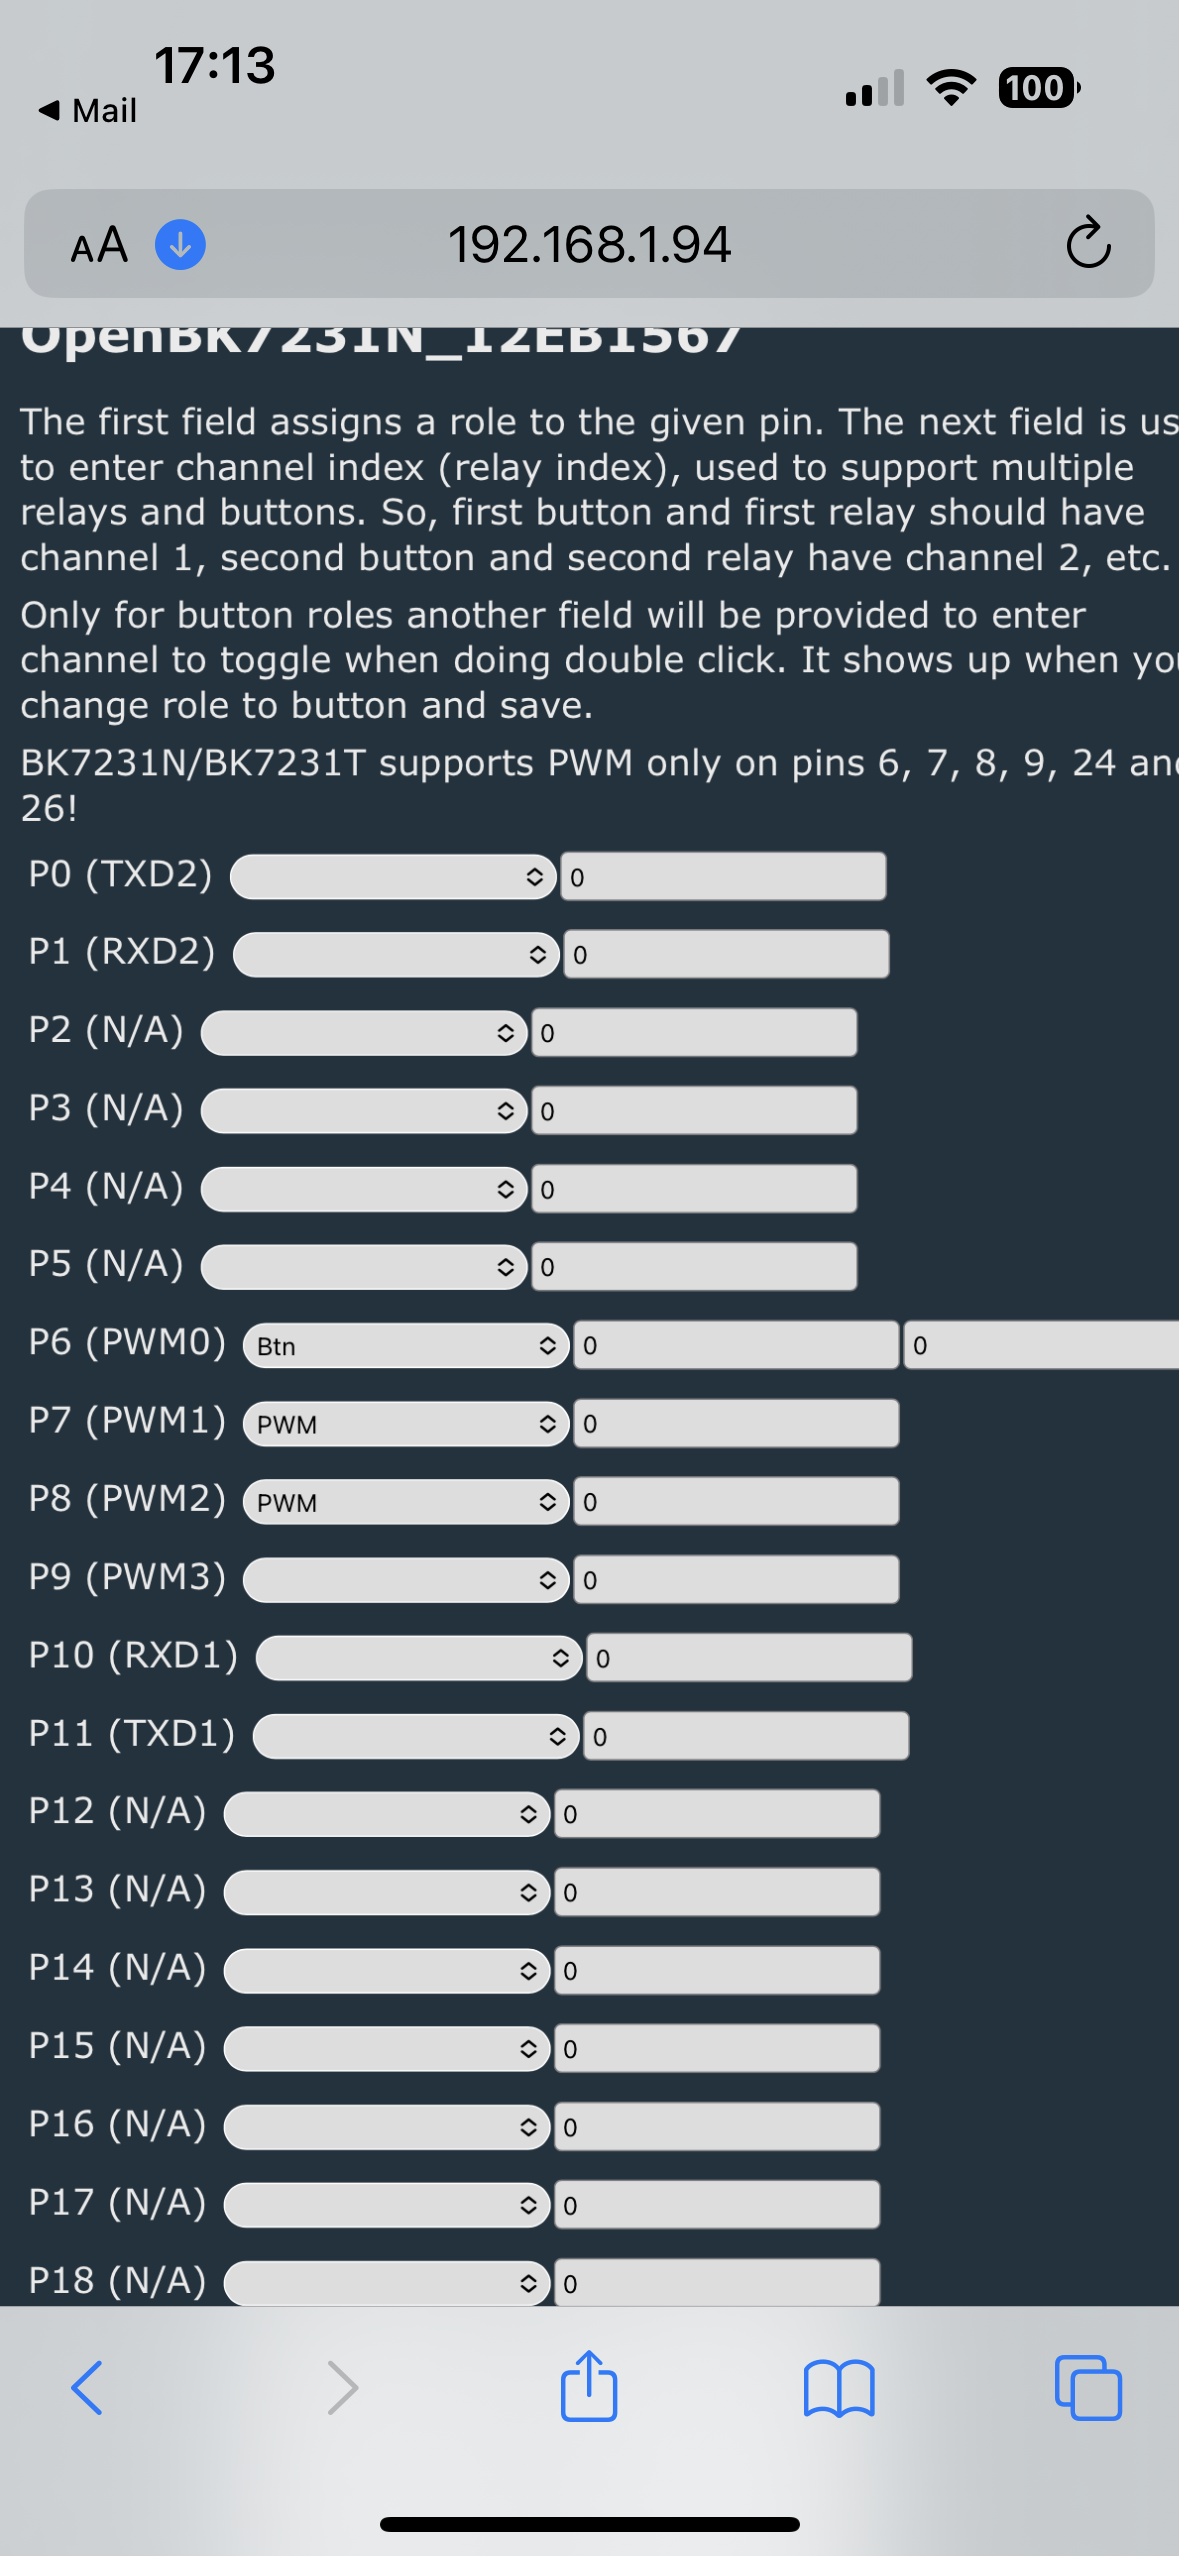
    But, in the webfront you can See the Slider for the led Temperature. And when you Slide the temperature the Channel goes to zero. And you Need to restart
    When you Not restart the led so Not Go on. Channel 0 Always Zero Miboxer FUT036w and CB3s Issues: Flashing Firmware, WiFi Connectivity, and Button Control Miboxer FUT036w and CB3s Issues: Flashing Firmware, WiFi Connectivity, and Button Control
  • #21 20529567
    p.kaczmarek2
    Moderator Smart Home
    Posts: 14711
    Help: 658
    Rate: 12780
    Which firmware version?
    Helpful post? Buy me a coffee.
  • #22 20529603
    mplum
    Level 3  
    Posts: 34
    Version 1.15.661.
  • #23 20529653
    p.kaczmarek2
    Moderator Smart Home
    Posts: 14711
    Help: 658
    Rate: 12780
    You are right, one file didn't make it into the build.
    Please try 1.15.662 and tell me if it works.
    Helpful post? Buy me a coffee.
  • Smart button behavior and flag 17 limitations

    #24 20529781
    mplum
    Level 3  
    Posts: 34
    Ok. With Version 1.15.663 all is Working. There is no 2nd slider. And Both Channels have the Same value
    👍👍

    And I have Activate flag 12 and 17 together. Then I can't activate. I can toggle on off But always value 0. Then I have deactivated Both flags. Then it was ok. Then activate only flag 12, is also ok. Then activate flag 17. Then is also Working. 🤔
    But with Flag 17 is only Working when I change the value in the Web. When the led is off and I Press the Smart Button the led going Not ON.

    Can you say something about Smart Button. About dimm up to the Maximum, and Then dimm down to the Minimum.
    Normally I can do it with a Script? When I Press the Button Long I get the actual value and increase with 1 until the Maximum is Reached. When I stop Pressing and Press Then Long again Then I decrease until the minus is reached. how Long is the Time for 1 Zyklus? When I increase oder decrease 1 Every Zyklus. How fast I reached the 100?
  • #25 20533740
    mplum
    Level 3  
    Posts: 34
    Can you say something to my questions? Have you seen my answer?
  • Flag 17 breaks smart button wake from off state

    #26 20534186
    p.kaczmarek2
    Moderator Smart Home
    Posts: 14711
    Help: 658
    Rate: 12780
    mplum wrote:

    And i have Activate flag 12 and 17 together. Then i cant activate. I csn toggle on off But always value 0. Then i have deactivsted Both flags. Then it was ok. Then activate only flag 12, is also ok. Then activate flag 17. Then is also Working. 🤔
    But with Flag 17 is only Working when i change the value in the Web. When the led is off and i Press the Smart Button the led going Not ON.

    Hello, can you provide more information, which value is always 0? When?
    What is the value of:
    - current temperature
    - dimmer
    - raw channels
    in case of the problem?

    I am trying to replicate your problem, so far on the simulator, but it seems ok:
    Miboxer FUT036w and CB3s Issues: Flashing Firmware, WiFi Connectivity, and Button Control

    Or do you mean that you've set brightness to 0 (or a very low value like 1%) and then on/off doesn't work?
    Helpful post? Buy me a coffee.
  • Flag 17 works only from web, not smart button

    #27 20534271
    mplum
    Level 3  
    Posts: 34
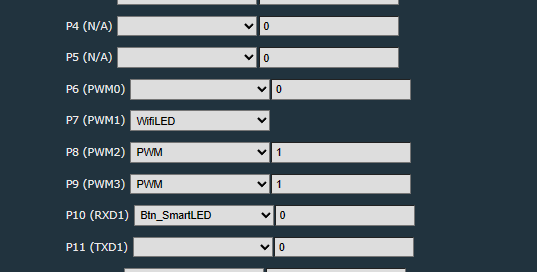
    I only use a single white LED. I use PWM1 and 2 für Channel 0.
    When I have activated both flags, the fan toggles on and off, but the brightness was always 0. I can't select the brightness over the web or with the smart button. I restarted the device. Also no brightness. Then I switched both flags off and made a restart. Then it was working.
    Then I activated only flag 12, which is also ok. Then I activated flag 17. Then it is also working. 🤔
    But with flag 17, it is only working when I change the value in the web. When the LED is off and I press the smart button, the LED does not turn on.
  • #28 20534279
    p.kaczmarek2
    Moderator Smart Home
    Posts: 14711
    Help: 658
    Rate: 12780
    mplum wrote:

    when i have activate Both flags i Fan toggle on off but the brightness was always 0. i cant select the brightness over the Web or with Smart Button. I restart the Device. Also no brightness.

    What if you HOLD smart button? Will it increase brightness then?
    Helpful post? Buy me a coffee.
  • #29 20534296
    mplum
    Level 3  
    Posts: 34
    No. There was no way to increase brightness.
  • Single PWM and BtnSmartLED button dimming test

    #30 20534303
    p.kaczmarek2
    Moderator Smart Home
    Posts: 14711
    Help: 658
    Rate: 12780
    Hmm that must be a bug. Can you please tell, if you have a single PWM pin, and BtnSmartLED, is there a way to increase brightness through that button?
    Can you check?

    Added after 14 [minutes]:

    I just tested with physical device (BK7231T):
    Miboxer FUT036w and CB3s Issues: Flashing Firmware, WiFi Connectivity, and Button Control
    For that configuration, I can use Button to both turn on and off and adjust dimmer....
    Both flags (12 and 17) set. Also works without them.

    Can you please tell me how to exactly reproduce your issue?
    Helpful post? Buy me a coffee.

Topic summary

✨ The discussion revolves around issues faced with the Miboxer FUT036w LED controller after flashing it with the ObenBK firmware. Users report successful WiFi connectivity and MQTT integration but encounter problems with web control and button functionality. The conversation highlights the complexity of the TuyaMCU protocol, the need for proper PWM pin connections to MOSFETs for effective light control, and the challenges of managing internal pull-up resistors affecting button operations. Solutions proposed include using a single PWM to control multiple MOSFETs, modifying button behavior through scripts, and addressing firmware bugs. Users also discuss the potential for connecting 1-wire sensors and the importance of maintaining device state across reboots. The conversation concludes with considerations for device configuration and the implications of using Flag 12 for state saving.
AI summary based on the discussion. May contain errors.

FAQ

TL;DR: For a 12–24V, 13A Miboxer FUT036W, the safest OpenBeken path is direct PWM only when the MOSFET drive is correct; "connect one PWM pin to MOSFET" is the core rule. This FAQ helps CB3S users fix flashing, WiFi, buttons, dimming, and group control. [#20521194]

Why it matters: The FUT036W can join WiFi and MQTT after flashing, yet still fail LED control if TuyaMCU, PWM pins, MOSFET drive, or button pull-ups are misconfigured.

Approach Hardware work OpenBeken effort Main risk
Keep TuyaMCU Low High: packet capture needed Device-specific UART protocol
Remove TuyaMCU and wire PWM Medium Lower 3.3V PWM may under-drive 5V MOSFET gate path
Use non-TuyaMCU LED controller Low Lowest Requires different controller

Key insight: OpenBeken control worked best when the CB3S used real BK7231 PWM pins and two PWM outputs shared one channel after the firmware fix. Device Groups needed repeated sends for reliable central on/off in this installation.

Quick Facts

  • The Miboxer FUT036W discussed here is rated for 12–24V LED strips and 13A output current. [#20521163]
  • BK7231 PWM is available only on 6 selected GPIOs, so a non-PWM GPIO will not provide smooth LED dimming. [#20521194]
  • The original button line measured 3.3V idle and 0V when pressed, because the PCB used a pull-up and the button shorted to GND. [#20521163]
  • OpenBeken SetButtonTimes 10 3 1 makes the repeat interval 0.1s, while SetButtonTimes 10 3 10 makes it 1.0s. [#20535602]
  • OpenBeken configuration backup copies settings except the unique MAC address and LittleFS; LittleFS files need a separate TAR backup. [#20564121]

How do I flash OpenBeken firmware onto a Miboxer FUT036W with a CB3S module and verify that the CRC and write process succeeded?

Flash the CB3S with OpenBeken, then verify the tool reports a matching CRC and successful write.
  1. Connect the CB3S to the flasher.
  2. Write the OpenBeken firmware image.
  3. Confirm messages like CRC matches 0x4ACF98A4 and Writing file data to chip success.
After power-up, the controller should expose WiFi, join the home network, and connect to MQTT if credentials are correct. [#20521163]

Why does a Miboxer FUT036W show WiFi and connect to MQTT after flashing OpenBeken but still not allow LED control from the web interface?

LED control can fail because the FUT036W uses a second MCU between WiFi and the power stage. WiFi and MQTT prove the CB3S runs OpenBeken, not that PWM reaches the MOSFETs. The user found another µC, removed it, and wired CB3S pins directly to MOSFETs, WiFi LED, and button. Web control then depends on correct PWM-capable GPIO selection. [#20521163]

What is TuyaMCU in a WiFi LED controller, and how does it communicate with a CB3S or BK7231 module?

"TuyaMCU is a secondary microcontroller that controls device hardware, communicating with the WiFi module through a simple UART protocol, with packet types that can be device-specific and must be captured before full support." OpenBeken supports TuyaMCU, but this FUT036W needed analysis of its own packet format. That made it more complex than a direct-PWM LED strip controller. [#20521194]

TuyaMCU vs direct PWM control: which approach is better for converting a Miboxer FUT036W to OpenBeken?

Direct PWM is easier once the MOSFET drive is safe, while TuyaMCU keeps the PCB intact but needs reverse engineering. The maintainer called the FUT036W “especially problematic” because it was the first tested LED strip controller with TuyaMCU. For 10 caravan units, a non-TuyaMCU controller with direct PWM would be faster and safer to convert. [#20528469]

How should I wire a CB3S PWM output to the MOSFETs in a 12–24V, 13A Miboxer FUT036W LED controller?

Wire a real BK7231 PWM-capable GPIO to the MOSFET gate-drive input, not a random GPIO. BK7231 has PWM on only 6 chosen GPIOs. If two MOSFETs drive the same LED output, you can feed both from one PWM signal or assign two PWM pins to the same OpenBeken channel after the firmware fix. Check MOSFET heating under 12–24V load before installing 10 units. [#20521194]

Why are there two MOSFETs connected to the same LED output on the Miboxer FUT036W PCB?

Two MOSFETs on the same LED output increase current capability, not redundancy. The FUT036W is rated for 13A, so parallel switching devices can share load and reduce stress. The maintainer also noted that some strip controllers leave one MOSFET unused, allowing it to drive an extra color channel instead. [#20521194]

How do I configure two OpenBeken PWM pins to use the same PWM channel without getting an unwanted cold/warm white temperature slider?

Update to the fixed OpenBeken build, then assign both PWM pins to the same channel number. A bug originally counted PWM pins instead of PWM channels, causing an unwanted cold/warm white UI slider. The fix allowed multiple PWM outputs on one channel. The user confirmed version 1.15.663 removed the second slider and both channels shared the same value. [#20529781]

What causes CB3S 3.3V PWM control to under-drive MOSFETs that were originally driven by a 5V TuyaMCU signal?

A MOSFET stage designed for a 5V control signal may not fully turn on from 3.3V PWM. In the thread, the original TuyaMCU drove the MOSFETs at 5V, while CB3S output only 3.3V. The user added a level converter, but then MOSFETs failed. Under-drive can heat MOSFETs because they operate partly on instead of fully enhanced. [#20525549]

How should I handle an external pull-up resistor when using Btn_SmartLED or a script-only button input in OpenBeken?

Remove or bypass the PCB pull-up if it prevents the button line from reaching 0V. Btn_SmartLED expects the button between GPIO and GND, with OpenBeken using the internal pull-up. The board already had 3.3V idle and 0V pressed, but adding the CB3S input created trouble. Direct wiring to the CB3S and disconnecting the pull-up solved the planned button path. [#20521347]

How can I customize OpenBeken Smart Button behavior so a long press dims up to 100%, then the next long press dims down only to a minimum brightness like 5%?

Use script-only buttons, a direction channel, and add_dimmer with positive or negative steps. The working script used channel 10 for direction and channel 11 for hold state. OnHoldStart toggled direction, OnRelease cleared hold, and labels ran add_dimmer 1 0 or add_dimmer -1 0. The user wanted dimming to stop at 100% and not fall below about 5%. [#20552740]

What do SetButtonTimes and DimmerDelta do in OpenBeken, and how do they change the speed and step size of button dimming?

SetButtonTimes changes press timing, and DimmerDelta changes each brightness step. SetButtonTimes 10 3 1 uses 1.0s long press, 0.3s short press, and 0.1s repeat. The maintainer said that repeat value makes dimming 5x faster than the 0.5s default. DimmerDelta 20 sets a 20-step dimmer change; values like 5 or 1 are also valid. [#20550761]

How can I use OpenBeken event handlers like OnClick, OnHold, OnHoldStart, OnRelease, OnDblClick, and On3Click in autoexec.bat scripts?

Use addEventHandler lines in autoexec.bat to bind button events to commands. Example: OnClick toggles power, OnHoldStart toggles dim direction, OnRelease clears a hold flag, OnDblClick sends all-on, and On3Click sends all-off. Supported events listed in the thread include OnHold, OnHoldStart, OnDblClick, On3Click, On4Click, On5Click, OnRelease, and OnPress. [#20550831]

How can I send a central on/off command from one CB3S OpenBeken LED controller to multiple other controllers using Device Groups, SendGet, or MQTT?

Use Device Groups for automatic sync, or script central commands with DGR_SendPower or SendGet. The caravan plan used 10 lights, each with its own button. A double click sent all-on, and a triple click sent all-off. The maintainer also suggested HTTP commands like SendGet ... POWER ON to fixed IP addresses, or MQTT through a broker if startup delay is acceptable. [#20553178]

Why might the first OpenBeken Device Groups command after several minutes of inactivity be missed, and what workarounds help improve reliability?

The first Device Groups command was missed on that network after several idle minutes, although it worked for the maintainer. The reliable workaround sent the same DGR_SendPower command twice with a 0.1s delay. Another option used SendGet to each light IP. The user confirmed repeated Device Groups sends worked fine. [#20554589]

How do I copy OpenBeken settings, scripts, and LittleFS files from one CB3S device to another without overwriting per-device RF calibration data?

Download the OBK config for settings, then separately download a LittleFS TAR backup for files and scripts. Do not clone a full 2MB flash image across devices unless you accept RF calibration risk. The maintainer warned that RF calibration data is per-device. OBK config excludes the unique MAC address and LittleFS, so it is the safer migration path. [#20564121]
AI summary based on the discussion. May contain errors.
ADVERTISEMENT