logo elektroda
logo elektroda
X
logo elektroda

Unique WiFi DIN Mount Circuit Breaker with ESP8285, SC92F7351 & CSE7759: In-Depth Details

ststefanov 4683 12

TL;DR LABEL_AI_GENERATED

  • A strange WiFi DIN-mount circuit breaker uses a PFS-B main module with ESP8285, SC92F7351, and CSE7759 inside a single enclosure.
  • It appears to trip with an 8-bit MCU and a bistable relay instead of the usual automatic magnetic field coil trip mechanics.
  • The unit packs everything into a 19 mm DIN package.
  • It still leaves the circuitry unexplained, with more details promised after reverse-engineering the internal wiring.
AI summary based on the discussion. May contain errors.
ADVERTISEMENT
Listen:
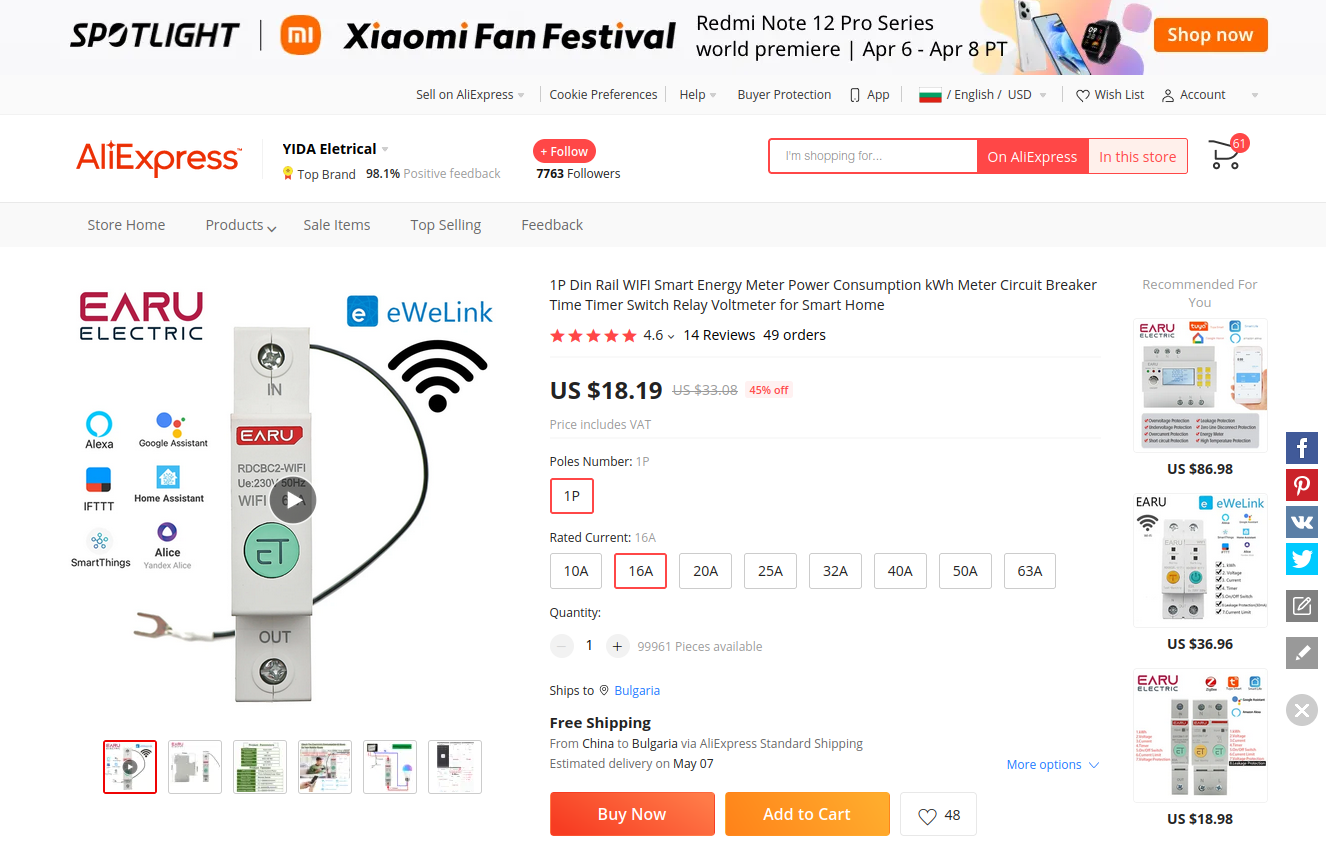
  • Bought from here:
    Link
    Page screenshot:

    Unique WiFi DIN Mount Circuit Breaker with ESP8285, SC92F7351 & CSE7759: In-Depth Details
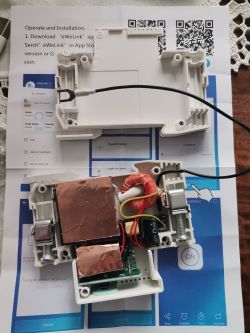
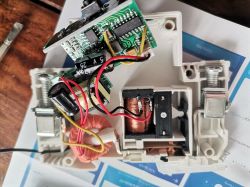
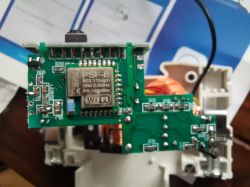
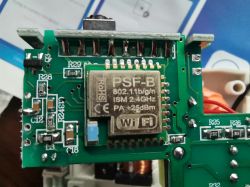
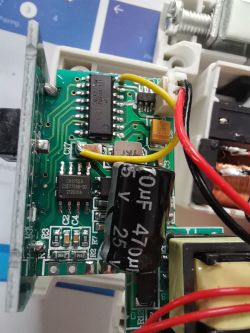
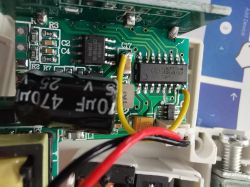
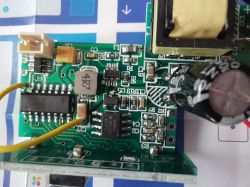
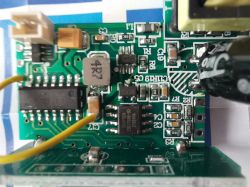
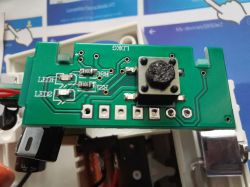
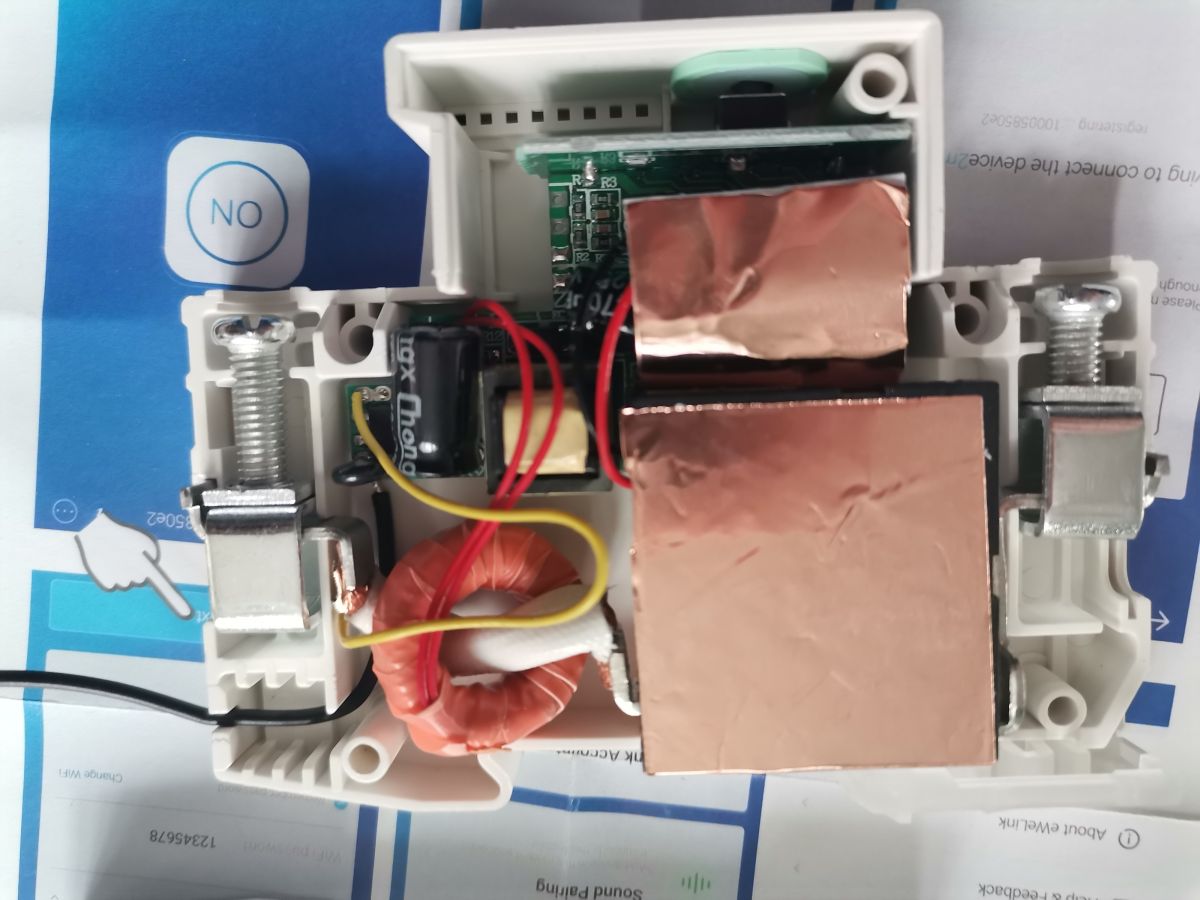
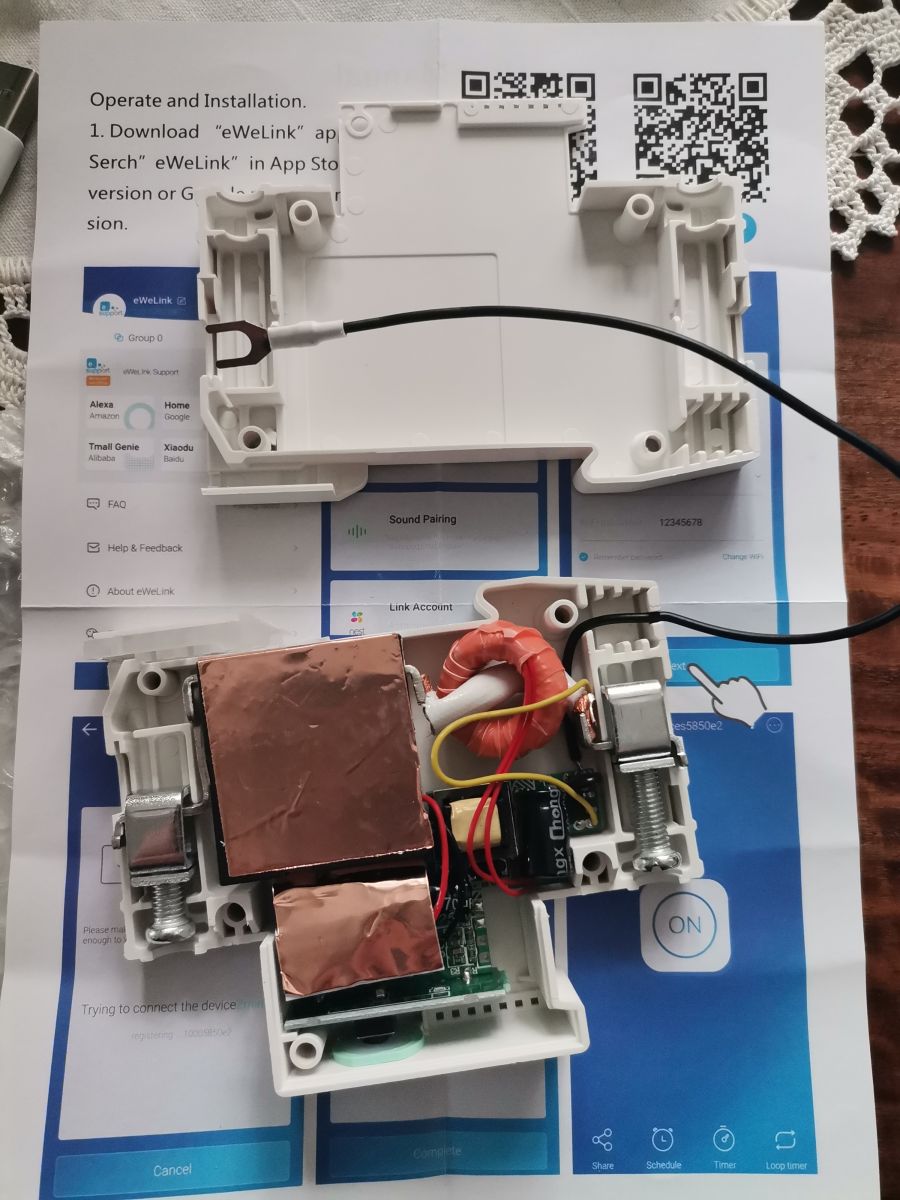
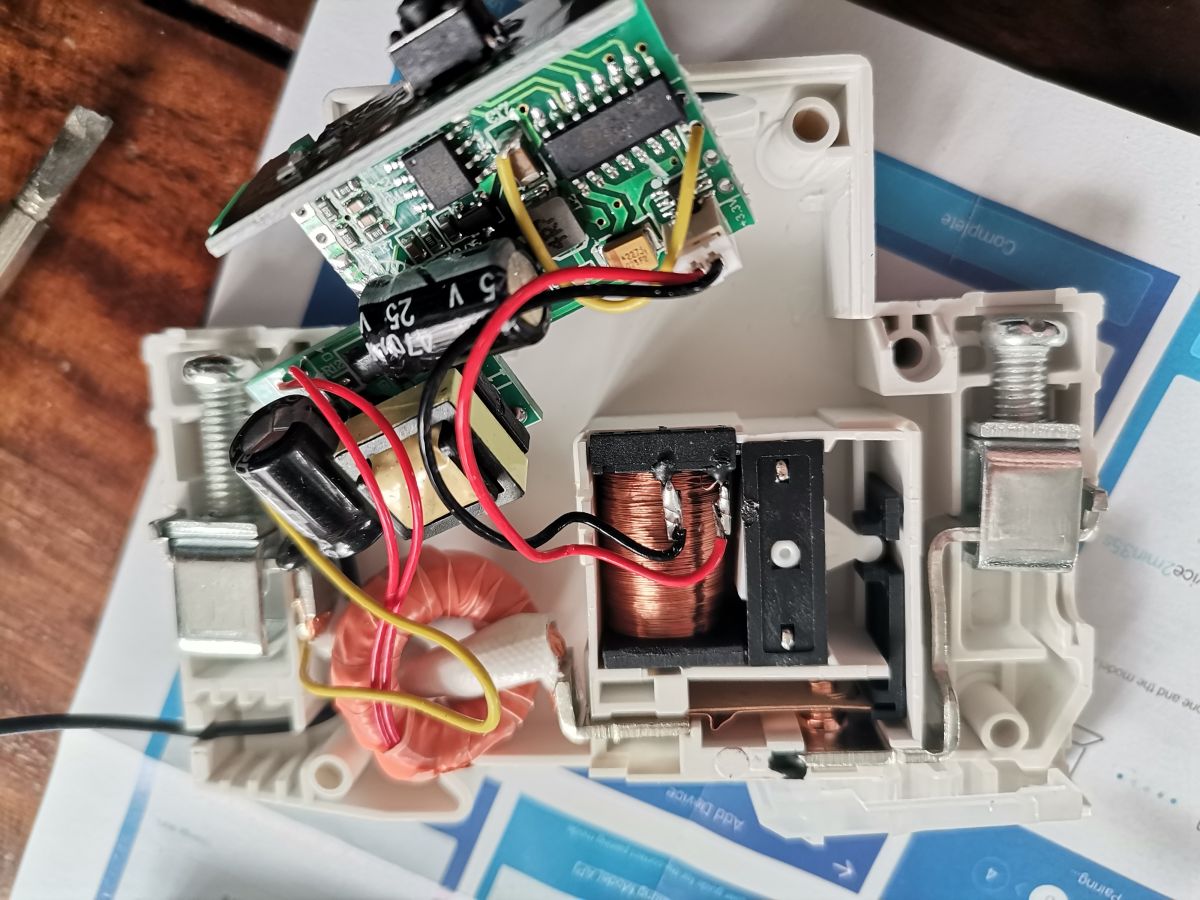
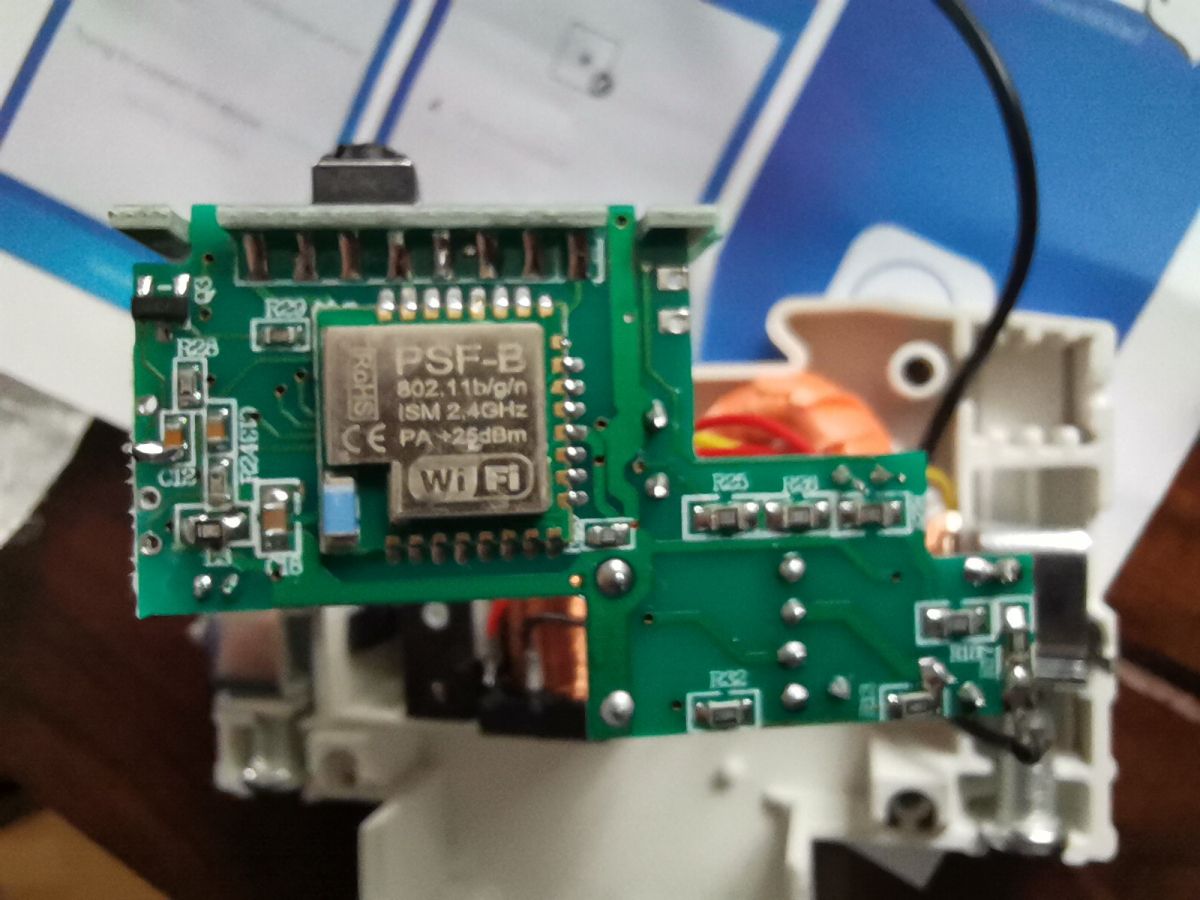
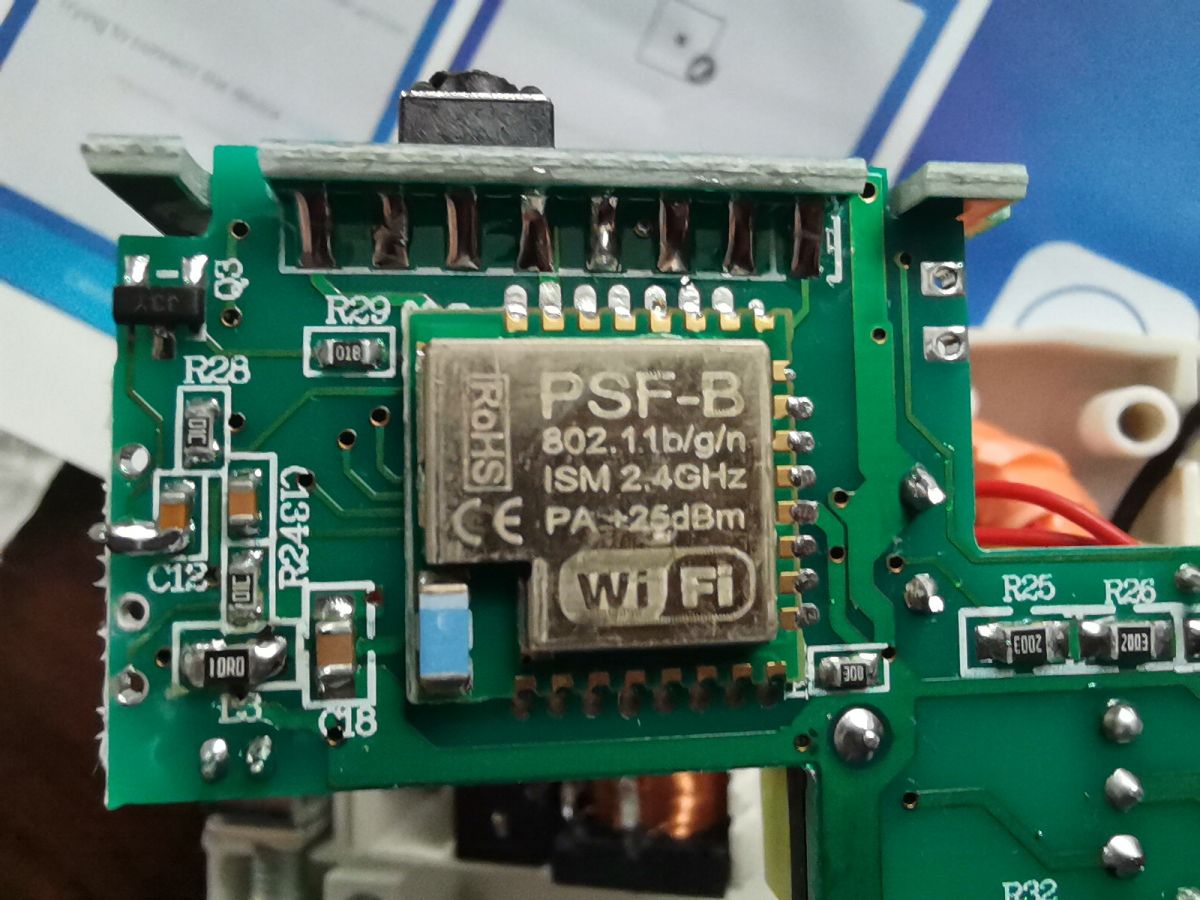
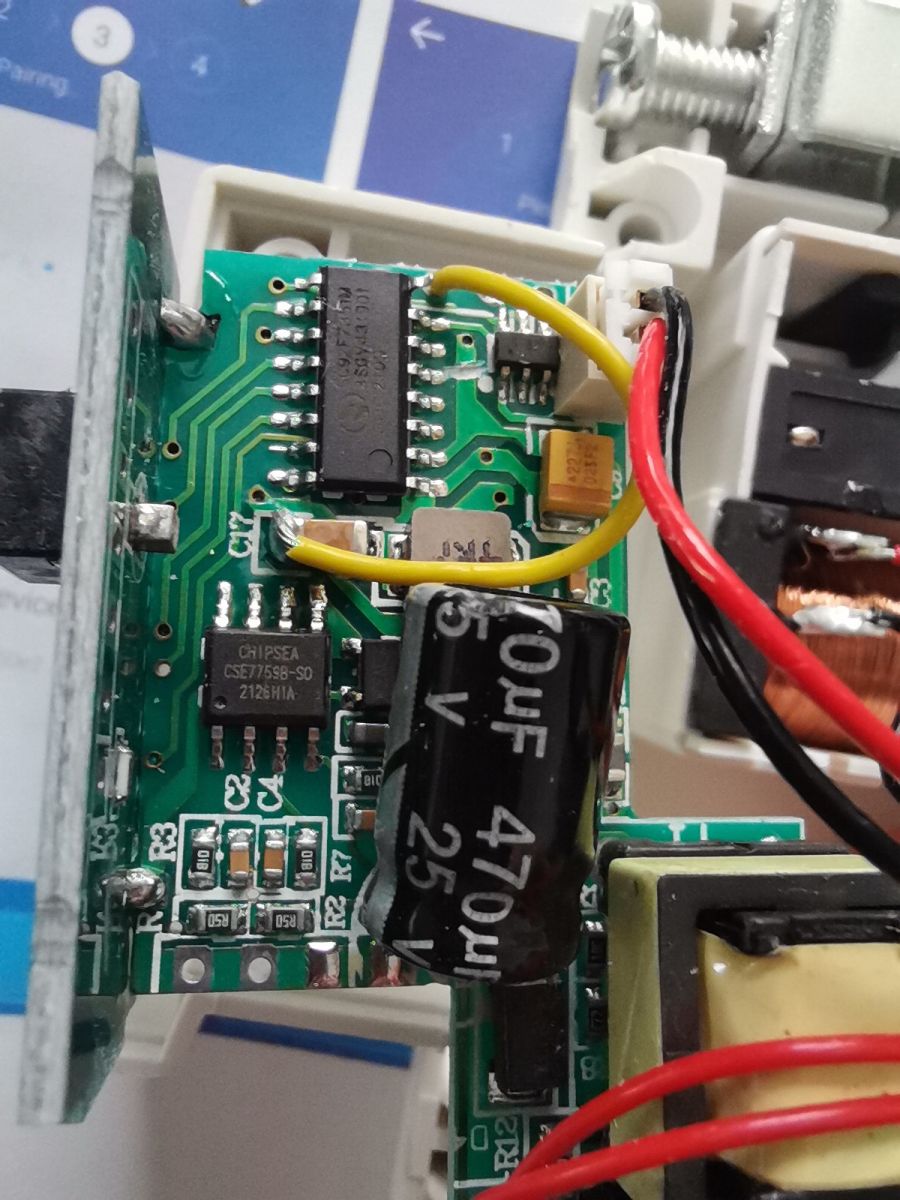
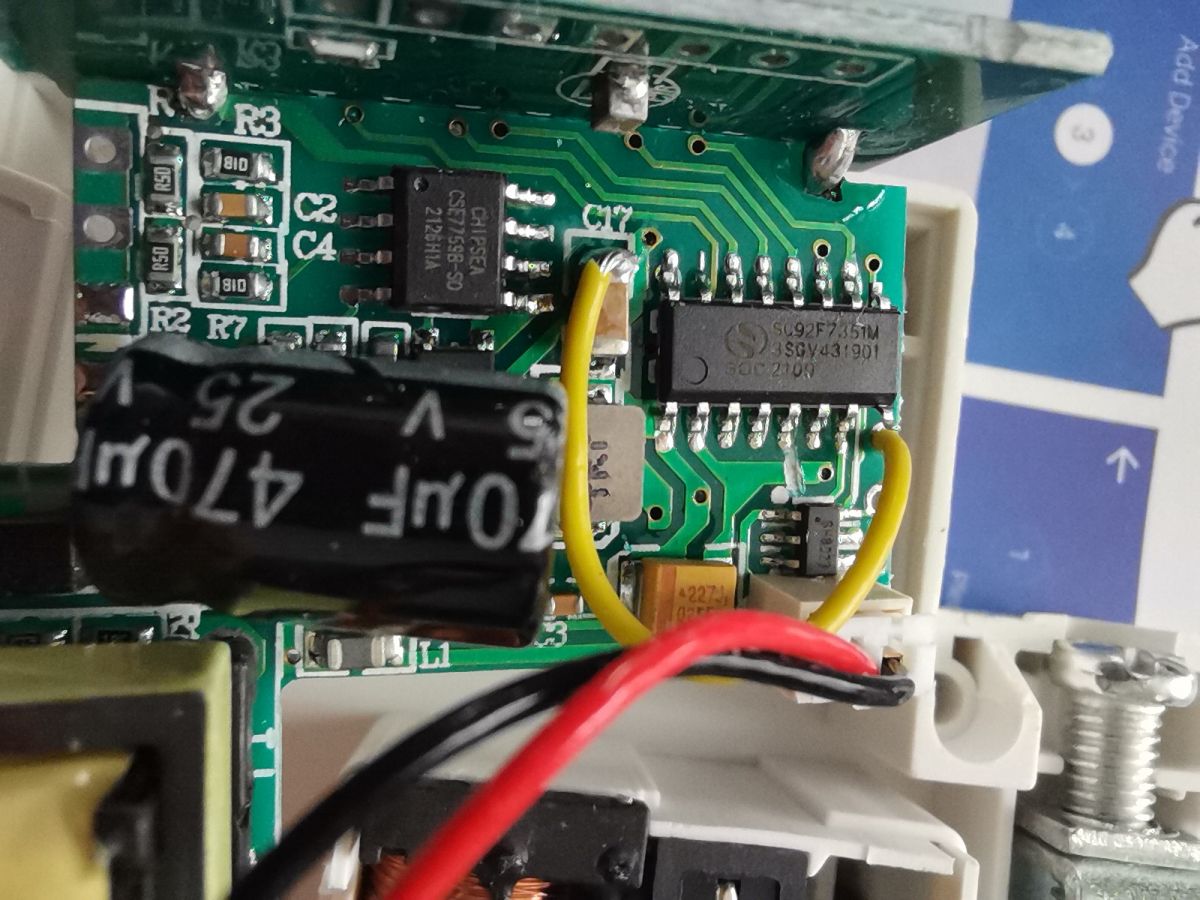
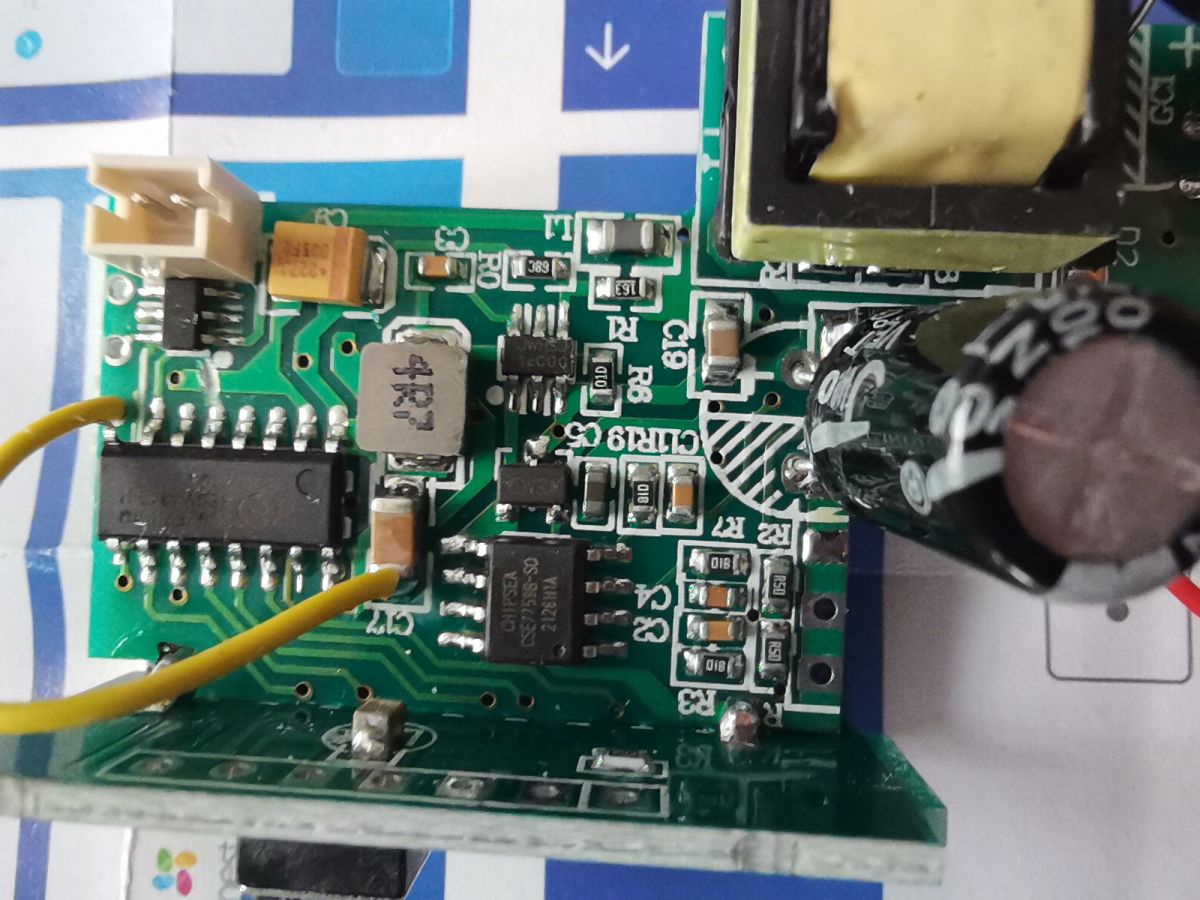
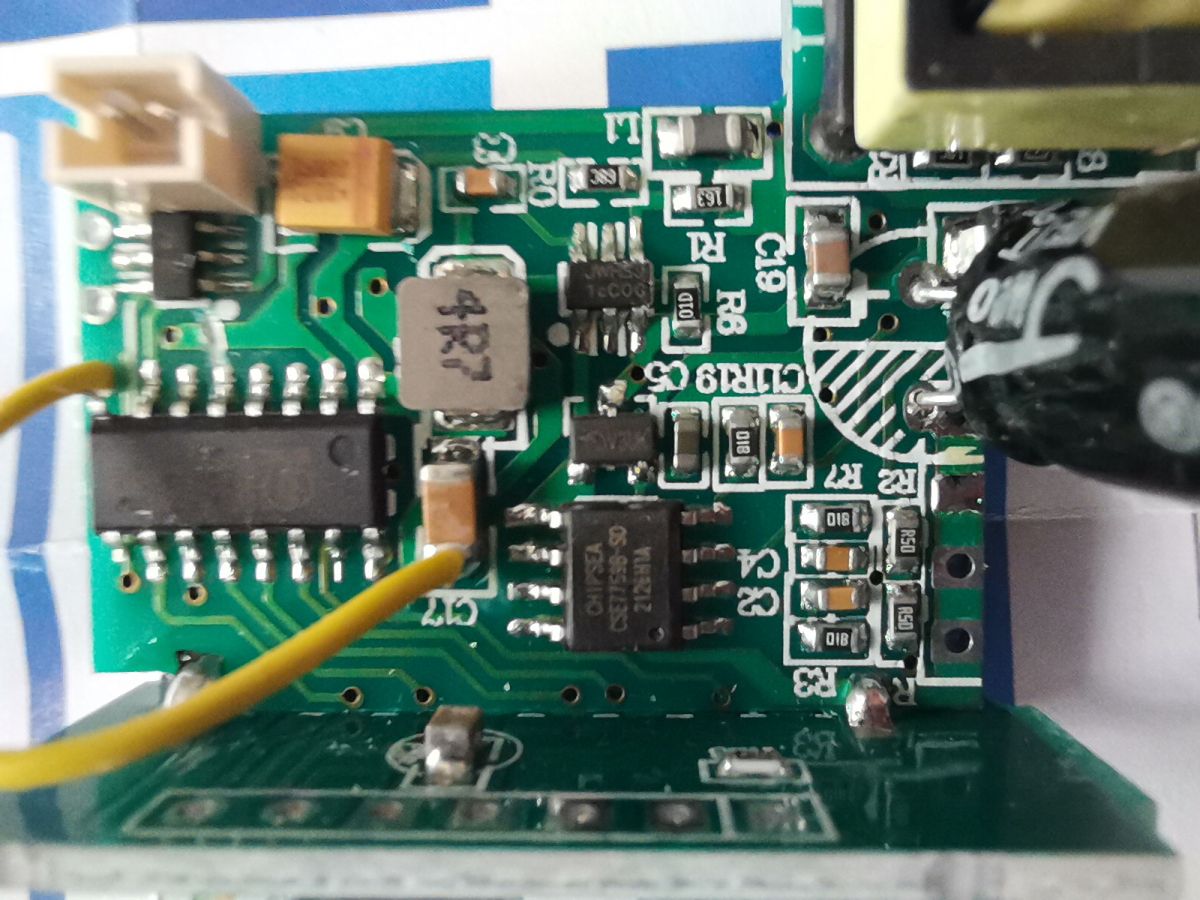
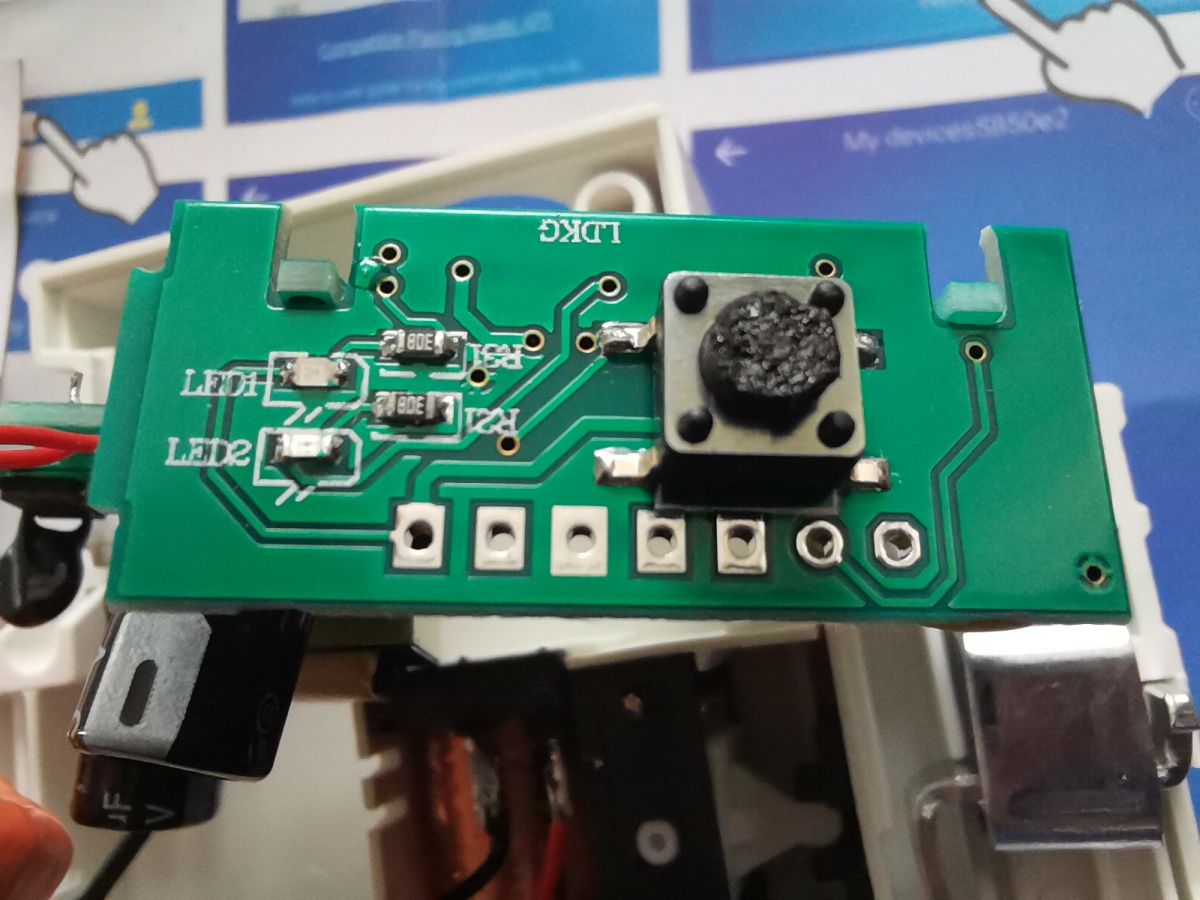
    Package contains strange circuit breaker, without automatic magnetic field coil trip mechanics. It seems to explore 8 bit MCU + bistable relay for trip. Main module is PFS-B containing ESP8285 CPU. Although there is powerfull 32 bit CPU there is additional 8 bit micro controller SC92F7351. I think this is to provide high reliability.
    Energy meter is CSE7759. All this is packed in 1 unit 19 mm DIN package.
    More details I'll post later when I manage to discover circuitry.
    Here are the images:
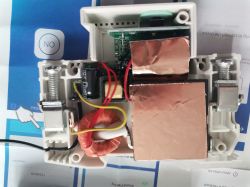
    Unique WiFi DIN Mount Circuit Breaker with ESP8285, SC92F7351 & CSE7759: In-Depth Details Unique WiFi DIN Mount Circuit Breaker with ESP8285, SC92F7351 & CSE7759: In-Depth Details Unique WiFi DIN Mount Circuit Breaker with ESP8285, SC92F7351 & CSE7759: In-Depth Details Unique WiFi DIN Mount Circuit Breaker with ESP8285, SC92F7351 & CSE7759: In-Depth Details Unique WiFi DIN Mount Circuit Breaker with ESP8285, SC92F7351 & CSE7759: In-Depth Details Unique WiFi DIN Mount Circuit Breaker with ESP8285, SC92F7351 & CSE7759: In-Depth Details Unique WiFi DIN Mount Circuit Breaker with ESP8285, SC92F7351 & CSE7759: In-Depth Details Unique WiFi DIN Mount Circuit Breaker with ESP8285, SC92F7351 & CSE7759: In-Depth Details Unique WiFi DIN Mount Circuit Breaker with ESP8285, SC92F7351 & CSE7759: In-Depth Details Unique WiFi DIN Mount Circuit Breaker with ESP8285, SC92F7351 & CSE7759: In-Depth Details

    Cool? Ranking DIY
    About Author
    ststefanov
    Level 9  
    Offline 
    ststefanov wrote 15 posts with rating 6. Been with us since 2014 year.
  • ADVERTISEMENT
  • Suggests UART capture to confirm TuyaMCU device

    #2 20529044
    p.kaczmarek2
    Moderator Smart Home
    Posts: 14790
    Help: 659
    Rate: 12937
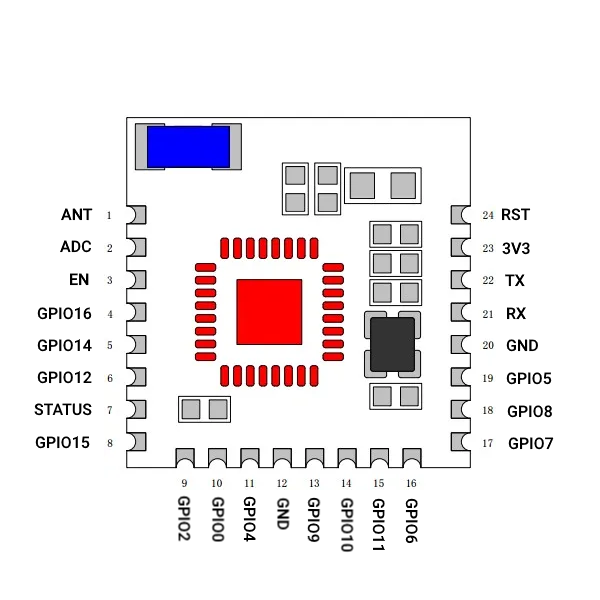
    Thank you, that's a very interesting teardown. I haven't been aware about the PSF-B module, but luckily pinout is already known:
    Unique WiFi DIN Mount Circuit Breaker with ESP8285, SC92F7351 & CSE7759: In-Depth Details
    Right now I will add that this is most likely a TuyaMCU device. I would suggest doing a UART packet capture from RX/TX lines, but of course this has to be done with device disconnected from mains and powered in some kind of safe manner...
    Helpful post? Buy me a coffee.
  • ADVERTISEMENT
  • #3 20534897
    vasara2008
    Level 5  
    Posts: 3
    hello,

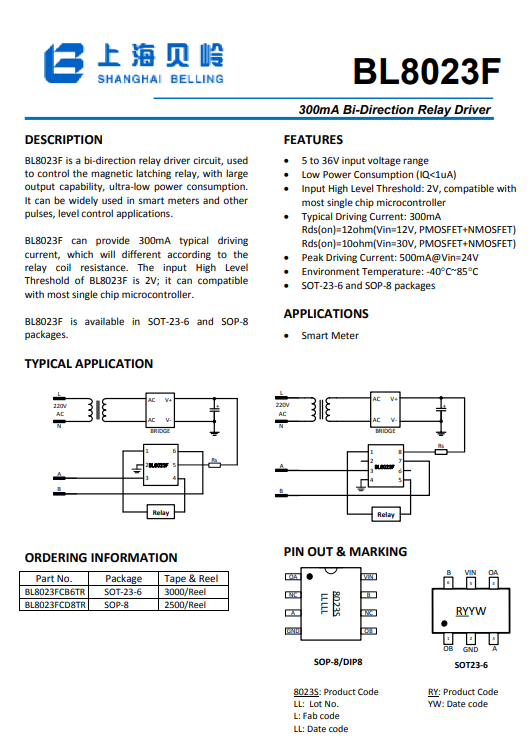
    anybody can identify transistors matrix in sot23-6 package, near relay socket, after some tests i have dead this transistor.

    thanks in advance
    Gintas
  • ADVERTISEMENT
  • #5 20536253
    vasara2008
    Level 5  
    Posts: 3
    Thank you, my friend.
  • ADVERTISEMENT
  • Tasmota flashed after isolating CSE7759B RX line

    #6 21158268
    civic9
    Level 12  
    Posts: 75
    Help: 1
    Rate: 17
    Hi,
    Can I flash it with Tasmota or other open-source software?
    Do I need to disable that TuyaMCU to flash PSF-B? How?
    Does anyone have a working configuration?
    Please give me any tips and hints about this device :)

    Thank you.

    Update:
    I managed to flash Tasmota.
    I just had to break CSE7759B connection to RX.
    Looks like it's working.
    Config: GPIO0 - Button 1, GPIO3 - CSE7766 Rx, GPIO12 - Relay 1, GPIO13 - LedLink

    Looks like SC92F7351 is controling relay and second red led, but it is connected directly to gpio12 of esp8255. No TuyaMcu protocol.
  • #7 21177522
    p.kaczmarek2
    Moderator Smart Home
    Posts: 14790
    Help: 659
    Rate: 12937
    Yes, Tasmota is a good choice for ESP-based devices.
    You can also use online Tasmota installer, as described here: https://www.elektroda.com/rtvforum/topic3990951.html
    Helpful post? Buy me a coffee.
  • Tasmota flashed by disconnecting CSE7759B RX

    #8 21202346
    jkwim
    Level 13  
    Posts: 186
    Help: 4
    Rate: 25
    civic9 wrote:
    Hi,
    Can I flash it with Tasmota or other open-source software?
    Do I need to disable that TuyaMCU to flash PSF-B? How?
    Does anyone have a working configuration?
    Please give me any tips and hints about this device :)

    Thank you.

    Update:
    I managed to flash Tasmota.
    I just had to break CSE7759B connection to RX.
    Looks like it's working.
    Config: GPIO0 - Button 1, GPIO3 - CSE7766 Rx, GPIO12 - Relay 1, GPIO13 - LedLink

    Looks like SC92F7351 is controling relay and second red led, but it is connected directly to gpio12 of esp8255. No TuyaMcu protocol.


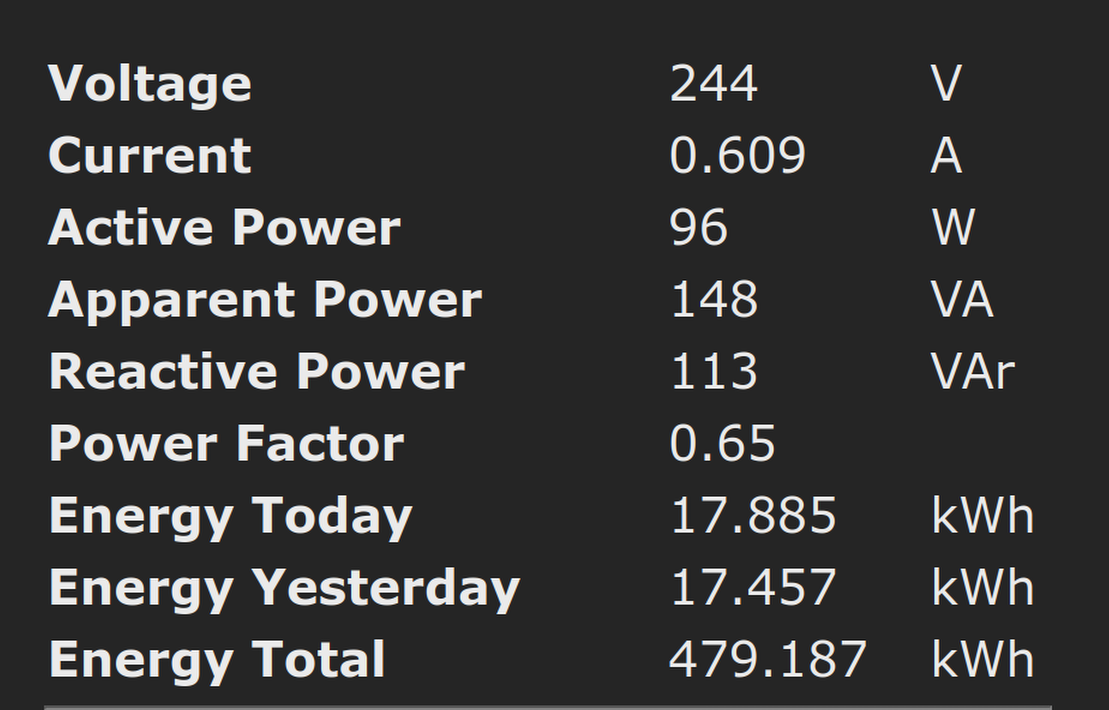
    What are the counter values displayed in Tasmota?

    Could you post some screenshots/logs please?
  • #9 21202375
    civic9
    Level 12  
    Posts: 75
    Help: 1
    Rate: 17
    >>21202346
    Displayed values of electrical energy parameters such as voltage, current, active power, apparent power, and others.
  • #10 21202806
    jkwim
    Level 13  
    Posts: 186
    Help: 4
    Rate: 25
    Thanks.

    I am also interested in the device because of the form factor.

    Was the opening of the device destructive?
  • #11 21202812
    p.kaczmarek2
    Moderator Smart Home
    Posts: 14790
    Help: 659
    Rate: 12937
    I've did a more detailed teardown of a similiar (same factor) device once, also on ESP, but you will need to use google translate:
    Przekaźnik Tuya/Smart który pamięta harmonogram po utracie sieci WiFi
    Helpful post? Buy me a coffee.
  • Need to assess GPIO safety for ModBus connection

    #12 21203119
    jkwim
    Level 13  
    Posts: 186
    Help: 4
    Rate: 25
    Found this youtube video:

    https://www.youtube.com/watch?v=jrmQpzMRU6o

    Added after 19 [minutes]:

    p.kaczmarek2 wrote:
    I've did a more detailed teardown of a similiar (same factor) device once, also on ESP, but you will need to use google translate:
    Przekaźnik Tuya/Smart który pamięta harmonogram po utracie sieci WiFi


    Thanks.

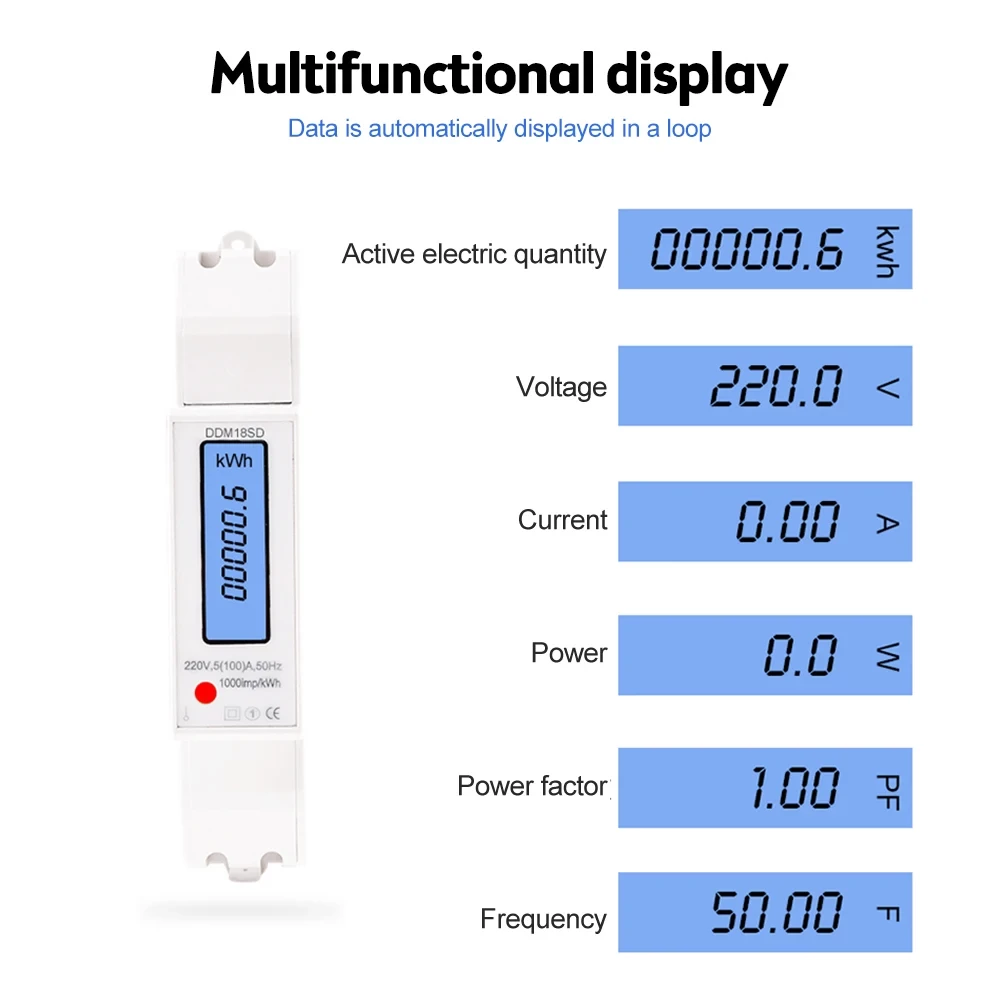
    Actually what I need is a ESP device in the switchboard to connect to few ModBus devices like these:

    Unique WiFi DIN Mount Circuit Breaker with ESP8285, SC92F7351 & CSE7759: In-Depth Details

    Need to figure out how safe it will be to hookup one GPIO Port for connectivity with the ModBus device. ModBus devices can be cascaded and connected to a single GPIO.
  • #13 21203305
    civic9
    Level 12  
    Posts: 75
    Help: 1
    Rate: 17
    >>21202806
    jkwim wrote:
    Was the opening of the device destructive?

    Rivets are used to hold two parts of an enclosure together. So dissasembling it is somewhat destructive. However, rivets can be drilled out quite easily and you can replace them with small screws afterward.

    I am not sure if it is safe to use a GPIO directly (without some form of extra separation) with another external device.
Listen:

Topic summary

LABEL_AI_GENERATED
The discussion revolves around a unique WiFi DIN mount circuit breaker featuring an ESP8285 microcontroller, an SC92F7351 8-bit MCU, and a CSE7759 energy meter. Users express interest in the device's teardown, functionality, and potential for flashing with open-source firmware like Tasmota. Key points include the identification of a BL8023F relay driver, the need to disconnect the CSE7759B for successful flashing, and the device's form factor. Concerns about the safety of using GPIO ports for ModBus connectivity and the destructive nature of disassembly due to rivets are also addressed. Users share resources, including pinout diagrams and a YouTube video for further insights.
AI summary based on the discussion. May contain errors.

FAQ LABEL_AI_GENERATED

TL;DR: This FAQ covers a 19 mm WiFi DIN rail breaker; expert quote: "Tasmota is a good choice" for ESP-based devices. It helps technicians flash PSF-B/ESP8285 hardware, map CSE7759B metering, and avoid unsafe mains or GPIO modifications. [#21177522] Why it matters: This compact breaker mixes ESP8285 WiFi, SC92F7351 control, CSE7759B metering, and relay-drive circuitry inside one DIN module, so safe reverse engineering matters.

Approach What the thread found Practical result
TuyaMCU-style capture Suggested early from RX/TX lines Useful only if powered safely off mains
Direct Tasmota flash Worked after breaking CSE7759B-to-RX GPIO3 can read metering as CSE7766 Rx
External ModBus use Considered for switchboard meters Needs extra separation before GPIO hookup

Key insight: The device can run Tasmota on the ESP8285 without a TuyaMCU protocol path. The critical fix was isolating the CSE7759B RX connection before flashing.

Quick Facts

  • The breaker uses a PSF-B ESP8285 WiFi module and fits a 1 unit, 19 mm DIN enclosure. [#20528974]
  • The metering IC is CSE7759/CSE7759B, and a working Tasmota setup maps it through GPIO3 as CSE7766 Rx. [#21158268]
  • The relay-area SOT23-6 device is BL8023F, identified as a 300 mA bi-direction relay driver. [#20536190]
  • Opening the enclosure is partly destructive because rivets hold the two housing parts together, but drilled rivets can be replaced by small screws. [#21203305]
  • Safe UART packet capture was advised only with the device disconnected from mains and powered by a safe alternative supply. [#20529044]

What is the PSF-B ESP8285 module used in this WiFi DIN rail circuit breaker?

The PSF-B is the ESP8285 WiFi CPU module inside the smart DIN breaker. It provides the networked control side of the device. The teardown identifies it as the main module and links it to the ESP8285 CPU. The full breaker fits into a 1 unit, 19 mm DIN package. [#20528974]

How does the SC92F7351 microcontroller work together with the ESP8285 in this smart DIN mount circuit breaker?

The SC92F7351 controls the relay path and the second red LED while the ESP8285 handles WiFi firmware. The thread later states there is no TuyaMCU protocol in the working Tasmota setup. GPIO12 from the ESP8285 connects directly into the SC92F7351 control path. This makes GPIO12 the practical relay control line. [#21158268]

What is the CSE7759 or CSE7759B energy metering chip, and what data can it provide to Tasmota?

The CSE7759B is the energy-metering chip read by Tasmota through the CSE7766 Rx driver setting. "CSE7759B is an energy-metering integrated circuit that reports electrical measurement data to the ESP UART, letting firmware display live power and counter-style energy readings when the serial line is mapped correctly." The thread shows a Tasmota status screen after this configuration. [#21202375]

How can I flash Tasmota onto a PSF-B based WiFi DIN rail circuit breaker safely?

Flash Tasmota only with the breaker removed from mains power and powered safely for serial work. Use this 3-step procedure:
  1. Disconnect the device fully from mains voltage.
  2. Isolate the CSE7759B connection to RX before flashing.
  3. Flash the ESP8285 PSF-B, then configure GPIO0, GPIO3, GPIO12, and GPIO13. One expert note says UART work must be done with the device disconnected from mains. [#20529044]

Why did breaking the CSE7759B connection to RX allow Tasmota flashing on this ESP8285 device?

Breaking the CSE7759B connection freed the ESP8285 RX line needed during flashing. The working report says Tasmota flashing succeeded only after disconnecting the CSE7759B from RX. Afterward, the same line could be configured as GPIO3 with CSE7766 Rx for metering. This is a clear serial-line conflict failure case. [#21158268]

What GPIO configuration works in Tasmota for the ESP8285 DIN circuit breaker with CSE7759B energy monitoring?

The working Tasmota configuration is GPIO0 Button 1, GPIO3 CSE7766 Rx, GPIO12 Relay 1, and GPIO13 LedLink. This setup was reported after successful flashing of the PSF-B ESP8285 device. It also matches the observation that the SC92F7351 controls the relay through GPIO12. [#21158268]

How should GPIO0, GPIO3, GPIO12, and GPIO13 be configured in Tasmota for this PSF-B smart breaker?

Configure GPIO0 as Button 1, GPIO3 as CSE7766 Rx, GPIO12 as Relay 1, and GPIO13 as LedLink. This assigns the local button, metering UART receive, relay command, and link LED functions. The configuration came from a working Tasmota flash on the ESP8285 DIN breaker. [#21158268]

What is the BL8023F SOT23-6 chip near the relay, and how is it used as a bi-directional relay driver?

The BL8023F is the SOT23-6 relay driver near the relay socket. "BL8023F is a 300 mA bi-direction relay driver that drives a latching relay coil in both directions, allowing electronic set and reset control from low-power logic circuitry." In this breaker, it sits by the relay hardware. [#20536190]

How can I identify and replace a damaged SOT23-6 relay driver transistor array in this smart circuit breaker?

Identify the damaged SOT23-6 relay driver as BL8023F, not a generic transistor matrix. The thread specifically names the chip as a BL8023F 300 mA bi-direction relay driver. Match the SOT23-6 package and relay-driver function when sourcing a replacement. This matters after tests damage the original device. [#20536190]

What Tasmota counter or energy values should appear when using the CSE7759B/CSE7766 RX configuration on this device?

Tasmota should show energy-monitoring values after GPIO3 is set to CSE7766 Rx. The thread includes a screenshot response when asked about counter values, confirming visible Tasmota metering output. The exact numeric readings are not provided in text. Use the screenshot as the thread evidence, not a fixed calibration table. [#21202375]

How destructive is opening this 19 mm DIN rail WiFi circuit breaker, and how can the riveted enclosure be reassembled?

Opening is somewhat destructive because rivets hold the two enclosure halves together. The practical method is to drill out the rivets carefully. After inspection or repair, replace the drilled rivets with small screws. This allows reassembly after accessing the 19 mm DIN breaker internals. [#21203305]

Tasmota vs TuyaMCU firmware: which approach makes more sense for an ESP8285 DIN rail breaker with SC92F7351 control?

Tasmota makes more sense once the RX conflict is solved, because the device worked without TuyaMCU protocol. The early guess was a TuyaMCU device, so UART capture was suggested. Later testing showed GPIO12 directly controls the SC92F7351 relay path. That makes direct ESP8285 Tasmota configuration practical. [#21158268]

How can I safely capture UART RX/TX packets from a Tuya-style ESP8285 device without connecting it to mains voltage?

Capture UART packets only with the device disconnected from mains and powered by a safe alternative method. The suggested lines are RX and TX on the ESP-side interface. Do not connect a USB-UART adapter while mains is present. This avoids lethal voltage exposure and damage to test equipment. [#20529044]

What safety precautions are needed when connecting an ESP GPIO from a switchboard device to external ModBus equipment?

Do not connect an ESP GPIO directly to external ModBus equipment without extra separation. The thread explicitly questions the safety of direct GPIO use from a switchboard device. Add isolation or another protection stage before linking external equipment. This is especially important inside a mains distribution board. [#21203305]

How can an ESP8285 DIN rail device be used as a ModBus gateway for multiple cascaded ModBus energy meters?

Use the ESP8285 DIN device only as a gateway after adding a safe interface between GPIO and ModBus hardware. The thread proposes connecting several cascaded ModBus devices to one GPIO path. It does not provide a verified wiring diagram. Treat direct connection as unsafe until isolation and interface hardware are added. [#21203119]
AI summary based on the discussion. May contain errors.
ADVERTISEMENT