Producer: Ezvis
Model: CS T30 10A
Model: CS T30 10A
Socket with FW dedicated to the Ezviz application, but it is also sold by other manufacturers as WiFi socket WG08 Tuya and then it can be added directly to the Tuya application. I decided to do a teardown because I don't see anyone looking at the Ezvizes anywhere...
To remove the top plug at the socket, just pry it up. Unfortunately, removing the PCB without destroying the housing seems impossible. An attempt to knock out and unscrew the pins gave nothing, so they were probably sunk in the plastic of the housing. Unfortunately, even heating them with hot air did not help. Desoldering them and removing them from the PCB is also not an easy task - I managed to collect tin from the outside, but a lot of it was left on the bottom of the board and there was no way to melt it. Trying to remove the plastic in the middle holding the socket plates, one of them fell off. The only way to disassemble was to cut the casing. I've done it so that it can be easily glued if needed...
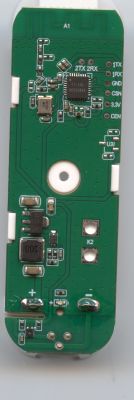
Inside there is a quite popular TYWE2S microcontroller, compatible with ESP, so theoretically you can throw FW Tasmota and EspHome.
In practice, this involves either destroying the device's housing and soldering it to the board, or you could make a small PCB (or some wire structure on a piece of tape or something similar) to size with the corresponding pin spacing, try to stick it to the TYWE2S board, or catch on a magnet and then program. However, this is a daunting task.
Tuya-convert over Wifi turned out to be ineffective. I wanted to check if it will start after shorting GPIO0 to GND, but after inserting the plug there was some short circuit and gray smoke went. Probably during heating and trying to pull out the pins some tin poured where it shouldn't, but fortunately the strip, UPS and fuses passed the test positively.
To sum up: Although programming the TYWE2S itself should not be a problem, I advise against buying these sockets due to the construction, which makes it extremely difficult to do anything with them. There is so much talk about ecology and recycling, and devices are allowed for sale that are apparently specially designed to make it as difficult or even impossible to dismantle and repair them...
Cool? Ranking DIY


![[TYWE2S] Ezviz CS-T30 10A EU (WG08(10)V1.4) brute-force teardown [TYWE2S] Ezviz CS-T30 10A EU (WG08(10)V1.4) brute-force teardown](https://obrazki.elektroda.pl/7921118800_1682066778_thumb.jpg)
![[TYWE2S] Ezviz CS-T30 10A EU (WG08(10)V1.4) brute-force teardown [TYWE2S] Ezviz CS-T30 10A EU (WG08(10)V1.4) brute-force teardown](https://obrazki.elektroda.pl/1729199600_1682067063_thumb.jpg)
![[TYWE2S] Ezviz CS-T30 10A EU (WG08(10)V1.4) brute-force teardown [TYWE2S] Ezviz CS-T30 10A EU (WG08(10)V1.4) brute-force teardown](https://obrazki.elektroda.pl/6909371800_1682067075_thumb.jpg)
![[TYWE2S] Ezviz CS-T30 10A EU (WG08(10)V1.4) brute-force teardown [TYWE2S] Ezviz CS-T30 10A EU (WG08(10)V1.4) brute-force teardown](https://obrazki.elektroda.pl/7069548500_1682067098_thumb.jpg)
![[TYWE2S] Ezviz CS-T30 10A EU (WG08(10)V1.4) brute-force teardown [TYWE2S] Ezviz CS-T30 10A EU (WG08(10)V1.4) brute-force teardown](https://obrazki.elektroda.pl/7774537900_1682067099_thumb.jpg)
![[TYWE2S] Ezviz CS-T30 10A EU (WG08(10)V1.4) brute-force teardown [TYWE2S] Ezviz CS-T30 10A EU (WG08(10)V1.4) brute-force teardown](https://obrazki.elektroda.pl/9475344600_1682067098_thumb.jpg)
![[TYWE2S] Ezviz CS-T30 10A EU (WG08(10)V1.4) brute-force teardown [TYWE2S] Ezviz CS-T30 10A EU (WG08(10)V1.4) brute-force teardown](https://obrazki.elektroda.pl/3887942500_1682067099_thumb.jpg)
![[TYWE2S] Ezviz CS-T30 10A EU (WG08(10)V1.4) brute-force teardown [TYWE2S] Ezviz CS-T30 10A EU (WG08(10)V1.4) brute-force teardown](https://obrazki.elektroda.pl/9831960400_1682067100_thumb.jpg)
![[TYWE2S] Ezviz CS-T30 10A EU (WG08(10)V1.4) brute-force teardown [TYWE2S] Ezviz CS-T30 10A EU (WG08(10)V1.4) brute-force teardown](https://obrazki.elektroda.pl/1622483500_1682067277_thumb.jpg)
![[TYWE2S] Ezviz CS-T30 10A EU (WG08(10)V1.4) brute-force teardown [TYWE2S] Ezviz CS-T30 10A EU (WG08(10)V1.4) brute-force teardown](https://obrazki.elektroda.pl/4042597200_1682067795_thumb.jpg)
![[TYWE2S] Ezviz CS-T30 10A EU (WG08(10)V1.4) brute-force teardown [TYWE2S] Ezviz CS-T30 10A EU (WG08(10)V1.4) brute-force teardown](https://obrazki.elektroda.pl/5362803500_1682068925_thumb.jpg)
![[TYWE2S] Ezviz CS-T30 10A EU (WG08(10)V1.4) brute-force teardown [TYWE2S] Ezviz CS-T30 10A EU (WG08(10)V1.4) brute-force teardown](https://obrazki.elektroda.pl/2558646400_1682068925_thumb.jpg)
![[TYWE2S] Ezviz CS-T30 10A EU (WG08(10)V1.4) brute-force teardown [TYWE2S] Ezviz CS-T30 10A EU (WG08(10)V1.4) brute-force teardown](https://obrazki.elektroda.pl/4878877200_1662475527_thumb.jpg)
![[TYWE2S] Ezviz CS-T30 10A EU (WG08(10)V1.4) brute-force teardown [TYWE2S] Ezviz CS-T30 10A EU (WG08(10)V1.4) brute-force teardown](https://obrazki.elektroda.pl/3463338400_1682281029_thumb.jpg)
![[TYWE2S] Ezviz CS-T30 10A EU (WG08(10)V1.4) brute-force teardown [TYWE2S] Ezviz CS-T30 10A EU (WG08(10)V1.4) brute-force teardown](https://obrazki.elektroda.pl/1392755800_1683548654_thumb.jpg)
![[TYWE2S] Ezviz CS-T30 10A EU (WG08(10)V1.4) brute-force teardown [TYWE2S] Ezviz CS-T30 10A EU (WG08(10)V1.4) brute-force teardown](https://obrazki.elektroda.pl/2660432000_1683550108_thumb.jpg)