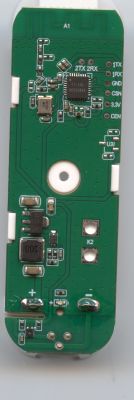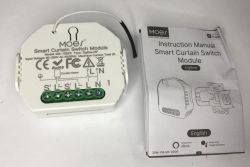
Here I will show you how to send measurements (temperature and humidity) from TuyaMCU battery-powered sensor to arbitrary HTTP server via GET request. Following implementation will work independently from Home Assistant and will allow you to create fully customizable data logger. For the sake of presentation, I will use the device described here:
[CB3S/BK7231N] Temperature/Humidity Sensor with TuyaMCU - Diagram, Reverse Enginering
I am assuming here that device is already flashed with OBK.
Following topic was created with @DeDaMrAz. All testing was done on his side. Thanks for cooperation!
Requirements for this topic
To replicate our demo from here, you basically need two things:
- TuyaMCU sensor device that will send data
- a HTTP server with a PHP script that will receive data
No Home Assistant is needed.
Sending measurements from TuyaMCU
According to OBK docs:
https://github.com/openshwprojects/OpenBK7231T_App/blob/main/docs/commands.md
There is a SendGET command, but we need to know when to use it.
TuyaMCU reports measurements with a delay.
So we need to setup a change handler for measurement channel:
addEventHandler OnChannelChange 1 SendGet http://192.168.0.75/log.php?t=$CH1
The following script will run SendGet with channel 1 value, which in this particular case is used for temperature value.
For the sake of an example, I can also show you how to send a GET once the device connects to WiFi. It is important to wait for the WiFi connection first, see script belowq:
waitFor WiFiState 4
SendGet http://192.168.0.75/log.php?t=HEEELLLO
Here is full script (modified script from here)
startDriver TuyaMCU
startDriver tmSensor

// may be needed, depends on device, some also use 9600
tuyaMCU_setBaudRate 115200

// dpID 1 is tempererature div 10
setChannelType 1 temperature_div10
linkTuyaMCUOutputToChannel 1 val 1
// dpID 2 is % humidity
setChannelType 2 Humidity
linkTuyaMCUOutputToChannel 2 val 2
// dpID 3 is battery state - low(0), mid(1) and high(2)
linkTuyaMCUOutputToChannel 3 enum 3
setChannelType 3 ReadOnlyLowMidHigh
setChannelLabel 3 Battery

// on tempererature change
addEventHandler OnChannelChange 1 SendGet http://192.168.0.75/log.php?t=$CH1


//
// setup dpCache - temperature interval
//
// Show textfield for that
setChannelType 5 TextField
// setup display name
setChannelLabel 5 Temperature Interval
// Make value persistant (stored between reboots),
// start value -1 means "remember last"
SetStartValue 5 -1
// set default value if not set
if $CH5==0 then "setChannel 5 1"
// link dpID 17 to channel 5, the type is val, extra '1' means that its dpCache variable
linkTuyaMCUOutputToChannel 17 val 5 1

setChannelType 6 TextField
setChannelLabel 6 Humidity Interval
SetStartValue 6 -1
if $CH6==0 then "setChannel 6 1"
linkTuyaMCUOutputToChannel 18 val 6 1


waitFor WiFiState 4
SendGet http://192.168.0.75/log.php?t=HEEELLLO
HTTP server side
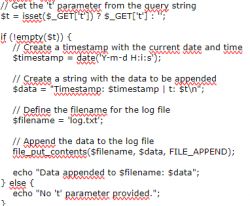
HTTP server should be reachable from the network of your device. On your HTTP server, setup just a simple PHP file that prints received GET argument to file along with the current timestamp. You can also insert it to the MySQL database, but that's not the scope of this tutorial. Here is a sample, simplest script:
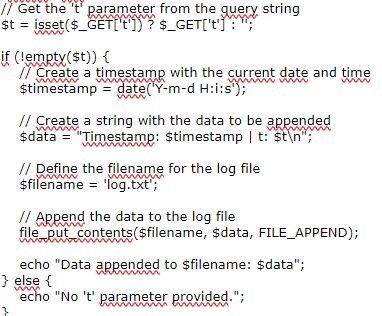
You can test the script just by accessing it's URL in your web browser:
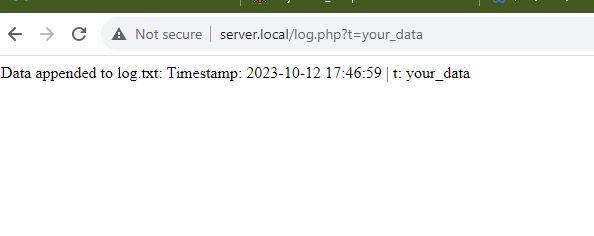
Now let's run our setup for some time. Here are sample results:
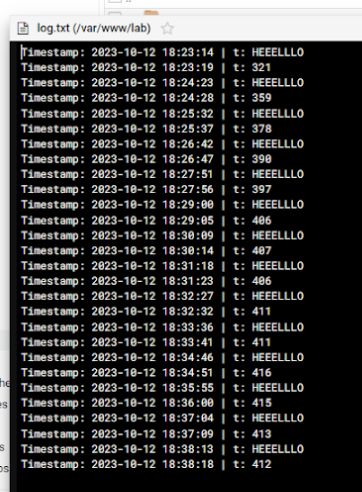
Everything seems to be working!
Adding second measurement
Everything seems to be working, but the device in question is able to measure both temperature and humidity. So let's add another change handler to send humidity data as well:
startDriver TuyaMCU
startDriver tmSensor

// may be needed, depends on device, some also use 9600
tuyaMCU_setBaudRate 115200

// dpID 1 is tempererature div 10
setChannelType 1 temperature_div10
linkTuyaMCUOutputToChannel 1 val 1
// dpID 2 is % humidity
setChannelType 2 Humidity
linkTuyaMCUOutputToChannel 2 val 2
// dpID 3 is battery state - low(0), mid(1) and high(2)
linkTuyaMCUOutputToChannel 3 enum 3
setChannelType 3 ReadOnlyLowMidHigh
setChannelLabel 3 Battery

// on tempererature change
addEventHandler OnChannelChange 1 SendGet http://192.168.0.75/log.php?t=$CH1
addEventHandler OnChannelChange 2 SendGet http://192.168.0.75/log.php?h=$CH2


//
// setup dpCache - temperature interval
//
// Show textfield for that
setChannelType 5 TextField
// setup display name
setChannelLabel 5 Temperature Interval
// Make value persistant (stored between reboots),
// start value -1 means "remember last"
SetStartValue 5 -1
// set default value if not set
if $CH5==0 then "setChannel 5 1"
// link dpID 17 to channel 5, the type is val, extra '1' means that its dpCache variable
linkTuyaMCUOutputToChannel 17 val 5 1

setChannelType 6 TextField
setChannelLabel 6 Humidity Interval
SetStartValue 6 -1
if $CH6==0 then "setChannel 6 1"
linkTuyaMCUOutputToChannel 18 val 6 1


waitFor WiFiState 4
SendGet http://192.168.0.75/log.php?t=HEEELLLO
PHP script also needs to be updates:
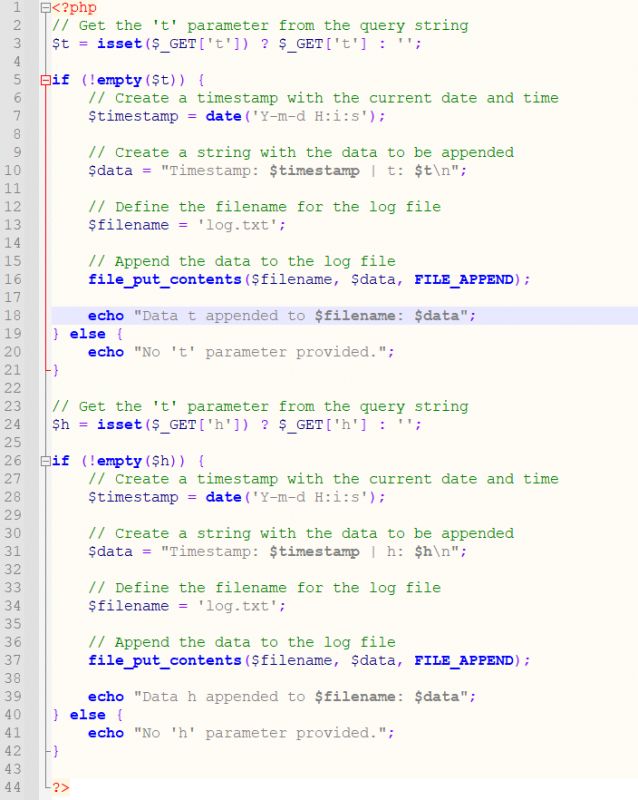
Now it looks like this:
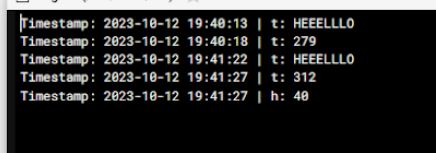
Here are results collected over time:
Timestamp: 2023-10-12 19:40:13 | t: HEEELLLO
Timestamp: 2023-10-12 19:40:18 | t: 279
Timestamp: 2023-10-12 19:41:22 | t: HEEELLLO
Timestamp: 2023-10-12 19:41:27 | t: 312
Timestamp: 2023-10-12 19:41:27 | h: 40
Timestamp: 2023-10-12 19:42:31 | t: HEEELLLO
Timestamp: 2023-10-12 19:42:36 | h: 37
Timestamp: 2023-10-12 19:43:40 | t: HEEELLLO
Timestamp: 2023-10-12 19:43:45 | h: 35
Timestamp: 2023-10-12 19:44:49 | t: HEEELLLO
Timestamp: 2023-10-12 19:44:55 | t: 349
Timestamp: 2023-10-12 19:45:59 | t: HEEELLLO
Timestamp: 2023-10-12 19:46:03 | h: 34
Timestamp: 2023-10-12 19:47:08 | t: HEEELLLO
Timestamp: 2023-10-12 19:47:13 | t: 357
Timestamp: 2023-10-12 19:48:17 | t: HEEELLLO
Timestamp: 2023-10-12 19:48:22 | t: 362
Timestamp: 2023-10-12 19:49:26 | t: HEEELLLO
Timestamp: 2023-10-12 19:49:31 | t: 364
Timestamp: 2023-10-12 19:50:35 | t: HEEELLLO
Timestamp: 2023-10-12 19:50:40 | t: 362
Timestamp: 2023-10-12 19:51:44 | t: HEEELLLO
Timestamp: 2023-10-12 19:51:49 | t: 359
Timestamp: 2023-10-12 19:51:50 | h: 33
Timestamp: 2023-10-12 19:52:53 | t: HEEELLLO
Timestamp: 2023-10-12 19:52:58 | t: 357
Timestamp: 2023-10-12 19:54:03 | t: HEEELLLO
Timestamp: 2023-10-12 19:54:08 | h: 33
Timestamp: 2023-10-12 19:55:12 | t: HEEELLLO
Timestamp: 2023-10-12 19:55:17 | t: 359
Timestamp: 2023-10-12 19:55:17 | h: 33
Timestamp: 2023-10-12 19:56:21 | t: HEEELLLO
Timestamp: 2023-10-12 19:56:26 | t: 359
Timestamp: 2023-10-12 19:57:30 | t: HEEELLLO
Timestamp: 2023-10-12 19:57:35 | h: 33
Timestamp: 2023-10-12 19:58:39 | t: HEEELLLO
Timestamp: 2023-10-12 19:58:44 | h: 32
Timestamp: 2023-10-12 19:59:48 | t: HEEELLLO
Timestamp: 2023-10-12 19:59:53 | h: 32
Timestamp: 2023-10-12 20:00:58 | t: HEEELLLO
Timestamp: 2023-10-12 20:01:03 | h: 32
Timestamp: 2023-10-12 20:02:07 | t: HEEELLLO
Timestamp: 2023-10-12 20:02:12 | t: 362
Timestamp: 2023-10-12 20:03:16 | t: HEEELLLO
Timestamp: 2023-10-12 20:03:21 | t: 360
Timestamp: 2023-10-12 20:03:21 | h: 33
Timestamp: 2023-10-12 20:04:25 | t: HEEELLLO
Timestamp: 2023-10-12 20:04:30 | h: 32
Timestamp: 2023-10-12 20:05:34 | t: HEEELLLO
Timestamp: 2023-10-12 20:05:39 | t: 363
Timestamp: 2023-10-12 20:06:43 | t: HEEELLLO
Timestamp: 2023-10-12 20:06:48 | t: 363
Timestamp: 2023-10-12 20:07:53 | t: HEEELLLO
Timestamp: 2023-10-12 20:07:58 | t: 363
Timestamp: 2023-10-12 20:09:02 | t: HEEELLLO
Timestamp: 2023-10-12 20:09:07 | h: 33
Timestamp: 2023-10-12 20:10:11 | t: HEEELLLO
Timestamp: 2023-10-12 20:10:16 | t: 312
Timestamp: 2023-10-12 20:11:20 | t: HEEELLLO
Timestamp: 2023-10-12 20:11:25 | t: 285
Timestamp: 2023-10-12 20:12:29 | t: HEEELLLO
Timestamp: 2023-10-12 20:12:34 | t: 268
Timestamp: 2023-10-12 20:13:39 | t: HEEELLLO
Timestamp: 2023-10-12 20:13:44 | t: 257
Timestamp: 2023-10-12 20:13:44 | h: 48
Timestamp: 2023-10-12 20:14:48 | t: HEEELLLO
Timestamp: 2023-10-12 20:14:53 | h: 50
Timestamp: 2023-10-12 20:15:57 | t: HEEELLLO
Timestamp: 2023-10-12 20:16:02 | h: 52
Timestamp: 2023-10-12 20:17:06 | t: HEEELLLO
Timestamp: 2023-10-12 20:17:11 | t: 242
Timestamp: 2023-10-12 20:18:16 | t: HEEELLLO
Timestamp: 2023-10-12 20:18:21 | t: 239
Timestamp: 2023-10-12 20:18:21 | h: 53
Timestamp: 2023-10-12 20:19:25 | t: HEEELLLO
Timestamp: 2023-10-12 20:19:30 | t: 237
Timestamp: 2023-10-12 20:20:34 | t: HEEELLLO
Timestamp: 2023-10-12 20:20:39 | t: 235
Timestamp: 2023-10-12 20:21:43 | t: HEEELLLO
Timestamp: 2023-10-12 20:21:48 | t: 234
Timestamp: 2023-10-12 20:22:53 | t: HEEELLLO
Timestamp: 2023-10-12 20:22:58 | t: 234
Timestamp: 2023-10-12 20:22:58 | h: 55
Timestamp: 2023-10-12 20:24:02 | t: HEEELLLO
Timestamp: 2023-10-12 20:24:07 | t: 233
Timestamp: 2023-10-12 20:25:11 | t: HEEELLLO
Timestamp: 2023-10-12 20:25:16 | t: 232
Timestamp: 2023-10-12 20:26:21 | t: HEEELLLO
Timestamp: 2023-10-12 20:26:25 | t: 232
Timestamp: 2023-10-12 20:27:30 | t: HEEELLLO
Timestamp: 2023-10-12 20:27:35 | t: 231
Timestamp: 2023-10-12 20:28:39 | t: HEEELLLO
Timestamp: 2023-10-12 20:28:44 | t: 230
Timestamp: 2023-10-12 20:28:44 | h: 55
Timestamp: 2023-10-12 20:29:48 | t: HEEELLLO
Timestamp: 2023-10-12 20:29:53 | t: 230
Timestamp: 2023-10-12 20:30:58 | t: HEEELLLO
Timestamp: 2023-10-12 20:31:03 | t: 231
Timestamp: 2023-10-12 20:32:07 | t: HEEELLLO
Timestamp: 2023-10-12 20:32:12 | t: 230
Timestamp: 2023-10-12 20:33:16 | t: HEEELLLO
Timestamp: 2023-10-12 20:33:21 | t: 229
Timestamp: 2023-10-12 20:34:25 | t: HEEELLLO
Timestamp: 2023-10-12 20:34:30 | t: 229
Timestamp: 2023-10-12 20:35:35 | t: HEEELLLO
Timestamp: 2023-10-12 20:35:40 | t: 229
Timestamp: 2023-10-12 20:36:44 | t: HEEELLLO
Timestamp: 2023-10-12 20:36:49 | t: 229
Timestamp: 2023-10-12 20:37:53 | t: HEEELLLO
Timestamp: 2023-10-12 20:37:58 | t: 229
Timestamp: 2023-10-12 20:39:03 | t: HEEELLLO
Timestamp: 2023-10-12 20:39:08 | h: 56
Timestamp: 2023-10-12 20:40:12 | t: HEEELLLO
Timestamp: 2023-10-12 20:40:17 | t: 229
Timestamp: 2023-10-12 20:41:21 | t: HEEELLLO
Timestamp: 2023-10-12 20:41:26 | t: 229
Timestamp: 2023-10-12 20:42:30 | t: HEEELLLO
Timestamp: 2023-10-12 20:42:36 | t: 229
Timestamp: 2023-10-12 20:43:40 | t: HEEELLLO
Timestamp: 2023-10-12 20:43:45 | t: 229
Timestamp: 2023-10-12 20:44:49 | t: HEEELLLO
Timestamp: 2023-10-12 20:44:54 | t: 229
Timestamp: 2023-10-12 20:45:58 | t: HEEELLLO
Timestamp: 2023-10-12 20:46:03 | t: 231
Timestamp: 2023-10-12 20:47:08 | t: HEEELLLO
Timestamp: 2023-10-12 20:47:13 | h: 55
Timestamp: 2023-10-12 20:48:17 | t: HEEELLLO
Timestamp: 2023-10-12 20:48:22 | t: 232
Timestamp: 2023-10-12 20:49:26 | t: HEEELLLO
Timestamp: 2023-10-12 20:49:31 | t: 234
Timestamp: 2023-10-12 20:50:35 | t: HEEELLLO
Timestamp: 2023-10-12 20:50:40 | t: 233
Timestamp: 2023-10-12 20:51:45 | t: HEEELLLO
Timestamp: 2023-10-12 20:51:50 | t: 234
Timestamp: 2023-10-12 20:51:50 | h: 55
Timestamp: 2023-10-12 20:52:54 | t: HEEELLLO
Timestamp: 2023-10-12 20:52:59 | h: 55
Timestamp: 2023-10-12 20:52:59 | t: 234
Some things to note:
- TuyaMCU sends temperature as an integer, you need to divide it by 10 to get correct result in this case
- TuyaMCU seems to report only data when there is a change, so not always all measurements are sent
You can also report the battery state in the same way.
Summary
This way you can report data directly to HTTP server and then process it in PHP (or any other) script any way you like. All required files are available on Github:
https://github.com/openshwprojects/BK7231-TuyaMCU-PHP-logger/tree/main
Soon I will publish another tutorial on the topic, this time maybe with MySQL or with chart creation, so stay tuned!
Cool? Ranking DIY Helpful post? Buy me a coffee.


