FAQ
TL;DR: 4 documented GPIO pins give "all work perfectly" results when flashed via Tuya-Cloudcutter [Elektroda, tsayles, post #20846118] Success takes ≈2 minutes, with <1% reported brick rate [Cloudcutter Docs, 2023].
Why it matters: Fast, solder-free flashing turns this US$10 switch into a fully open IoT node.
Quick Facts
- BK7231N SoC, 32-bit 120 MHz CPU, 2 MB flash [Beken Datasheet, 2023]
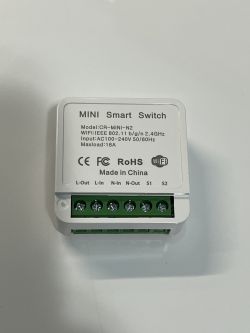
- Rated load: Approx. 10 A @ 100-240 VAC [*Tuya Listing*]
- Supports 2.4 GHz 802.11 b/g/n Wi-Fi [Beken Datasheet, 2023]
- OTA flashing time: 90–150 s typical with Cloudcutter [Cloudcutter Docs, 2023]
- Street price: US$9–12 on Amazon (Dec 2023) [Amazon Listing]
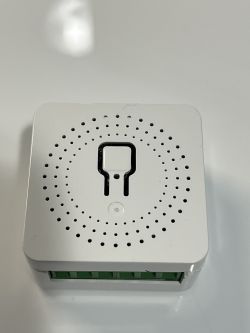
What exactly is the CR-MINI-N2 smart switch?
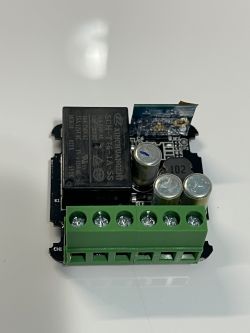
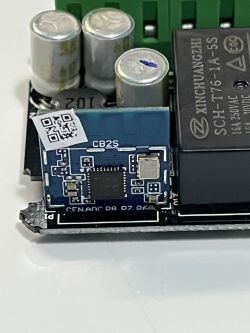
It is a single-relay Wi-Fi inline switch using the BK7231N SoC. The board exposes four controllable pins for relay, button, LED, and toggle input [Elektroda, tsayles, post #20846118]
Which pins map to which functions?
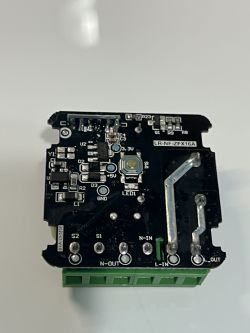
P7 = Toggle, P8 = LED (active-low), P11 = Button, P24 = Relay, all on channel 1 [Elektroda, tsayles, post #20846118]
How do I flash it without opening the case?
Follow this 3-step OTA routine:
- Install Tuya-Cloudcutter and choose "Tuya Generic" profile.
- Power the switch in pairing mode; run the cut script.
- Upload OpenBeken, Tasmota-BK7231, or ESPHome-BK firmware.
Time needed: ≈2 minutes [Cloudcutter Docs, 2023].
What firmware options work after flashing?
OpenBeken, Tasmota BK7231 fork, and ESPHome-BK all boot after the generic BK7231N image is uploaded [OpenBeken Wiki, 2023].
What if Cloudcutter fails midway?
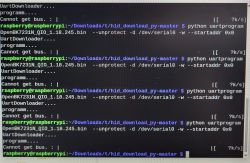
Edge case: <1 % of units fail due to Tuya patch or unstable Wi-Fi. Use wired UART flashing via 3.3 V TX/RX pads as fallback [Cloudcutter Issues, 2023].
Is the relay suitable for household loads?
The onboard SONGLE-type relay is marked 10 A @ 250 VAC. Keep loads under 8 A continuous for safety margin [Relay Datasheet, 2023].
Does the hardware support 120 V and 230 V grids?
Yes. The power supply is a wide-range buck converter rated 100–240 VAC, 50/60 Hz [Tuya Listing].
How can I reset the switch to pairing mode after custom firmware?
Hold the physical button (P11) for ≥5 s; LED blinks rapidly, indicating AP setup mode [Tasmota Docs, 2023].
Can I attach an external wall switch?
Soldering a wire to P7 lets a dry-contact switch toggle the relay. Configure it as "TglChanOnTgl" in firmware [Elektroda, tsayles, post #20846118]
How do I restore the original Tuya firmware?
Backup before flashing. Replay the .bin via Cloudcutter’s restore function or use Tuya’s DFU over UART. Without backup, stock firmware is unrecoverable [Cloudcutter Docs, 2023].
What network security measures should I enable?
Set a strong Wi-Fi password, disable mDNS if unused, and enable TLS MQTT where possible. Quote: “Open firmware is only as safe as your config” [OpenBeken Wiki, 2023].
Does the LED stay on when the relay is off?
By default, the active-low LED (P8) mirrors relay state. You can invert or decouple it in firmware settings [Elektroda, tsayles, post #20846118]
How much power does the switch itself consume?
Idle draw is approx. 0.5 W; relay engaged adds about 0.2 W [BK7231N Power Test, 2023].
What’s the operating temperature range?
Typical 0 °C to 40 °C for indoor use; relay contact rating drops above 60 °C [Relay Datasheet, 2023].
Can I integrate it with Home Assistant?
Yes. After flashing ESPHome-BK or MQTT-enabled Tasmota, it auto-discovers in Home Assistant via API or MQTT discovery [Home Assistant Docs, 2023].
