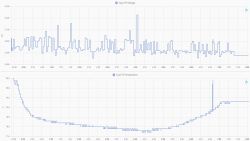
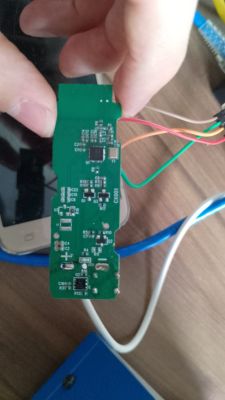
I got this sensor from Aliexpress and installed openbeken on it using some soldering via serial.
Images
Chips
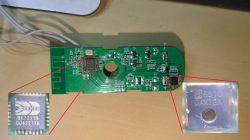
PCB side A

PCB Side B
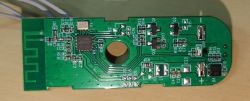
Case
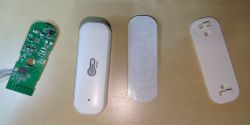
Manual


Output of BF7231 Flasher
Related posts
Similar devices
https://www.elektroda.com/rtvforum/topic4058406.html
Calibration command
https://www.elektroda.com/rtvforum/topic3971252.html#20539841
Where to buy
https://es.aliexpress.com/item/1005007861419682.html
After playing a little bit i come up with this config:
Calibrations:
Battery, as per BK7231 flasher text extracted from tuya
Temperature
Comparing with a bunch of other chinese sensors and calculating the average
Im posting this to have it for future reference and to update later with changes.
EDIT 2025-02-07: Autoexec script
Operation modes:
Loop mode: The device will turn on with the wifi led also on, publish mqtt, go to sleepp 600seg and start again.
Maintenance mode: The device will stay on for 600s with the led blinking, then reboot to normal mode. This 600s must be enough to do any required change in the configuration while avoiding keep the device powered on too much to kill the batteries.
To enter maintenance mode, you press the internal button while the led is on. If the device is sleeping, when you press the internal button it will turn on, an then, while led is on you can enter maintenance mode.
To exit maintenance mode, just wait 600s or press the internal button while led is blinking.
Images
Chips

PCB side A

PCB Side B

Case

Manual


Output of BF7231 Flasher
[syntax=json]
{
   "tmp_min":"-100",
   "hum_sen":"5",
   "alt_pin_pin":"16",
   "tran_t":"15",
   "net_led_pin":"26",
   "hum_min":"0",
   "jv":"2.0.1",
   "bt_lv":"0",
   "alt_pin_lv":"1",
   "i2c_sda_lv":"0",
   "samp_sw_pin":"17",
   "max_V":"3000",
   "tmp_max":"600",
   "min_V":"2350",
   "samp_sw_lv":"1",
   "cfg_en":"0",
   "tmp_sen":"5",
   "i2c_sda_pin":"9",
   "bt_pin":"20",
   "rep_t":"1",
   "rstcnt":"3",
   "module":"CBU",
   "s_type":"1",
   "i2c_scl_pin":"6",
   "rep_t2":"60",
   "net_t":"180",
   "samp_type":"1",
   "net_led_lv":"1",
   "i2c_scl_lv":"0",
   "samp_pin":"23",
   "alarm_st":"1",
   "hum_max":"100",
   "crc":"87"
}
[/syntax]
[syntax=text]
Device configuration, as extracted from Tuya:
- ALT pin on P16
- Battery Relay on P17
- Battery Max Voltage: 3000
- Battery Min Voltage: 2350
- I2C SDA on P9
- Button (channel 0) on P20
- I2C SCL on P6
- Battery ADC on P23
Device seems to use Battery Driver. See more details here: https://www.elektroda.com/rtvforum/topic3959103.html
Device seems to be using CBU module, which is using BK7231N.
And the Tuya section starts, as usual, at 2023424
[/syntax]
Related posts
Similar devices
https://www.elektroda.com/rtvforum/topic4058406.html
Calibration command
https://www.elektroda.com/rtvforum/topic3971252.html#20539841
Where to buy
https://es.aliexpress.com/item/1005007861419682.html
After playing a little bit i come up with this config:
[syntax=json]
{
  "vendor": "Tuya",
  "bDetailed": "0",
  "name": "Tuya TH Sensor",
  "model": "enter short model name here",
  "chip": "BK7231N",
  "board": "PCB_576P1-V1.0",
  "flags": "0",
  "keywords": [
    "Tuya",
    "CHT8310",
    "TODO"
  ],
  "pins": {
    "6": "CHT83XX_SCK;1;0",
    "9": "CHT83XX_SDA;1;2",
    "17": "BAT_Relay;5",
    "20": "dInput;43",
    "23": "BAT_ADC;40",
    "26": "WifiLED_n;37"
  },
  "command": "backlog PowerSave 1; startDriver battery; startDriver CHT83XX; CHT_calibrate -5 19",
  "image": "https://obrazki.elektroda.pl/5076675700_1736544409.jpg",
  "wiki": "https://www.elektroda.com/rtvforum/topic4098816.html"
}
[/syntax]
Calibrations:
Battery, as per BK7231 flasher text extracted from tuya
Battery_Setup 2350 3000Temperature
Comparing with a bunch of other chinese sensors and calculating the average
CHT_calibrate -5 19Im posting this to have it for future reference and to update later with changes.
EDIT 2025-02-07: Autoexec script
Operation modes:
Loop mode: The device will turn on with the wifi led also on, publish mqtt, go to sleepp 600seg and start again.
Maintenance mode: The device will stay on for 600s with the led blinking, then reboot to normal mode. This 600s must be enough to do any required change in the configuration while avoiding keep the device powered on too much to kill the batteries.
To enter maintenance mode, you press the internal button while the led is on. If the device is sleeping, when you press the internal button it will turn on, an then, while led is on you can enter maintenance mode.
To exit maintenance mode, just wait 600s or press the internal button while led is blinking.
// Pins and Channel definitions
SetPinRole 6 CHT83XX_SCK
SetPinChannel 6 1

SetPinRole 9 CHT83XX_SDA
SetPinChannel 9 1 2

SetPinRole 17 BAT_Relay
SetPinChannel 17 5

SetPinRole 20 dInput
SetPinChannel 20 43
SetChannelLabel 43 intButton 1

SetPinRole 23 BAT_ADC
SetPinChannel 23 40

SetPinRole 26 WifiLED_n
SetPinChannel 26 37

// Internal Channels definition
setChannelType 44 ReadOnly
//SetChannelVisible 43 0
setChannelLabel 44 LoopMode 1
// LoopMode=1 for start
setChannel 44 1

//Always save power
PowerSave 1

// hold button to get into safe mode
addEventHandler OnHold 20 SafeMode

// Battery
startDriver battery
Battery_Setup 2350 3000

// Temp and Hum sensor
startDriver CHT83XX
CHT_calibrate -2 12

// 30s timeout to deep sleep 2mins if waits never complete
addRepeatingEventID 30 -1 5 DeepSleep 120

//set wifi light on to indicate that deepsleep still can be cancelled
SetPinRole 26 Rel
setChannel 37 1

//to cancell the deepsleep by pressing the internal button
//TODO: make led blinking to indicate the "operating mode"
addChangeHandler Channel43 == 0 backlog echo "exit loop mode"; setChannel 44 0; setChannel 37 0

// wait until wifi is connected
//waitFor WiFiState 4
//echo "WiFiState"
// wait for MQTT to connect
waitFor MQTTState 1
// wait for NTP to sync
//waitFor NTPState 1

cancelRepeatingEvent 5
echo "cancel event 5"

publishChannels
echo "!!!!!!!!!!!!!!channels published !!!!!!!!!!!!!!!!!!"
delay_s 5
// turn led OFF, going to sleep
setChannel 37 0

// Deep sleep (shut down everything) and reboot automatically when in loop  mode
if $CH44==1 then PinDeepSleep 600

//////// if not in loop mode
clearAllHandlers

// blink the led
addRepeatingEvent 1 -1 setChannel 37 !$CH37

// stay in mantenance mode 5 mins and then go back to loop mode
addRepeatingEvent 600 -1 restart

//reboot if button pressed
addChangeHandler Channel43 == 0 backlog echo "exit maintenance mode"; restart


