Teardown and OpenBeken conversion of a Tuya CBU/BK7231N PIR motion sensor powered by three AAA batteries for cloud-free local use.
The CBU handles PIR reporting itself, then enters deep sleep and wakes only to send a WiFi status update when motion occurs.
Tuya mapping shows Button on P20, LED on P26, PIR on P16, battery relay on P17, and battery ADC on P23, with 3000/2200 mV limits.
Configured with DoorSensorWithDeepSleep and the battery driver, it works with Home Assistant Discovery and the LED lights immediately on motion detection.
DSEdge may need tuning for the PCB version, and the author notes static IP plus placing the sensor close to the router can improve battery life.
Generated by the language model.
I will present here the teardown, the principle of operation and the firmware change (in order to free it from the cloud and gain independence from the manufacturer's servers) of a cheap PIR sensor by Tuya, bought on one of the Polish shipping portals. Finally, I will provide its full configuration for OpenBeken, along with the template. Of course, we will configure the device to work with deep sleep and the PIR sensor will only wake it up when a movement is detected. This is essential for battery-powered gadgets with WiFi communication, otherwise battery would drain too fast.
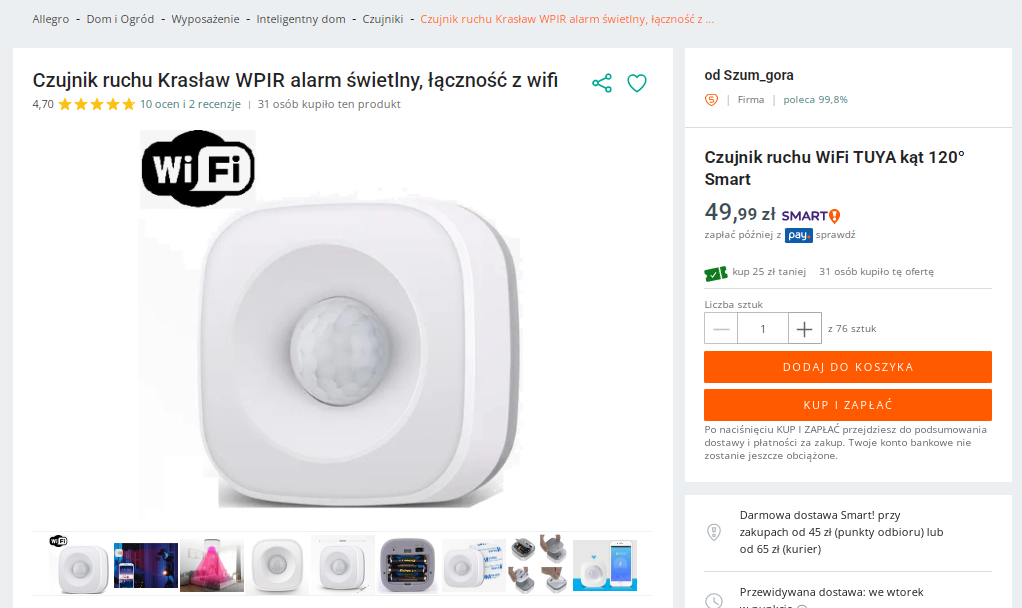
Sensor purchase The sensor was purchased by one of the users OpenBeken on a Polish auction site, with the intention of giving it to me so that I could change its firmware. Below are screenshots of the offer:
We paid only PLN 50 (about 12$), the shipment was free (in the package for regular customers of this portal).
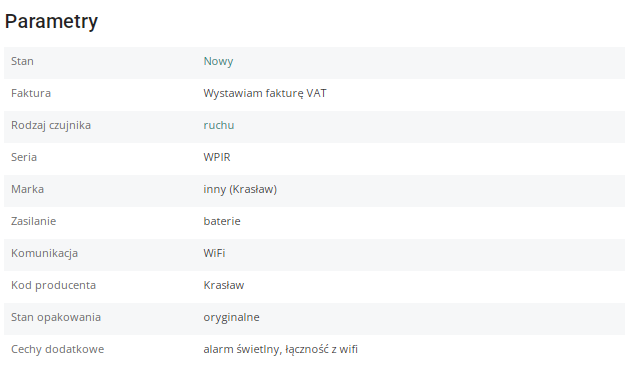
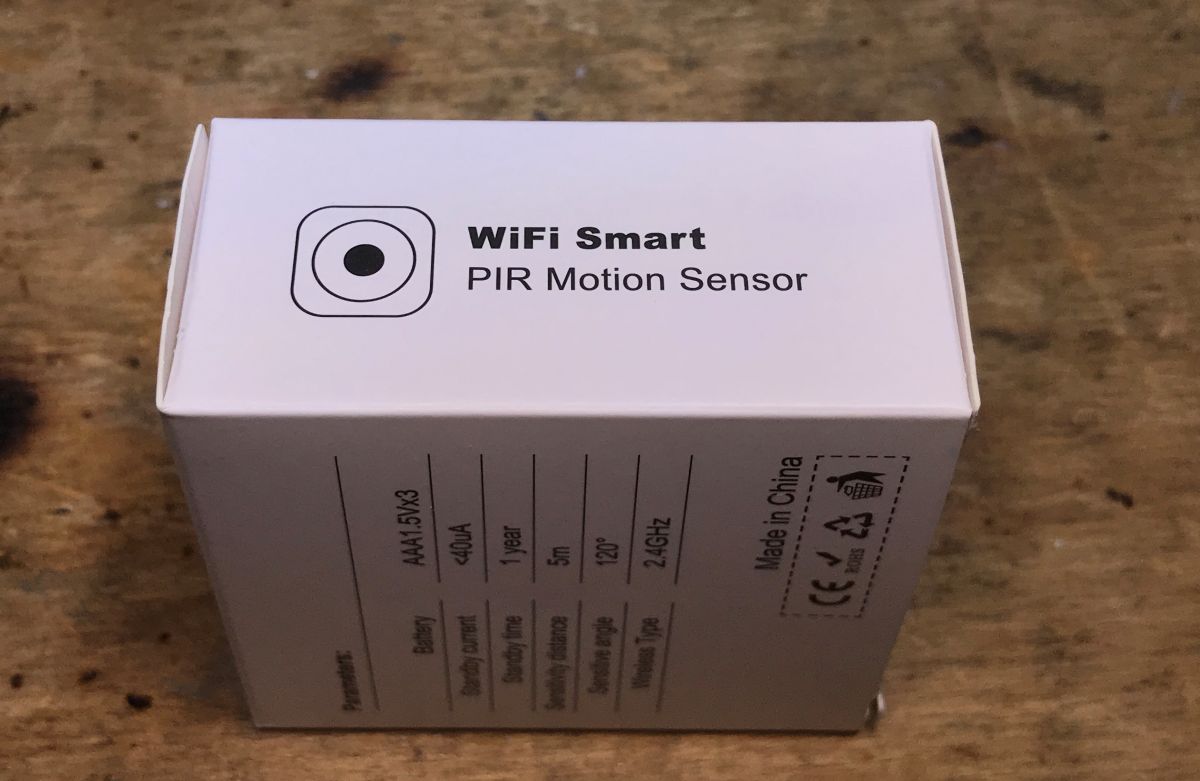
Parameters, no specifics here:
Only in the features can we read, for example, that the sensor "holds" presence detection for 30 seconds, or at what distance it can detect:
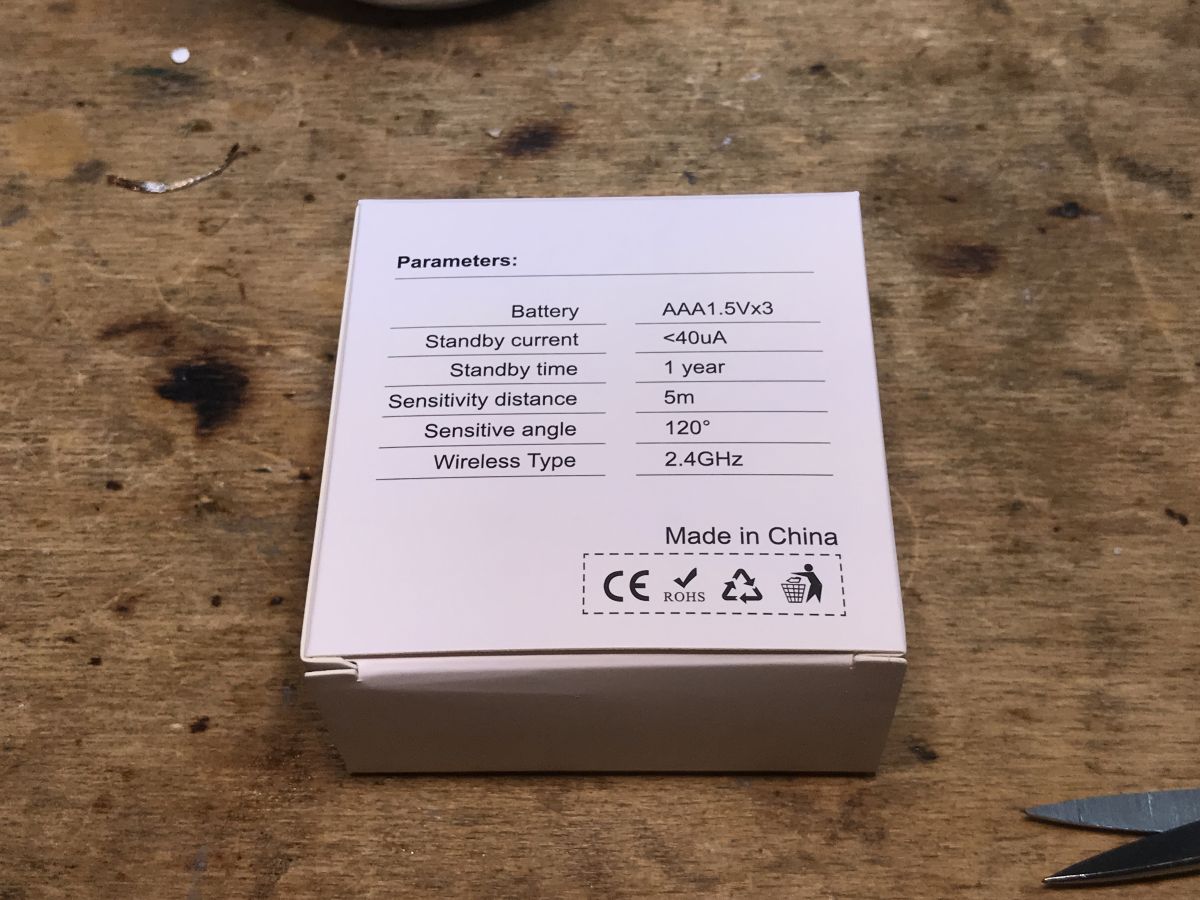
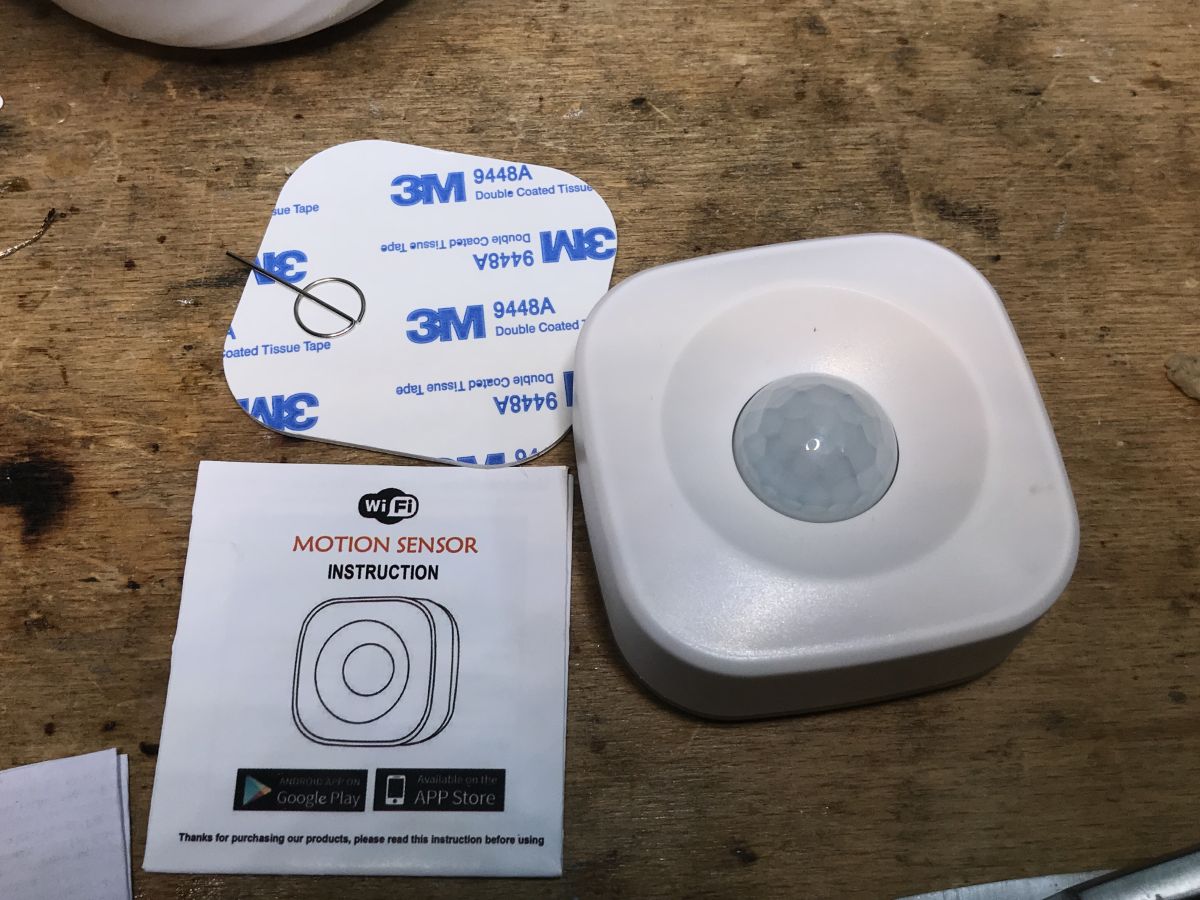
This sensor is powered by three AAA batteries (they are not included in the set, they must be purchased separately).
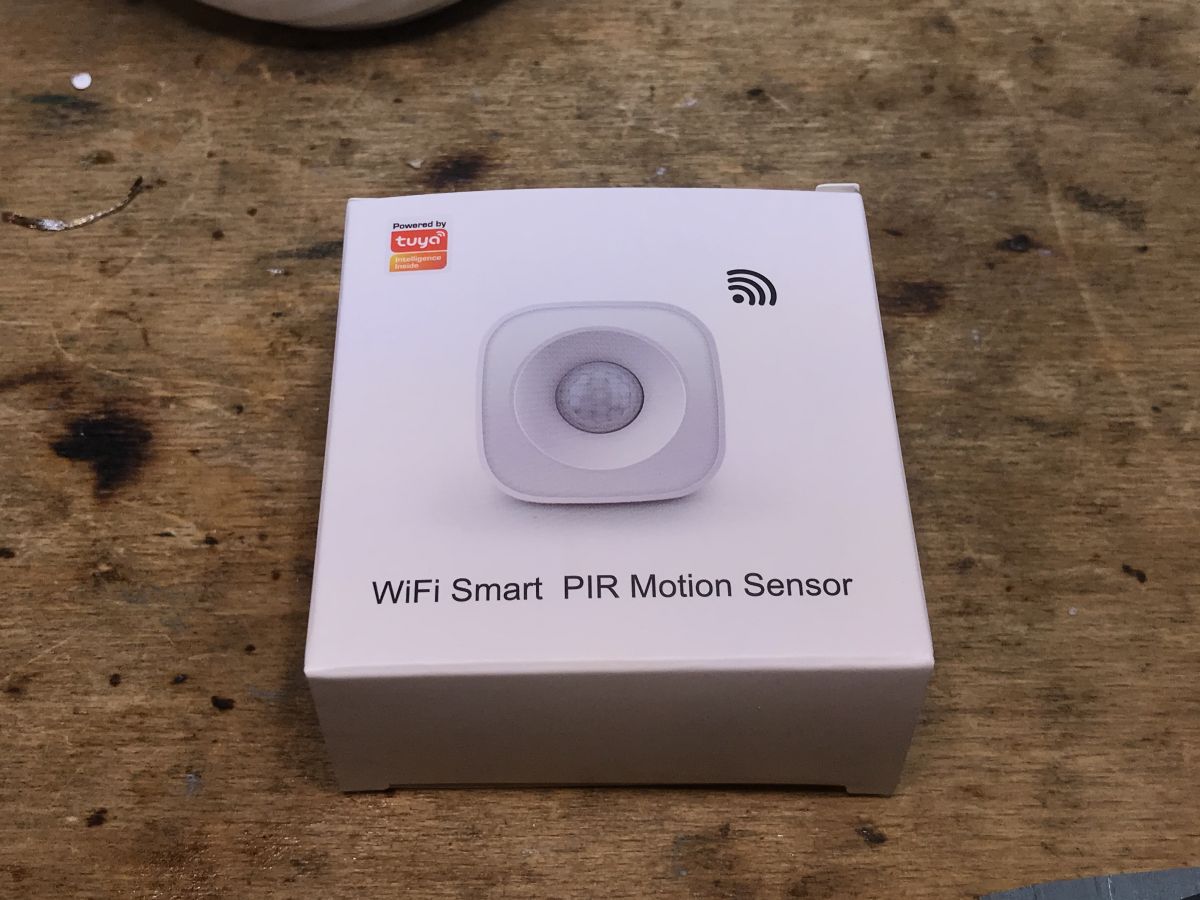
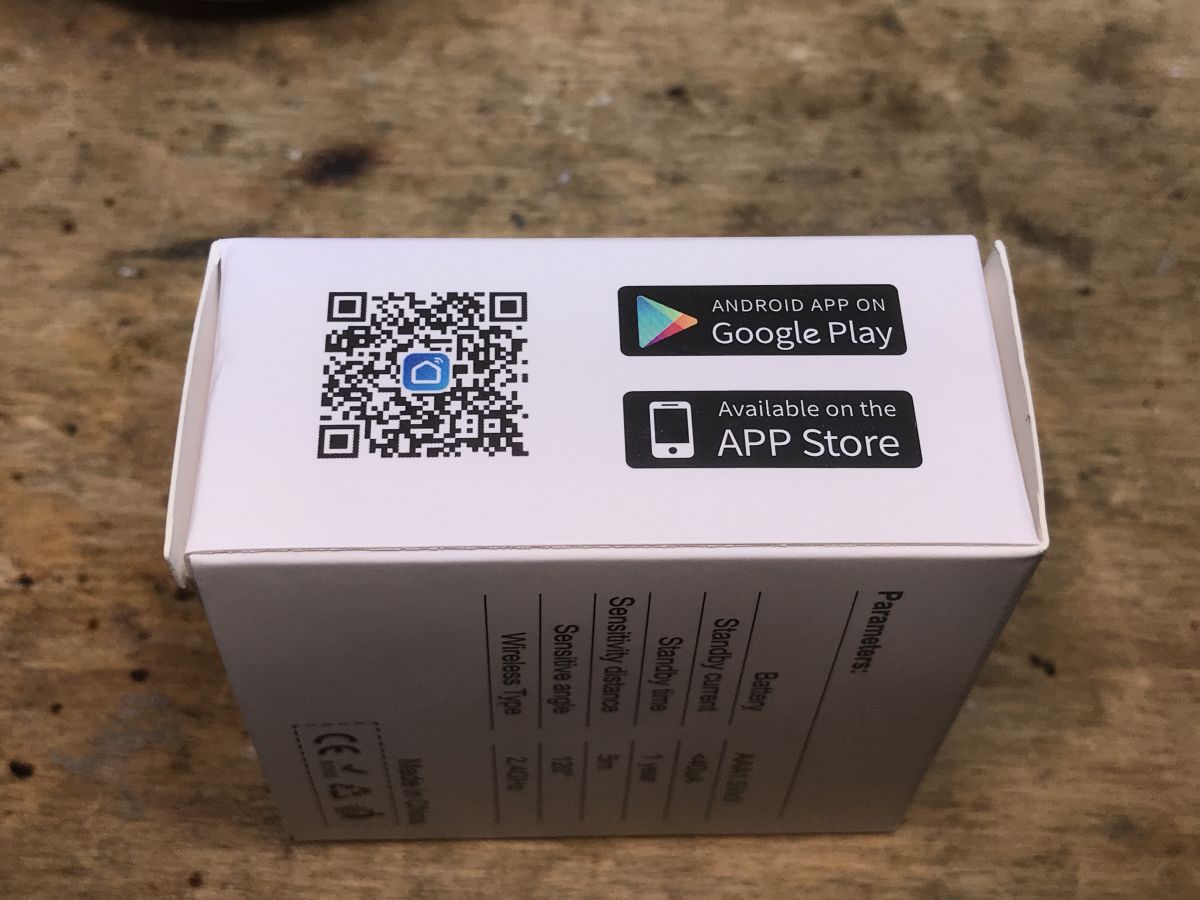
The packaging, unfortunately, does not have specific markings:
Here's what we got in the kit:
There is a tape and a reset key.
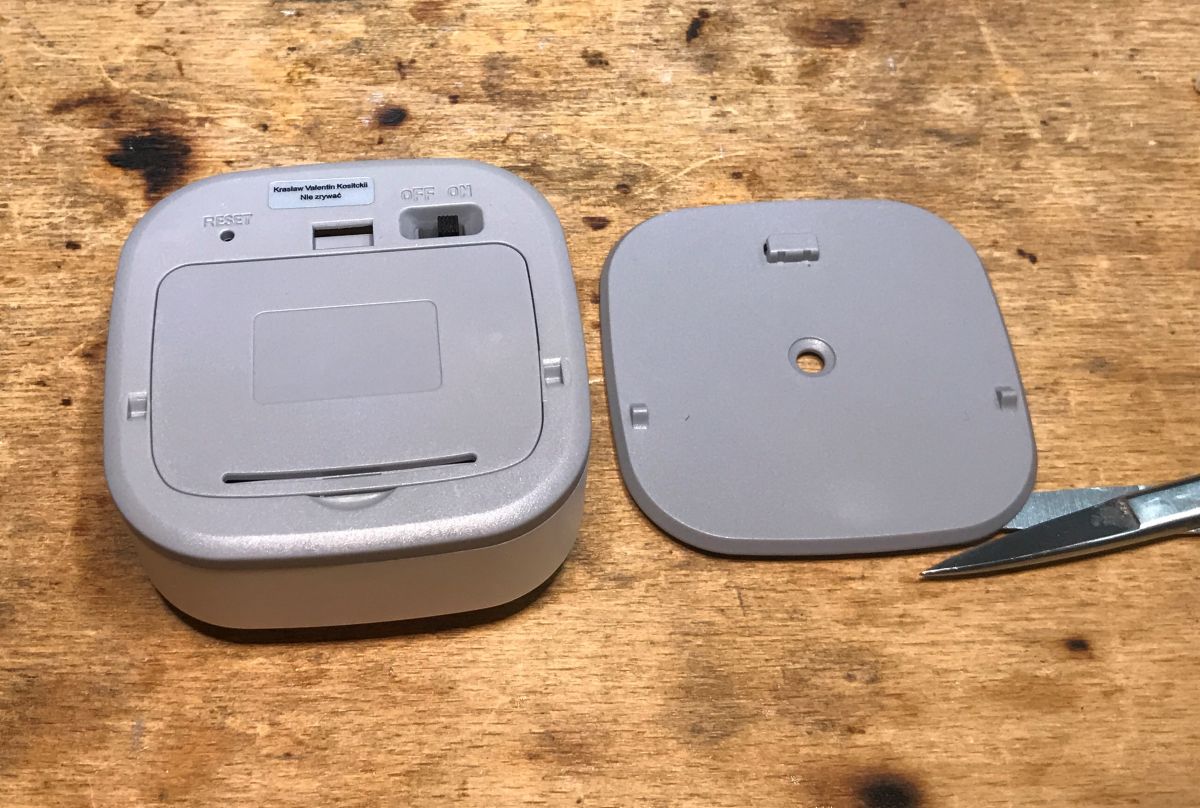
The product also has a hook to stick to the wall (this is the tape), and after removing it, we have access to the battery, the ON-OFF button and the reset button (i.e. pairing):
The teardown of the sensor Apparently the sensor has a warranty seal from the seller, but it is glued in such a way we don't have to remove it.
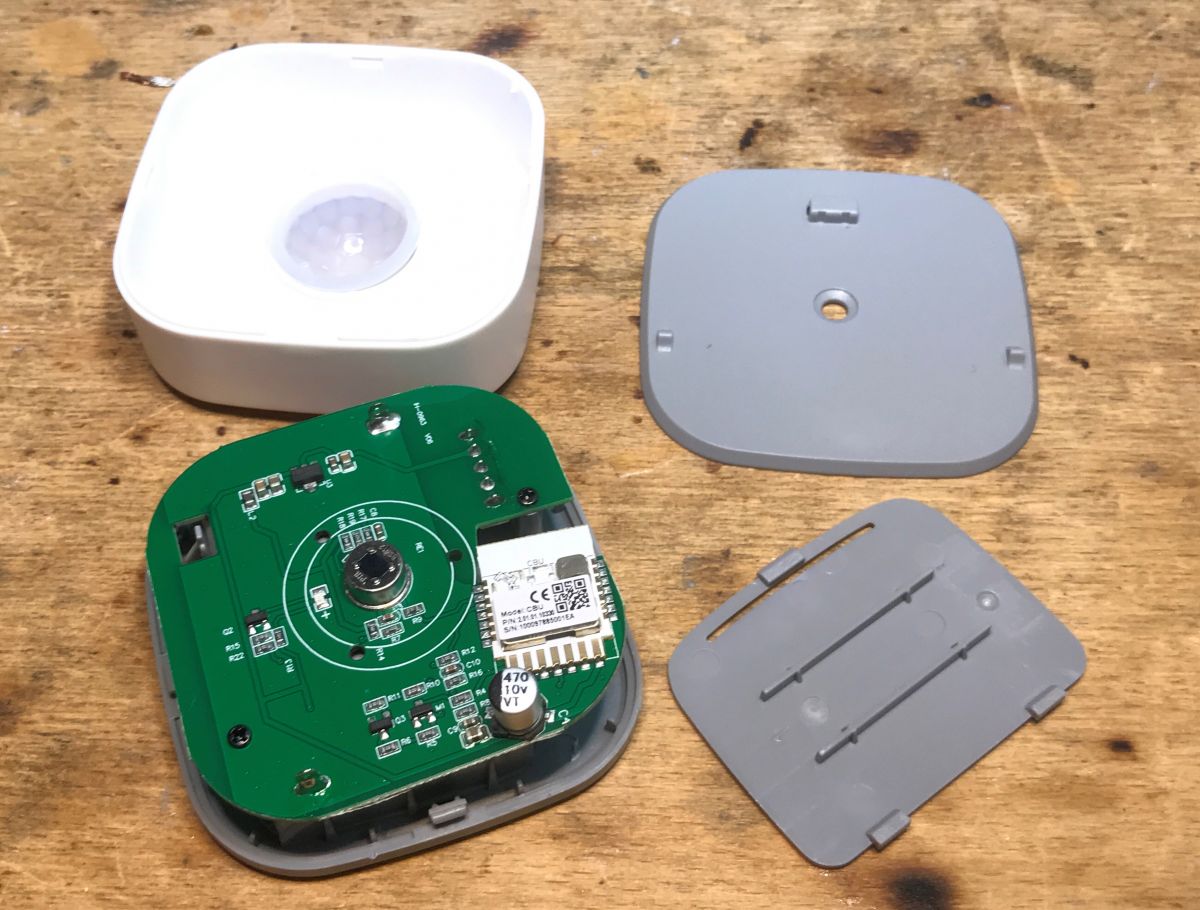
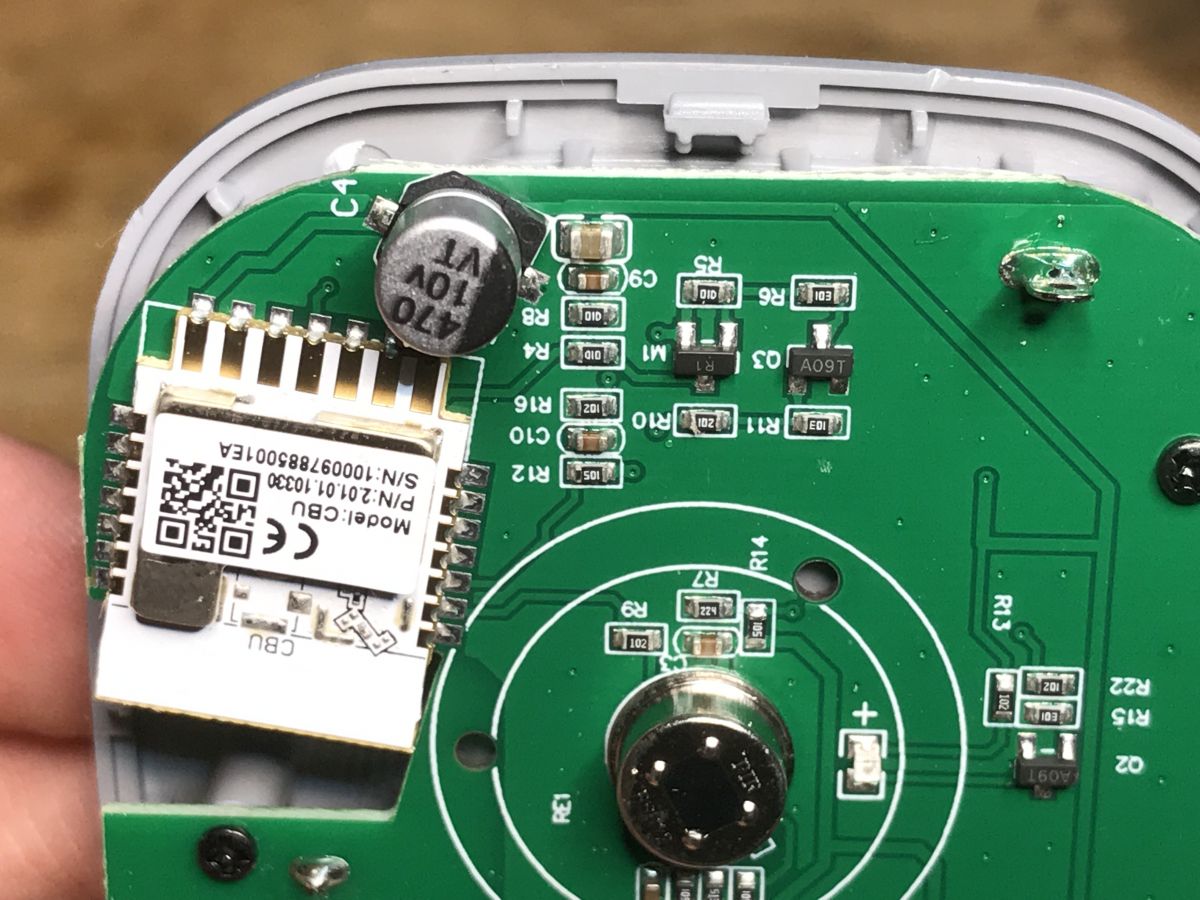
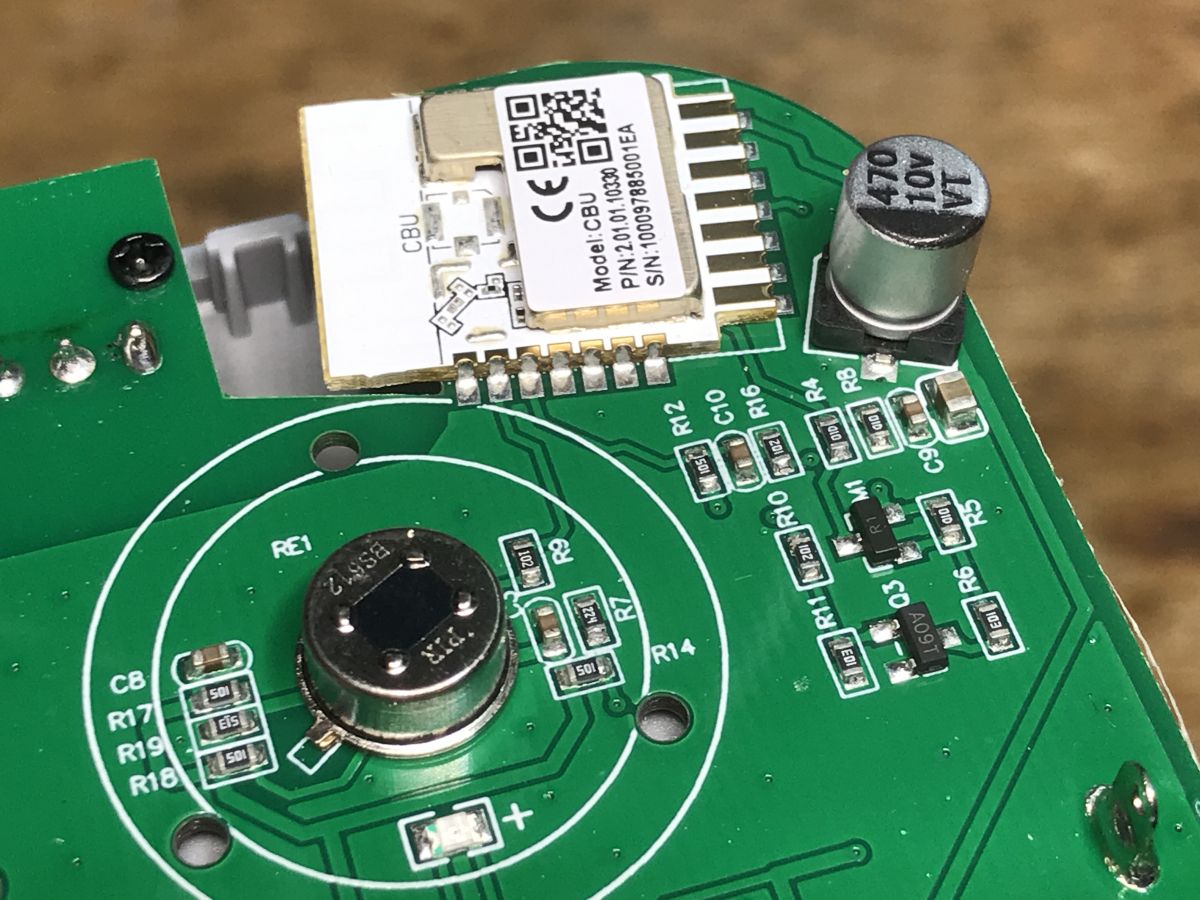
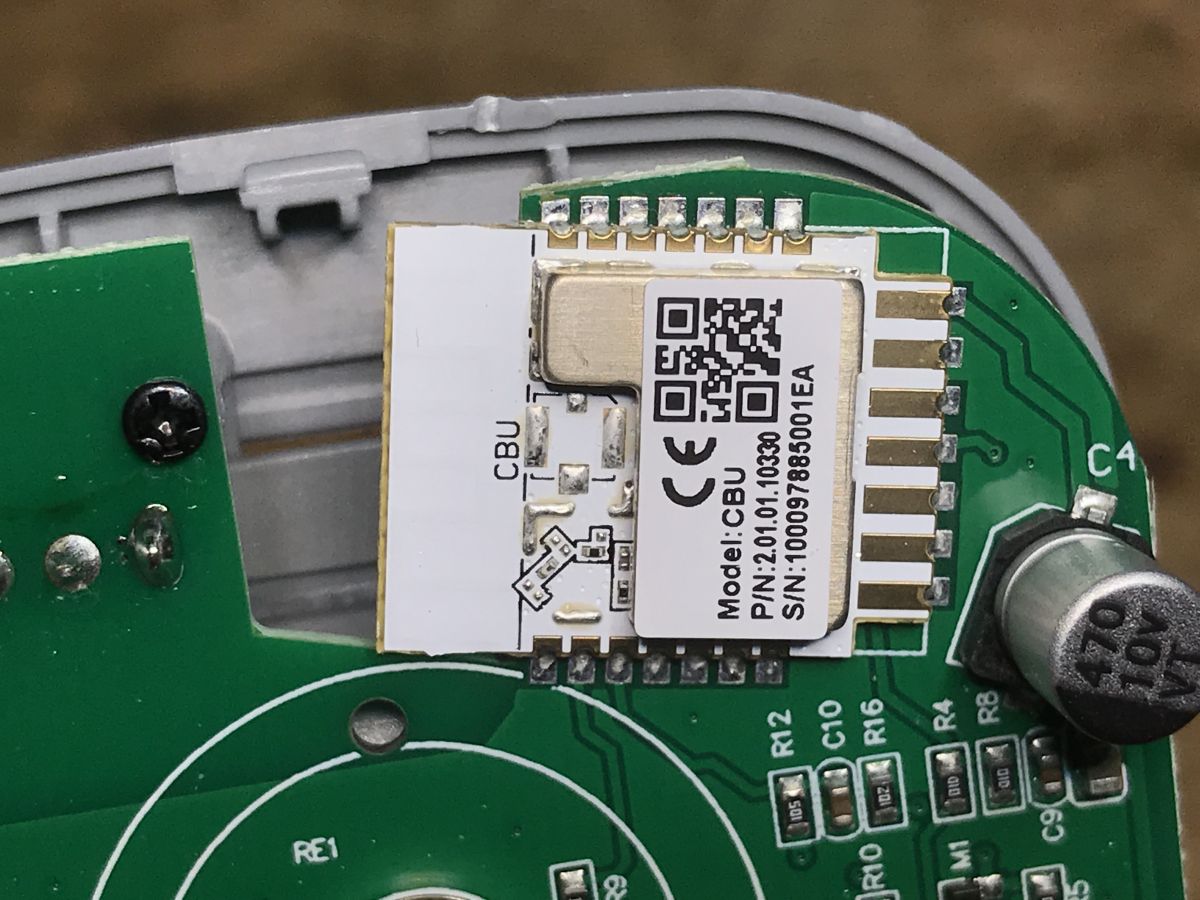
There is a module inside CBU , its documentation is on the Tuya website, a OpenBeken supports BK7231N.
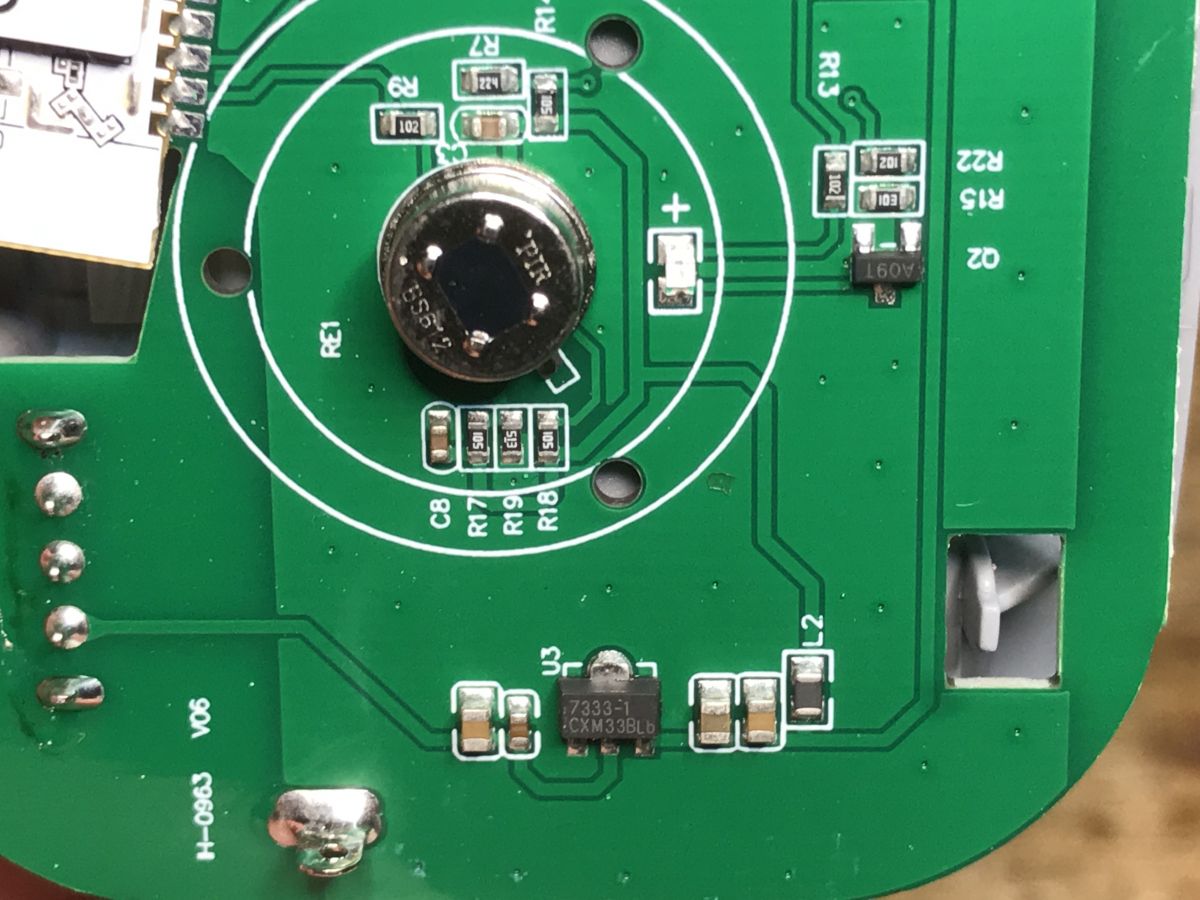
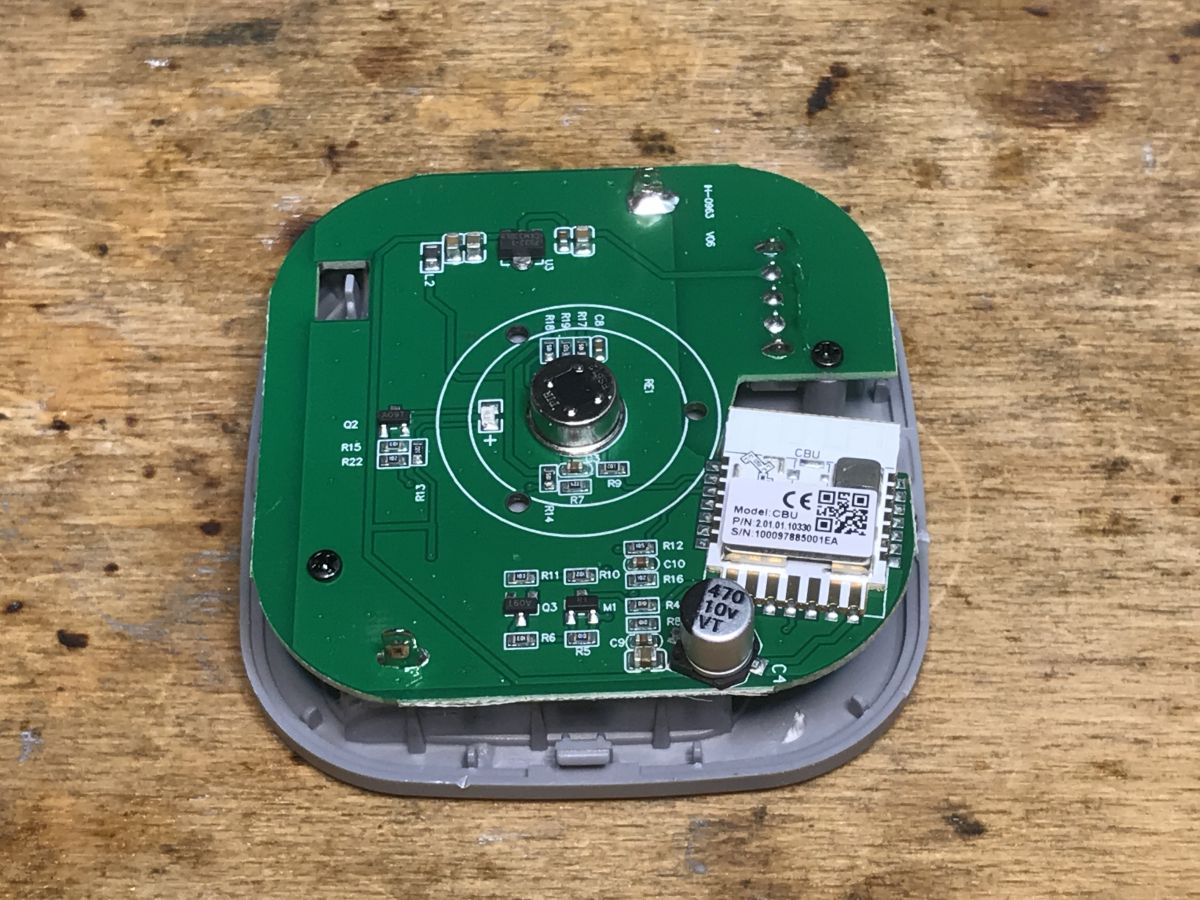
Let's take a look at the board:
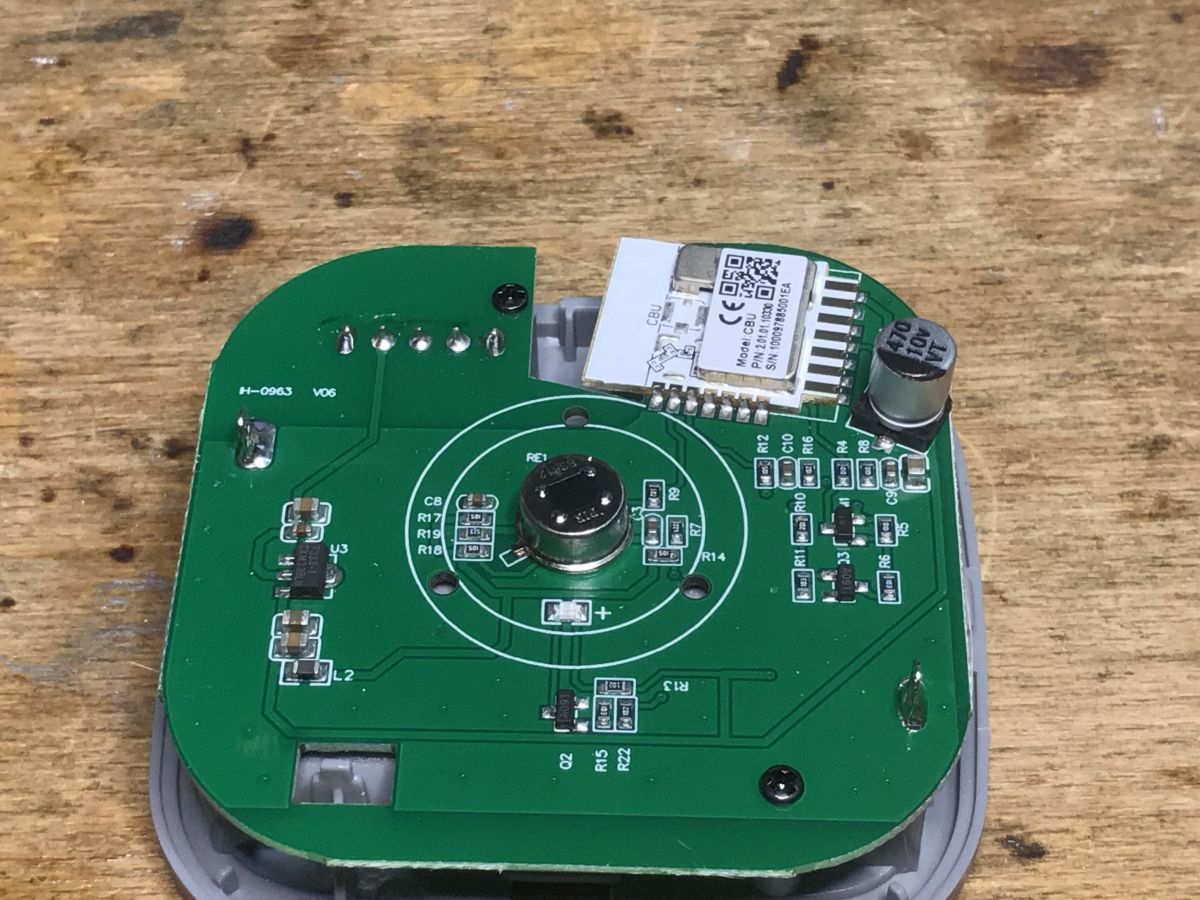
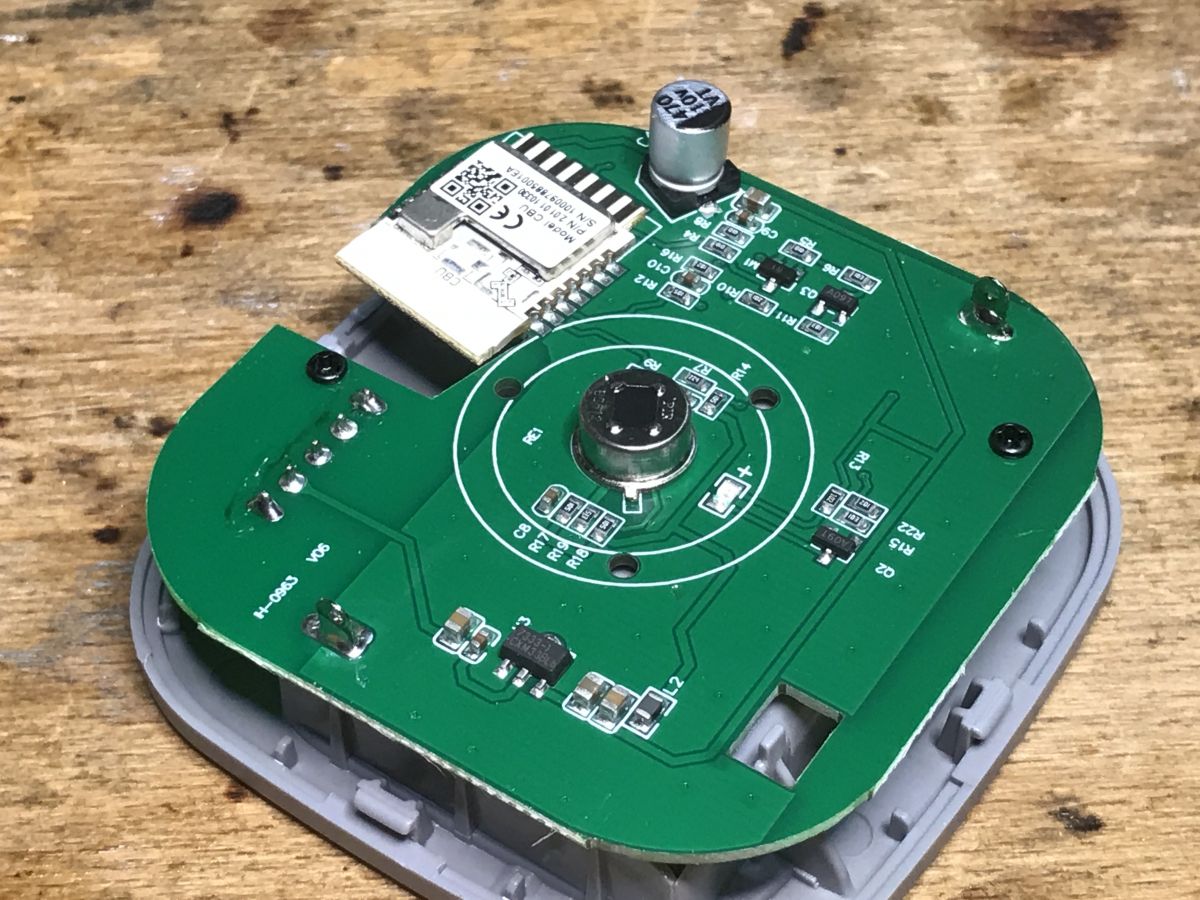
Not much happens on this board. The PIR sensor is typical, such as in popular modules for Arduino. My attention was caught by the U3 chip, i.e. 7333, 3.3V LDO regulator. I thought that there would be a slightly more efficient step down converter here, but no. All in all, it makes some sense, here there are three nominally 1.5V batteries, i.e. 4.5V in total, of course less and less with their discharge. Tuya battery powered products with converters instead of regulators are rather two batteries, then there is 3V, and the converter increases them to 3.3V.
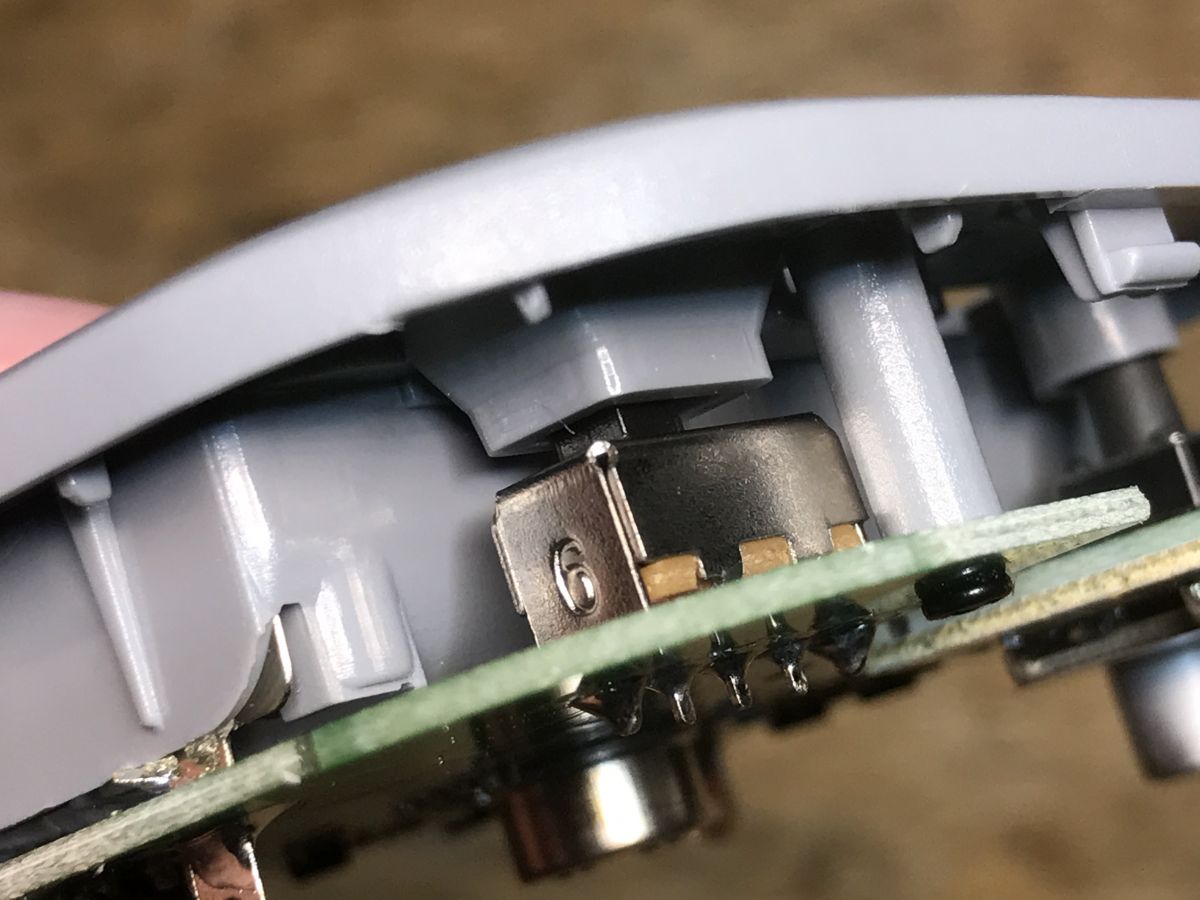
The on-off button allows you to turn off the sensor completely without removing the battery:
Transistors R1 and A09T, whose roles I have not analyzed:
CBU:
This device does not use TuyaMCU. There is no additional microcontroller here, nothing is blocking UART1 from the CBU. The CBU controls everything by itself and falls into a deep sleep when nothing happens. This device wakes up and connects to WiFi only when a status needs to be reported.
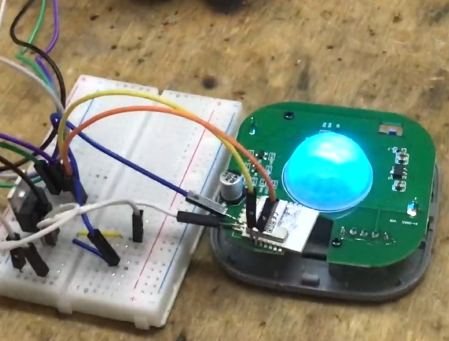
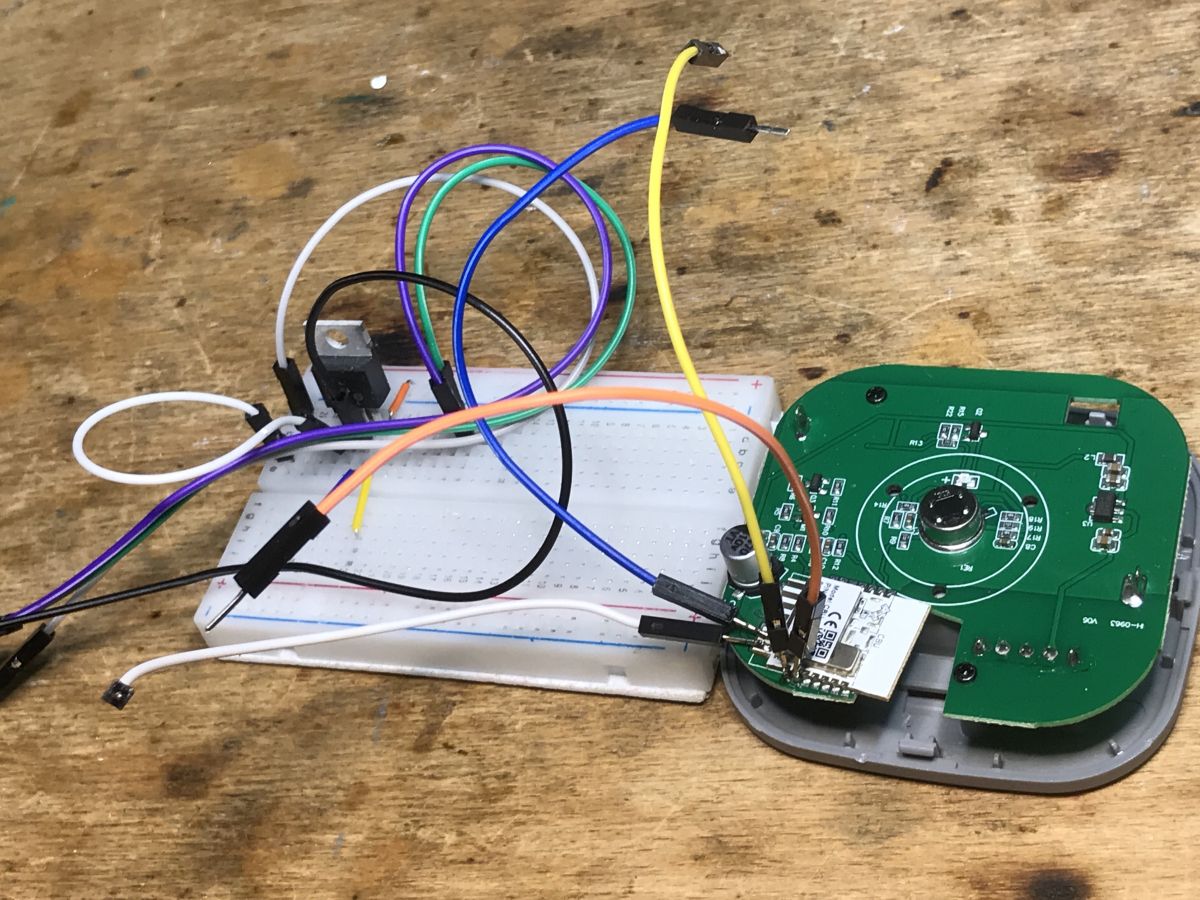
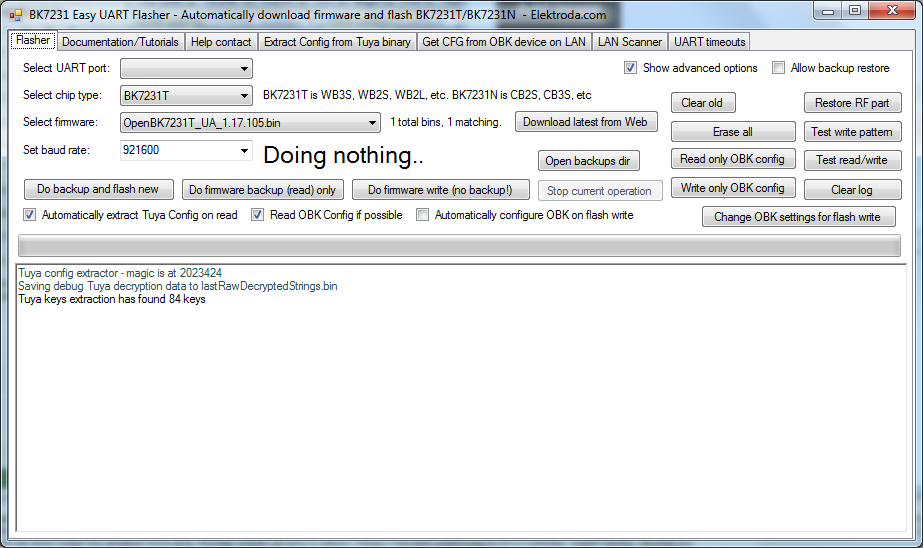
Programming, configuration We connect the common ground, RX and TX from the UART converter and possibly the power supply, start the flasher, and do the power cycle (off and on). Everything as described in our repo:
https://github.com/openshwprojects/BK7231GUIFlashTool The same process can be seen on our YT channel:
https://www.youtube.com/@elektrodacom Soldered wires:
Flasher in motion:
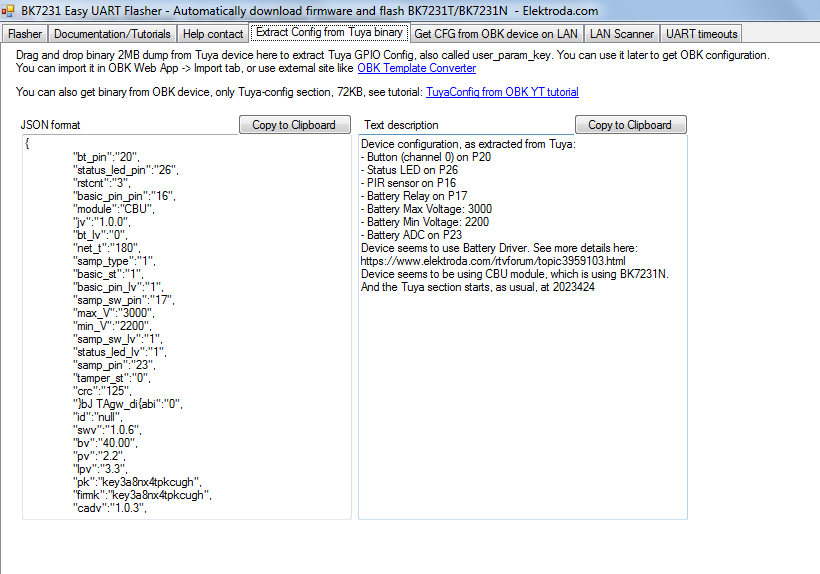
Flasher can also read Tuya configuration:
Here we have the JSON from Tuya, their device description format:
Device configuration, as extracted from Tuya:
- Button (channel 0) on P20
- Status LED on P26
- PIR sensor on P16
- Battery Relay on P17
- Battery Max Voltage: 3000
- Battery Min Voltage: 2200
- Battery ADC on P23
Device seems to use Battery Driver. See more details here: https://www.elektroda.com/rtvforum/topic3959103.html
Device seems to be using CBU module, which is using BK7231N.
And the Tuya section starts, as usual, at 2023424
Partially finished template in our JSON format:
Code: JSON
Log in, to see the code
Let's analyze what we've got here. First, there's the pairing button, Button, on the P20. There is a WiFi LED here on the P26. There is a PIR sensor on the P16. And we have a battery status control system, i.e. ADC + GPIO which turns on the resistor divider. These GPIOs are there to save energy and to make the resistor divider only let current when we make a measurement. Tuya also determines the maximum and minimum battery voltages, it is used for calculations.
There was already a topic about the battery controller here:
https://www.elektroda.com/rtvforum/topic3959103.html Now it's all about deep sleep. The WiFi module cannot work all the time, it would drain the batteries too quickly. To do this, we will use the deep sleep solution described here:
https://www.elektroda.com/rtvforum/topic3960149.html Also, check out this topic on deep sleep:
https://www.elektroda.pl/rtvforum/topic3972898.html https://www.elektroda.com/rtvforum/topic3972898.html In summary, here is what needs to be configured:
- set the Button role for the button to P20 to be able to wake the device from a deep sleep in an emergency - set the role of LED (or WiFi LED - at your discretion, or LED_n) to P26, select channel 1 there
- set the role of DoorSensorWithDeepSleep for P16, because we will use the door sensor driver to report movement, also set channel 1
- additionally, depending on which PCB version you have, you may need to configure DSEdge to select the type of edge that wakes up the sensor (rising, falling, or respectively increasing when the system goes to sleep with a low state on the sensor or falling when the system goes to sleep with a high state on sensor)
- configure the battery driver, as in the previously linked topic
After that, you can perform Home Assistant Discovery to connect the device to the HA:
https://www.youtube.com/watch?v=pkcspey25V4
Summary That was a success - another device freed from the cloud and from the manufacturer's servers. In addition, once again we managed to encounter something using a battery controller based on the ADC input and the digital GPIO output, where the digital GPIO turns on the resistor voltage divider only for the time of measurement. I have seen it several times in this type of products, also in the case of a door sensor.
As for the configuration of the device itself, it is worth noting that it could also be handled "manually", through the OpenBeken script, simply by entering a simple loop with IF and GoTo, which will put it to sleep using the PinDeepSleep command when there are no changes on the sensor for while.
Here the question arises whether we want the device to "sleep" only when there is no movement (and it was "wake up" until the PIR reports the presence of movement), or to "fall asleep" in both states. When using the driver, DoorSensor falls asleep in both states. This is probably better in terms of battery life.
It is worth adding that in OBK such a device can control others even without Home Assistant - just script the SendGET command and, for example, send a new state for the light switch via IP.
That's probably it, at the end I'll just remind you that a static IP and placing the device close to the router will also extend the battery life to some extent.
Does any of the readers use this type of PIR sensors? And if so, is it in the "cloud" version related to the manufacturer's servers, or maybe in a fully local version?
About Author
p.kaczmarek2 wrote 14637 posts with
rating 12649 , helped 655 times.
Been with us since 2014 year.
Hello,
I have the same sensor and I was able to flash it with OpenBK after using the cloudcutter tool.
Everything seems to be working using the provided configuration, I just had to put the PIR sensor... [Read more]
p.kaczmarek2
15 Aug 2023 13:13
LED could be very easily scripted to behave as you wish. For example, you can put LED on channel 4 (or any other one), and then in autoexec.bat do:
// turn on LED
setChannel 4 1
// schedule an event,... [Read more]
pippo_franco
15 Aug 2023 16:24
Thanks, I will try with the script as suggested and see if it works. If I properly understood, that script is going to turn on the LED as soon as the device is turnt on, and not when the PIR detects a... [Read more]
p.kaczmarek2
15 Aug 2023 17:23
You are correct. If you want to link LED behaviour to PIR channel, you should do smth like that:
// set channel to 1 and after 2 seconds set it to 0
// NOTE: addRepeatingEvent [RepeatTime]... [Read more]
pippo_franco
16 Aug 2023 11:02
Thanks a lot for the quick feedback, I’ll try with the provided script and let you know if I have further questions.
Regarding the SendGet approach, if I properly understood it means that I will need... [Read more]
p.kaczmarek2
16 Aug 2023 11:11
Well, you could certainly call HA API that way, but I was thinking about using SendGet directed towards a lamp IP and sending a Tasmota-style cm interface POWER ON call. That way PIR communicates directly... [Read more]
pippo_franco
16 Aug 2023 14:11
Got it, thanks. The lamp is actually controlled using a Shelly 1 with the original firmware and connected to HA, that’s why I would prefer to have it controlled with an automation in HA. I’ll try to do... [Read more]
lambuzz
20 Feb 2024 17:49
Hello,
I have the same sensor. I was able to flash it with OpenBK with Tuya cloudcutter. Everything seems to be working until I provided my SSID and password info in the configuration. After, it restarted... [Read more]
p.kaczmarek2
20 Feb 2024 17:56
So you already accessed OBK on the OBK config page?
Well, then try to enter safe mode:
https://obrazki.elektroda.pl/1935619000_1708448192_thumb.jpg
https://github.com/openshwprojects/OpenBK... [Read more]
lambuzz
20 Feb 2024 18:13
I was able to access OBK config page.
I did the 5 quick power on/off on both device but nothing happened. I tried multiple times [Read more]
p.kaczmarek2
20 Feb 2024 19:04
Have you already entered a deep sleep command for that device? Maybe it's asleep? [Read more]
lambuzz
20 Feb 2024 19:28
The only thing I updated once I flashed OBK is in the wifi settings. I added the SSID and password and I clicked on Submit. This made me confirmed I entered the correct information. and then it turned... [Read more]
p.kaczmarek2
20 Feb 2024 19:42
The safe mode really should work. It's designed in such a way that even if the AP connect crashes, safe mode will still kick in.
Anyway, can you connect USB to UART converter to get log from TX2? [Read more]
lambuzz
21 Feb 2024 16:42
Tried again to enter safe mode on both devices, nothing happened.
unfortunately, I don't have UART connector [Read more]
p.kaczmarek2
04 Mar 2024 18:02
Is your device the same as the one in the first post? Maybe your device is TuyaMCU based. That could complicate things. TuyaMCU battery powered devices have MCU controlling the power of WiFi module, so... [Read more]
lambuzz
07 Mar 2024 14:48
This is the same device. I bought a new one and tried again. This time it worked and I think I understand what happened with the first two devices. I did not configure the devices and the buttons, LED... [Read more]
p.kaczmarek2
22 Mar 2024 09:24
This should never break BK7231 device, unless you enter a deep sleep command with a large delay and get BK7231 sleeping on power from a capacitor. Still, even there, if should just turn off and be flashable... [Read more]
DeDaMrAz
24 Aug 2024 16:04
This will provide basic functionality and can be further tweaked to preserve battery.
//safe mode 20 is the pin number where your switch is
addEventHandler OnHold 20 SafeMode 5
// wait for wifi... [Read more]
p.kaczmarek2
13 Oct 2024 22:06
For a non-debug version, delay_s 15 should be removed and PinDeepSleep enabled (remove comment). Or at least.... we need to add a mechanism to run PinDeepSleep only if a pairing button is not pressed (so... [Read more]
FAQ
TL;DR: For battery-powered Tuya PIR owners, this FAQ shows how to flash a BK7231N/CBU sensor bought for PLN 50 and keep deep sleep working. "The CBU controls everything by itself," so correct pin roles, separate channels, and battery setup are the keys to local OpenBeken operation with motion wake-up. [#20648488]
Why it matters: A Wi-Fi PIR that sleeps correctly can run locally, report motion on demand, and avoid the battery drain that comes from leaving radio and ADC logic active all the time.
Option
Hardware control path
Deep sleep behavior
Main risk or trade-off
CBU-only BK7231N sensor
CBU module controls PIR, LED, ADC, and battery relay directly
Wakes only to report status over Wi-Fi
Slower wake-to-report than stock firmware in one user test
TuyaMCU-based PIR sensor
External MCU can control Wi-Fi module power
May shut Wi-Fi off before OpenBK AP is usable
Harder recovery and troubleshooting
MQTT via Home Assistant
Sensor wakes, joins Wi-Fi, then MQTT
Flexible automation
Adds connect time before action
Direct SendGet to lamp
Sensor wakes, joins Wi-Fi, then HTTP GET
Can act without HA online
Still depends on Wi-Fi association
Key insight: The most important fix is to separate the PIR function from battery measurement logic. One user found deep sleep never triggered until the PIR input and battery ADC/relay stopped sharing the same channel. [#20694211]
Quick Facts
The sensor in the thread used 3×AAA batteries, a 3.3 V 7333 LDO, and a Tuya CBU module built around BK7231N. [#20648488]
The extracted Tuya configuration mapped P20 button, P16 PIR, P26 status LED, P17 battery relay, and P23 battery ADC. [#20648488]
The original sale listing claimed roughly 30 s presence hold time and a purchase price of PLN 50 with free shipping in that order. [#20648488]
One user measured about 5 s to join Wi‑Fi plus 2–3 s for MQTT, giving a total motion update delay near 7–8 s with OpenBK. [#20694430]
1. How do I flash the Tuya Krasław 120° PIR motion sensor with OpenBeken on a CBU/BK7231N module and keep deep sleep working on battery power?
Flash it over UART, then configure deep-sleep roles before daily use. 1. Connect GND, RX, and TX from a UART adapter, power-cycle the sensor, and flash OpenBeken with the BK7231 GUI flasher. 2. Assign P20 as Button, P16 as DoorSensorWithDeepSleep, P26 as LED, P17 as BAT_Relay, and P23 as BAT_ADC. 3. Set the wake edge correctly and keep battery measurement on its own channel so sleep is not retriggered by ADC updates. The thread’s sensor used a CBU module with BK7231N and three AAA cells. [#20648488]
2. What is the CBU module in Tuya devices, and how does it relate to the BK7231N chip used by OpenBeken?
"CBU" is a Tuya Wi‑Fi module that integrates the radio and control logic, and in this sensor it uses a BK7231N SoC that OpenBeken supports directly. In the teardown, the CBU handled the PIR, LED, battery ADC, and sleep logic without a second MCU. That is why the author could flash OpenBeken and use UART1 directly, with no TuyaMCU layer blocking control. [#20648488]
3. What is TuyaMCU, and how is a TuyaMCU-based PIR sensor different from a CBU-only sensor when flashing or troubleshooting OpenBK?
"TuyaMCU" is an extra microcontroller layer that manages the main Wi‑Fi chip, often including power control, serial messaging, and device logic. A CBU-only PIR lets BK7231N control everything itself. A TuyaMCU PIR can cut power to the Wi‑Fi module unexpectedly, which complicates flashing, AP access, and recovery. In the thread, a later backup was identified as TuyaMCU-based for exactly that reason. [#20990161]
4. Why does this Tuya PIR sensor use an ADC pin plus a GPIO-controlled battery relay for battery measurement, and how should that be configured in OpenBeken?
It uses a switched resistor divider to save battery power. The ADC reads voltage on P23, while a GPIO on P17 enables the divider only during measurement. That prevents constant bleed current from the battery pack. The extracted Tuya configuration showed max_V 3000 and min_V 2200 for the battery driver, and the author said this ADC-plus-GPIO pattern appears in several battery Tuya devices. [#20648488]
5. Which OpenBeken pin roles and channels should be assigned for the button, PIR input, LED, battery ADC, and battery relay on this PIR sensor?
Use P20 for Button, P16 for DoorSensorWithDeepSleep, P26 for LED, P17 for BAT_Relay, and P23 for BAT_ADC. The author recommended channel 1 for the LED and PIR path, while the battery driver should stay separate so ADC updates do not interfere with motion logic. The extracted template named the device a generic PIR sensor with deep sleep on BK7231N/CBU. [#20648488]
6. Why does deep sleep fail if the PIR sensor and battery ADC/relay are placed on the same channel in OpenBK, and how should the channels be separated?
Deep sleep can fail because each battery update restarts the same channel activity that the sleep logic watches. One user reported that sleep never triggered until the PIR sensor and the battery ADC/relay were moved to different channels. Keep the PIR on its motion channel and place battery measurement on separate battery-specific roles and channels. That isolates motion events from periodic voltage reporting. [#20694211]
7. How can I change the LED behavior in OpenBeken so the PIR sensor LED only blinks briefly on motion instead of staying on while motion is present?
Use an alias plus a change handler, not a direct LED-to-PIR bind. The maintainer suggested putting the LED on channel 4, then creating an alias that sets channel 4 to 1 and schedules setChannel 4 0 after 2 seconds. Next, trigger that alias with addChangeHandler Channel1 == 1 blinky. That makes the LED blink briefly on motion instead of staying on while PIR remains active. [#20694518]
8. What are the best ways to reduce wake-up latency on a battery-powered OpenBK PIR sensor, including static IP, quick connect, and MQTT timing?
Set a static IP, enable quick connect, and minimize the time spent waiting for MQTT. In the thread, one user still saw about 5 seconds to join Wi‑Fi and 2–3 more seconds for MQTT, even with static IP and quick connect enabled. The author also noted that placing the device close to the router can help battery life, and direct local control can avoid waiting for Home Assistant logic after the network comes up. [#20694430]
9. How does controlling a lamp with OpenBeken SendGet compare with using Home Assistant automation over MQTT for a PIR motion sensor?
SendGet can react faster after Wi‑Fi comes up because it talks directly to the target device. The maintainer suggested sending a Tasmota-style cm?cmnd=Power0 ON request to a lamp IP, which also works if Home Assistant is offline. MQTT through Home Assistant is more flexible, but it adds broker connection time and automation delay. In the reported case, MQTT connection followed Wi‑Fi by another 2–3 seconds. [#20695354]
10. What is DSEdge in OpenBeken, and how do I choose the correct wake-up edge for a PIR sensor that uses PinDeepSleep?
"DSEdge" is an OpenBeken deep-sleep wake setting that selects which GPIO edge or state change wakes the chip from sleep. Use it to match your board’s idle and active PIR levels. The original guide says some PCB versions need rising-edge wake and others need falling-edge wake, depending on whether the sensor sleeps with a low or high PIR state. A later script example used DSEdge 2 to wake on any state change. [#20648488]
11. How do I use SendGet in an OpenBeken script to trigger another local device, such as a Tasmota or OBK-controlled light, right after motion is detected?
Wait for Wi‑Fi, send the GET request, then keep the device awake long enough for the request to leave. The maintainer showed a script that waits for WiFiState 4, sends SendGet http://192.168.0.112/cm?cmnd=Power0%20ON, then delays 3 seconds. He also noted you can target another OBK device and trigger an alias there. This approach is local and does not require Home Assistant to be online. [#20695354]
12. Why might a flashed BK7231N PIR sensor appear bricked after entering Wi-Fi credentials, and what recovery steps should I try before reflashing?
It may not be bricked at all; it may be asleep, misconfigured, or shutting down before you can see activity. First try safe mode. If that fails, connect a USB-to-UART adapter and read debug output from TX2. The maintainer also warned that a true TuyaMCU variant can power off the Wi‑Fi module unexpectedly, which changes the diagnosis. One user later recovered by starting over and configuring device roles correctly. [#20990161]
13. What does OpenBeken safe mode do, and how do I enter safe mode on a battery-powered PIR sensor if normal boot no longer works?
Safe mode is a recovery boot path that bypasses problematic runtime behavior so you can reconfigure the device. In the thread, the maintainer pointed to OpenBeken safe mode and said it should work even if AP connect crashes. He also shared a script-based emergency method: addEventHandler OnHold 20 SafeMode 5, using the button on pin 20. If the device still never appears, capture TX2 logs over UART. [#20970703]
14. Why do commands like "waitFor WiFiState 4" or "waitFor MQTTState 1" return "Invalid command" in an OpenBeken script, and what should I use instead?
Your build is rejecting those commands, so use a simpler timing-based script first. In the thread, the user got Invalid command for both waitFor WiFiState 4 and waitFor MQTTState 1. The maintainer then advised enabling delay_s 15 for testing, or even 30 seconds, and keeping a short delay because publishChannel is non-blocking and MQTT publish needs time to finish. [#21305120]
15. How can I tell whether a Tuya PIR backup belongs to a TuyaMCU-based device that may shut off the Wi-Fi module before the OpenBK AP becomes usable?
Check whether the backup looks like a Tuya datapoint schema instead of a simple CBU pin map. In the thread, a backup showing schemaId, services, and datapoints such as pir_state, battery_percentage, pir_sensitivity, and pir_time was identified as a TuyaMCU device. The warning was clear: the MCU may turn Wi‑Fi off before you can use the OpenBK AP, even though flashing seemed successful. [#21655096]


Comments
Hello, I have the same sensor and I was able to flash it with OpenBK after using the cloudcutter tool. Everything seems to be working using the provided configuration, I just had to put the PIR sensor... [Read more]
LED could be very easily scripted to behave as you wish. For example, you can put LED on channel 4 (or any other one), and then in autoexec.bat do: // turn on LED setChannel 4 1 // schedule an event,... [Read more]
Thanks, I will try with the script as suggested and see if it works. If I properly understood, that script is going to turn on the LED as soon as the device is turnt on, and not when the PIR detects a... [Read more]
You are correct. If you want to link LED behaviour to PIR channel, you should do smth like that: // set channel to 1 and after 2 seconds set it to 0 // NOTE: addRepeatingEvent [RepeatTime]... [Read more]
Thanks a lot for the quick feedback, I’ll try with the provided script and let you know if I have further questions. Regarding the SendGet approach, if I properly understood it means that I will need... [Read more]
Well, you could certainly call HA API that way, but I was thinking about using SendGet directed towards a lamp IP and sending a Tasmota-style cm interface POWER ON call. That way PIR communicates directly... [Read more]
Got it, thanks. The lamp is actually controlled using a Shelly 1 with the original firmware and connected to HA, that’s why I would prefer to have it controlled with an automation in HA. I’ll try to do... [Read more]
Hello, I have the same sensor. I was able to flash it with OpenBK with Tuya cloudcutter. Everything seems to be working until I provided my SSID and password info in the configuration. After, it restarted... [Read more]
So you already accessed OBK on the OBK config page? Well, then try to enter safe mode: https://obrazki.elektroda.pl/1935619000_1708448192_thumb.jpg https://github.com/openshwprojects/OpenBK... [Read more]
I was able to access OBK config page. I did the 5 quick power on/off on both device but nothing happened. I tried multiple times [Read more]
Have you already entered a deep sleep command for that device? Maybe it's asleep? [Read more]
The only thing I updated once I flashed OBK is in the wifi settings. I added the SSID and password and I clicked on Submit. This made me confirmed I entered the correct information. and then it turned... [Read more]
The safe mode really should work. It's designed in such a way that even if the AP connect crashes, safe mode will still kick in. Anyway, can you connect USB to UART converter to get log from TX2? [Read more]
Tried again to enter safe mode on both devices, nothing happened. unfortunately, I don't have UART connector [Read more]
Is your device the same as the one in the first post? Maybe your device is TuyaMCU based. That could complicate things. TuyaMCU battery powered devices have MCU controlling the power of WiFi module, so... [Read more]
This is the same device. I bought a new one and tried again. This time it worked and I think I understand what happened with the first two devices. I did not configure the devices and the buttons, LED... [Read more]
This should never break BK7231 device, unless you enter a deep sleep command with a large delay and get BK7231 sleeping on power from a capacitor. Still, even there, if should just turn off and be flashable... [Read more]
This will provide basic functionality and can be further tweaked to preserve battery. //safe mode 20 is the pin number where your switch is addEventHandler OnHold 20 SafeMode 5 // wait for wifi... [Read more]
For a non-debug version, delay_s 15 should be removed and PinDeepSleep enabled (remove comment). Or at least.... we need to add a mechanism to run PinDeepSleep only if a pairing button is not pressed (so... [Read more]