Elektroda.com
Elektroda.com
X

Door/window sensor without TuyaMCU - deep sleep and energy saving, OpenBeken

p.kaczmarek2 4185 31
This content has been translated flag-pl » flag-en View the original version here.
  • Door/window sensor without TuyaMCU - deep sleep and energy saving, OpenBeken
    I will show here the configuration and operation of the window / door opening sensor in OpenBeken , realized without TuyaMCU, i.e. based on the deep sleep of the WiFi module. The sensor implemented in this way connects to WiFi only when you need to send a state change to the MQTT server, otherwise it "falls asleep" and disconnects from the network, entering a state of very low power consumption. Only events on the pins, i.e. pressing the configuration button or changing the state of the door/window, can wake it up from this state.

    Configuration in OpenBeken
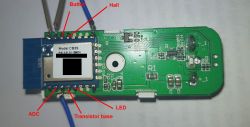
    The configuration here is intended for sensors of this type (photo from the user):
    miroww1 wrote:

    Door/window sensor without TuyaMCU - deep sleep and energy saving, OpenBeken
    Door/window sensor without TuyaMCU - deep sleep and energy saving, OpenBeken

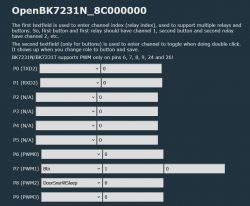
    Everything is run automatically, the user only needs to set the role of the sensor pin to DoorSensorWithDeepSleep . In addition, we set the role for the configuration button button . For the door sensor, set the channel, e.g. the first one, for the button the second channel.
    Door/window sensor without TuyaMCU - deep sleep and energy saving, OpenBeken
    You don't need anything else.
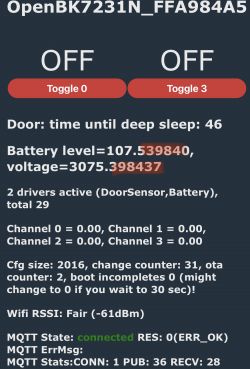
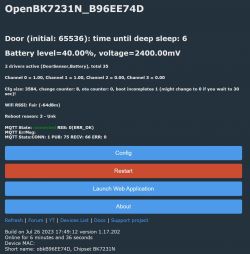
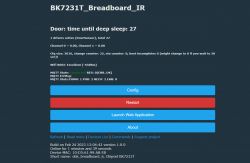
    After reboot we will see:
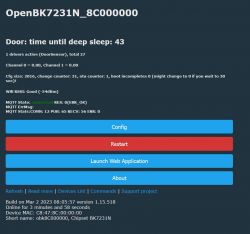
    Door/window sensor without TuyaMCU - deep sleep and energy saving, OpenBeken
    The sensor will "go to sleep" after this time:
    
    Door: time until deep sleep: 11
    

    Changing the door state resets this time, the countdown starts again.
    The sensor can wake up both the change of the door status and pressing the button.
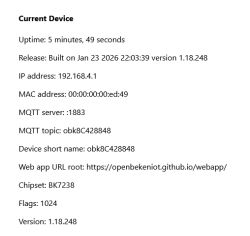
    Starting an OTA (WiFi update) also blocks sleep.

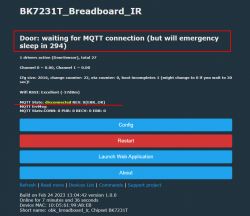
    Lack of connection with MQTT also blocks sleep, but only for 300 seconds (the value will be changed in the configuration):
    Door/window sensor without TuyaMCU - deep sleep and energy saving, OpenBeken
    The delay is to ensure that the sensor has time to report its status to the MQTT before bedtime.

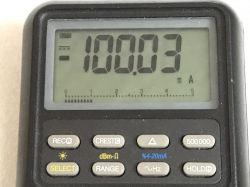
    Current consumption during WiFi operation (occasionally ranges from 50mA to 150mA):
    Door/window sensor without TuyaMCU - deep sleep and energy saving, OpenBeken
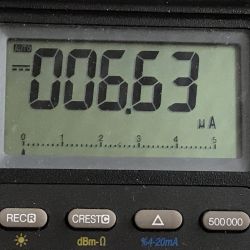
    Power consumption while sleeping:
    Door/window sensor without TuyaMCU - deep sleep and energy saving, OpenBeken


    Presentation of the action on the video
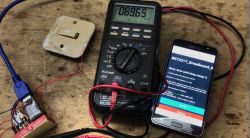
    I do not have this type of sensor, so I simulated it by connecting a switch.
    The video shows the WiFi module, a switch (simulating a door opening sensor), an ammeter and a telephone, where you can see how the page counts down the time until sleep is turned on.
    Wakeup works in both cases - both when "door is closed" and when "door is open".


    The video also shows how the power consumption changes, I recommend enlarging the video.


    And what does the sensor based on TuyaMCU look like?
    It is worth noting that the sensor based on TuyaMCU has already been described. The description is here:
    https://www.elektroda.com/rtvforum/topic3914412.html (English)
    https://www.elektroda.pl/rtvforum/topic3914412.html (Polish)
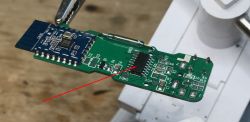
    Such a sensor is characterized by the presence of the MCU on the PCB:
    Door/window sensor without TuyaMCU - deep sleep and energy saving, OpenBeken
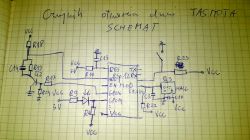
    In his case, the TuyaMCU (microcontroller) handles the power supply of the WiFi module and the WiFi module is completely turned off through the transistor. He cuts off his power. This is different than the sensor from the topic. Here we see two different Tuya approaches to saving energy. One uses low power MCU and the other uses deep sleep on the WiFi module itself.
    Both approaches are supported by OpenBeken.

    Home Assistant setup
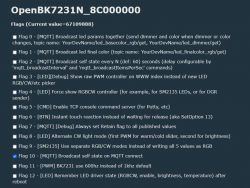
    Make sure this flag is checked:
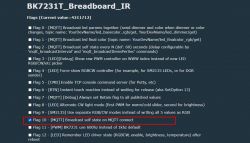
    Door/window sensor without TuyaMCU - deep sleep and energy saving, OpenBeken
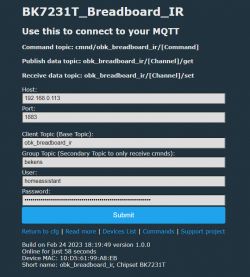
    Set MQTT data in Config:
    Door/window sensor without TuyaMCU - deep sleep and energy saving, OpenBeken
    If the device wants to turn off during setting, then either turn off the door controller with the command stopDriver DoorSensor or simulate door opening/closing.
    Do a Discovery here:
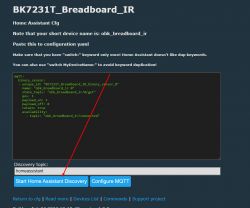
    Door/window sensor without TuyaMCU - deep sleep and energy saving, OpenBeken
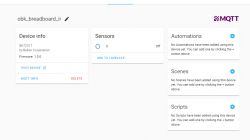
    The device will add itself to Home Assistant if there is already an MQTT connection.
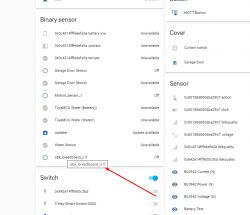
    Door/window sensor without TuyaMCU - deep sleep and energy saving, OpenBeken Door/window sensor without TuyaMCU - deep sleep and energy saving, OpenBeken

    Configuration summary
    To sum up, to configure such a sensor you should:
    1. Upload OpenBeken to it
    https://github.com/openshwprojects/BK7231GUIFlashTool
    2. Configure WiFi and MQTT data
    3. Set the Button role for the configuration button, channel 1, and the DoorSensor role for the door sensor, channel 0 (you can also try the nPup version, i.e. without the pull up resistor)
    4. Perform MQTT discovery:
    https://www.youtube.com/watch?v=pkcspey25V4&ab_channel=Elektrodacom
    Ready! Now you just need to remember that if you don't want the sensor to go to sleep during configuration, you have to either change the door state, or press the button, or send it the "stopDriver DoorSensor" command.

    Summary
    The deep sleep mode with waking up by changing the pin state is necessary in window/door opening sensors implemented without TuyaMCU. Without this mode, the battery would probably discharge in less than a day, maybe the dynamic energy saving mode (PowerSave 1 command) would help a little, but probably not much.
    One downside to deep sleep is that the door sensor must first connect to WiFi and MQTT before reporting its status, but I don't know what to do about that. The delay is acceptable.
    The configuration of such a sensor in OpenBeken is very simple, you do not need to write any scripts, and Home Assistant Discovery helps you connect it with Home Assistant just as easily.
    PS: The topic was created, among others. on user requests from these topics:
    https://www.elektroda.com/rtvforum/topic3959677.html
    https://www.elektroda.com/rtvforum/viewtopic.php?p=20450113#20450113

    Cool? Ranking DIY
    About Author
    p.kaczmarek2
    Moderator Smart Home
    Offline 
    p.kaczmarek2 wrote 5843 posts with rating 5827, helped 279 times. Been with us since 2014 year.
  • #2
    krzbor
    Level 25  
    Does OpenBeken also have the mode of sending an event notification to some address via the http protocol (without MQTT)?
  • #3
    p.kaczmarek2
    Moderator Smart Home
    At the moment, OpenBeken can send a GET request to any server via HTTP, and automatic variable completion allows you to insert the values of any variables ("channels") into this GET to, for example, collect temperature information from DHT11 or TuyaMCU via a PHP script sensor (e.g. from a watch/thermometer TH06 with LCD), or from any place.

    Channels in OpenBeken are like variables, you can do anything with them, map any of the values, so there are no limits. You can perform mathematical operations on them, conditionals, etc.

    Sending HTTP GET also allows you to control other devices (e.g. Tasmota or OBK, via cm?cmnd=COMMAND), but I don't know if it is needed, because OBK also supports the Tasmoty Device Groups protocol anyway:
    https://www.elektroda.pl/rtvforum/topic3925472.html

    OpenBeken also provides the REST interface itself (just like Tasmota, our interface supports many of Tasmota, it mimics it), which allows, for example, our Web Application (the second, sometimes a bit more extensive web panel) to be downloaded from the web on an ongoing basis:
    https://github.com/OpenBekenIOT/webapp/tree/gh-pages
    The native HTTP interface is in flash, normally, but this Web Application is an application in VUE (Javascript) that is downloaded from the web and "for free" gives us a GUI and only uses the REST interface, saving us flash memory.
    If someone, in turn, does not want to download our apk from the network, they can put a copy of it (or their own equivalent) and redirect the app there in the OBK settings.

    OBK can work without the Web Application - it's just a visual overlay, a bonus, so you don't have to type commands by hand.

    Send/receive other protocols I can add upon request.
  • #4
    krzbor
    Level 25  
    Thanks for explanation. I knew about controlling devices with cm?cmnd=COMMAND. It's nice that there is also a reverse option, which is important, for example, in this device.
    This is also a typical system for which a fixed IP in the OB can significantly extend battery life.
  • #5
    p.kaczmarek2
    Moderator Smart Home
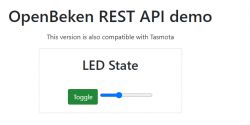
    These cm?cmnd even allows you to make your own REST page to control e.g. LED:
    Door/window sensor without TuyaMCU - deep sleep and energy saving, OpenBeken
    Code: html
    Log in, to see the code


    I remember about IP, although I don't know if it will significantly help the battery in the current version. It will definitely increase the reaction rate of HA, which is also a plus.
    The current version waits 60 seconds (configurable time) after connecting to MQTT after waking up and then goes back to sleep.
    Changing the state of the door resets the counter to 60 again.
    The idea is based on my subjective impression that the door is often opened for a moment, so instead of immediately after reporting the opening, I decided that the sensor would wait these 60 seconds and maybe immediately in one session also report closing.
    A different approach could be taken, and e.g. the sensor could fall asleep just after reporting to MQTT that there was a change of state .... (here I would only have to find out if and how in our MQTT with the LWIP library we use, I can check whether publish was definitely received by the server).
  • #6
    krzbor
    Level 25  
    It's definitely worth doing the fall asleep immediately after sending (and receiving the acknowledgment). The calculations show that in the deep sleep mode the sensor can work for 16 years on batteries, but with the expectation of 60s the battery is enough for only 600 notifications. With 10 shifts per day, this gives you only 2 months of work. That's why it's best when these systems work as short as possible - at 2s we already have 5 years. With a fixed IP, it may be possible to go down to about 1s.
  • #7
    miroww1
    Level 6  
    Hello

    Unfortunately, I was unable to configure the sensor as described. Do I need to change the firmware?
    I have version 1.15.468, Chipset BK7231N , I can't define the pin on "DoorSensorWithDeepSleep". It's not in the pick list.
  • #8
    p.kaczmarek2
    Moderator Smart Home
    @miroww1 we don't have automatic OTA update, you have to manually update it in Launch Web Application -> OTA by downloading RBL to the appropriate platform (in general, the application itself suggests you links to download RBL and additionally validates whether you are dragging the right file).

    @krzbor then I'll improve it and check how much faster the static IP will work. Although it is worth mentioning that we have a supported hybrid sleep mode, which would probably also hit these 100mA without completely turning off the device. Ultimately, hybrid sleep will be enabled on all devices, but for now it is in the testing phase. Still, it does quite well, unless the user has web app log enabled in the browser (then non-stop network activity makes hybrid sleep difficult for BK, possibly I will reduce the refresh rate).
  • #9
    krzbor
    Level 25  
    p.kaczmarek2 wrote:
    Although it is worth mentioning that we have a supported hybrid sleep mode
    Unfortunately, I do not know what it is and what the power consumption is. In general, the energy consumption per message cycle is important.
  • #10
    miroww1
    Level 6  
    I updated the sensor to version 1.15.503, configured it, it works as you described. But I came across a serious problem, from the moment of waking up I have to wait about 16 seconds for it to send a message after mqtt. In the original firmware, it took 5 seconds.
    That is the process of waking up, connecting to wifi and sending a message after mqtt. The sensor consumes about 67 mA during normal operation. As previously worked with PowerSave it drew from 11mA to 28mA.
  • #11
    p.kaczmarek2
    Moderator Smart Home
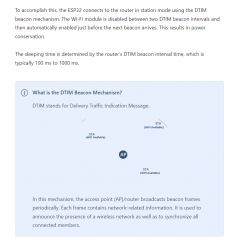
    Current consumption of dynamic sleep, i.e. with us PowerSave 1 could be further reduced by configuring the network refresh rate on the router, i.e. the so-called DTIM interval.
    What is DTIM interval?
    To quote https://lastminuteengineers.com/esp32-sleep-modes-power-consumption/:
    Door/window sensor without TuyaMCU - deep sleep and energy saving, OpenBeken

    As for the connection time, I will check it, but could you also write me (if you are able to check) what is the bottleneck, or in other words, how many seconds does it take to connect to WiFi?

    Added after 1 [minutes]:

    Edit: Oh, I think I see an obvious oversight on my side, from what I checked, I have a slightly artificially delayed connection to WiFi and MQTT in the code because at the very beginning (as we didn't have the LWIP fix for multithreading yet) there were problems with connecting immediately. I'll try to speed it up a bit.

    Added after 5 [minutes]:

    EDIT 2: Yes, wifi connect itself is 5s after reboot now. I'm going to try to speed it up in a moment, but I have to approach it cleverly so as not to spoil the users' devices en masse, there is a reason for this delay that was added in the past.

    Added after 3 [hours] 22 [minutes]:

    I uploaded an update with fixes, can you @miroww1 check if it connects faster? You need to do an update. I will add that fast connect is enabled when the door sensor pin is defined, because I don't want to accidentally break something on other platforms and devices. I'll make more tomorrow.
  • #12
    miroww1
    Level 6  
    Could you tell me what firmware version I should upload
  • #13
    p.kaczmarek2
    Moderator Smart Home
    The latest version, whenever I write about the fact that I am sharing a modification, then it is available from the next Release on Github.
    https://github.com/openshwprojects/OpenBK7231T_App/releases
    At the moment, the latest one is 1.15.517, because I added the Map command for the user along with the tests, but there will probably be another new version by the evening.
  • #14
    miroww1
    Level 6  
    I uploaded version 1.15.517 to the sensor, unfortunately the situation worsened from the moment of waking up, I have to wait about 33s. to send the mqtt message. In addition, after sleep, the sensor in HA is still visible as online, this process takes about 1 million 30 seconds, then goes offline and then the mqtt message is sent again. I observed in mqtt explorer that messages (ip, mac, rssi, .. etc.) are sent one at a time with a slight delay.

    Added after 10 [minutes]:

    I also measured the connection time of the sensor with wifi. The time was about 7s. I also connected the sensor to the laboratory power supply and found that the wake-up is almost instantaneous. At the first moment it is 54mA, then 67mA. Evidently, I result from the fact that there is a problem with sending messages via mqtt and it connects to wifi for quite a long time.

    Added after 8 [minutes]:

    I made one more measurement, from the moment "connected" to the mqtt server appeared on the screen, I waited about 7s for the message about opening the door.
  • #15
    p.kaczmarek2
    Moderator Smart Home
    It's a bit strange that now it's slower for you, because nothing has been changed except waiting 5 seconds to connect to WiFi and as I tested, it connected very quickly for me. Are there any errors in the log?
    EDIT: after re-analysing the system and what you wrote, I think I know what happened, I'll let you know when you need to update

    Did you use the "Erase all" option and then "Restore RF partition" during flashing? Do you have factory RF calibration stored?

    For starters, can you check how quickly the Log in Web Application revives after waking up the sensor? You must have the Web Application open all the time, but the log has been cleared - you wake up the sensor and watch how quickly the log will appear.

    The sensor should not have online/offline at all, the fact that you have it means that you paired it either manually or in an older version that added availaibity topic to HA, and it shouldn't be there. Remove it from HA and pair it again with the current firmware version.

    The MQTT order is not a problem, I can add in the drivers to force the publishing of the sensor value immediately, so that there is no doubt. Also now I think that the question is whether you have the "Publish device state on MQTT connect" flag, but I will add it soon, so that it is not needed.

    Added after 12 [minutes]:

    I think I've spotted another potential problem. I will upload an update and let you know.

    Added after 2 [hours] 20 [minutes]:

    I will post the fixes tomorrow morning, there was one edge case that could cause a delay of 8 seconds, but it is also fixed now.
    At the moment, my sensor responds in four seconds as seen in the video below:


    Realterm is a log from the UART, you can see when it boots, the state changes in HA for 4 seconds.

    @miroww1 I will ask you to test it again when I post a new release tomorrow.

    Added after 10 [hours]:

    Another attempt on the video, once about 4 seconds, then 5 seconds for a full MQTT report :


    Then, as @krzbor wrote, I will check the static IP.

    I'm uploading 1.15.518 soon, it will be checked.
  • #16
    ACCel
    Level 22  
    And what about monitoring the operation of such a sensor? Shouldn't it, for example, send a status that it works from time to time?
  • #17
    p.kaczmarek2
    Moderator Smart Home
    At the moment, there is no such thing implemented, although it could be considered. Only as I wrote - in HA the sensor will not disappear until Yaml / discovery has an "availability topic", our HA discovery takes care of it recently.

    However, it is worth monitoring the battery condition - colleague @dheenhasty discussed it here:
    https://www.elektroda.pl/rtvforum/topic3959103.html
    He has a very similar sensor, only not a door/window sensor, just a humidity/temperature sensor, but we also triggered it based on deep sleep.
    [BK7231N CBU] Generic Temperature and Humidity Sensor
    If @miroww1 finds time, we will also try to run this battery monitoring for him.

    I don't have this particular device, so I have to test it "in the wild".
  • #18
    miroww1
    Level 6  
    "During flashing, did you use the "Erase all" option and then "Restore RF partition"? Do you have the factory RF calibration saved?"

    I am programming the sensor using Launch Web Application - OTA. I don't know how flash works. The factory RF calibration is a flash memory dump ? If so, I copied the contents of the flash memory to a file and I have this data.
  • #19
    p.kaczmarek2
    Moderator Smart Home
    As long as you didn't break anything (i.e. didn't overwrite flash and didn't erase all), it's ok.

    Check the latest version. Other testers say it's ok:
    Door/window sensor without TuyaMCU - deep sleep and energy saving, OpenBeken
    I am waiting for information from you, and then we will continue to improve even more...
  • #20
    miroww1
    Level 6  
    I made some more tests, the results are as follows:

    - from waking up after 9 sec. I received information in the router about assigning an IP address (unfortunately, I can't connect to realterm)
    - after waking up, I received a message about opening the door after 19 seconds.

    I have a question, how can I connect the sensor with realterm?
  • #21
    p.kaczmarek2
    Moderator Smart Home
    Are these really the results of this last Release? On what I had (as in the videos) 4-5 seconds and another user from the BL602 platform reported 5 seconds?

    Show the version from the main panel... maybe you are testing the older ones that had shortcomings?

    How far from the router are you testing?

    Log is on TX2, baud 115200.
  • #22
    miroww1
    Level 6  
    Door/window sensor without TuyaMCU - deep sleep and energy saving, OpenBeken Door/window sensor without TuyaMCU - deep sleep and energy saving, OpenBeken Door/window sensor without TuyaMCU - deep sleep and energy saving, OpenBeken

    These are the settings I have, no other changes have been made.

    You suggested the distance from the router, I checked it, it turned out that the sensor shows the connection status (good, weak - alternately).
    I brought it closer to the router and I got the mqtt message after about 8 seconds. IT'S ALREADY A BIG SUCCESS. In the evening I will connect to the TX2 pin and see what's going on there.

    Added after 6 [minutes]:

    Thanks for the tips, I think we're getting close to the "final version". Is there any way to increase the power of the CB3S so that I can get a better quality wifi connection?
  • #23
    p.kaczmarek2
    Moderator Smart Home
    Wait a minute... @miroww1, how does a MAC end up with three null bytes? And the name of the device is all zeros (it comes from MAC)?

    This definitely proves that you clicked something wrong at the flashing stage (e.g. you tried to upload QIO to the offset behind the bootloader) and overwrote the RF partition, losing RF calibration at the same time, i.e. worsening the range of the device.

    I don't know exactly how it happened (it could also be different - as a result of playing with LittleFS and trying to format it to a larger size), but it definitely happened. I flash devices often and I never clean the RF partition by itself.

    At the moment you have two options.
    - or restore the original batch and then reload normally OBK without doing Erase All / without destroying the RF partition
    - or in our Launch Web Application, use the Restore RF partition button from the Flash tab, but it gives placeholder calibration data because we haven't figured out how to do the calibration fully correctly yet

    Your device is still fully functional, but may have poorer WiFi range than factory calibrated.


    See our video about the lamp:


    There we program with my flasher and after uploading there is a normal MAC (and a normal MAC-based device name), not 00 00 00:
    Door/window sensor without TuyaMCU - deep sleep and energy saving, OpenBeken

    Added after 50 [seconds]:

    EDIT: for clarity , the RF partition is a bit further down the end of the OBK binary, so normal flashing doesn't overwrite it.
  • #24
    Lesnoi
    Level 5  
    Hello. i am experiencing the same problem. the sensor starts to be available within 10-20 seconds. the downside is that if there was a short-term opening (for example, 8 seconds), I will not receive any information. since the sensor will already be in the closed position.
  • #25
    p.kaczmarek2
    Moderator Smart Home
    I will make sure to send the queued sensor value as well. 10-20 seconds is VERY long. With fast connect flag, it's about 5 seconds. Do you have that enabled?
  • #26
    Lesnoi
    Level 5  
    @p.kaczmarek2 if it works in my case after 10 hours, then the connection will be about 30-40 seconds. but the time then connection is standard 10-20 seconds. also i have battery driver enabled can this be used? Ready to test if needed.
    Update
    I ran a couple more tests. replacing the battery and removed powersave this reduced it to 8 seconds. this is a great result. I don’t know if the problem with waking up with a long downtime remains, I will test it. also, if there was a trigger during these 8 seconds, then there will be no data on the trigger by mqtt. I have a couple more questions. I saw a thread discussing the percentage of batteries. will the tool be in its calibration (it shows 120% for me). and the second question. data is sent to HA up to a comma, but I have a relay with energy monitoring and full data is sent there, how can this be used in the firmware itself to make the number more readable? and can it be fixed in the interface?Door/window sensor without TuyaMCU - deep sleep and energy saving, OpenBeken
  • #27
    p.kaczmarek2
    Moderator Smart Home
    Yes, I will make this number more readable today.

    I have an important update to door sensor driver.

    If you experience that your door sensor does not wake up from one of the states - for example, opening door wakes it up, but closing doesn't please see this topic:
    https://www.elektroda.com/rtvforum/topic3971140.html
    The solution is to use DSEdge command (at startup, after starting DoorSensor driver) to configure wakeup edge, because, strangely enough, it seems that my default logic (if pin is low, wake up on rising, if pin is high, wake up on falling) does not work well on SOME devices.
    See command docs:
    https://github.com/openshwprojects/OpenBK7231T_App/blob/main/docs/commands.md

    I will look into that "Early trigger" issue (save the first value and make sure to send it)
  • #28
    p.kaczmarek2
    Moderator Smart Home
    UPDATE: make sure to use static IP option which we have added recently to speed up connection to network.

    Lesnoi wrote:
    I will test it. also, if there was a trigger during these 8 seconds, then there will be no data on the trigger by mqtt.

    It has been fixed today as well. Update your devices.
  • Helpful post
    #29
    taggbricka
    Level 5  
    I have managed to get my copy of this device working. It was easy, this thread is accurate.
    Program version: 1.17.202
    Static IP.

    Excerpt from TUYA Config
    	"bt_pin":"20",
    	"status_led_pin":"26",
    	"rstcnt":"3",
    	"basic_pin_pin":"16",
    	"module":"CBU",
    	"jv":"1.0.5",
    	"bt_lv":"0",
    	"net_t":"180",
    	"samp_type":"1",
    	"basic_st":"1",
    	"basic_pin_lv":"1",
    	"samp_sw_pin":"17",
    	"max_V":"3000",
    	"min_V":"2200",
    	"samp_sw_lv":"1",
    	"status_led_lv":"1",
    	"samp_pin":"23",
    

    Door/window sensor without TuyaMCU - deep sleep and energy saving, OpenBeken
    Two details remain:

    1.) After a button press or magswitch application this device wakes up, sends about 50 to 100 MQTT "get" messages before deep sleeping after 60 seconds.
    I expected only 1 "get" message.
    Can I change the deep sleep delay?

    2.) BAT_ADC on pin 23 reports very correctly below 2400 mV, anything above 2.4V reports as 2400mV
    The voltage on CBU pin 5 (ADC) is the battery voltage exactly, not hardware limited to 2.4V.
    Tested 2.0V to 3.3V from a lab power supply.
  • #30
    p.kaczmarek2
    Moderator Smart Home
    Hello, the Deep Sleep delay can be configured with this command:
    
    DSTime [timeInSec]
    

    See commands doc:
    https://github.com/openshwprojects/OpenBK7231T_App/blob/main/docs/commands.md

    Are you sure that you've got battery driver configured correctly? Do you have battery relay pin set? This pin is enabling correct voltage divider, but only for the time of measurement. So if you tested with multimeter with that divider deactivated, you will get incorrect results.