logo elektroda
logo elektroda
X
logo elektroda

Printing with a laser printer on a PCB laminate

lukasku 58635 111
ADVERTISEMENT
Treść została przetłumaczona polish » english Zobacz oryginalną wersję tematu
  • #61 16740798
    lukasku
    Level 10  
    Piottr242 wrote:

    The fact is that I have so far ironed tiles that do not exceed the surface of the tram ticket, I do not know if I will be able to do so nicely with a larger area.

    Exactly it is, I do not have a lot of experience in thermo, but jokingly writing the difficulty increases squared with the size of the tile (and dense paths) :) At least I yes I had.
  • ADVERTISEMENT
  • #62 16774013
    ksik
    Level 13  
    To the author of the subject:
    Is the Model 2500 instead of a Pantum 2502 printer capable of converting it?
    With us in Poland it is hard to reach 2502.
    pozdr
  • #63 16774220
    silelis
    Level 12  
    ksik wrote:
    To the author of the subject:
    Is the Model 2500 instead of a Pantum 2502 printer capable of converting it?
    With us in Poland it is hard to reach 2502.
    Pozdr


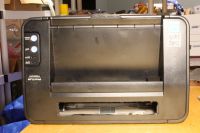
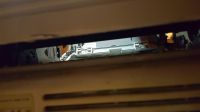
    I corresponded with the author of the original text on Instructable and confirmed that he actually owns the P2500W.

    With the rest how to take a good look at this photo:
    Printing with a laser printer on a PCB laminate
    Printing with a laser printer on a PCB laminate

    this is the inscription P2500W, which the rest of the original author confirmed. :D

    while @lukasku told me that there are problems with the photosensitive drum and the possibility of its damage during the "first tests". The new one costs PLN 180.

    I would like to play with this construction, but I need to develop this subject of the drum. What to look for??
  • #64 16774244
    Freddy
    Level 43  
    P2500W is the name of the series, so I think that the last digits are only minor modifications, and the mechanism itself.
  • #65 16774910
    lukasku
    Level 10  
    Added after 12 [minutes]:
    silelis wrote:
    ksik wrote:
    To the author of the subject:
    Is the Model 2500 instead of a Pantum 2502 printer capable of converting it?
    With us in Poland it is hard to reach 2502.
    Pozdr


    I corresponded with the author of the original text on Instructable and confirmed that he actually owns the P2500W.

    With the rest how to take a good look at this photo:
    Printing with a laser printer on a PCB laminate
    Printing with a laser printer on a PCB laminate

    this is the inscription P2500W, which the rest of the original author confirmed. :D

    while @lukasku told me that there are problems with the photosensitive drum and the possibility of its damage during the "first tests". The new one will cost PLN 180.

    Yes, I modified Panthum 2500 without "W". "W" is a sign of the wi-fi card, which is not needed for happiness and is more expensive.

    Quote:
    I'd love to play with this structure, but I just need to develop this drum theme. What to look for?


    Maybe in the simplest way, the drum is very delicate, (it seems to me that the Lexmark E260 / 460 have much stronger) therefore, everything with a contact must be smoothed and in case of any stop (when there is a PCB in the middle) ) it can not be dragged (this was my mistake), only unfortunately you have to disassemble the toner every time. Of course, this will happen at the beginning / testing of fun in printing.

    Due to the fact that I did not get the Lexmark E260 (that is the second printer from the link from the first post) I bought a Lexmark E460, which I am finishing by myself. I will try to show results in this thread. Greetings.
  • #66 16775598
    ksik
    Level 13  
    To Marianm68:
    Have you tried silicone spray with thermal transfer?
    How do I give details?

    To lukasku:
    I tried to print the nitride directly on the paper and after evaporation move the copper on the thermotransfer, the effect was the same as without it and even worse because as a color paper it also carried minimal, sometimes paint from the paper especially red, I will add that nitro did not dissolve the toner I have to have a different solvent that takes my toner because the standard nitro does not want to eat it.


    pozdr
  • #67 16777944
    lukasku
    Level 10  
    Hello, have you met with toner, which (heated) does not dissolve: acetone, gasoline, solvents: phthalic, nitro, for oil paints, only very minimal solvent for chlorinated rubber paints. Someone knows what you can try, because rubbing with only 500-800 paper is a torment. Did anyone have anything similar to you? greetings
  • #68 16777981
    uhyt
    Level 14  
    You can still try it with spirit.
  • #69 16778070
    Piottr242
    Level 23  
    The label remover is great for removing toner. I have one in orange spray, the toner washes away perfectly.
  • ADVERTISEMENT
  • #70 16778148
    lukasku
    Level 10  
    uhyt wrote:
    You can still try it with spirit.

    Isopropyl alcohol, oil does not work, I will see clean but rather poor chances.
    Piottr242 wrote:
    The label remover is great for removing the toner. I have one in orange spray, the toner washes off perfectly.

    I do not know where such a thing can be bought, but thanks to look.
  • #71 16778224
    silelis
    Level 12  
    lukasku wrote:
    I do not know where you can buy something, but thanks to look.

    lebel off it will peel off each label.
  • #72 16780247
    uhyt
    Level 14  
    Well, there are still nasty things like toluene and xylen, but poor chances.
    By the way, what is this toner?
  • #73 16780304
    lukasku
    Level 10  
    uhyt wrote:
    Well, there are still nasty things like toluene and xylen, but no chances.
    By the way, what is this toner?

    Hello, I have no idea I bought it with the printer, I know it was topped up. I tried to find out, but I can not reach the seller ;)
  • #74 16780376
    yogi009
    Level 43  
    Xylene perfectly dissolves toner. At least the one from HP. Because now there are toners-inventions.
  • ADVERTISEMENT
  • #75 16782304
    marianm68
    Level 18  
    ksik wrote:
    To marianm68:
    Have you tried silicone spray with thermal transfer?
    How do I give details? Pozdr


    Yes, but not very successful. I tried three times but I always had some losses in the transferred printout on the board. Each time I tried, I tried (and evenly) to spread / wipe the silicone. The sticky toner held firmly but unfortunately not everywhere.

    Perhaps I am still playing with silicone (I did not have too much time to try and I made this plate with the "classic" termotransfer).
  • #76 16787954
    ksik
    Level 13  
    lukasku wrote:
    uhyt wrote:
    Well, there are still nasty things like toluene and xylen, but poor chances.
    By the way, what is this toner?

    Hello, I have no idea I bought it with the printer, I know it was topped up. I tried to find out but I can not reach the seller ;)
    < br />

    And you found out what this toner is? Unfortunately, what I have in Samsung ML2165 (D101S) is some kind of stick and I often have clearances on larger copper squares and garnish so that the thermal transfer begins to annoy me.
  • #77 16790424
    lukasku
    Level 10  
    ksik wrote:
    Well, there are still nasty things like toluene and xylen, but poor chances.
    By the way, what is this toner?

    Unfortunately, no solvent (xylene) so far I have not tested either.

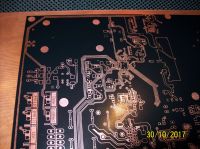
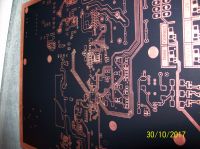
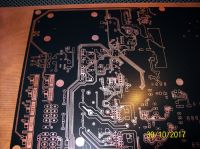
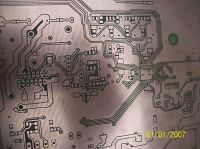
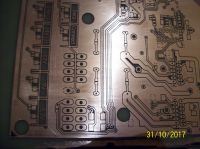
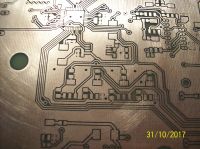
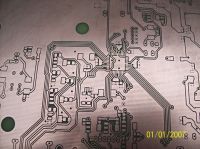
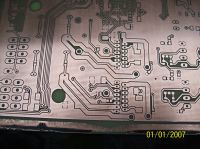
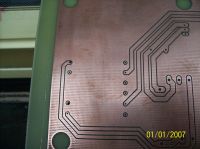
    First print tests with Lexmark (size of the 195x255 board, so almost A4 size)
    Printing with a laser printer on a PCB laminate :
    Printing with a laser printer on a PCB laminate
    Printing with a laser printer on a PCB laminate
  • ADVERTISEMENT
  • #78 16790561
    ksik
    Level 13  
    Show it after picking up how the toner reacts on contact with B327.
  • #79 16792869
    lukasku
    Level 10  
    It's hard to get a good photo with my camera.
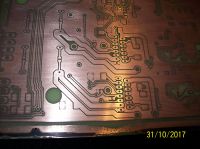
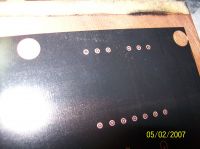
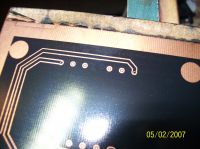
    Printing with a laser printer on a PCB laminate Printing with a laser printer on a PCB laminate Printing with a laser printer on a PCB laminate Printing with a laser printer on a PCB laminate
    Printing with a laser printer on a PCB laminate Printing with a laser printer on a PCB laminate Printing with a laser printer on a PCB laminate
    Double-sided plate, holes are in the range of 0.5 mm, as for me it is sufficient accuracy.
    Printing with a laser printer on a PCB laminate
  • #80 16793621
    bodzio667
    Level 18  
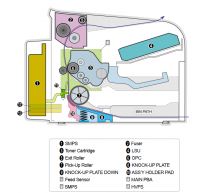
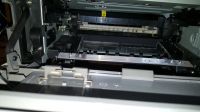
    To the author of the topic. I see that in the middle this Pantum is Samsung. Very similar to ML1610 or ML2010.

    Printing with a laser printer on a PCB laminate


    The sensors and electromagnet need to be seized:

    3.2.4  Sensor Controller 
    
    3.2.4.1  Paper Feeding/Width
    
    When a paper passes an actuator of a feed sensor unit after feeding a paper into a set,it detects a signal of
    the photo interrupter and informs the paper feeding status to CPU. After sensing the signal and certain time
    later, it strews an image data.(Related in Paper Front Edge Adjustment)
    If it could not detect the feed sensor within 1 second after feeding a paper, a paper jam0 (CPU#_) occurs.
    ML-1610  differs  from  other  general  printers  because  it  doesn’t  have  a  paper  empty  sensor.  It  recognizes
    the paper existing status by using a firmware. If a paper is not fed, it recognizes the state as no paper (Red
    and Yellow lights turn on among other LEDs). With the same principle, it senses the OPC unit. After OPC
    unit is mounted,the actuator operates. When it passes the actuator of sensor unit, it detects the signal of
    the photo interrupter, informs the existing OPC unit to CPU, and then stays at the status.
    
    3.2.4.2  Paper Empty Sensing
    
    The paper empty is detected by the empty sensor mounted to an engine board and the actuator mounted
    to  a  frame.  Paper  senses  the  on/off  time  of  the  empty  sensor  by  using  CPU  and  informs  the  normal
    operation status and the jam occurrence status to CPU. 
    3.2.4.3  Jam Cover/Cover Open Sensing
    ML-1610 uses two M/S:one senses the cover open and the other senses the jam cover open.
    The cover open sensor is located on the left bottom of HVPS.When the front cover is open, +24V supplied
    to  each  unit  (DC  fan,Solenoid,Main  Motor,Polygon  Motor  Unit  of  LSU  in  Fusing  Unit,and  HVPS)is
    interrupted.
    The  jam  cover  open  sensor  is  located  on  the  left  bottom  of  SMPS.  When  the  jam  cover  is  open,  +24V
    supplied to each unit (DC fan, Solenoid, Main Motor, Polygon Motor Unit of LSU in Fusing Unit, and HVPS)
    is interrupted.
    D0 bit of CPU detects the jam cover open/cover open, and D7 bit of CPU detects the existence of OPC.
    In this case, it informs the status to user by turning on the red LED among OP panel LEDs.
    
    3.2.4.4  Solenoid Driving Circuit
    
    The solenoid consists of two used for paper pick-up and MP signal. D4 bit of CPU turns it on/off, and its
    driving time is 300ms. The diode protects the drive TR from the pulse (noise)generated by de-energizing
    operation of solenoid.


    You can search for such printers for a project. Although you can see that the paper path is not perfectly straight to Fusera, you would need to work on it. Remake the clamps, dump everything from the paper path, make the tray. But he will very similarly come to this Pantum.
  • #81 16793910
    lukasku
    Level 10  
    bodzio667 wrote:
    To the author of the topic. I see that in the middle this Pantum is Samsung. Very similar to ML1610 or ML2010.

    Printing with a laser printer on a PCB laminate
    The sensors and electromagnet need to be seized:

    Perhaps it would be ok, sensors and electromagnet is not a problem, fuser must be dismantled anyway, and I would like to pay attention to whether it is possible to pass through the toner / opc plate without problems and the life of the opc drum itself.
  • #82 16795680
    ksik
    Level 13  
    And you found out what this toner is? Unfortunately, what I have in Samsung ML2165 (D101S) is some kind of stick and I often have clearances on larger copper squares and garnish through it until it starts me already termotransfer denerwować. [/ Quote]

    Did you correct something with a pen before throwing it in the etcher, because the pictures show that the paths are even and not ragged, and in addition large areas of copper are also undamaged until it is impossible that such a good toner is not bitten.
    Pozdr.
  • #83 16795985
    lukasku
    Level 10  
    ksik wrote:

    Did you correct something with a pen before throwing it in the etcher, because the pictures show that the paths are even and not ragged, and in addition large areas of copper are also undamaged until it is impossible that such a good toner is not bitten.
    Pozdr.

    I do not know what kind of toner, because I bought this printer about 5-6m ago and the company I bought in does not speak (maybe it does not exist anymore). I am not a chemist, but who knows whether the cause is not in some degree also the primer, or silicone (maybe react with each other). I did not have too much time and the problem with buying xylene in my area, so far I do not know the solvent.
    As for the correction, they were corrected (not counting the sides, because I wanted to widen the circuit on the perimeter of the plate), in three areas (approximately 2x3 cm), but because a bit less toner left them in the drum (I did not want to let go print again) and I preferred to improve the pen for sure. I print the printout and sometimes it is so that the dust-bound dust (these are microns, but under the light) looks like the uncoated copper surface. There were many such eyes (dust), so I took the risk of etching to see one hundred percent, whether it is connected to dust as I wrote earlier, or not the toner (luckily, my assumptions have worked). In general, if only the print is even, there are no problems with undercoating.
  • #84 16831071
    ksik
    Level 13  
    To lukasku:

    Did you find any toner cleaner?
    I bought the same solvent as I used sooner, there is the same company etc. but the new bottle does not wash up completely, even using a heavily moistened cloth it smudges it over the laminate rather than washes it and I have a similar problem slowly like you.

    Have you tried maybe something that the forum members suggested eg label off?

    Greetings.
  • #85 16831351
    lukasku
    Level 10  
    ksik wrote:
    To lukasku:

    Did you find any toner cleaner?
    I bought the same solvent as I used sooner, there is the same company etc. but the new bottle does not wash up completely, even using a heavily moistened cloth it smudges it over the laminate rather than washes it and I have a similar problem slowly like you.

    Have you tried maybe something that the forum members suggested eg label off?

    Pozdro.

    Unfortunately, I have not found, xylene also does not work. The toner reacts with the silicone and where the less applied silicone can be washed away with Nitro, but with an even position, I do not know the solvent that would wash it. By the way, this effect can probably be used to harden the toner, instead of heating or placing the plate in the vapors of acetone probably just put a layer of silicone with a spray on it. I did not notice any problems with pickling after the application of silicone.
  • #86 16838404
    rsv6
    Level 13  
    I will do a great job also because I have no nerves to chalk paper and iron.
  • #87 16872714
    silelis
    Level 12  
    Hey,

    I have a question, or rather a request for help.

    I made Lexmark e260D sublimity in accordance with with this tutorial or at least I think so.

    The printer takes a plate, but unfortunately there is not the smallest trace of toner on the copper. Nothing, nothing.

    Does anyone who did this modification have any idea what a mistake it is?

    Under this link film with printouts

    And a few photos:
    Printing with a laser printer on a PCB laminate Printing with a laser printer on a PCB laminate Printing with a laser printer on a PCB laminate
  • #88 16872749
    lukasku
    Level 10  
    silelis wrote:
    Hello,

    I have a question, or rather a request for help.

    I made Lexmark e260D sublimity in accordance with with this tutorial or at least I think so.

    The printer takes a plate, but unfortunately there is not the smallest trace of toner on the copper. Nothing, nothing.

    Does anyone who did this modification have any idea what a mistake it is?

    Under this link film with printouts


    Does the tape (tape adhesive) conduct electricity? There are two options, either the board (software) does not fit in the time window (especially the emulation of the second sensor), or you do not dissipate the static energy from the board (although in this case there should be some traces of toner). It's also possible that you can not fit into times because you choose bad paper. I do not know what should be in the tutorial because I wrote myself, but try, for example, foil instead of plain paper. And so most likely to my eye, you do not turn on the sensor of the second marked in the tutorial "pis". Check the cables again and see if uC works.

    And here a more advanced modification, using the original transmission mechanisms.
    [Film: cc7b303338] https://filmy.elektroda.pl/2_1512594302.mp4 [/ film: cc7b303338]
    And here the accuracy of both sides of the double-sided disc
    Printing with a laser printer on a PCB laminate
    Second page
    Printing with a laser printer on a PCB laminate
  • #89 16872827
    silelis
    Level 12  
    And the fact that instead of AtTiny13 I gave by mistake ATTiny13A can be the reason ???
    I talked to the describing tutorial and he says no.
    But the difference is that my one does not have analog inputs / outputs
    Added after 6 [minutes]:
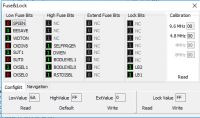
    And the question about the coffee grounds are they well set up ?? I do not know about Atmel - it's not my story, because I've done everything on PICs so far.
    Printing with a laser printer on a PCB laminate
  • #90 16873059
    lukasku
    Level 10  
    You do not have a hole in the sheet, or the hole is badly measured and does not turn on the writing. If you have it, increase it until it works.

Topic summary

The discussion revolves around the challenges and techniques of printing directly on PCB laminates using modified laser printers, particularly the Pantum and Lexmark models. Users share experiences with various methods, including the use of silicone spray to enhance toner adhesion and the hybrid approach of combining inkjet printing with toner transfer. Key issues include the need for precise laminate preparation, the durability of the toner, and the potential wear on printer components. Participants also explore the feasibility of using UV inkjet printers and CNC milling for PCB fabrication, highlighting the importance of print quality and the impact of different toners and papers on the final results.
Summary generated by the language model.
ADVERTISEMENT