logo elektroda
logo elektroda
X
logo elektroda

Printing with a laser printer on a PCB laminate

lukasku 58635 111
ADVERTISEMENT
Treść została przetłumaczona polish » english Zobacz oryginalną wersję tematu
  • Some time ago I successfully converted EPSON P50 into a printer that directly prints on the laminate. The effects were very satisfying for me, but the whole difficulty is to find an appropriate waterproof ink. I personally did not succeed in this, which is why I used the hybrid method (printing on an inkjet printer with "waterproof"inks, then sprinkling the toner and then heating the disc), but this method, although cool (it is possible to describe the plate) and quick has a disadvantage, which is the constant memory of cleaning and maintaining the head/carcass in proper order (although by switching on once a week).

    A few years ago, I was wondering whether it was possible to print on pcb with a laser printer and everybody said they were not. There are currently several pages showing printer upgrades so that you can print directly onto pcb. I decided to try it out using the description of the factory modification of a new and cheap printer (unfortunately expensive toner) from this website: https://www.instructables.com/id/Modification-of-the-Pantum-2502W-for-Direct-Laser-/ but using cheaper versions without wi-fi (Pantum 2502 without "W" all parts are identical.

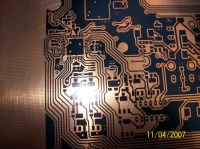
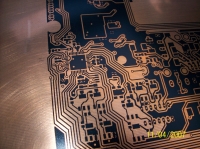
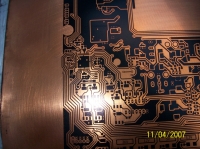
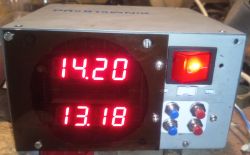
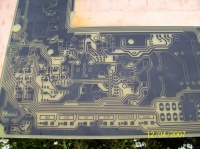
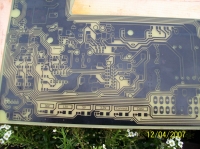
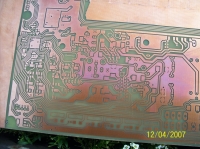
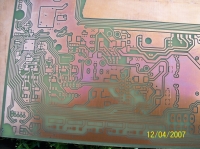
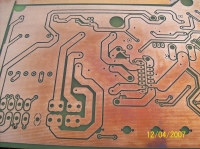
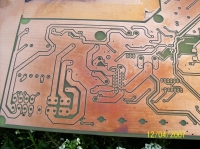
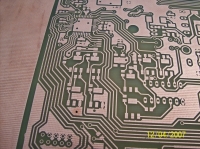
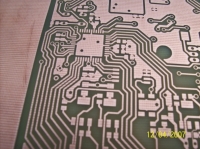
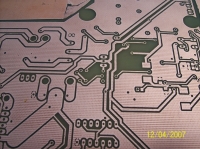
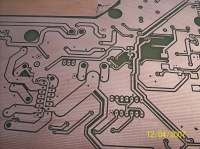
    I would like to show you the result in the form of several photographs and a movie, here:
    Printing with a laser printer on a PCB laminatePrinting with a laser printer on a PCB laminatePrinting with a laser printer on a PCB laminatePrinting with a laser printer on a PCB laminate


    Seeing as well as practicing "iron methods" they are personally for me a "murder". In this method (although more expensive) as well as printing on an inkjet printer, in fact, after designing the plates on a computer for etching they divide a second/minute and as well as how I "worked out" you do not even need great rigours with regard to degreasing.
    This fast I dedicate mainly to people who hesitated (I myself had a fear) to try this method.

    Cool? Ranking DIY
    About Author
    lukasku
    Level 10  
    Offline 
    lukasku wrote 95 posts with rating 42. Been with us since 2010 year.
  • ADVERTISEMENT
  • #2 16628463
    Freddy
    Level 43  
    This method has one major disadvantage.
    The laminate must be perfectly straight, of appropriate thickness and perfectly polished. :)
  • #3 16628484
    lukasku
    Level 10  
    Let me disagree :) Well, if you look good, it's not a simple laminate at all. In addition, it has a tape (from the front of the tile) protecting against scratches of the photosensitive drum. Testing this method (I made about 30 prints) I can say with satisfaction that:
    - tape (ordinary insulating) protects the drum against scratches, so durability looks good at this moment
    - having a perfectly polished surface (water paper, probably 1500 or 1800), the toner torn off in some places, so I "torn" copper with paper ~ 400 (such as on a sponge), but sometimes the toner does not even perfectly (fine polishing is of little importance)
    -It is crucial to prepare the tile and, more specifically, degreasing I will only suggest that I found the center by accident, thanks to which the toner is placed perfectly and you might say "fat" ;) < br /> With his help, it would be de facto possible to print on the plate straight from the store ;)
  • #4 16628502
    mr_grabarz
    Level 20  
    lukasku wrote:
    I'll just tell you that by accident I found the middle, so that the toner goes perfectly

    and the name of this agent you do not give in both the first and the second post because, because ...?
  • #5 16628529
    lukasku
    Level 10  
    mr_grabarz wrote:
    lukasku wrote:
    I just tell you that by accident I found the middle , thanks to which the toner is put on perfectly

    and the name of this agent is not given in both the first and the second post because, because ...?

    silicon w spreyu ;)
  • ADVERTISEMENT
  • #6 16628623
    jacynka84
    Level 26  
    What? And how is copper consumed by silicone ??
  • #7 16629802
    lukasku
    Level 10  
    jacynka84 wrote:
    That what? And how does copper get through silicone?

    It is a silicon spray, which is used to prevent the seals from freezing in the car. Can I digest this silicon? The answer is, I have no idea :) Well, you just need water with washing powder or the like, wash the plate and after the case (for the isopropyl alcohol combiners well removes silicon and toner from Pantum printer could not cope, probably vinegar also washes). I assure you that the applied toner (on the silicon substrate) is holding very strongly and is very hard to wash off with acetone. In addition, you have the impression that the board would not have a layer of copper, but the whole would be like "plastic". I am also guilty of explaining. Well, the tile I made is two-sided. However, the printer shifted my printout. Due to the fact that I'm really in a hurry with her (gate driver), I've put up a rewrite of two-sided printing for the next time. I printed the other side using the "iron" method also on the "silicon substrate" (for the posterity, because I saw a rather new topic about the detachment of the toner from the plate). Let me document it with pics.

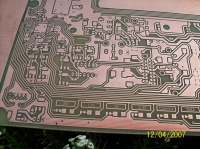
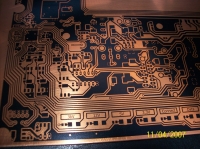
    Direct print page from a laser printer after etching:
    Printing with a laser printer on a PCB laminate Printing with a laser printer on a PCB laminate

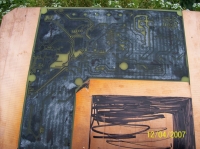
    Side of the "iron" method:
    Printing with a laser printer on a PCB laminate Printing with a laser printer on a PCB laminate

    After removing the toner (1):
    Printing with a laser printer on a PCB laminate Printing with a laser printer on a PCB laminate

    After removing the toner (2 "iron"):
    Printing with a laser printer on a PCB laminate Printing with a laser printer on a PCB laminate

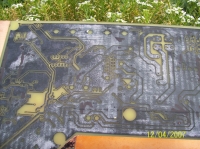
    The effect after smoothing with paper (~ 1500 sides):
    Printing with a laser printer on a PCB laminate Printing with a laser printer on a PCB laminate Printing with a laser printer on a PCB laminate Printing with a laser printer on a PCB laminate Printing with a laser printer on a PCB laminate

    I do not know if you noticed, but the copper is unmoved and the plate (190x190) was etched on "twice" because it did not fit into the baler.
  • #8 16629817
    jacynka84
    Level 26  
    You can make 2 1-sided prints by your way and connect them with pins with empty pages but you probably know.
    I have such an idea to use the 3D printer reprap for this operation, instead of, or by coupling a 405nm laser (near ultraviolet) with the motor axis giving the filament. The plate is greased
    UV resin for 3D printing would react to it but it would require experiments with the amount of irradiation and speed, and you would have to prepare the bitmap translation files for the 3d project to the slicer which would in turn only generate the g-code.
    Well, but generally it is a better method with a laser printer, however, you have to risk destroying the printer because then there may be a problem with normal printing on paper.
  • #9 16629832
    lukasku
    Level 10  
    jacynka84 wrote:
    ... you have to risk destroying the printer because then there may be a problem with normal printing on paper.

    Well, you're right. By editing the printer from the description given at the very top, through the rush the only thing that I managed to spoil is a photoconductor. Unfortunately, the toner with it is expensive, but I managed to buy the same printer (new after return) for less than PLN 100. So now I have two :) If I have a moment, I will try to write (for posterity) what to look for when modifying the printer (maybe even a few photos how it looks). greetings
  • #10 16629848
    kortyleski
    Level 43  
    All the time I go to my head to cover the laminate with a thin layer of black paint and burn the paths with a CNC laser. And then in the etchant.
  • #11 16629871
    Freddy
    Level 43  
    jacynka84 wrote:
    ... and you would have to prepare the bitmap translation files for the 3d project to the slicer ...
    For what reason, if 99% of the programs have the option of exporting to HPGL, hence the banal to g-code :) .
      @lukasku How is it that photos you have from 2007, how the Pantum company was founded in 2011? :)
  • #12 16629892
    piotr_go
    DIY electronics designer
    Freddy wrote:
    @lukasku How is it that you have photos from 2007, how Pantum was founded in 2011?

    He did not want to set the date on the camera :D

    What is this copper so discolored?
  • #13 16629916
    Freddy
    Level 43  
    piotr_go wrote:
    He did not want to set the date on the camera
    Probably so. ;)
    This discoloration of Piotr, probably after the iron - too high temperature and poor laminate.
  • ADVERTISEMENT
  • #14 16629975
    lukasku
    Level 10  
    Freddy wrote:
    piotr_go wrote:
    He did not want to set the date on the camera
    Sure yes.

    Exactly :)
    Freddy wrote:
    These discolorations of Piotr, probably after the iron - too high temperature and poor laminate.

    Not after the iron. Well, one of the few things when modifying the printer is the disassembly of the heater / heater. "Print" is a bit "dry" (even without the use of silicon, the reverse of the tile does not cause the toner to peel off). I put such a plate in the oven and hence overheating. But as a curiosity I will say that I tested (preheating and printing after printing) and at about 50 degrees (and as we know the temperature of the toner melting is much higher) the toner gets very hard. You have to use enough force to tear him away. Therefore, it is possible to print eg directly on "light-sensitive laminates" (if for some reason it would detach) and make more "demanding" tiles. :)
  • #15 16630051
    jacynka84
    Level 26  
    Is something else important yet the blocking mechanism must be removed and the laminate heated before passing through the printer?
  • #16 16630102
    lukasku
    Level 10  
    jacynka84 wrote:
    Is it still necessary to do something other than the mechanics that block the passage, disassemble and heat the laminate before passing it through the printer?

    In this link, http://www.instructables.com/id/Modification-of-the-Pantum-2502W-for-Direct-Laser-/ is nicely described with pictures. If I remember correctly, one roll, heaters, make a plate guide and place a slotted reed switch on it, etch a small plate with a micro controller and load the batch (it's ready), cut out the hole in the plastic casing (I think I made a knife :) ). More or less. It took me about 8 hours.
    As for heating, if you would like to pick it up after printing. But just if you would like to print on the so-called "photosensitive laminates" or similar is indifferent, to be sure because probably (I did not check how I will write a plate in a while) should stay without heating and if it is already 45-55 degrees is sufficient.
  • #18 16630431
    Anonymous
    Anonymous  
  • #19 16630455
    lukasku
    Level 10  
    Stefan_2000 wrote:
    lukasku wrote:
    I place this plate in the oven and hence is overheating

    I understand that the plate goes to the oven for fixation, and what about the acetone trick shown here: https://www.youtube.com/watch?v=VY-7hQ6ocx8

    I have not tried (my plate is 190x190), but it probably works. As soon as I'm doing a new (smaller) plate, I'll try and check it out.
    Christophorus wrote:
    lukasku wrote:
    make a plate lead and place a reed switch on it slotted
    This is a slotted optocoupler, no reed switch.

    Thanks for the correction. My bad.
  • #20 16630569
    jacynka84
    Level 26  
    I've just tested a 405nm laser diode (about, it's blue for violet) and a photosensitive resin (I plan to make a 3D printer but it's cool) and practically harden the 0.1mm layer immediately.
    As if instead of a filament head, control this laser in any 3D printer it would be something. Only you need to use the filament engine signals to control the laser, this is a problem because the control signals
    this stepper motor is a square. And here you have a permanent interrupted only between separate circuits.
  • #21 16630760
    marianm68
    Level 17  
    lukasku wrote:
    ... By testing this method (I made about 30 prints) I can be glad to say that:
    - tape (regular insulation) protects the drum against scratches, so durability looks good at this moment ...


    And I'm curious how much you can actually "print" the tiles before you know the wear (damage to the photosensitive surface) of the drum. I am afraid that this will happen sooner or later (certainly faster than when printing on paper).
    How will it affect the costs of "production" of tiles - the initial investment in the printer + replacement of the roller (next rollers)?
    Do you use "ordinary" insulating tape? Are not you afraid that the adhesive from the tape will stomp the drum?
    And what about the other edges of the tile, do you bite, grind?

    lukasku wrote:
    This is a spray silicon like you use for anti-freeze seals in your car

    I was interested in this silicone patent. I will try it with a thermotransfer!
    I assume you are applying a very thin layer. You can give more details. What specific spray did you use?
  • #22 16630866
    lukasku
    Level 10  
    marianm68 wrote:
    lukasku wrote:
    ... Testing this method (I did it about 30 prints) I am pleased to say that:
    - tape (regular insulation) protects the drum against scratches, so durability looks good at this moment ...


    And I'm curious how much you can actually "print" the tiles before you know the wear (damage to the photosensitive surface) of the drum. I am afraid that this will happen sooner or later (certainly faster than when printing on paper).
    How will it affect the costs of "production" of tiles - the initial investment in the printer + replacement of the roller (next rollers)?
    Do you use "ordinary" insulating tape? Are not you afraid that the adhesive from the tape will stomp the drum?
    And what about the other edges of the board, do you chamfer, grind?


    It is so that it is certainly a slightly more expensive method. For me personally, most methods are too "laborious", but I accept a slightly higher cost in advance (purchase of a printer). This is the price of "convenience" unfortunately, but after designing the plate we print (later, as in the film, a patent with acetone or soaking) and the tile goes straight to the baler.
    As for the drum's wear, I would not be surprised (at the moment it is in perfect condition), if it would withstand the end of the toner. The pressure roller (the teak which presses against the drum) is "spongy", additionally it has a regulation of about 1 cm on quite soft springs. In my humble opinion, it will last 2-3 times as much. Rollers do not wear out, there is no friction. The plate simply enters the drum that rotates at the same speed. I am not afraid of tape, it will not harm anything. Testing, I heated before the printing (of course with the taped tape) plate to about 60 degrees, so if anything would be wrong - it would work out. I smooth the remaining edges a little so that they will not be sharp. One more thing, in my case (because I was making a very large 19cmx19cm plate) I did not use a tray to which a smaller plate could be attached (as it is in the description of the printer modification), so I had to drill two holes 0.8mm to deceive the optocoupler. With smaller tiles, they are only made once in a daddy and calm.
    Ordinary insulating tape (no name) from hypermarkets sold in a multi-colored set, probably 10 pcs.

    marianm68 wrote:
    lukasku wrote:
    This is a silicon spray like this how to use anti-freeze seals in the car

    I was interested in this silicone patent. I will try it with a thermotransfer!
    I assume you are applying a very thin layer. You can give more details. What specific spray did you use?


    I do not have much experience in thermal transfer (I have always printed on a refined Epson P50 inkjet printer and older).
    The scheme looked like this, cleaning the plate with water paper, degreasing with acetone, the position of a thin layer of silicone and spreading with a cloth / breakfast paper until the plate looks like dry, after transferring the print to the plate basking 180-190 degrees 2-3min.
    Paper from the magazine "Linux Magazine", silicone company "K2 perfect" "SIL silicone spray".
    Maybe I have stupid ideas, but personally, if I was doing a thermotransfer, I would also try whether by wetting with acetone a piece of paper / foil with the imprint of the tile (perhaps also a few seconds of waiting) with the help of a sprayer (such as for window cleaning) would not give the desired effect also.
    greetings
  • #23 16630956
    marianm68
    Level 17  
    I watched the photos you attached.
    Where did you get these paths?
      Printing with a laser printer on a PCB laminate
    cut out of this photo:
    Printing with a laser printer on a PCB laminate
    Printed directly from the printer (it's not a thermal transfer)?
    Is not this the result of what I asked earlier?
  • #24 16631034
    eDZio
    Level 16  
    jacynka84 wrote:
    As if instead of a head with a filament to control this laser in any old 3D printer it would be something. Only you need to use the filament engine signals to control the laser, it's a problem because the control signals

    I see that you are trying to invent the wheel anew. If you want to build a 3D printer just to mount a laser in it, then this is an idea a bit misguided. It's better to build a laser plotter from the very beginning.
    In general, it is not a problem to mount in a printer instead of a laser head and control it. The popular Repetier reprapware (other probably also) has an option that has already been implemented.
  • #25 16631125
    Piottr242
    Level 23  
    And how will you get a plate etched on both sides?
  • #26 16631140
    jacynka84
    Level 26  
    It's more of an idea for those who already have a 3d printer. And building a small, simple cnc just under the laser like engravers is not a big deal. Because it does not have to be heavy and durable like those for metalworking. And also you can buy cheap on ali.
  • ADVERTISEMENT
  • #27 16631195
    lukasku
    Level 10  
    marianm68 wrote:
    I watched the photos you attached.
    Where did you get these paths?
    Printing with a laser printer on a PCB laminate
    cut out of this photo:
    Printing with a laser printer on a PCB laminate
    Printed directly from the printer (it's not a thermal transfer)?
    Is not this the result of what I asked earlier?

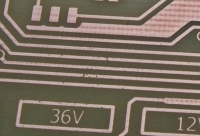
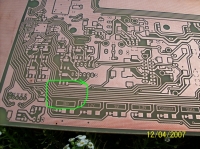
    These are mechanical abrasions that happened to me while making the other side of the tile. unfortunately, I always forget to put anything under the printed page (such a defect, I've always done one-sided tiles). Those who you noticed did not improve (first of all, it was hard for me to 20mils improve the path nicely and two thought that it would be ok). The second abrasion was just to the left of what you showed, but I corrected it, so it seems to be hardly noticeable. Generally, this tiles shallowly from my error. In general, I did double-sided on an inkjet printer a few times, but I immediately glued the print from the bottom with a paper tape.
    Piottr242 wrote:
    And how will you get a plate etched two-sided?
    I do not know if there is any other option, but I do it (at least on inkjet printers). On the print in the top of the drill several holes (3-6) and it remains only to set the margins to aim at these holes.
  • #28 16631587
    wada

    VIP Meritorious for electroda.pl
    it is not simpler and cheaper to look around for a digital printer in the area, which makes large format prints, make a polymer printout, usually while you wait, and with an average resolution of 800 dpi per inch. The cost of printing 1m ² it's only 30-40 PLN, and for larger quantities a lot ... much cheaper.
  • #29 16631658
    Piottr242
    Level 23  
    lukasku wrote:
    Piottr242 wrote:
    And how would you get a plate digested bilaterally ?
    I do not know if there is any other option, but I do it (at least on inkjet printers). On the print in the top of the drill several holes (3-6) and it remains only to set the margins to aim at these holes.

    I mean, you put a plate into the printer so many times, and you print until the overprint overlaps with those holes? I understood?
  • #30 16631817
    lukasku
    Level 10  
    wada wrote:
    it's no simpler and cheaper to look around for a digital printer in the area, which makes large format prints, do polymer printing, usually while you wait, and in resolution an average of 800dpi per inch. The cost of printing 1m ² it's only 30-40 PLN and for larger quantities much ... much cheaper.


    I never did any serial prints. It seems to me that everyone has to adapt the technique to what and how much he does. As far as I am concerned, I learn electronics (such a hobby) and if I had to fly every time to the printing house and pay ~ 30 PLN for printing, then after five I would have a printer (and you can buy a cheap one). But as I say, the issue seems to me very individual.

    Piottr242 wrote:
    lukasku wrote:
    Piottr242 wrote:
    And how will you get a plate etched on both sides?
    I do not know if there is any other option but I do it (at least on inkjet printers). On the print in the top of the drill several holes (3-6) and it remains only to set the margins to aim at these holes.

    I mean, you put a plate into the printer so many times, and you print until the overprint overlaps with those holes? I understood correctly?

    It is so, in this case (the plate was as wide as possible) I did not use the tray. So everything had to be done to "deceive" the printer and print it. In this case, if someone has not even a lot of experience and understands how it works, only 1-3 amendments. However, gluing (as in the link to remake the printer at the very top of the discussion) to the tray plate, the case is even a little simpler. You can, for example, print on a tray (interestingly an aluminum tray and elegantly prints) the middle, whether the beginning of the page and refer to it. Then max 1 fix if someone is skilled.


    I have a request for you (maybe loosely related to this subject), so I wanted to put a UV mask and cover with a pad print and a small zonk, if layers Pads and Vias is no problem how to "pull" smd pads from Top without paths?

Topic summary

The discussion revolves around the challenges and techniques of printing directly on PCB laminates using modified laser printers, particularly the Pantum and Lexmark models. Users share experiences with various methods, including the use of silicone spray to enhance toner adhesion and the hybrid approach of combining inkjet printing with toner transfer. Key issues include the need for precise laminate preparation, the durability of the toner, and the potential wear on printer components. Participants also explore the feasibility of using UV inkjet printers and CNC milling for PCB fabrication, highlighting the importance of print quality and the impact of different toners and papers on the final results.
Summary generated by the language model.
ADVERTISEMENT