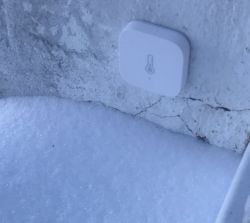
Hello, here I will present the Aqara temperature / pressure / humidity sensor model WSDCGQ11LM. I will pair it with Home Assistant via Zigbee2MQTT, show its operation, interior and sample graphs of data collected with it over a few days at the end of winter.
Aqara temperature / pressure / humidity sensor
The sensor was purchased on one of the Polish portals with online sales:
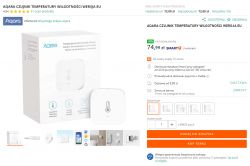
The cost of purchase - PLN 75 + shipping.
The seller lists the following parameters:
Quote:Brand: Aqara
Name: Aqara Temperature / Pressure Sensor
Model: WSDCGQ11LM
Standard: EU
Working environment temperature: -10 ? to 55 ?
Humidity: 0% - 100% RH
Wireless transmission: ZigBee 2.0
White color
Power supply: CR2032 battery
Battery life: approx. 2 years
Dimensions: 50 × 50 × 15 mm
Supported Apps: Apple Home, Aqara Home
The seller also presents the so-called 'exploded view', i.e. the view of the sensor divided into parts:
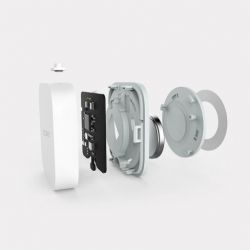
The seller also emphasizes that the Aqara central unit and the Apple Home or Aqara Home application are needed to use the sensor, but in fact this is not the only option. This sensor can also be used with Home Assistant with the Zigbee module and the Zigbee2mqtt plugin, but more on that later.
Aqara Temperature / Pressure / Humidity Sensor - First Impression
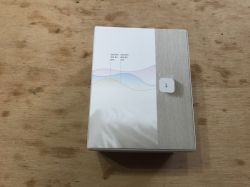
The sensor is delivered in an aesthetic, additionally foil box:
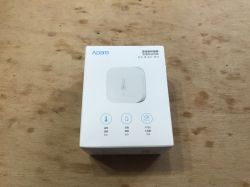

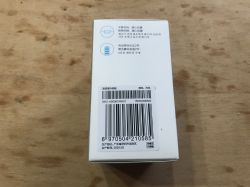
Next to the barcode you can read the SKU of the product - AS008CNW01.
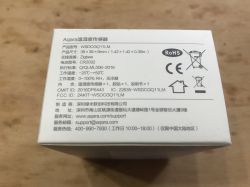
On its top there is information about the device model (WSDCGQ11LM) and the type of battery used (CR2032).
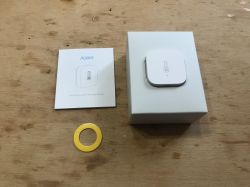
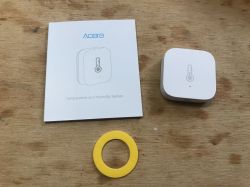
Inside there is a sensor (with the battery already installed), instructions and a double-sided disc that allows you to stick it to the wall:
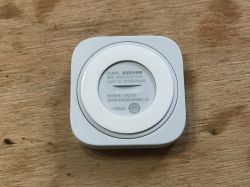
Sensor on the bottom (this cover is turned to change the battery):
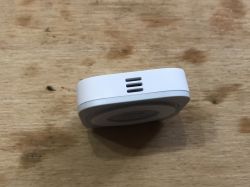
Sensor on the side (you can see where the sensor is, it should not be covered):
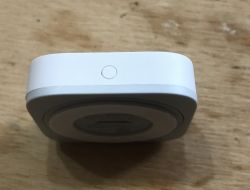
Button (for pairing):
Temperature / pressure / humidity sensor instruction
Below photos from the section in English:
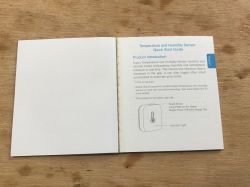
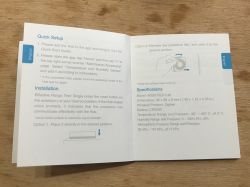
Aqara temperature / pressure / humidity sensor - pairing with Home Assistant
I do not have the Aqara manufacturer's hub, but fortunately there are also free open-source solutions compatible with this sensor. As a hub, I used CC2531 here:
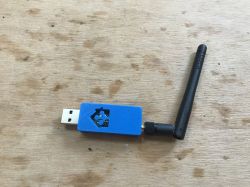
I connected it to my server on Banana Pi, and on the software side, I used Home Assistant from Zigbee2MQTT.
Detailed Home Assistant and Zigbee2MQTT tutorial is here:
https://www.elektroda.pl/rtvforum/topic3777098.html#19247020
The sensor was already in the package with the battery. There was nothing to do except press the button on the housing:

After that, I got a notification that Home Assistant has detected a new device:

From that moment in "Zigbee2mqtt" (shortcut to the list of devices from the sidebar) the sensor from the topic, i.e. WSDCGQ11LM, appeared (I already had a paired motion sensor, on the list it is number 2):

Detailed view of the device:
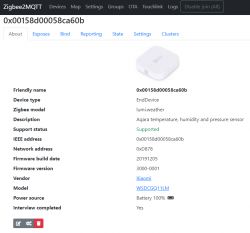
Parameters exported by the sensor:
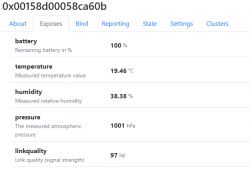
The same, but in text form ("State" tab)
Quote:
{
"battery": 100,
"humidity": 38.38,
"linkquality": 97,
"pressure": 1001,
"temperature": 19.46,
"voltage": 3055
}
A sensor configured in this way can be installed in a place chosen by us.
Room temperature:
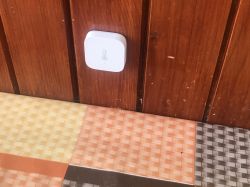
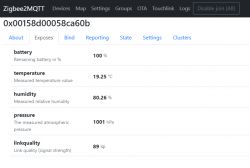
Temperature outside the window (NOTE: this is not an external sensor, I put it only for the experiment, additionally it is under the canopy):
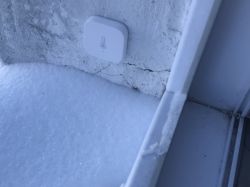
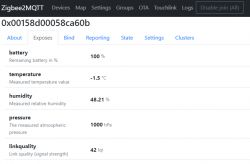
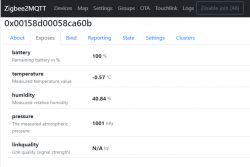
You just need to remember about the sensor's working range: -10°C to 55°C
Temperature / pressure / humidity sensor interior
It's hard to get inside this sensor. Just replacing the battery can be problematic. The coin (?) Recess is too low and the lid is too tight to remove. The only good way I know is to stick the sensor (on the sticky pad from the kit) to a flat surface and then turn it slightly. Then we gain access to the CR2032 battery:
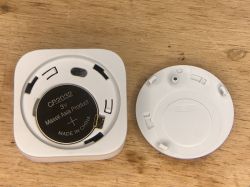
Then it is enough to pry the plastic cap off with a flat screwdriver and you can get to the electronics:
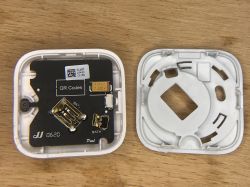
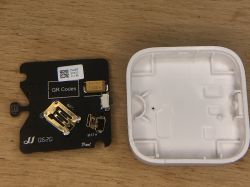
On top of the PCB there is only a large electrolytic capacitor (well, big by SMD standards) with the code 227, ie 220 uF. You can also see the sensor and the button.
Let's take a closer look at:
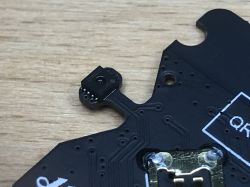
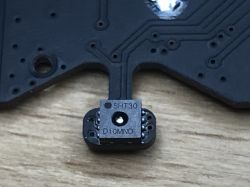
This sensor is SHT30. Quite popular, even in the Arduino world. You can also buy it as a beginner-friendly module:
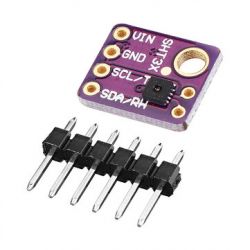
More about him can be found in his catalog note:
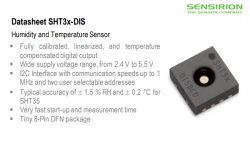
This sensor uses I2C for communication, you can easily handle it yourself from a microcontroller. SHT3x catalog note:
Now the plate on the other side:
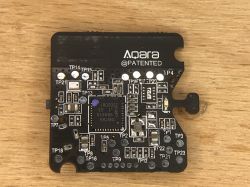
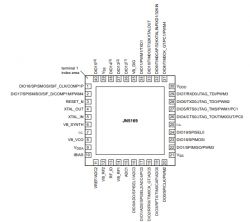
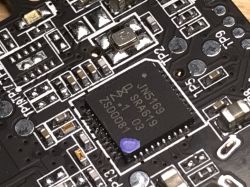
The heart of the sensor is JN5169:
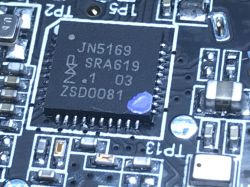
32-bit microcontroller with 512KB of Flash memory, 32KB RAM and 4KB EEPROM, offering various peripherals, incl. hardware I2C (and the sensor used is exactly what I2C uses):
PCB antenna and chip (perhaps a filter?) Signed P2T 028 (I have not found information about it):
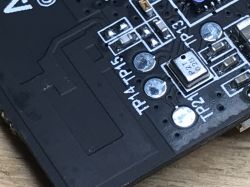
Place for an additional circuit (I do not know what was originally supposed to be there) with 10 pins (2 rows of 5) and a quartz resonator / clock source with 4 pins:
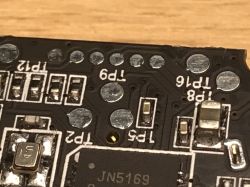
Programming connector (pins RX and TX are led out here):
In the catalog note JN5169 you can find information on how to program it, including:
Quote:
DO0 / SPICLK / PWM2 - JTAG programming mode: must be left floating high during reset to avoid entering JTAG programming mode.
DO1 / SPIMISO / PWM3 - UART programming mode: leave pin floating high during reset to avoid entering UART programming mode or hold it low to program
Full note below:
Aqara sensor - automation
Of course, such a sensor connected to the Home Assistant is not only used to let the user check how warm it is outside. In Home Assistant, all kinds of automation can be done for him.
For example, you can turn on the heating when the temperature drops below the given value, or turn it off when it reaches a certain threshold.
I have already discussed creating automation in Home Assistant here:
Home Assistant Tutorial - configuration, WiFi, MQTT, Zigbee, Tasmota
I also wrote a little about them here:
Relay driver compatible with Home Assistant / Tasmota HTTP + housing
The sensor itself provides the following variables, and they can all be used in automations:
{
"battery": 100,
"humidity": 38.38,
"linkquality": 97,
"pressure": 1001,
"temperature": 19.46,
"voltage": 3055
}
We even have access to the voltage from the CR2032 and can be monitored remotely by the Home Assistant.
Aqara sensor - temperature chart outside the window
Home Assistant automatically creates a graph of the obtained measurements. Below is the temperature chart from this sensor:
It is worth remembering that the sensor was installed outside the window around 2 p.m.
Same chart - but after two days:

The chart can be generated for any range in Home Assistant.
Summary
The WSDCGQ11LM temperature / pressure sensor seems to be a very good choice, it is light, small and energy efficient - it uses Zigbee communication which is less power hungry than WiFi. It can be used very easily outside its 'natural environment', i.e. pair with Home Assistant and you do not even need to open or program it (although the fact that you have to have HA in place and you need a zigbee dongle ..)
I have not tested the WSDCGQ11LM sensor with its original hub and manufacturer's software, so I will not say anything about them.
In the middle of the sensor there is a JN5169 microcontroller, SHT30 is used for measurements, and it is powered by a CR2032 battery.
The only downside of this sensor is its measured temperature range - it only reaches -10 ° C, and in our country it can sometimes be lower. But basically it is a sensor for indoor rather than outdoor, so we can consider it ok.
Cool? Ranking DIY Helpful post? Buy me a coffee.


