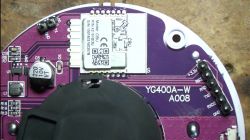
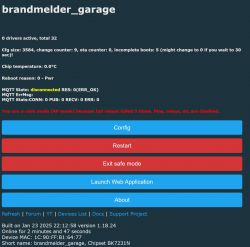
I have bought four devices after reading this article. Is there a complete instruction somewhere what to do or what order? I only know tasmota so far.
The soldering is as easy as it gets.
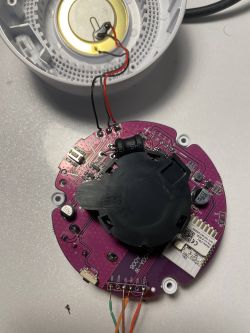
ok you need install BK7231 EASY UART flasher, Select the N model, click download latest from web and hit flash. Maybe press the reset button on the smoke alert so it will be able to flash.
I used the current build to this date Built on Jan 23 2025 22:12:58 version 1.18.24
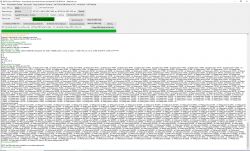
After the flash I have to disconnect the power and reconnect and wait for openbeken wifi AP to appear, connect to 192.168.4.1 in your browser.
If no wifi shows, 5x reconnect power to reset the device and you should see the wifi eventually.
After entering the PIN information and the autoexe.bat it seems to work as long as it get 3.3V from the UART flasher.
{
"vendor": "Tuya",
"bDetailed": "0",
"name": "Tuya YG400A-W Smoke Alarm Smoke Sensor",
"model": "YG400A-W",
"chip": "BK7231N",
"board": "TODO",
"flags": "1024",
"keywords": [
"TODO",
"TODO",
"TODO"
],
"pins": {
"9": "dInput_n;2",
"15": "dInput_n;1",
"17": "WifiLED_n;3",
"23": "BAT_ADC;4",
"26": "BAT_Relay_n;5",
"28": "Btn;6"
},
"command": "",
"image": "https://obrazki.elektroda.pl/YOUR_IMAGE.jpg",
"wiki": "https://www.elektroda.com/rtvforum/topic_YOUR_TOPIC.html"
}
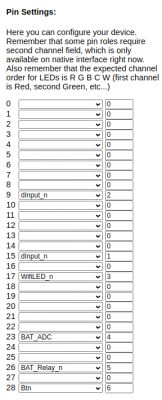
I used this autoexe.bat from post 102, post 88 did not work for me
Battery_Setup 2000 3000 2 2400 4096
//measure batt every 2s
Battery_cycle 2
//mqtt_broadcastInterval 1
//mqtt_broadcastItemsPerSec 5
addEventHandler OnHold 10 SafeMode 5

setChannelLabel 1 Smoke
setChannelLabel 2 Tamper

// now wait for MQTT
waitFor MQTTState 1
// extra delay, to be sure
delay_s 1
// publish smoke and tamper state at least once after boot
publish 1 $CH1
publish 2 $CH2

// if tampered, keep cycling (but drains battery)
again1:
delay_s 1
if $CH2!=1 then goto again1
delay_s 5
goto again

// if smoke detected, keep cycling (but drains battery)
again:
delay_s 1
if $CH1!=1 then goto again
delay_s 5

// All good, sleep for 1 day
PinDeepSleep 86400
Restart the device, enter mqtt information of home assistant and start the homeassistant discovery from openbeken config menu. Then you should see the sensor as mqtt device in homeassistant.
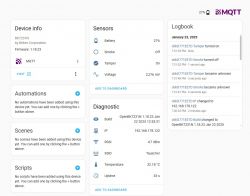
With this everything works nice. Thank you everybody. I really like the tamper feature so I can see if the tenants removed the smoke detectors.
However, the tamper pin will not wake up the device from deep sleep.
Because I changed to rechargable AAA Ni MH batteries, I changed the autoexec code as follows:
Battery_Setup 2000 2800 2 2400 4096
//measure batt every 30
Battery_cycle 30
//mqtt_broadcastInterval 1
//mqtt_broadcastItemsPerSec 5
addEventHandler OnHold 10 SafeMode 5

setChannelLabel 1 Smoke
setChannelLabel 2 Tamper

// now wait for MQTT
waitFor MQTTState 1
// extra delay, to be sure
delay_s 1
// publish smoke and tamper state at least once after boot
publish 1 $CH1
publish 2 $CH2

// if tampered, keep cycling (but drains battery)
again1:
delay_s 1
if $CH2!=1 then goto again1
delay_s 5
goto again

// if smoke detected, keep cycling (but drains battery)
again:
delay_s 1
if $CH1!=1 then goto again
delay_s 5

// All good, sleep for 1 hour
PinDeepSleep 3600
Explanation of Parameters:
2000: The low threshold voltage (2000 mV, or 2.0V) when the battery is considered nearly empty.
2800: The high threshold voltage (2800 mV, or 2.8V) when the battery is fully charged.
2: The frequency of battery measurement (every 2 seconds).
2400: The scale factor for normalizing the readings (typically set to the nominal voltage, 2400 mV for a 2-cell pack).
4096: The maximum ADC value (assumes a 12-bit ADC, common in microcontrollers).


