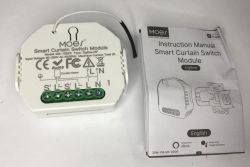
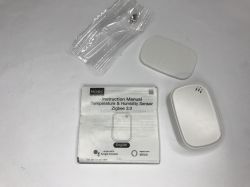
Hello, this is my first teardown of a generic Tuya-compatible smart switch with 4 ports. The model is WSM16-4.
I bought it from AliExpress: https://a.aliexpress.com/_mM5GhGI
Let me also post here some screenshots from the Aliexpress link, in case it expires...
![[BK7231N / CBU] Generic Tuya 4-Port Wifi Smart Switch WSM16-4 [BK7231N / CBU] Generic Tuya 4-Port Wifi Smart Switch WSM16-4](https://obrazki.elektroda.pl/1163830600_1672938690_thumb.jpg)
![[BK7231N / CBU] Generic Tuya 4-Port Wifi Smart Switch WSM16-4 [BK7231N / CBU] Generic Tuya 4-Port Wifi Smart Switch WSM16-4](https://obrazki.elektroda.pl/4938331800_1672938700_thumb.jpg)
What a nice tricky way to do a dual way control.
![[BK7231N / CBU] Generic Tuya 4-Port Wifi Smart Switch WSM16-4 [BK7231N / CBU] Generic Tuya 4-Port Wifi Smart Switch WSM16-4](https://obrazki.elektroda.pl/1375930800_1672938723_thumb.jpg)
![[BK7231N / CBU] Generic Tuya 4-Port Wifi Smart Switch WSM16-4 [BK7231N / CBU] Generic Tuya 4-Port Wifi Smart Switch WSM16-4](https://obrazki.elektroda.pl/5963279600_1672938754_thumb.jpg)
![[BK7231N / CBU] Generic Tuya 4-Port Wifi Smart Switch WSM16-4 [BK7231N / CBU] Generic Tuya 4-Port Wifi Smart Switch WSM16-4](https://obrazki.elektroda.pl/8567448700_1672938757_thumb.jpg)
![[BK7231N / CBU] Generic Tuya 4-Port Wifi Smart Switch WSM16-4 [BK7231N / CBU] Generic Tuya 4-Port Wifi Smart Switch WSM16-4](https://obrazki.elektroda.pl/4276694700_1672934762_thumb.jpg)
![[BK7231N / CBU] Generic Tuya 4-Port Wifi Smart Switch WSM16-4 [BK7231N / CBU] Generic Tuya 4-Port Wifi Smart Switch WSM16-4](https://obrazki.elektroda.pl/3081719100_1672934931_thumb.jpg)
![[BK7231N / CBU] Generic Tuya 4-Port Wifi Smart Switch WSM16-4 [BK7231N / CBU] Generic Tuya 4-Port Wifi Smart Switch WSM16-4](https://obrazki.elektroda.pl/2099491800_1672934969_thumb.jpg)
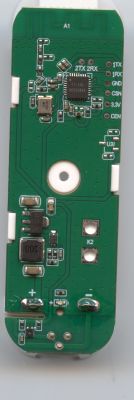
We can see that the MCU used is a CBU. These pictures were taken after disassembly and OpenBK converting, that's why there are burn marks on the plastic casing and uneven solder.
Datasheet: https://developer.tuya.com/en/docs/iot/cbu-module-datasheet?id=Ka07pykl5dk4u
By looking at the datasheet, this is the pinout used for flashing OpenBK:
![[BK7231N / CBU] Generic Tuya 4-Port Wifi Smart Switch WSM16-4 [BK7231N / CBU] Generic Tuya 4-Port Wifi Smart Switch WSM16-4](https://obrazki.elektroda.pl/2681432600_1672935523_thumb.jpg)
![[BK7231N / CBU] Generic Tuya 4-Port Wifi Smart Switch WSM16-4 [BK7231N / CBU] Generic Tuya 4-Port Wifi Smart Switch WSM16-4](https://obrazki.elektroda.pl/9445509800_1672935293_thumb.jpg)
- GND: pin 13
- VCC: pin 14
- TX1: pin 15
- RX1: pin 16
- CEN: pin 18
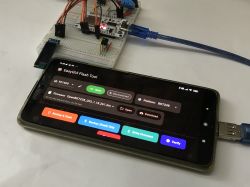
To flash OpenBK, I used a USB UART programmer and connected the cables accordingly. As usual, CEN neeeds to be grounded before flashing, so I connected CEN to a push button that grounds the pin when I press it, so the MCU can enter the bootloader mode.
![[BK7231N / CBU] Generic Tuya 4-Port Wifi Smart Switch WSM16-4 [BK7231N / CBU] Generic Tuya 4-Port Wifi Smart Switch WSM16-4](https://obrazki.elektroda.pl/8918025500_1672935616_thumb.jpg)
I used the hid_download tool to flash, obtained from https://github.com/OpenBekenIOT/hid_download_py and used the following parameters:
As soon as the program started, I pressed the push button connected to CEN to put the device into bootloader mode in order to flash the new firmware. The unprotect parameter is required, otherwise it will fail with a CRC error.
NOTE: As pointed out, the method above can be replaced by using the new Windows, user-friendly flashing tool from https://github.com/openshwprojects/BK7231GUIFlashTool
After flashing, it was time to configure the module by assigning its pins to their functions. I tried to look for existing teardowns and their setups, but unfortunately none of them had the same pinout as this "generic" module, so it was a trial and error method by connecting a light bulb to the relay outputs and testing each pin to find the correct pinout.
![[BK7231N / CBU] Generic Tuya 4-Port Wifi Smart Switch WSM16-4 [BK7231N / CBU] Generic Tuya 4-Port Wifi Smart Switch WSM16-4](https://obrazki.elektroda.pl/6036317000_1672936095_thumb.jpg)
- P6: Btn, channel 2
- P7: Btn, channel 3
- P8: Btn, channel 4
- P9: WifiLED
- P10: Relay, channel 2
- P16: Relay, channel 4
- P17: Relay, channel 3
- P20: Relay, channel 1
- P24: Btn; this is the button originally used to pair the device, I'm using it to toggle all relays on or off.
- P26: Btn, channel 1
![[BK7231N / CBU] Generic Tuya 4-Port Wifi Smart Switch WSM16-4 [BK7231N / CBU] Generic Tuya 4-Port Wifi Smart Switch WSM16-4](https://obrazki.elektroda.pl/4729234300_1672936435_thumb.jpg)
I bought it from AliExpress: https://a.aliexpress.com/_mM5GhGI
Let me also post here some screenshots from the Aliexpress link, in case it expires...
![[BK7231N / CBU] Generic Tuya 4-Port Wifi Smart Switch WSM16-4 [BK7231N / CBU] Generic Tuya 4-Port Wifi Smart Switch WSM16-4](https://obrazki.elektroda.pl/1163830600_1672938690_thumb.jpg)
![[BK7231N / CBU] Generic Tuya 4-Port Wifi Smart Switch WSM16-4 [BK7231N / CBU] Generic Tuya 4-Port Wifi Smart Switch WSM16-4](https://obrazki.elektroda.pl/4938331800_1672938700_thumb.jpg)
What a nice tricky way to do a dual way control.
![[BK7231N / CBU] Generic Tuya 4-Port Wifi Smart Switch WSM16-4 [BK7231N / CBU] Generic Tuya 4-Port Wifi Smart Switch WSM16-4](https://obrazki.elektroda.pl/1375930800_1672938723_thumb.jpg)
![[BK7231N / CBU] Generic Tuya 4-Port Wifi Smart Switch WSM16-4 [BK7231N / CBU] Generic Tuya 4-Port Wifi Smart Switch WSM16-4](https://obrazki.elektroda.pl/5963279600_1672938754_thumb.jpg)
![[BK7231N / CBU] Generic Tuya 4-Port Wifi Smart Switch WSM16-4 [BK7231N / CBU] Generic Tuya 4-Port Wifi Smart Switch WSM16-4](https://obrazki.elektroda.pl/8567448700_1672938757_thumb.jpg)
![[BK7231N / CBU] Generic Tuya 4-Port Wifi Smart Switch WSM16-4 [BK7231N / CBU] Generic Tuya 4-Port Wifi Smart Switch WSM16-4](https://obrazki.elektroda.pl/4276694700_1672934762_thumb.jpg)
![[BK7231N / CBU] Generic Tuya 4-Port Wifi Smart Switch WSM16-4 [BK7231N / CBU] Generic Tuya 4-Port Wifi Smart Switch WSM16-4](https://obrazki.elektroda.pl/3081719100_1672934931_thumb.jpg)
![[BK7231N / CBU] Generic Tuya 4-Port Wifi Smart Switch WSM16-4 [BK7231N / CBU] Generic Tuya 4-Port Wifi Smart Switch WSM16-4](https://obrazki.elektroda.pl/2099491800_1672934969_thumb.jpg)
We can see that the MCU used is a CBU. These pictures were taken after disassembly and OpenBK converting, that's why there are burn marks on the plastic casing and uneven solder.
Datasheet: https://developer.tuya.com/en/docs/iot/cbu-module-datasheet?id=Ka07pykl5dk4u
By looking at the datasheet, this is the pinout used for flashing OpenBK:
![[BK7231N / CBU] Generic Tuya 4-Port Wifi Smart Switch WSM16-4 [BK7231N / CBU] Generic Tuya 4-Port Wifi Smart Switch WSM16-4](https://obrazki.elektroda.pl/2681432600_1672935523_thumb.jpg)
![[BK7231N / CBU] Generic Tuya 4-Port Wifi Smart Switch WSM16-4 [BK7231N / CBU] Generic Tuya 4-Port Wifi Smart Switch WSM16-4](https://obrazki.elektroda.pl/9445509800_1672935293_thumb.jpg)
- GND: pin 13
- VCC: pin 14
- TX1: pin 15
- RX1: pin 16
- CEN: pin 18
To flash OpenBK, I used a USB UART programmer and connected the cables accordingly. As usual, CEN neeeds to be grounded before flashing, so I connected CEN to a push button that grounds the pin when I press it, so the MCU can enter the bootloader mode.
![[BK7231N / CBU] Generic Tuya 4-Port Wifi Smart Switch WSM16-4 [BK7231N / CBU] Generic Tuya 4-Port Wifi Smart Switch WSM16-4](https://obrazki.elektroda.pl/8918025500_1672935616_thumb.jpg)
I used the hid_download tool to flash, obtained from https://github.com/OpenBekenIOT/hid_download_py and used the following parameters:
python uartprogram OpenBK7231N_QIO_1.15.206.bin --unprotect -d /dev/ttyUSB0 -w --startaddr 0x0As soon as the program started, I pressed the push button connected to CEN to put the device into bootloader mode in order to flash the new firmware. The unprotect parameter is required, otherwise it will fail with a CRC error.
NOTE: As pointed out, the method above can be replaced by using the new Windows, user-friendly flashing tool from https://github.com/openshwprojects/BK7231GUIFlashTool
After flashing, it was time to configure the module by assigning its pins to their functions. I tried to look for existing teardowns and their setups, but unfortunately none of them had the same pinout as this "generic" module, so it was a trial and error method by connecting a light bulb to the relay outputs and testing each pin to find the correct pinout.
![[BK7231N / CBU] Generic Tuya 4-Port Wifi Smart Switch WSM16-4 [BK7231N / CBU] Generic Tuya 4-Port Wifi Smart Switch WSM16-4](https://obrazki.elektroda.pl/6036317000_1672936095_thumb.jpg)
- P6: Btn, channel 2
- P7: Btn, channel 3
- P8: Btn, channel 4
- P9: WifiLED
- P10: Relay, channel 2
- P16: Relay, channel 4
- P17: Relay, channel 3
- P20: Relay, channel 1
- P24: Btn; this is the button originally used to pair the device, I'm using it to toggle all relays on or off.
- P26: Btn, channel 1
![[BK7231N / CBU] Generic Tuya 4-Port Wifi Smart Switch WSM16-4 [BK7231N / CBU] Generic Tuya 4-Port Wifi Smart Switch WSM16-4](https://obrazki.elektroda.pl/4729234300_1672936435_thumb.jpg)
Cool? Ranking DIY


![[BK7231N / CBU] Generic Tuya 4-Port Wifi Smart Switch WSM16-4 [BK7231N / CBU] Generic Tuya 4-Port Wifi Smart Switch WSM16-4](https://obrazki.elektroda.pl/3737740800_1672948898_thumb.jpg)
![[BK7231N / CBU] Generic Tuya 4-Port Wifi Smart Switch WSM16-4 [BK7231N / CBU] Generic Tuya 4-Port Wifi Smart Switch WSM16-4](https://obrazki.elektroda.pl/9803992000_1673164147_thumb.jpg)