logo elektroda
logo elektroda
X
logo elektroda

Uploading firmware to the 4.5W RGBW GU10 Spectrum SMART WOJ+16823 LED bulb with BK7231N

mashgsm 2265 1

TL;DR

  • A 4.5W RGBW-CCT GU10 Spectrum SMART WOJ+16823 LED bulb with a BK7231N controller was flashed to OpenBK instead of the original Tuya firmware.
  • After Tuya updated the bulb from 1.3.22 to 1.5.21, Cloudcutter no longer worked, so the case was cut open and the board wired to RX, TX, 3.3V, and ground.
  • The bulb sold for PLN 21.99 and uses a CBLC5 micro board; flashing was done with BK7231Flasher and OpenBK7231N_QIO_1.17.308.bin.
  • The result was a working OpenBK bulb with color configuration, but disassembly was difficult, one green LED was damaged, and heat makes stronger glue preferable.
Generated by the language model.
ADVERTISEMENT
Treść została przetłumaczona polish » english Zobacz oryginalną wersję tematu
📢 Listen (AI):
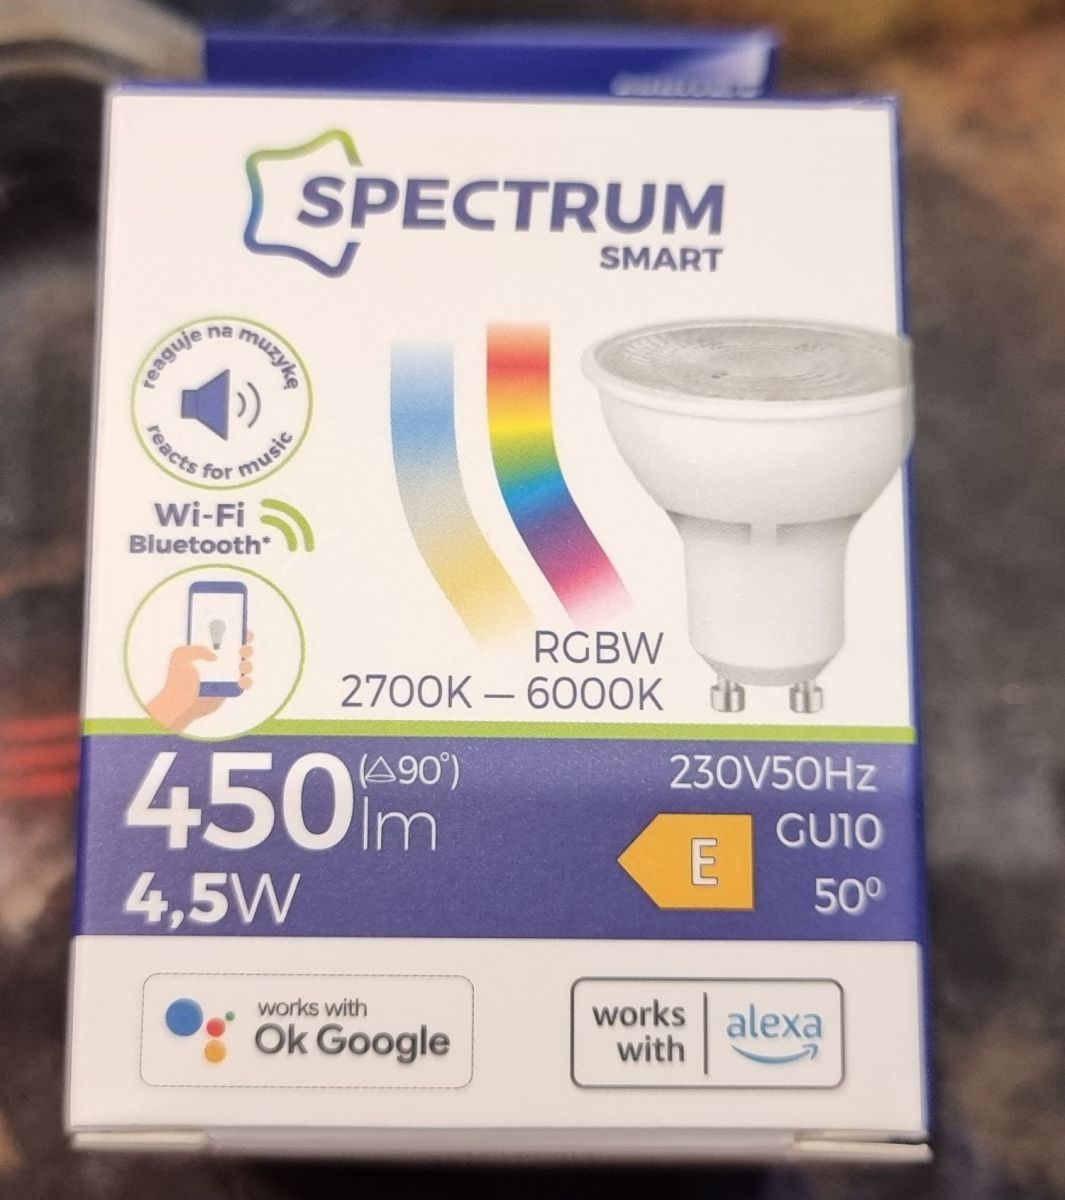
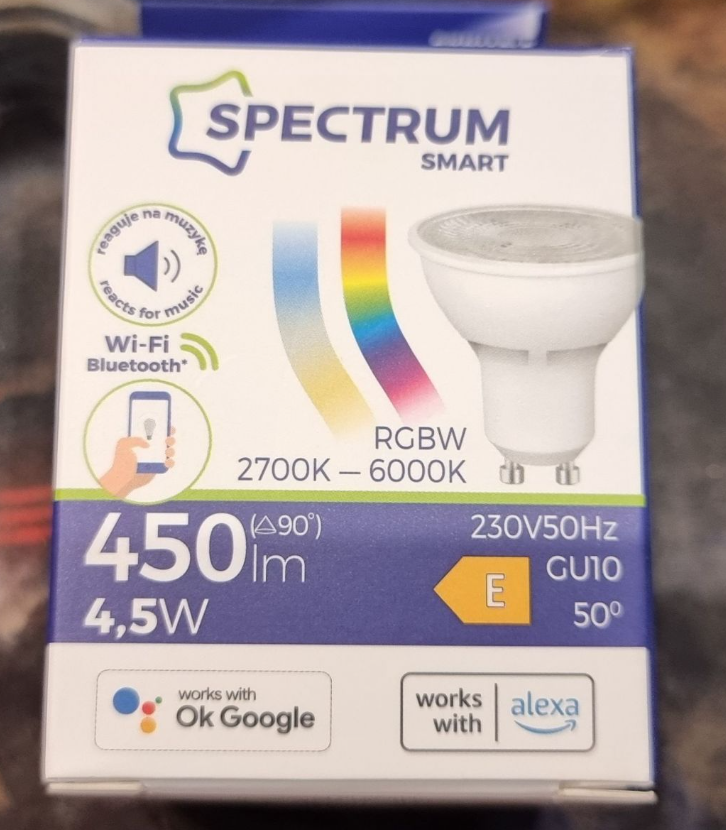
  • Box of Spectrum Smart LED RGBW GU10 4.5W bulb with Wi-Fi and Bluetooth features.
    Hello, here is a description of flashing via WiFi (without soldering) a 4.5W LED bulb from the SpectrumLed store, the successor of the 5W model. The promotional price is PLN 21.99, so rather good for an RGBW-CCT bulb.
    Screenshot from the store:
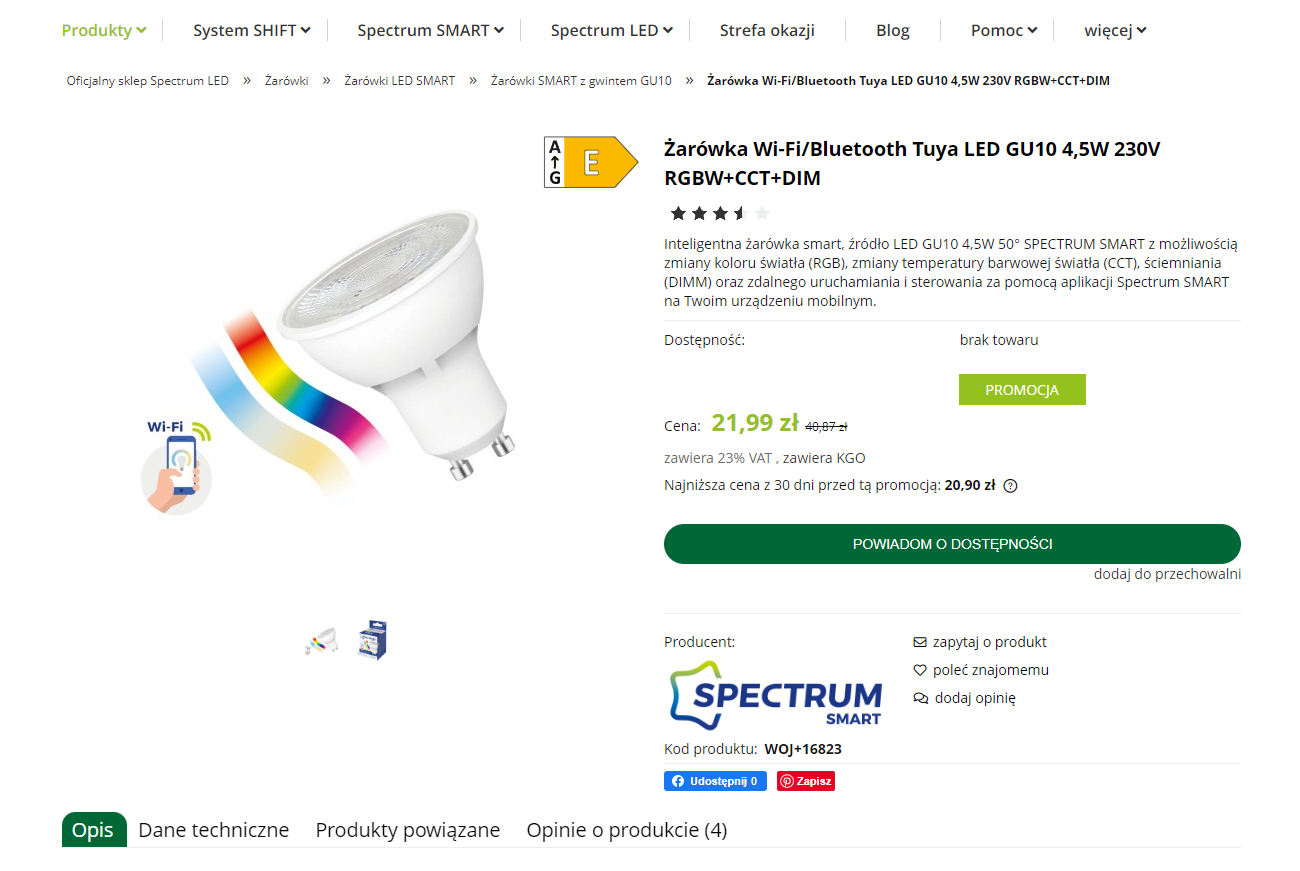
    Screenshot of the Spectrum LED website displaying the offer for LED bulb Spectrum SMART GU10 4.5W.
    https://sklep.spectrumled.pl/pl/p/Zarowka-Wi-...ooth-Tuya-LED-GU10-4%2C5W-230V-RGBW-CCT-DIM/2

    Previously, I bought the same ones, only 5W, but when they are lit next to each other, there is no difference. In my opinion, this is a new model, the earlier WOJ+14415 is probably being withdrawn by the manufacturer.

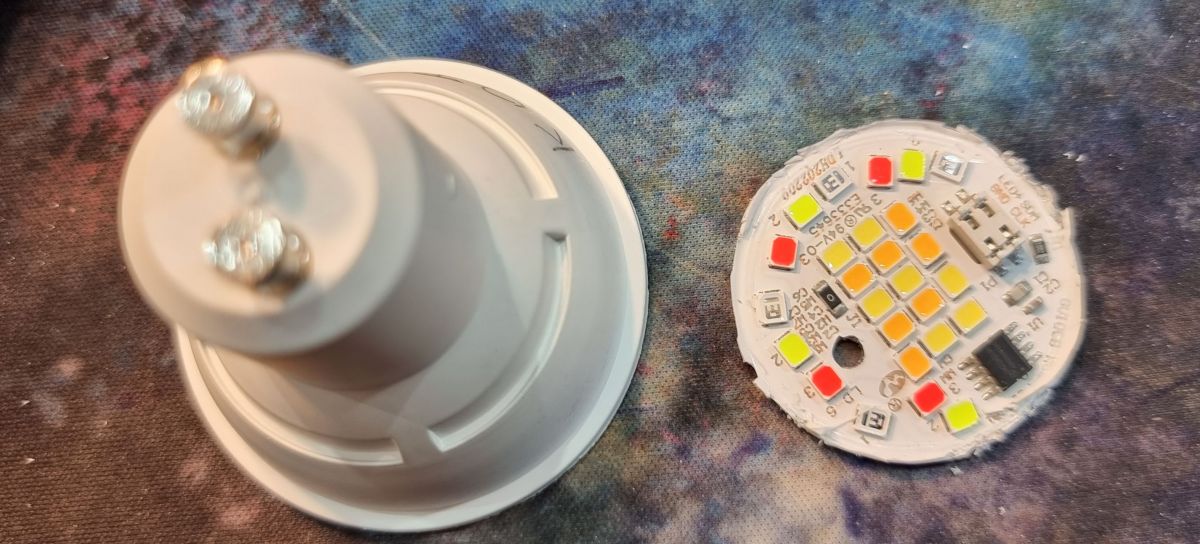
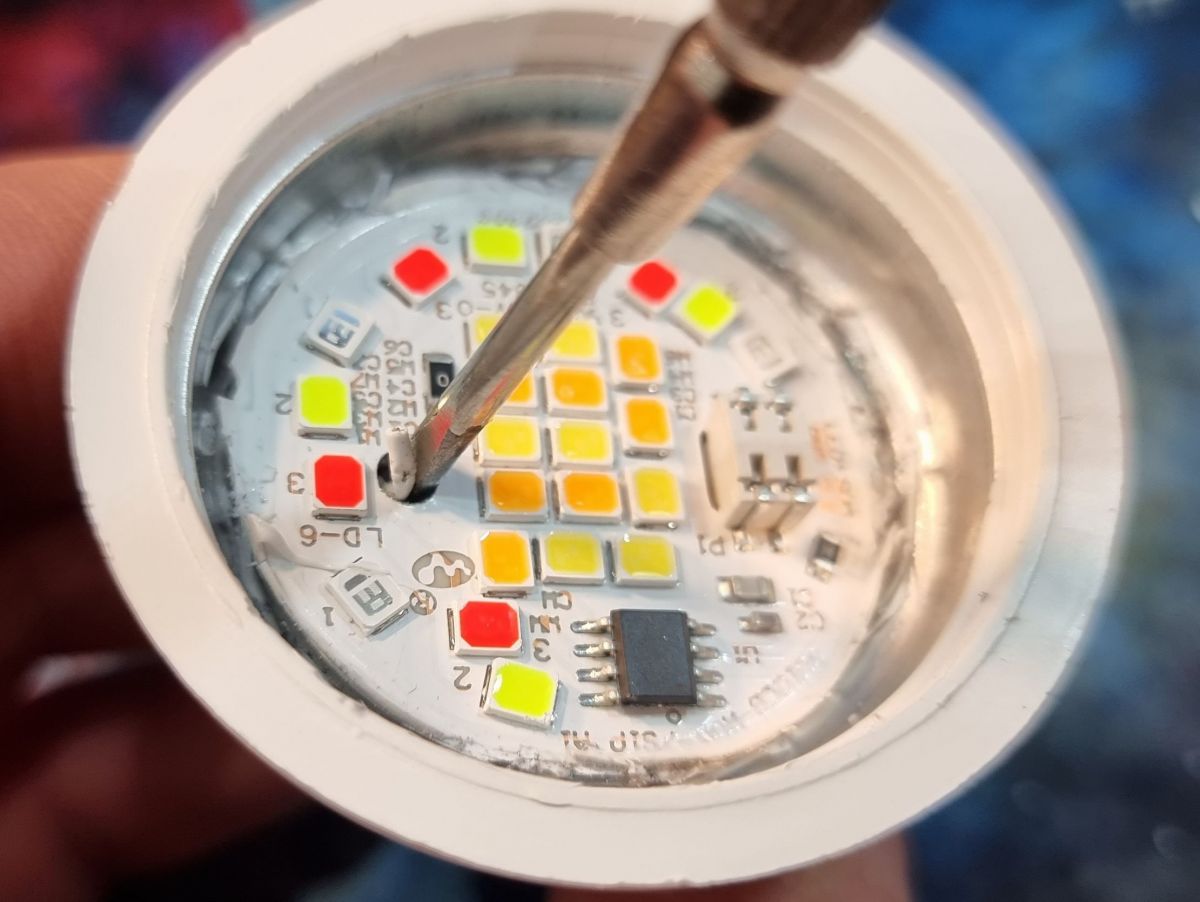
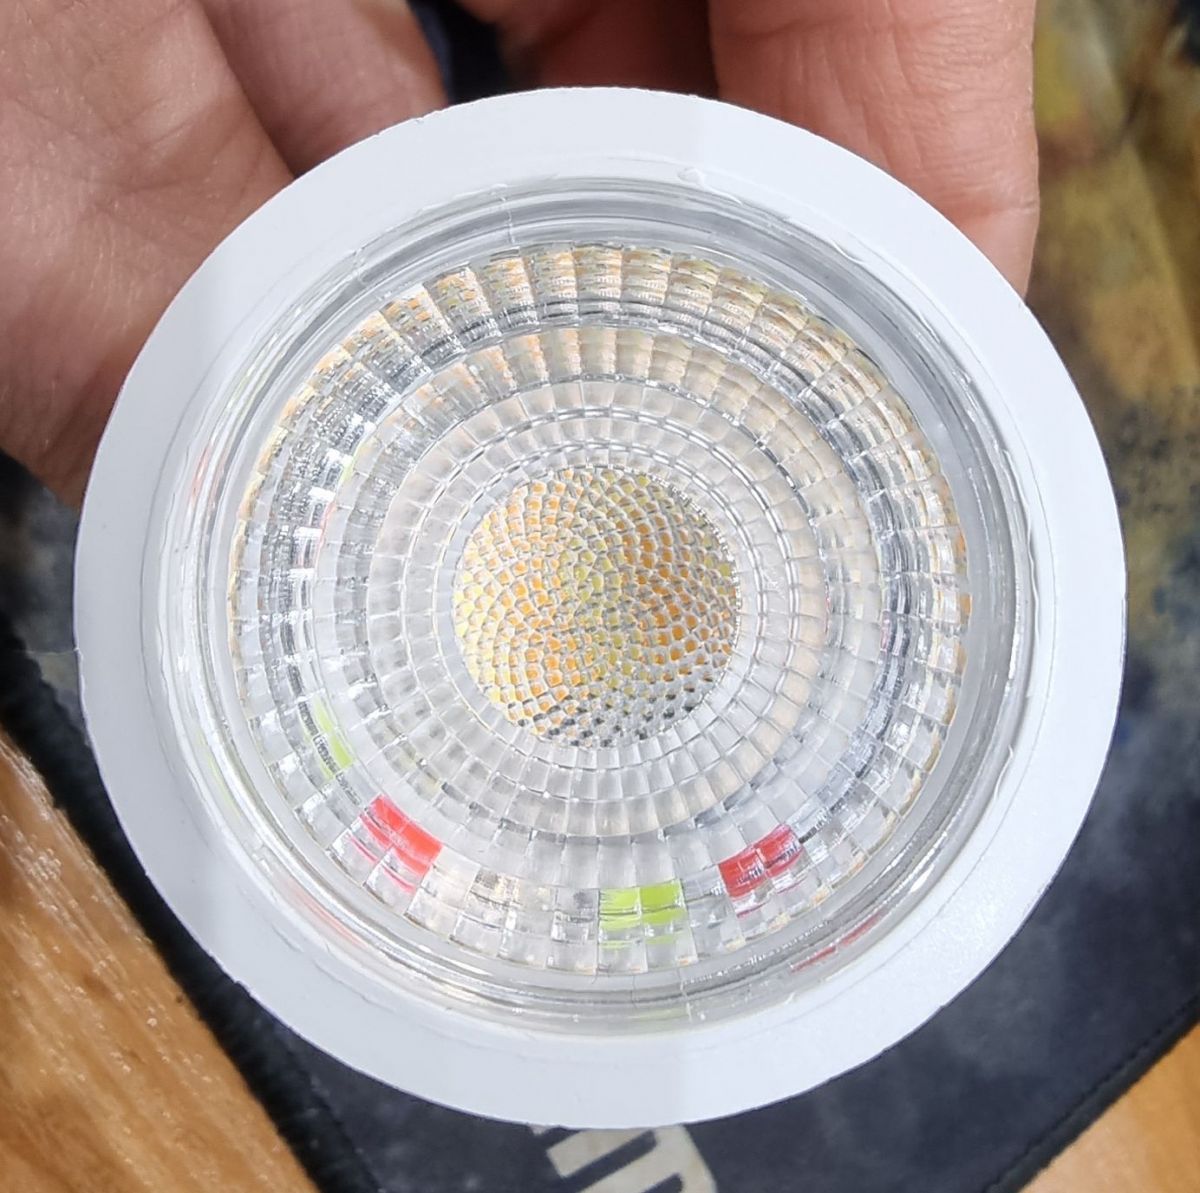
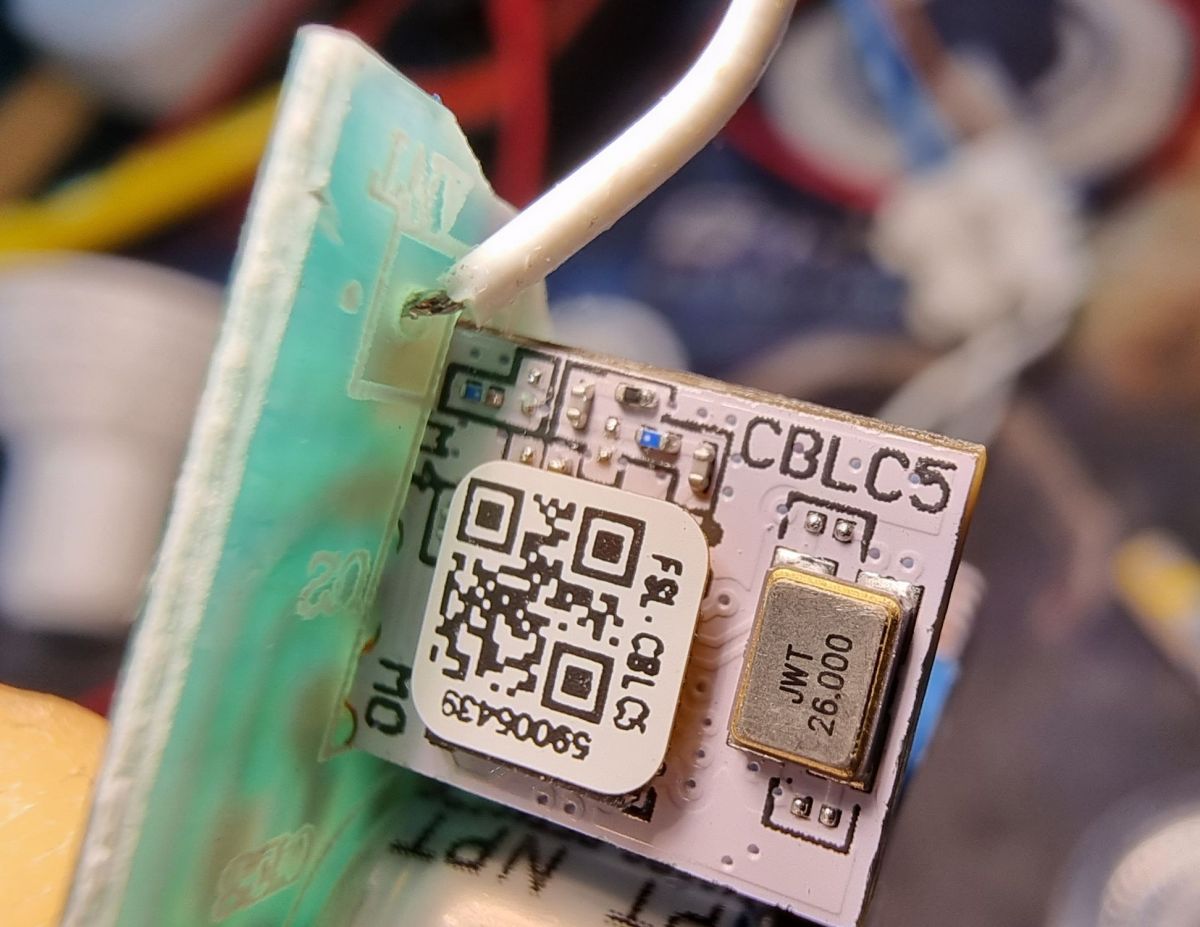
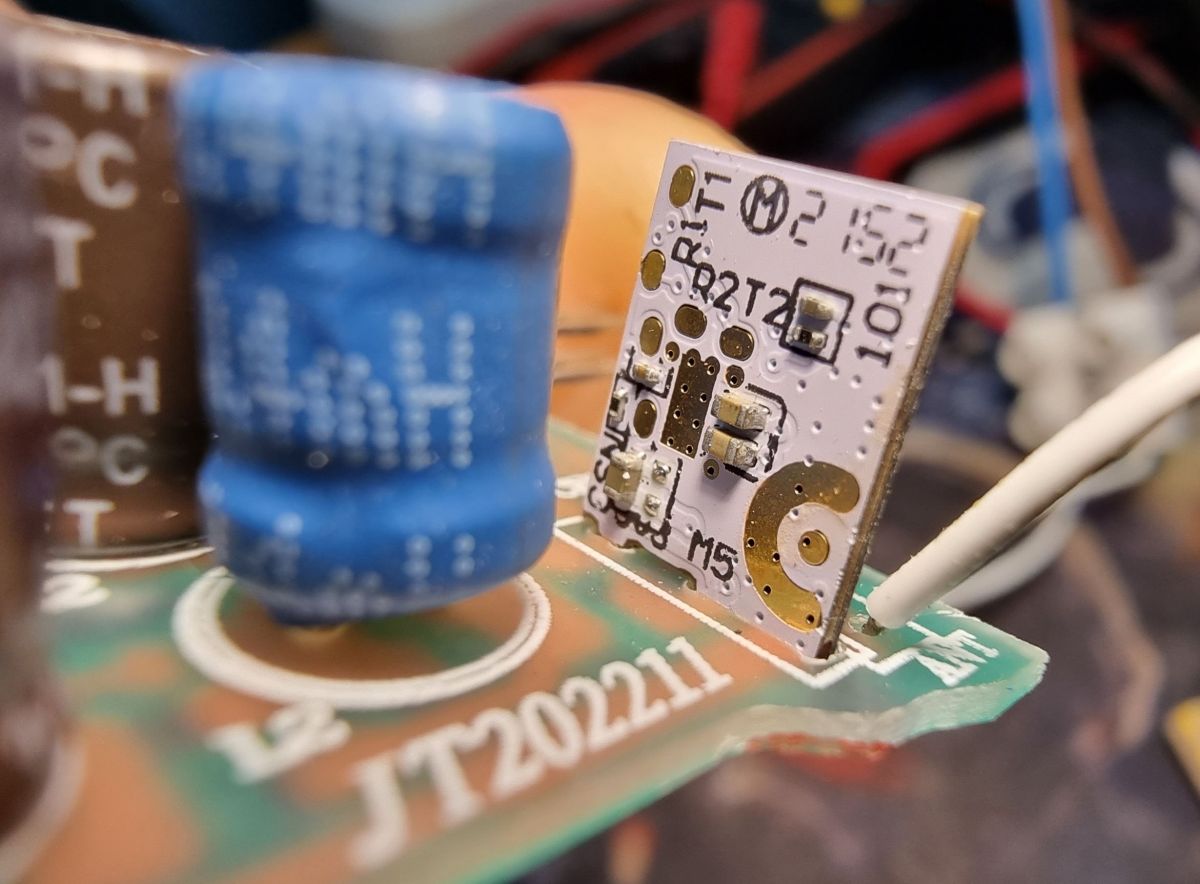
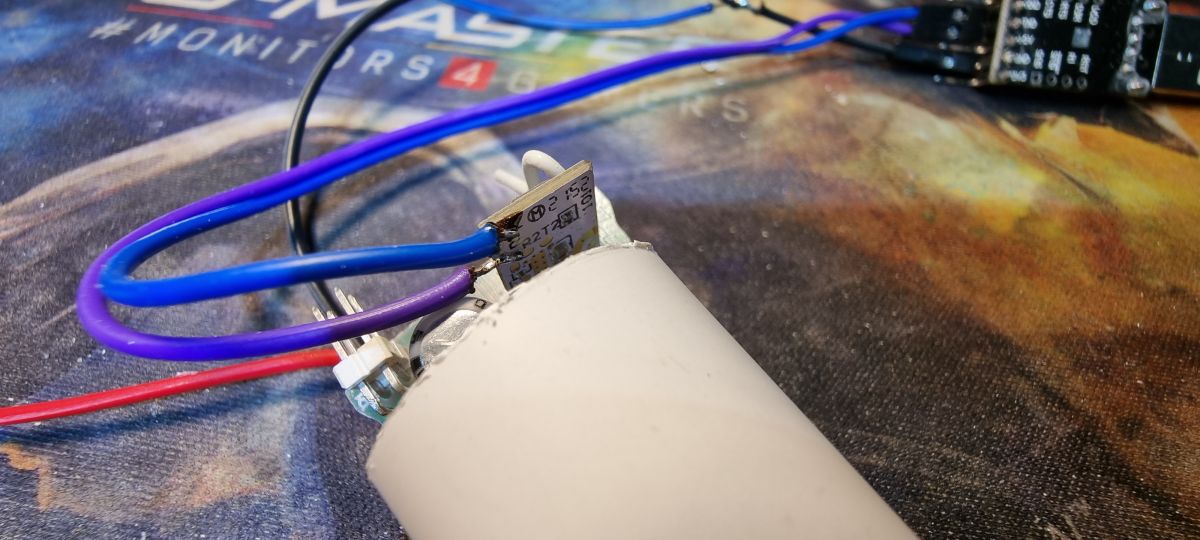
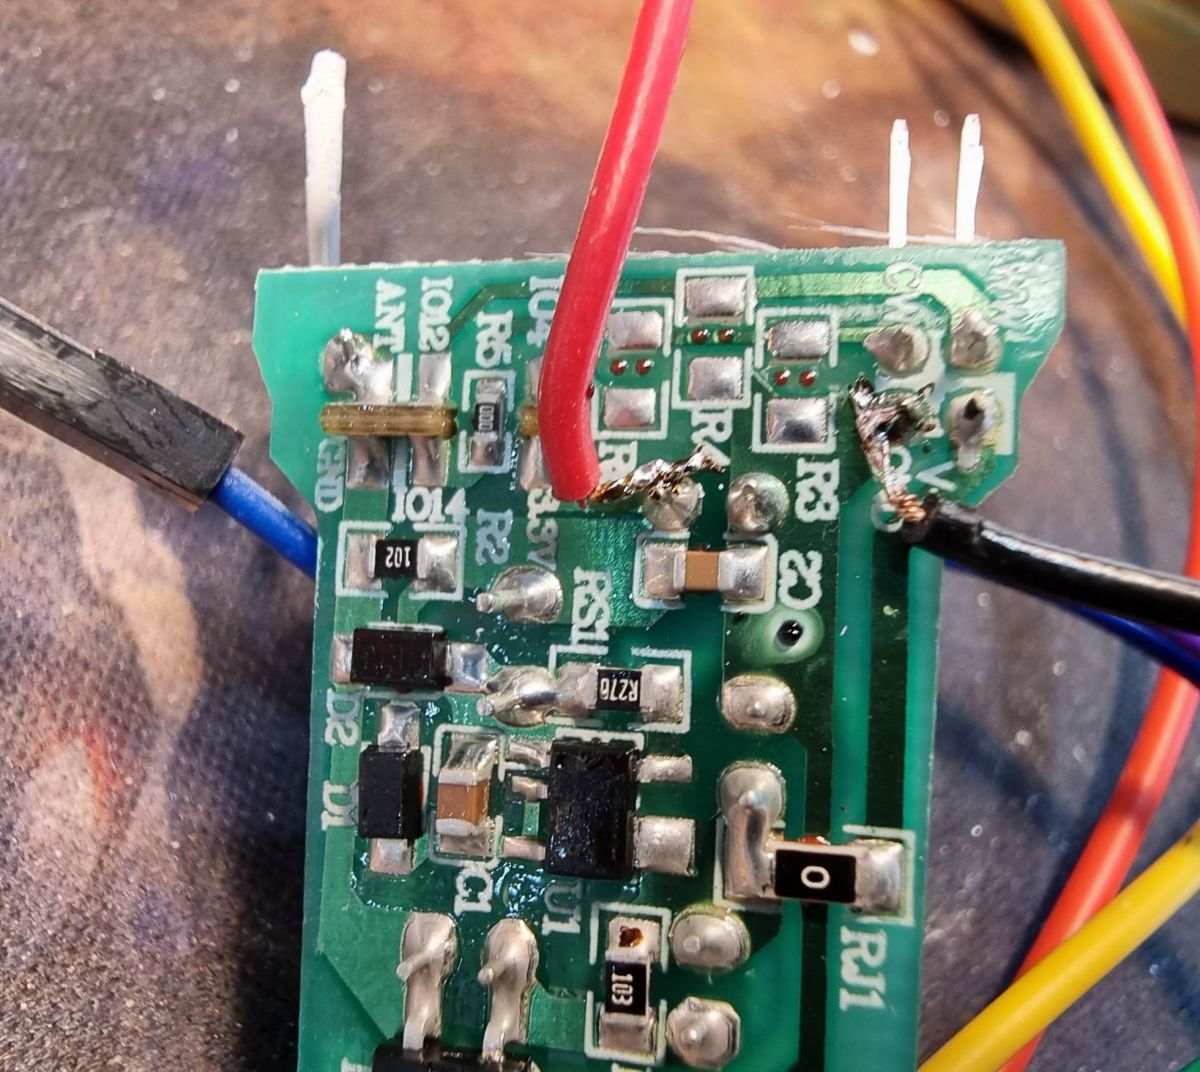
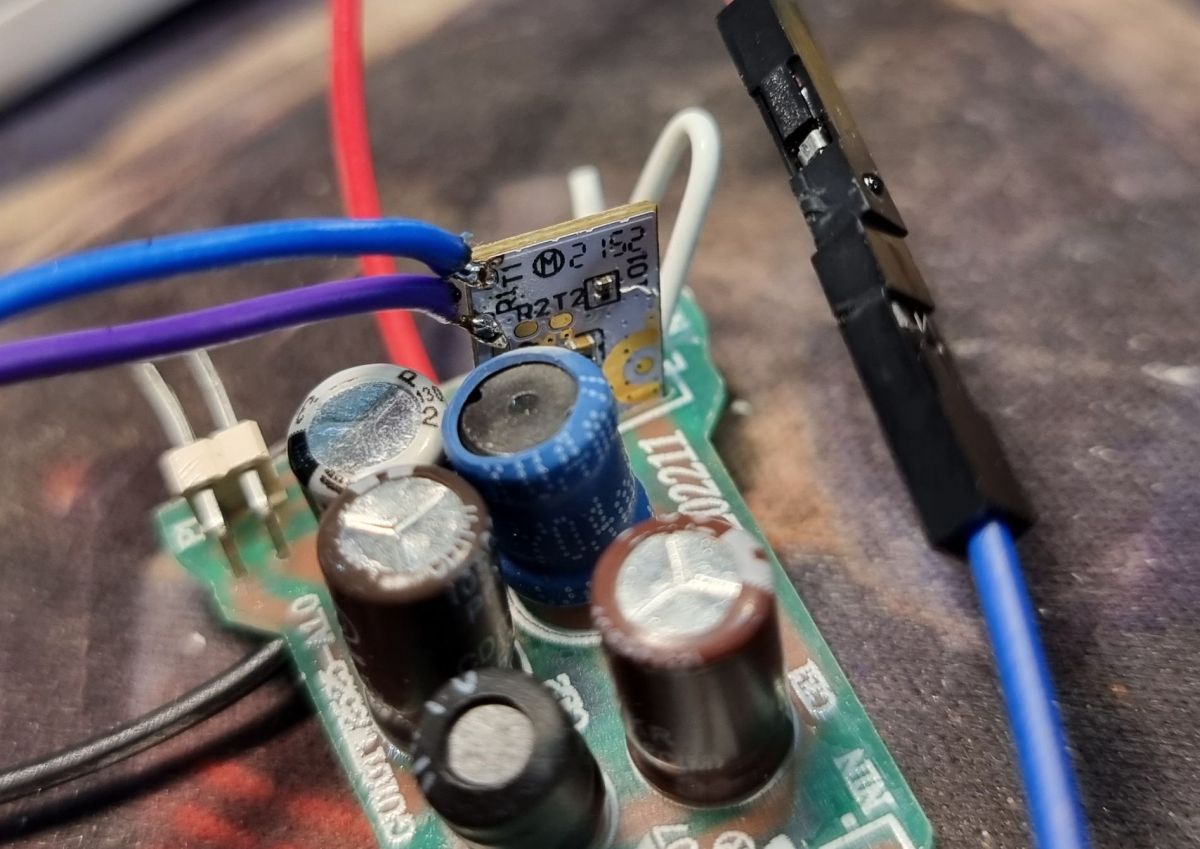
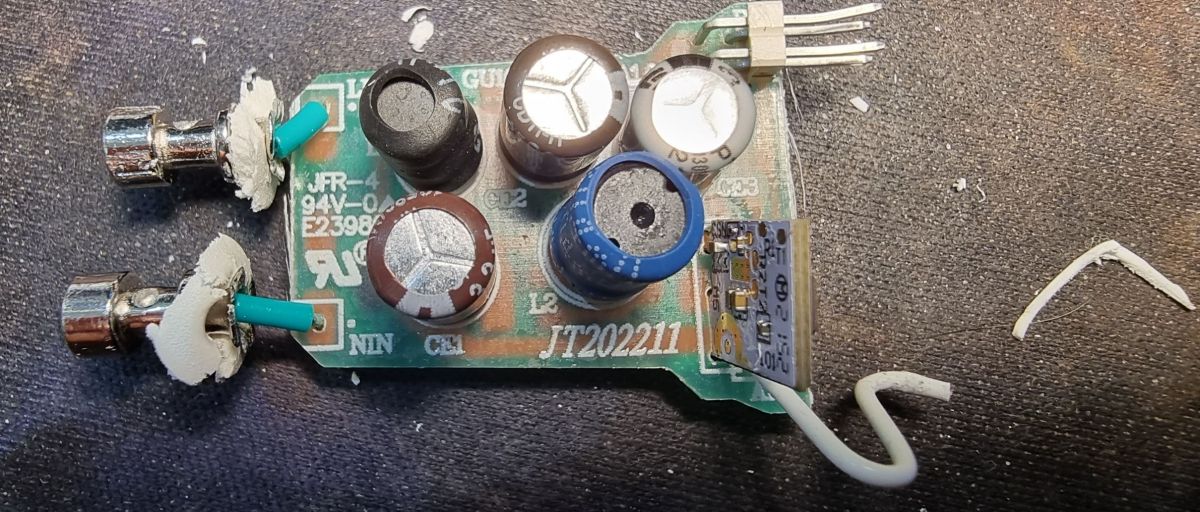
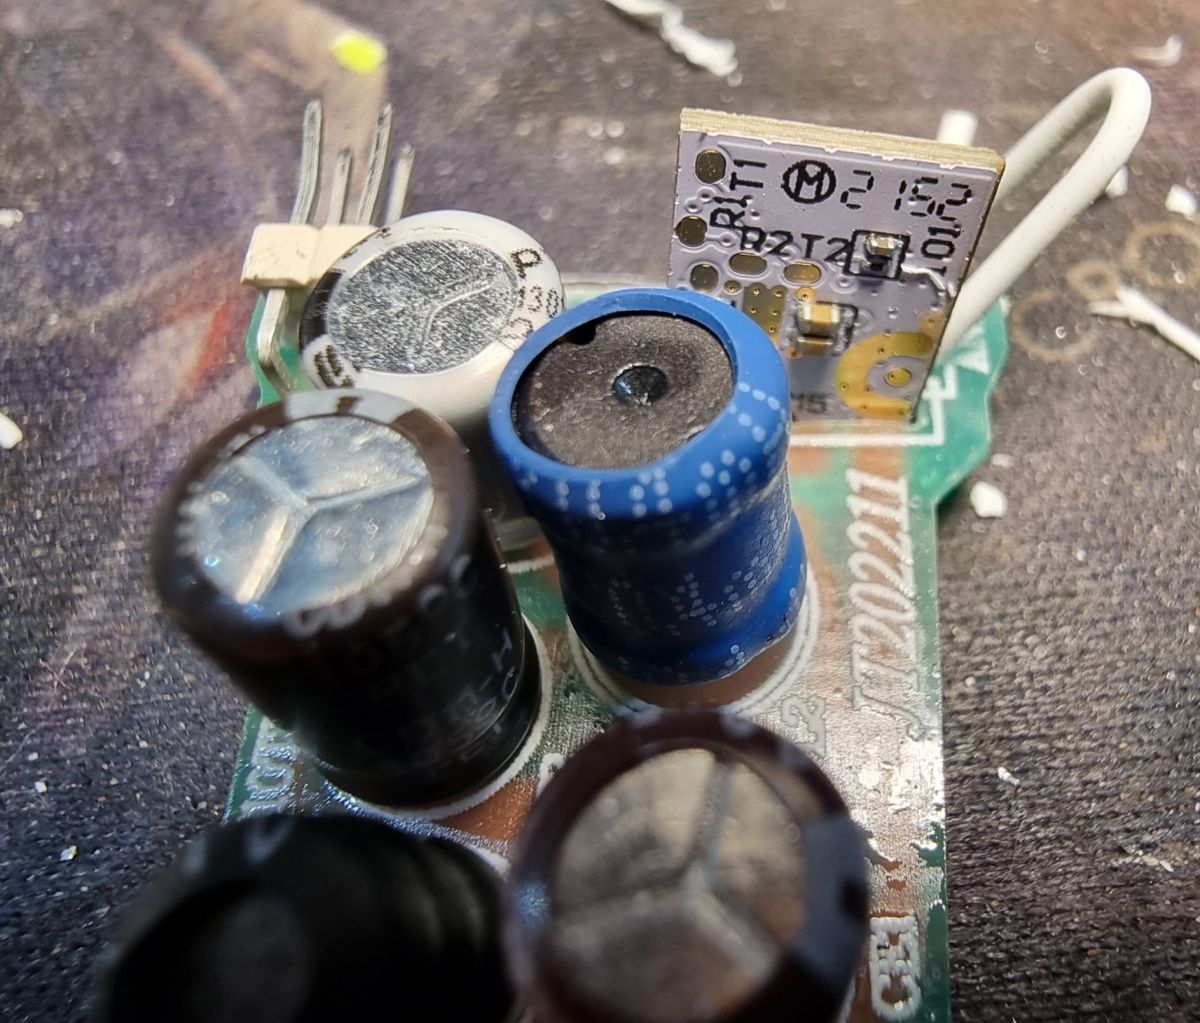
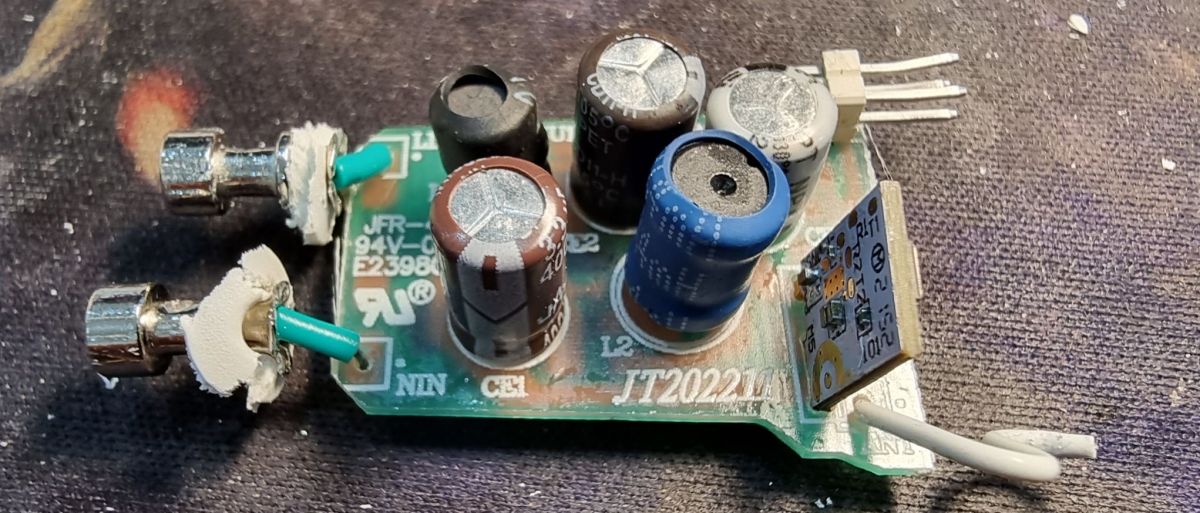
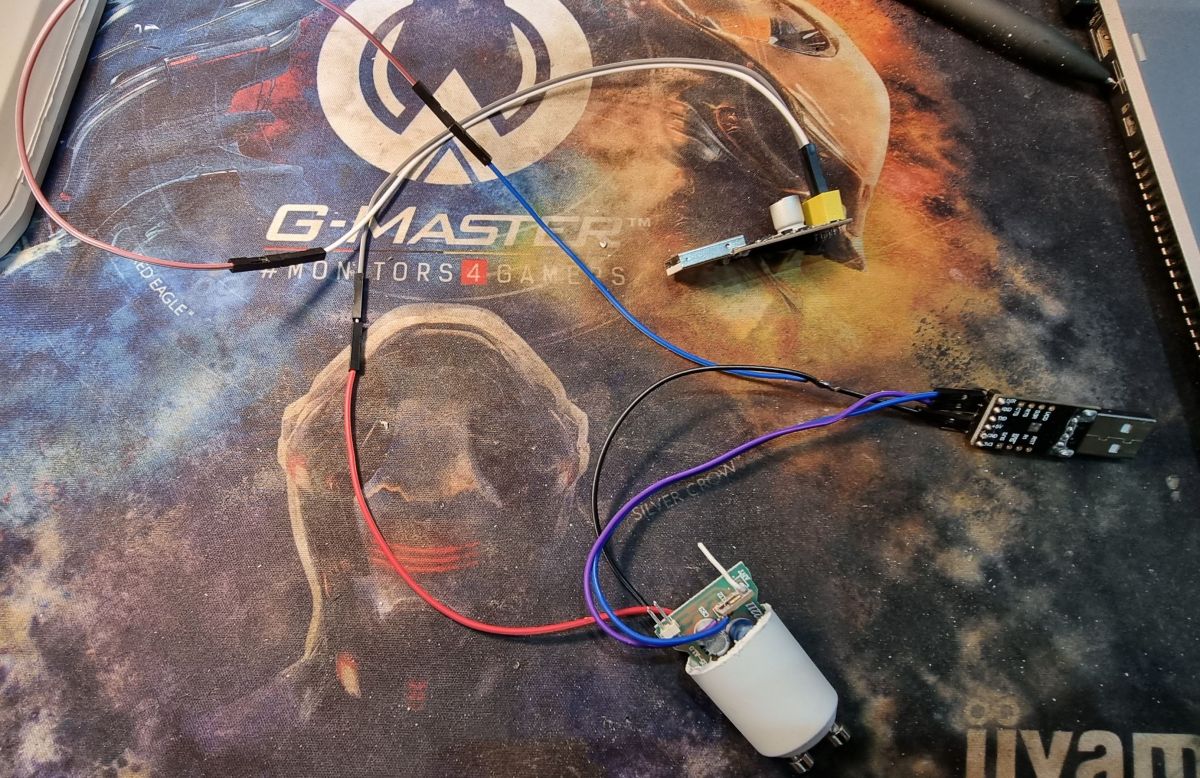
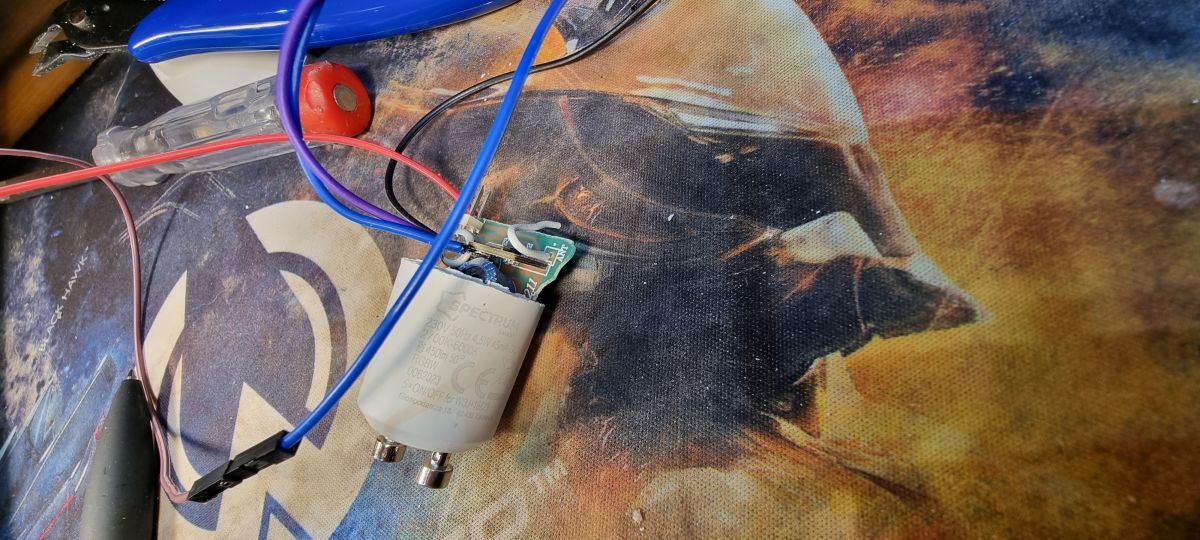
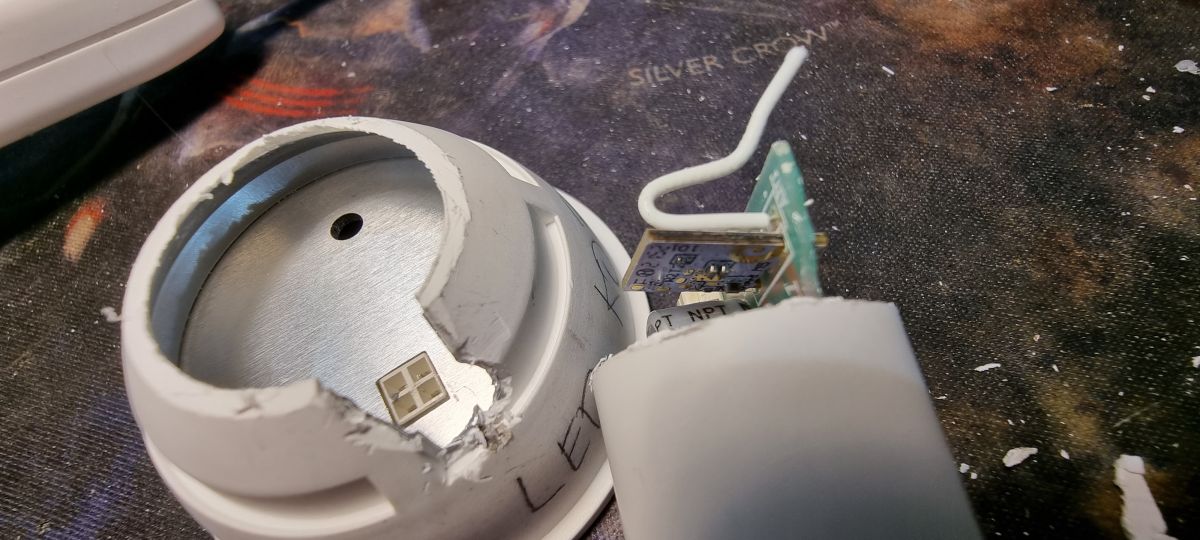
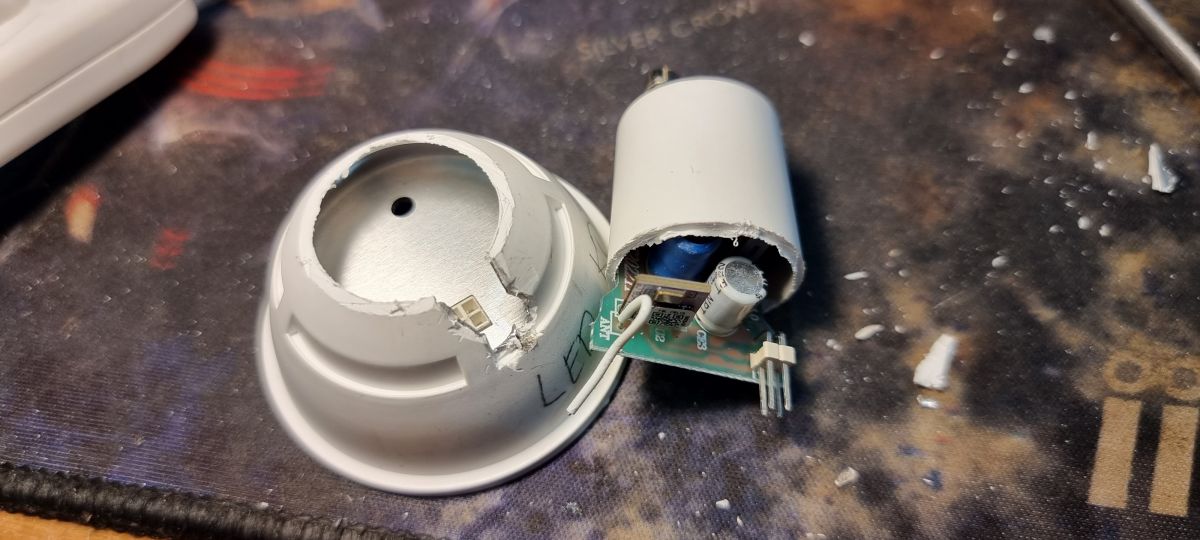
    Code number WOJ+16823. Originally in the bulb firmware 1.3.22 ( I have no way of confirming this, but on other new LEDs I managed to upload the firmware via WiFi on this profile!! ), after updating in the Tuya application it becomes 1.5.21 and is no longer supported by Tuya Cloudcutter, so you need to disassemble the bulb, connect to RX(R1) and TX(T1) and 3.3v, ground , upload the appropriate firmware. Power must be supplied from a separate source, not from the same converter! This model has a BK7231N on a micro board called CBLC5. If the update was not performed, I managed to modify several bulbs without disassembling the Tuya with Cloudcutter (as I wrote above). If you buy a new one, it is best to do it immediately before the update . Unfortunately, I updated several bulbs from the machine and had to get inside them, which is not an easy process. I opened the first bulb from the front as usual, i.e. removing the plastic cover, e.g. with a knife, quickly comes off, then you need to collect the glue around the board with the LEDs. Removing the board is quite tedious, I managed to do it by inserting a thin screwdriver into the hole where the antenna comes out and prying it off carefully. Be careful not to damage the elements on the board. Unfortunately, I damaged one green LED and then all the others did not light up, but I finally bridged the damaged diode and the rest did not work. After removing the board with diodes, there is a board with a controller inside. Unfortunately, we cannot take it out because it is held by cables connected to the 230 GU10 power pins and they are very short. I treated the first bulb experimentally and pushed the GU10 terminals inside using force using pliers. Unfortunately, the plastic around them cracked and later I had to fiddle with adhesives and reconstruction to be able to insert it into the GU10 socket. I decided to disassemble the next bulbs in a slightly different way. I decided to cut them in half so as not to damage the GU10 power pins and not to mess with the LEDs because there you have to be careful and use a lot of force and precision. The cut turned out to be very effective! An ordinary hacksaw with a thin thickness. Gently so as not to damage the tile that will be visible right after cutting. I also thought about cutting with high temperature, something heated, e.g. a thin knife, but I had no idea? After cutting it, you can easily get to the CBLC5 board with the BK7231N system. The necessary TX and RX pins are available and you can connect the cables even using a transformer soldering iron with a thin tip. You don't have to tear anything out or try anything else. After uploading the software, you can easily assemble the cut bulb and glue it. I used standard SuperGlue, but in my opinion there should be another two-component (Poxipol?) resistant to high temperatures because the bulb heats up quite a lot. If someone plans to place them outside or in bathrooms, it is better to glue them with something better. I have them in dry rooms, so it's not a problem for me. I took a few photos of my work, if anyone wants to use this method, I recommend it, but there are probably other methods, it all depends on what you have. I described the physical part of disassembly and assembly because it caused me the most problems, time and nerves. When it comes to programming, it was quite quick and simple. I used the BK7231Flasher program and the current firmware for the N version, i.e. OpenBK7231N_QIO_1.17.308.bin. Then configuration and settings, color search, etc. If something is missing, please let me know and I can provide it. It would be nice to create a new profile in OpenBK because it is not normally found and is not in the database. I have several dozen Tuya devices at home and I managed to convert all of them either wirelessly with Tuya Cloudcutter or wired with disassembling/opening the devices. As of today, I no longer have anything related to the Tuya/localTuya cloud in my HomeAssistant. Everything is on OpenBK or Tasmota. I will provide the configuration that works for me for OpenBK.

    For OpenBK:
    Code: JSON
    Log in, to see the code


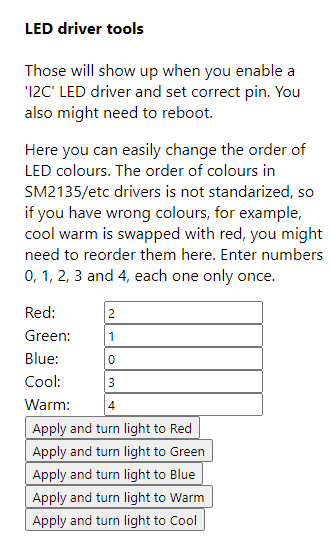
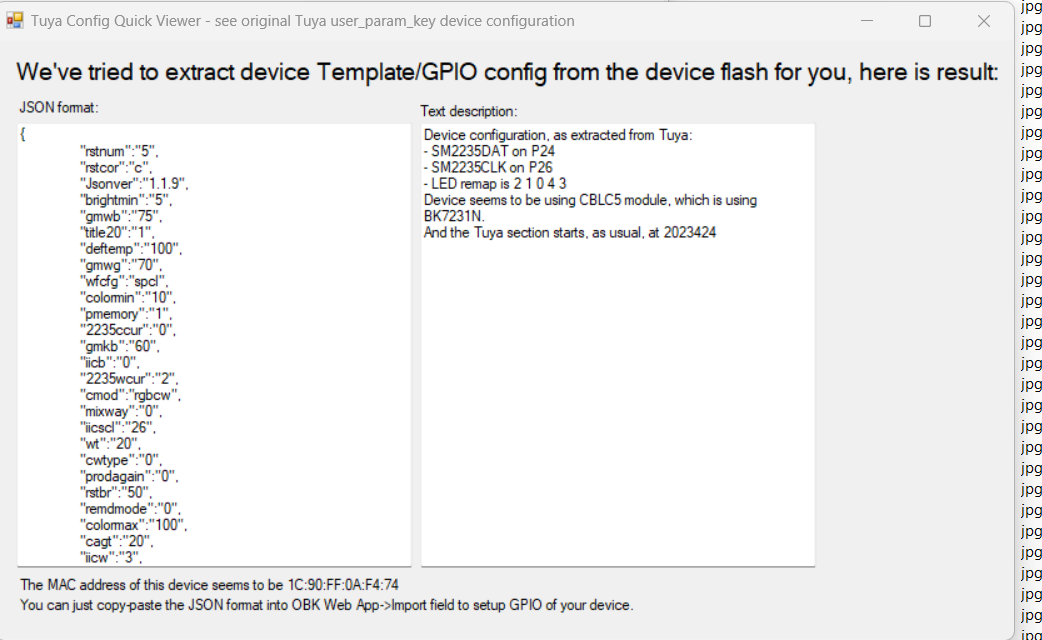
    Entire Template:


    Screenshot of an LED driver tool allowing the change of LED color order.
    Screenshot showing device configuration in Tuya Config Quick Viewer
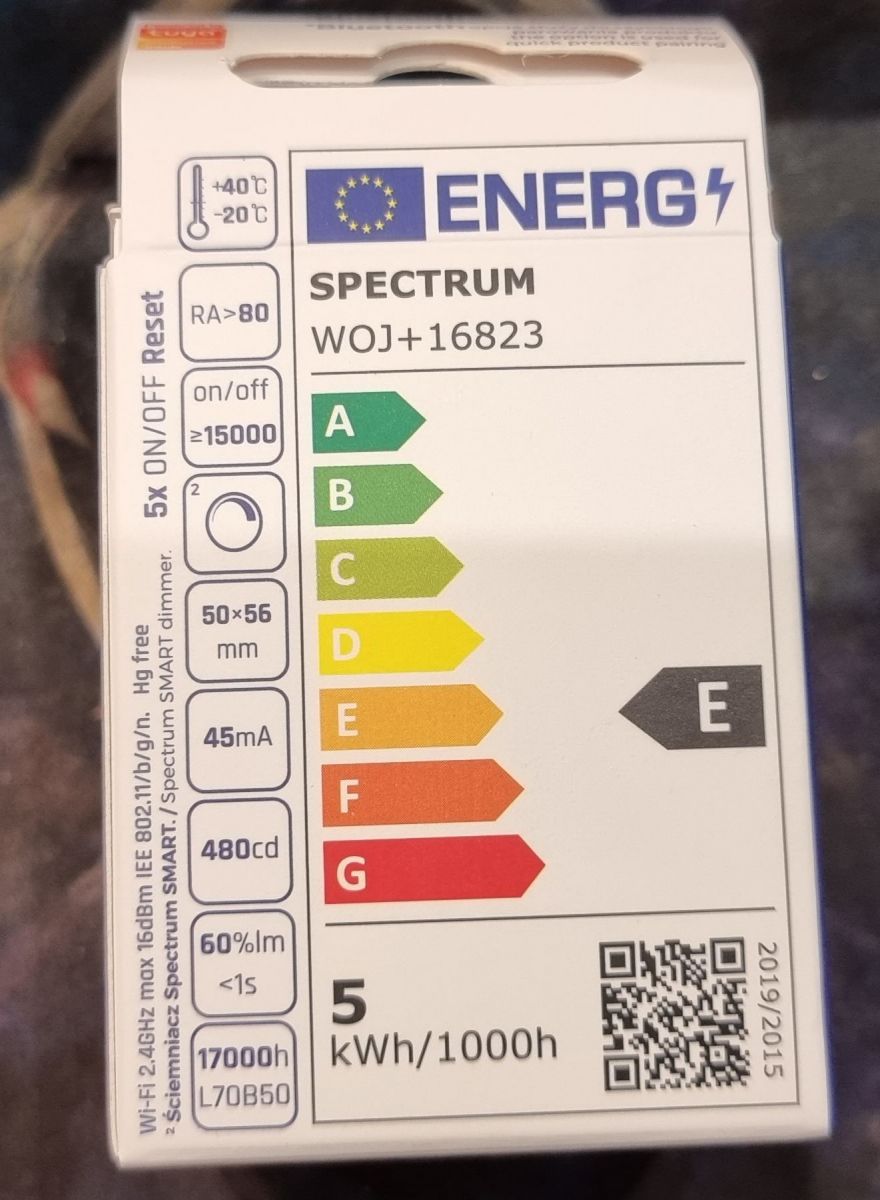
    Photos of my works:
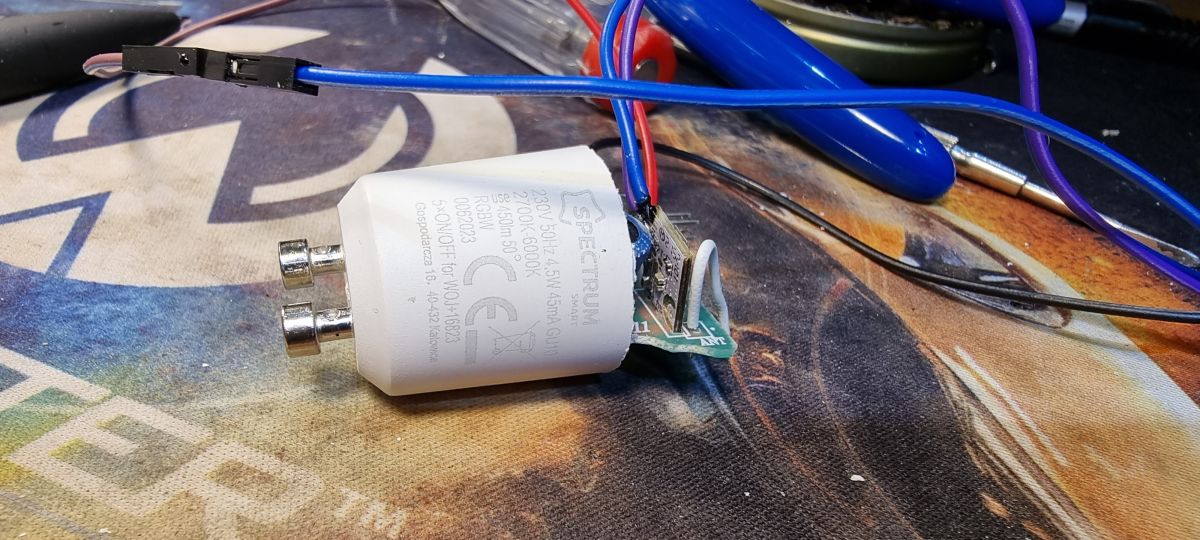
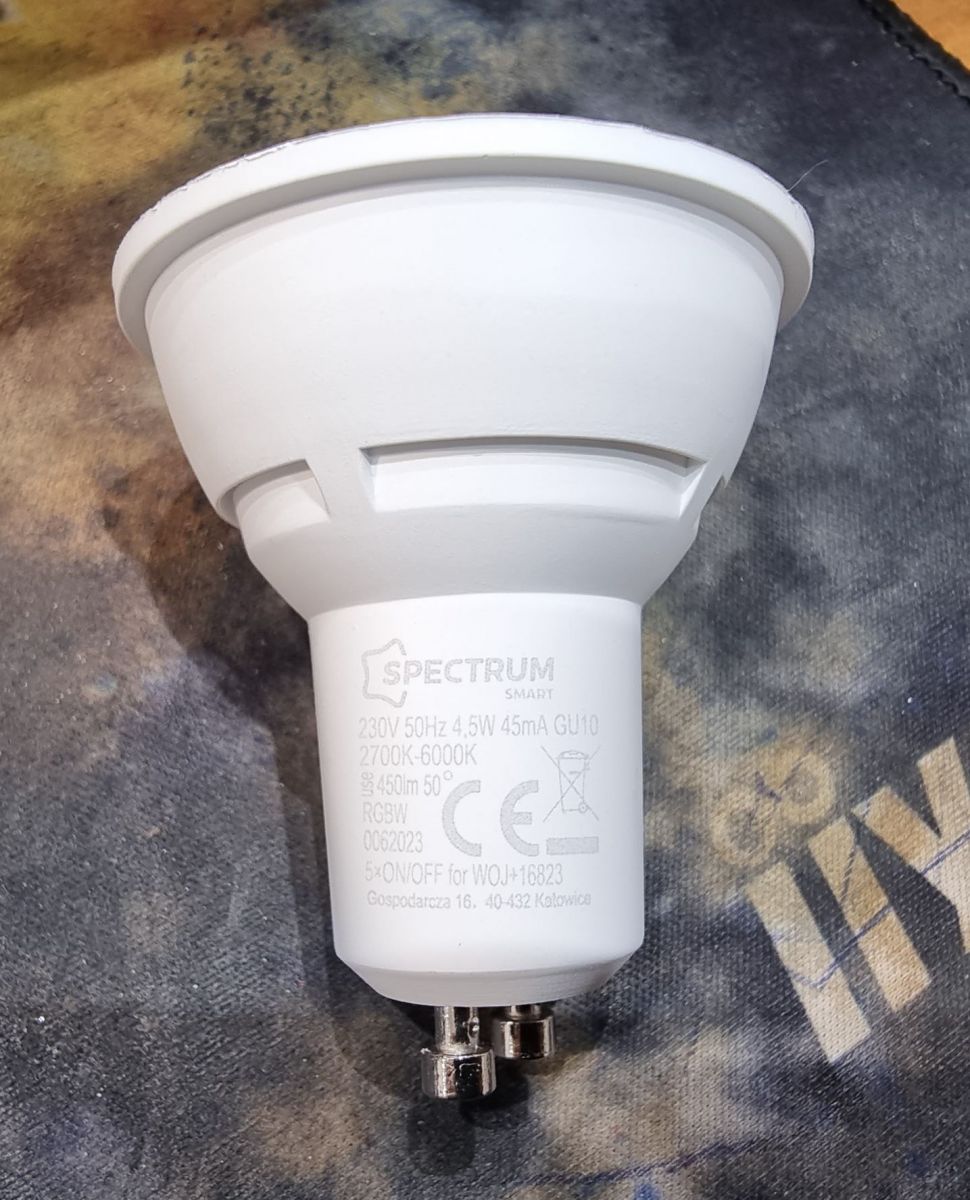
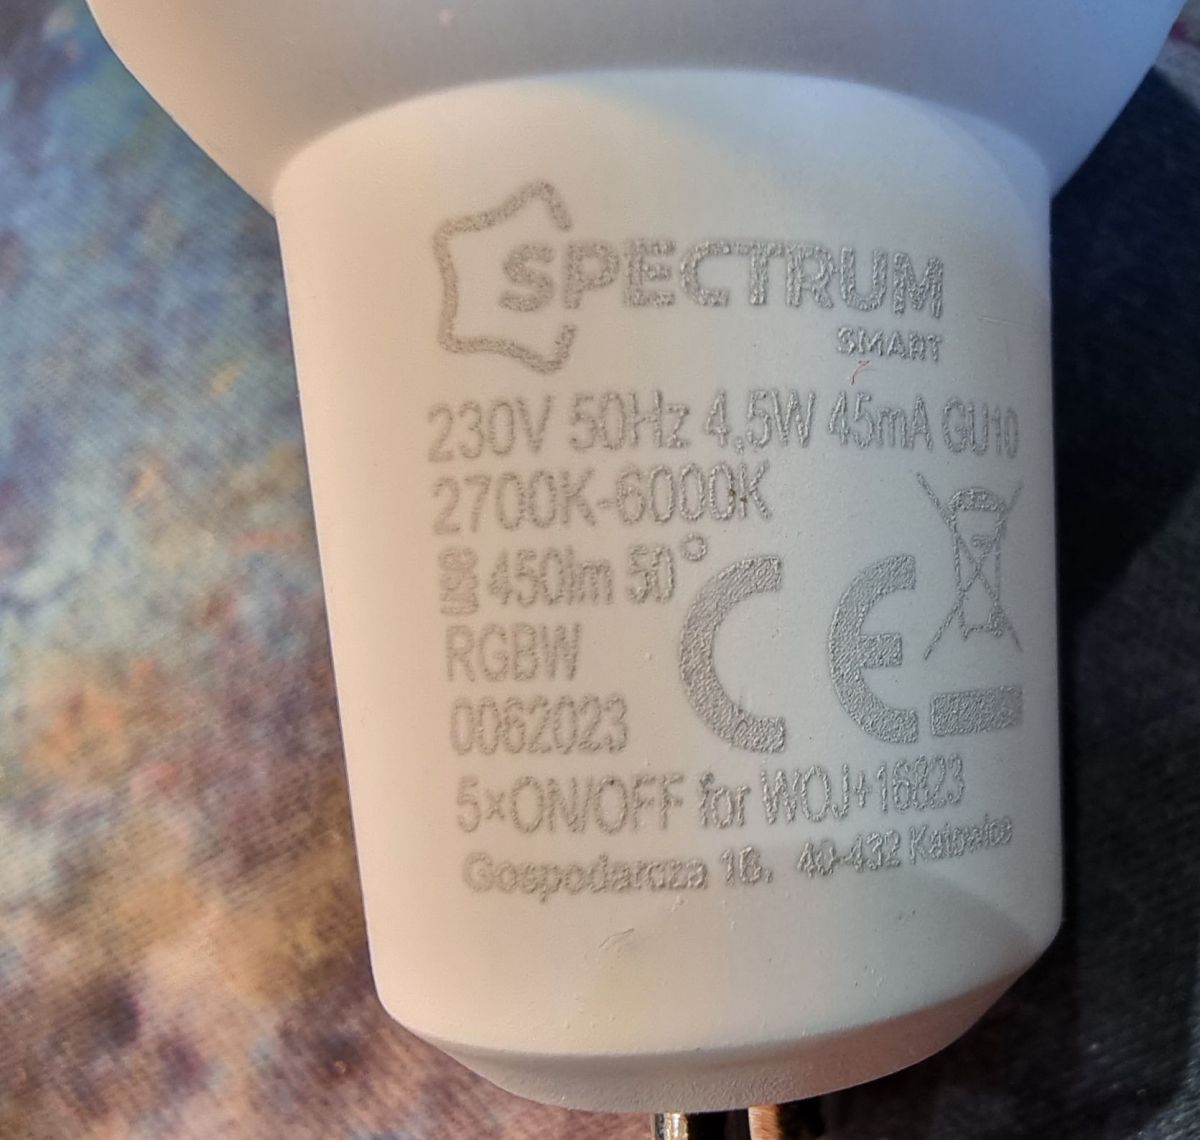
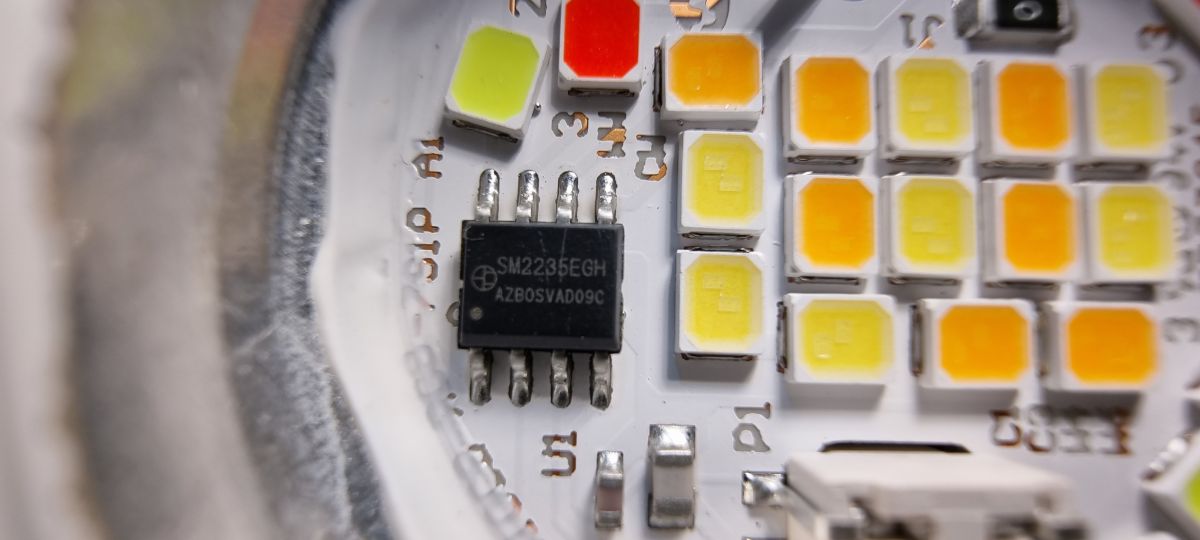
    Packaging of Spectrum WOJ+16823 LED bulb with energy class E and technical parameters. Packaging of Spectrum Smart 4.5W RGBW LED bulb. Dismantled LED bulb with RGBW diode board. Close-up of the internal part of an LED bulb showing diodes and a microchip. Close-up of a Spectrum Smart GU10 4.5W LED bulb with a white exterior and technical specifications. Close-up of technical specifications visible on the Spectrum Smart LED 4.5W GU10 bulb. Close-up of a GU10 LED bulb with a visible transparent plastic cover. Close-up of a circuit board with a BK7231N chip on a CBLC5 board. Close-up of a PCB with electronic components. DIY LED bulb modification project. Printed circuit board with wires connected to various solder points. Close-up of an electronic circuit board with attached wires. Close-up of an LED bulb circuit board with connected wires. Close-up of an LED controller board with visible capacitors and electronic components. Photo of a circuit board with electronic components. Electronic components and wires on a printed mat. Close-up of a disassembled SpectrumLed GU10 bulb with visible wire connections. Spectrum LED bulb with a soldered board and wires. Interior of a disassembled LED GU10 bulb with visible circuit board. Dismantled LED bulb with visible internal components Close-up of a LED bulb's board with SM2235EGH chip.

    Cool? Ranking DIY

    About Author
    mashgsm
    Level 15  
    Offline 
    mashgsm wrote 236 posts with rating 26, helped 5 times. Live in city Słupsk. Been with us since 2002 year.
  • ADVERTISEMENT
  • #2 20846170
    p.kaczmarek2
    Moderator Smart Home
    Posts: 14512
    Help: 651
    Rate: 12517
    Indeed, updating the Tuya software can cut off the possibility of changing the batch via WiFi. Newer versions of Tuya firmware are protected against tuya-convert and tuya-cutter methods. I wrote more about it in the topic:
    Tuya-Cloudcutter device list - tuya-convert for BK7231
    Congratulations on being able to handle the "cable" method as well. A similar process was once presented on YT:


    The only advice for the future is what you wrote in the article - do not update the firmware if you want to "hack" the product to upload the batch via OTA (basically, all OTAs are based on buffer overflows, which Tuya fixed in subsequent firmware versions)

    Added after 3 [minutes]:

    PS: I added a JSON entry to the list:
    https://github.com/OpenBekenIOT/webapp/commit/bfa0bd86eb5c8353a26457d3c13f3f72162225fd
    The product should now appear on our official forum topic list:
    https://openbekeniot.github.io/webapp/devicesList.html
    Helpful post? Buy me a coffee.
📢 Listen (AI):

FAQ

TL;DR: This FAQ shows how to reflash a 4.5W Spectrum SMART WOJ+16823 GU10 bulb before Tuya blocks OTA, and why “do not update” is the key rule. It helps Home Assistant and OpenBeken users keep Wi‑Fi flashing via Tuya Cloudcutter, or switch to serial flashing on the BK7231N/CBLC5 hardware when updates already closed that path. [#20841689]

Why it matters: A single Tuya app update can turn a fast, solder-free firmware swap into a risky hardware disassembly job.

Option Access method Firmware state Effort Main risk
WOJ+16823 before update Wi‑Fi with Cloudcutter Stock firmware around 1.3.22 Low Losing OTA path after update
WOJ+16823 after update Serial via RX/TX and 3.3V Updated to 1.5.21 High Damage during opening or wiring
Older 5W WOJ+14415 Mentioned as earlier model Older generation Medium Less certain availability

Key insight: If the bulb still has its original Tuya firmware, flash it immediately over Wi‑Fi. Once updated, the practical path in this thread is opening the lamp and programming the BK7231N board over serial.

Quick Facts

  • The bulb discussed is a Spectrum SMART GU10 rated at 4.5W, 230V, RGBW‑CCT, with a promotional price of PLN 21.99. [#20841689]
  • The critical firmware change is from Tuya 1.3.22 to 1.5.21; after that update, the author reports Tuya Cloudcutter no longer works on this model. [#20841689]
  • Inside, the controller board is CBLC5 and the main chip is BK7231N, which the author flashed with a wired serial method. [#20841689]
  • Serial flashing used RX, TX, 3.3V, and GND, and the bulb had to be powered from a separate 3.3V source, not the same converter. [#20841689]
  • The OpenBeken profile for this lamp maps pin 24 = SM2235DAT and pin 26 = SM2235CLK, and an official JSON entry was later added to the device list. [#20846170]

How do I flash the Spectrum SMART WOJ+16823 4.5W RGBW GU10 bulb with a BK7231N chip over WiFi before Tuya updates block Cloudcutter?

Flash it immediately after purchase, before the Tuya app updates the bulb. 1. Power the new WOJ+16823 and avoid any firmware update. 2. Use Tuya Cloudcutter while the stock firmware is still in the vulnerable state reported around 1.3.22. 3. After flashing, move to OpenBeken and finish configuration there. The author says several new bulbs were modified this way without opening them, but updated units lost that Wi‑Fi path. [#20841689]

Why does updating the Tuya firmware on the WOJ+16823 bulb from version 1.3.22 to 1.5.21 prevent flashing with Tuya Cloudcutter?

The update closes the OTA route that Cloudcutter relies on. In this thread, the bulb could be flashed over Wi‑Fi at firmware 1.3.22, but after updating to 1.5.21 it was no longer supported by Tuya Cloudcutter. A follow-up post explains that newer Tuya firmware versions are protected against tuya-convert and tuya-cutter style methods because Tuya fixed the underlying flaws in later releases. [#20846170]

What is Tuya Cloudcutter, and how is it used to replace stock Tuya firmware on BK7231N devices?

"Tuya Cloudcutter" is an OTA flashing tool that replaces stock Tuya firmware over Wi‑Fi, without opening the device, on vulnerable firmware versions. In this thread, it was used on new BK7231N-based bulbs before the Tuya update. Once the author updated to 1.5.21, Cloudcutter stopped working and serial flashing became necessary. That makes Cloudcutter the fast path only when the device still runs an older, unpatched Tuya build. [#20841689]

What is the CBLC5 board inside the Spectrum SMART GU10 bulb, and how does it relate to the BK7231N module?

"CBLC5" is the controller board inside this smart bulb that carries the BK7231N Wi‑Fi microcontroller and exposes the serial pads needed for reflashing. In the WOJ+16823, the author identifies CBLC5 as the internal micro board. After opening the lamp, that board gives access to RX, TX, 3.3V, and GND so BK7231Flasher can write OpenBeken firmware to the BK7231N chip. [#20841689]

Which RX, TX, 3.3V, and GND connections are needed to flash the WOJ+16823 bulb with BK7231Flasher after disassembly?

You need the board’s serial RX and TX pads, plus 3.3V and GND. The author states that RX is marked R1 and TX is marked T1, and that these lines are available on the CBLC5 board after opening the bulb. Use a separate 3.3V supply and connect ground correctly before flashing with BK7231Flasher. The post does not provide any extra pin numbers beyond those pad labels. [#20841689]

What is the safest way to open the Spectrum WOJ+16823 GU10 bulb without damaging the LED board or the GU10 power pins?

The safest method in this thread is cutting the bulb body in half with a thin hacksaw. The author first tried the front-entry method by removing the diffuser and prying out the LED board, but that approach damaged one green LED and later cracked plastic near the GU10 pins. Cutting the housing gave direct access to the CBLC5 board and avoided forcing the short mains-pin wiring. That reduced both mechanical stress and reassembly trouble. [#20841689]

How does cutting the bulb in half with a thin hacksaw compare with removing the front diffuser and LED board when accessing the CBLC5 controller board?

Cutting the bulb in half was easier and safer in this case. Removing the front diffuser and LED board required glue removal, careful prying, and significant force, and it led to LED damage on one test bulb. The hacksaw method exposed the controller board right after the cut, preserved the GU10 pins better, and made later gluing simpler. The author calls the cut “very effective” for reaching the CBLC5 board. [#20841689]

What firmware file and flashing tool should I use for the BK7231N version of the Spectrum SMART WOJ+16823 bulb in OpenBeken?

Use BK7231Flasher with the OpenBK7231N_QIO_1.17.308.bin firmware file. The author explicitly reports flashing the BK7231N version of this bulb with that tool-and-file combination. After flashing, they completed configuration, color setup, and normal OpenBeken adjustments. This answer applies to the BK7231N-based WOJ+16823 on the CBLC5 board described in the thread. [#20841689]

How do I configure OpenBeken for the WOJ+16823 bulb using the SM2235DAT and SM2235CLK pin mapping?

Set pin 24 to SM2235DAT and pin 26 to SM2235CLK in the OpenBeken device profile. The posted JSON template identifies the device as Tuya, model WOJ+16823, chip BK7231N, board CBLC5, and includes those two pin assignments. In the same template, the flags value is 4096. That mapping is the core configuration needed to bring up the LED driver correctly in OpenBeken. [#20841689]

Why do the remaining LEDs stop working after one green LED is damaged in this RGBW-CCT GU10 bulb?

Because the LED chain can fail as one circuit when a single diode opens. In this bulb, the author damaged one green LED during disassembly, and then all the others stopped lighting. They later bridged the damaged diode and got the rest working again. That is a practical failure case: mechanical damage to one LED on the board can interrupt the whole lighting path until the bad section is bypassed or repaired. [#20841689]

What precautions should I take when powering the bulb from a separate 3.3V source during serial flashing so I do not damage the converter or the module?

Use an independent 3.3V source and do not power the bulb from the same converter used elsewhere in the setup. The author warns directly that power must come from a separate source, not from the same converter. Keep the wiring limited to RX, TX, 3.3V, and GND on the CBLC5 board, and avoid stressing the short internal wires. This reduces the chance of damaging the converter path or the BK7231N module during flashing. [#20841689]

Which glue works best for reassembling a cut-open GU10 smart bulb that gets hot in normal operation?

A heat-resistant two-component adhesive is the better choice. The author reassembled the bulb with standard SuperGlue, but says a two-component product such as Poxipol would be better because the bulb gets quite hot in normal use. They especially recommend a stronger adhesive if the lamp will be used outdoors or in bathrooms. For dry indoor rooms, their SuperGlue repair was acceptable. [#20841689]

How does the 4.5W Spectrum SMART WOJ+16823 compare with the older 5W WOJ+14415 in brightness, firmware behavior, and hackability?

The 4.5W WOJ+16823 looked as bright as the older 5W WOJ+14415 in side-by-side use. The author says there was no visible difference when both were lit together, despite the 4.5W versus 5W rating. They also suspect the newer model is replacing the older one. For hackability, the key difference is firmware timing: new WOJ+16823 units could be flashed over Wi‑Fi before update, but updated units needed opening and serial flashing. [#20841689]

Where can I find the official OpenBeken device profile or JSON template for the Spectrum SMART WOJ+16823 bulb after it was added to the device list?

You can find it in the official OpenBeken device list after the JSON entry was added. In the follow-up post, the maintainer states that a JSON entry was committed to the list and that the product should now appear on the project’s official forum-linked device page. That means you can use either the posted JSON template from the thread or the later official device-list entry for the WOJ+16823. [#20846170]

What are the best steps to take right after buying a new Tuya-based Spectrum GU10 bulb to avoid losing the option to flash it wirelessly?

Do not let the bulb update before you try OTA flashing. 1. Buy the lamp and power it without running a Tuya firmware upgrade. 2. Attempt Tuya Cloudcutter immediately while the original firmware is still vulnerable. 3. Only after successful flashing should you move to OpenBeken setup and normal use. The thread’s clearest advice is simple: if you want the easy Wi‑Fi path, “do not update the firmware.” [#20846170]
Generated by the language model.
ADVERTISEMENT