logo elektroda
logo elektroda
X
logo elektroda

How tightly will Tuya pack two relays? Small flush-mount AVATTO WSM16-W2 module

p.kaczmarek2 2334 2
ADVERTISEMENT
Treść została przetłumaczona polish » english Zobacz oryginalną wersję tematu
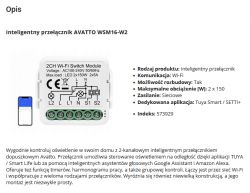
  • AVATTO WSM16-W2 2-channel Wi-Fi switch module in packaging
    Some time ago I reviewed the Tuya single relay module AVATTO WSM16-W1 WiFi relay for PLN 30 , today it`s time for a similar gadget, but with two relays. All this in a small housing measuring 39mm x 39mm x 19mm. The maximum load on one channel is only 150W, but it is still worth giving this product a chance and taking a look inside...

    We bought AVATTO WSM16-W2 for PLN 56, which is quite a lot, considering the fact that its "single" version cost only PLN 30:
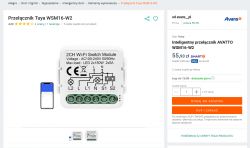
    Tuya WSM16-W2 switch front view with a mobile app illustration.
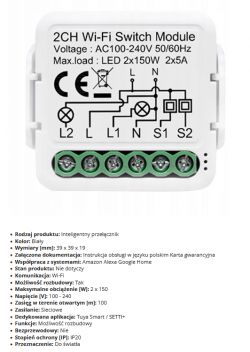
    Specification:
    Smart switch AVATTO WSM16-W2 with description and technical specifications.
    White WiFi relay module with two channels, markings, and terminals.
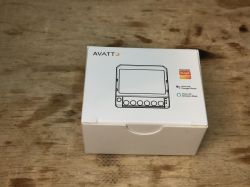
    In practice, we get a small box:
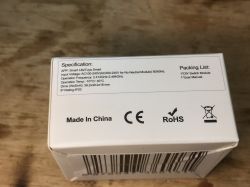
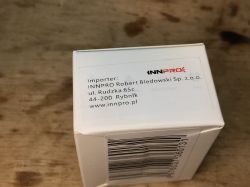
    Technical specifications on the packaging of the AVATTO WSM16-W2 relay module. Box of the AVATTO WSM16-W2 module with logo and compatibility information with Tuya Label on the box with information about INNPRO importer.
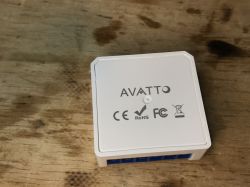
    There is even an importer`s logo on the switch:
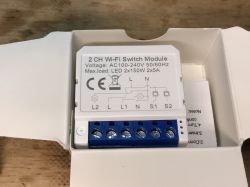
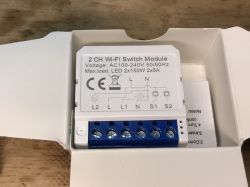
    View of AVATTO dual relay Wi-Fi switch module in an open box. View of the AVATTO WSM16-W2 module with branding and certifications on top.
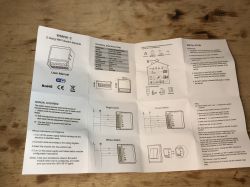
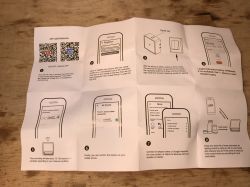
    Instruction:
    User manual of the AVATTO WSM16-W2 WiFi switch module with diagrams and technical specifications. User manual for pairing the AVATTO WSM16-W2 module with an app
    But I haven`t discussed pairing with Tuya for a long time, let`s look inside.

    Interior of AVATTO WSM16-W2
    I recommend comparing the interior of this product with its single version:
    [CBU/BK7231N] AVATTO WSM16-W1 WiFi relay module for PLN 30 - firmware change
    We remove the cover:
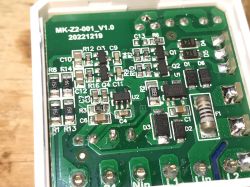
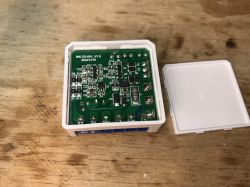
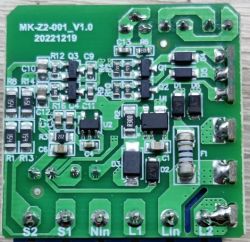
    PCB of AVATTO WSM16-W2 model with electronic components. Interior of the AVATTO WSM16-W2 smart module with two relays.
    PCB is practically the same. Even the date is correct - MK-Z2-001_V1.0 20221219
    We take out the plate:
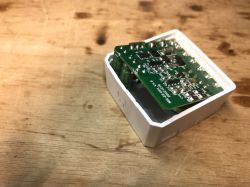
    View of the interior of the AVATTO WSM16-W2 module in an open casing.
    You can see the first difference:
    Close-up of the AVATTO WSM16-W2 relay module with two relays.
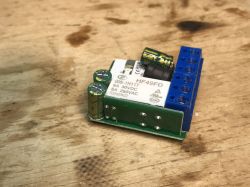
    Yes, there are two relays and they are very narrow:
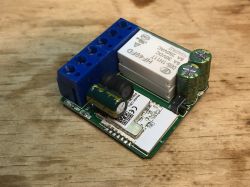
    AVATTO WSM16-W2 module with two relays on a wooden surface.
    The relay model is HF49FD 005-1H11T, 5A 250VAC.
    The rest is the same as in the case of the single version.

    Changing the AVATTO WSM16-W2 load
    The CBU module and its location are the same as in the single version:
    [CBU/BK7231N] AVATTO WSM16-W1 WiFi relay module for PLN 30 - firmware change
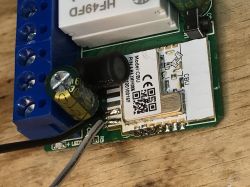
    The procedure is also the same, so I will not describe it here again. Photos:
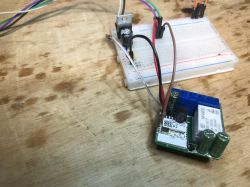
    AVATTO WSM16-W2 module with two relays on a workbench. Close-up of the interior of the AVATTO WSM16-W2 module with electronic components.
    My flasher correctly detects configurations:
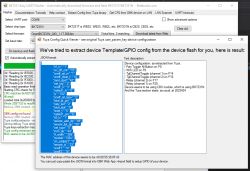
    View of the screen of the Tuya device configuration application in JSON format.
    Here is Tuya`s JSON:
    Code: JSON
    Log in, to see the code

    Verbal description:
    
    Device configuration, as extracted from Tuya: 
    - Pair/Toggle All Button on P8
    - WiFi LED on P6
    - TglChannelToggle (channel 1) on P14
    - TglChannelToggle (channel 2) on P16
    - Relay (channel 2) on P17
    - Relay (channel 1) on P20
    Device seems to be using CBU module, which is using BK7231N.
    And the Tuya section starts, as usual, at 2023424


    OBK template:
    Code: JSON
    Log in, to see the code


    Summary
    This is one of the smallest two-channel switches I have tested so far. I just don`t know why it is so much more expensive than the single version, PLN 30 compared to almost PLN 60 is rather too much.
    In addition, I would like to remind you to turn on PowerSave 1 (by entering this command into autoexec.bat in OBK), because without it we will probably repair this switch after half a year: How to fix a smart device that is chirping, squeaking and making strange sounds?
    Is it worth buying? Your decision, but if you have little space and need to control something, maybe this is not such a bad option. An additional advantage is the presence of a CBU module inside, which has slightly more pins, so you could also connect DHT11, but in this situation you should be very careful because the power supply of this module does not isolate it from the network...

    Cool? Ranking DIY
    Helpful post? Buy me a coffee.
    About Author
    p.kaczmarek2
    Moderator Smart Home
    Offline 
    p.kaczmarek2 wrote 12163 posts with rating 10121, helped 580 times. Been with us since 2014 year.
  • ADVERTISEMENT
  • #2 21025112
    omniron
    Level 10  
    This unit is a perfect candidate in case you would like to see how relays work with straight 3.3V (as mentioned here) .

    Relay:
    That relay company also has 3V relays, a bit wider but should fit easily.
    https://www.hongfa.com/en/Product/Item/HF46F.

    AC/DC
    The common BP2525 can also be easily switched to 3.3V operation by lifting the SEL pin and connecting it to VCC.
    PDF of BP2525

    The linear 5V to 3.3V regulator can then be bypassed and that's it!

    Relay savings (whenever the switch is "on"): 360mW vs 240mW (less if reduced to 3V),
    Lifetime power savings: 1.7V drop x "whatever tuya module consumes"mW vs. just "whatever tuya module consumes" mW.

    What suprises me is that the relays seem parallel.
    If relays are in close proximity (i.e. touching) they should be alternated by 180 degrees.
  • #3 21339306
    zakdma
    Level 3  
    Hi!

    I just tried to do the same with my devices which are the same as yours.
    AVATTO WSM16-W2
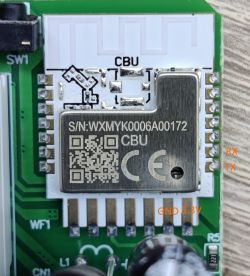
    There are photos
    Circuit board with CBU module and pin labels RX, TX, GND, and 3.3V. Printed circuit board with various electronic components.

    There is CBU module which as you said is BK7231N
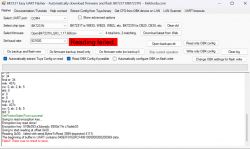
    So I downloaded BK7231 GUI Flash Tool v1.3.3 and tried to read the firmware first but failed.
    When the flasher asked me I off/on the module fastly.
    But it always hung on Reading 0x00...
    I tried BK7231N, BK7231T, BK7231M and different baud rates but the same.
    I tried a separate 3.3v power supply with high current capabilities but the same
    Could you please help me with it? Maybe I have to use CEN pin to be able to read and flash new firmware?

    There is log I received
    BK7231 Easy UART Flasher software interface with reading error.

    Backup name is set to WSM16-W2.
    Starting read!
    Read parms: start 0x00 (sector 0), len 0x200000 (0 sectors)
    Now is: 8 грудня 2024 р. 22:14:25.
    Flasher mode: BK7231N
    Going to open port: COM4.
    Serial port open!
    Getting bus... (now, please do reboot by CEN or by power off/on)
    Getting bus failed, will try again - 0/100!
    Getting bus failed, will try again - 1/100!
    Getting bus failed, will try again - 2/100!
    Getting bus failed, will try again - 3/100!
    Getting bus failed, will try again - 4/100!
    Getting bus failed, will try again - 5/100!
    Getting bus failed, will try again - 6/100!
    Getting bus failed, will try again - 7/100!
    Getting bus failed, will try again - 8/100!
    Getting bus success!
    Going to set baud rate setting (921600)!
    Will try to read device flash MID (for unprotect N):
    Flash MID loaded: 1560EB
    Will now search for Flash def in out database...
    Flash def found! For: 1560EB
    Flash information: mid: 1560EB, icName: TH25Q_16HB, manufacturer: TH, szMem: 1000000, szSR: 2, cwUnp: 0, cwEnp: 7, cwMsk: 407C, sb: 2, lb: 5, cwdRd: 05-35-FF-FF, cwdWr: 01-FF-FF-FF
    Entering SetProtectState(True)...
    sr: 34
    sr: 34
    final sr: 34
    msk: 407c
    cw: 0, sb: 2, lb: 5
    bfd: 0
    sr: 0
    sr: 0
    final sr: 0
    msk: 407c
    cw: 0, sb: 2, lb: 5
    bfd: 0
    SetProtectState(True) success!
    Going to read encryption key...
    Encryption key read done!
    Encryption key: 510fb093 a3cbeadc 5993a17e c7adeb03
    Going to start reading at offset 0x00...
    Reading 0x00... failed with serial.BytesToRead 3999 (expected 4111)
    The beginning of buffer in UART contains 040EFF01E0FCF4061009000000200069 data.
    Failed! There was no result to save.

    Added after 1 [hours] 8 [minutes]:

    I finally managed to make it work. Suddenly is starts reading flash and then I just flash it with latest OpenBaken and that's all.

    Added after 26 [minutes]:

    I have a question. Can't find this device here https://openbekeniot.github.io/webapp/devicesList.html
    Its AVATTO WSM16-W2
    Could you please add it?
ADVERTISEMENT