logo elektroda
logo elektroda
X
logo elektroda

How to Change Firmware on PH-W218 WiFi 8-in-1 Water Quality Tester with CB3S Chip?

Upright6771 7176 82
ADVERTISEMENT
  • #61 21150612
    p.kaczmarek2
    Moderator Smart Home
    It is possible to make a custom panel with HTML, JS and CSS:
    Alternative control html page for TOMPD-63-WIFI
    This way you can also do rounding in the any way you like.
    Helpful post? Buy me a coffee.
  • ADVERTISEMENT
  • #62 21166867
    Nordlicht77
    Level 9  
    I have ordered another device.
    I think the manufacturer has had a tinkering session again. I can't get the device flashed and this message
    Code: Arduino
    Log in, to see the code


    Code: Arduino
    Log in, to see the code
  • #63 21177106
    p.kaczmarek2
    Moderator Smart Home
    So as usual, make sure to disconnected TuyaMCU first (desolder the MCU or cut traces or put it in reset), make sure you power your device well, shorten your wires, try lower baud, etc...

    Let me know if you've fixed the issue @Nordlicht77 , I've flashed hundreds of devices, this just straight up has to work. Check out our Elektroda flashing guides, by the way:
    https://www.youtube.com/playlist?list=PLzbXEc2ebpH0CZDbczAXT94BuSGrd_GoM
    Helpful post? Buy me a coffee.
  • #64 21198642
    alfredtorch
    Level 3  
    Hi,

    Completely new to OpenBeken, I was able to desolder the MCU and flash a new firmware on it.

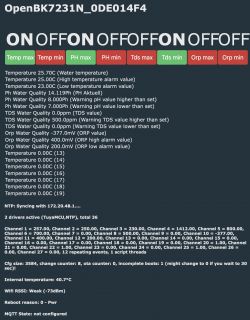
    However, I used the current bat script and I don't have the same output.


    What should I do?

    thank you
    Max

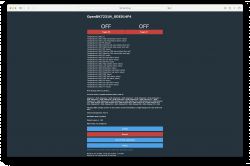
    Screenshot of the OpenBK7231N user interface showing sensor status and settings.
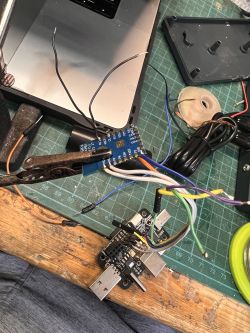
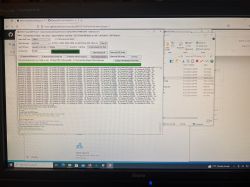
    Microcontroller on a workbench with connected wires. Computer screen displaying the BK7231 firmware flashing tool and a file explorer window.
  • ADVERTISEMENT
  • #65 21199762
    p.kaczmarek2
    Moderator Smart Home
    Remove starting of tmSensor driver in autoexec.bat. Someone must have put it there by mistake.
    Helpful post? Buy me a coffee.
  • #66 21201772
    alfredtorch
    Level 3  
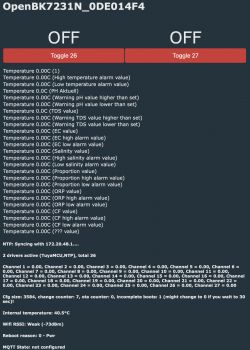
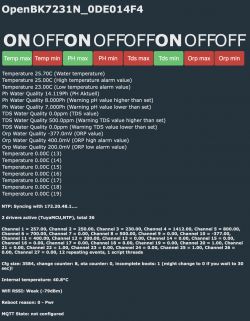
    Thank you for your feedback. I made the update in the bat file. However, it didn't solve the empty values. How can I check the communication with the Co-MCU is working?

    Maybe the issue origin is a weak solder connection. Do you think it's hardware or more software related?

    Sorry for all my questions. I'm new to OpenBeken and wondering about its ingredients.

    Have a great weekend

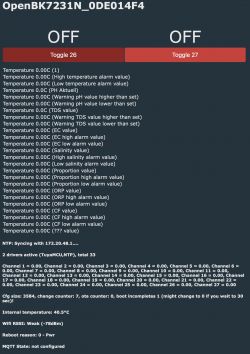
    OpenBK7231N user interface showing temperature readings and switch statuses.
  • ADVERTISEMENT
  • #67 21201832
    p.kaczmarek2
    Moderator Smart Home
    Is the WiFI module connected physically to the MCU? Some people desolder WiFi module and forget to solder back the pads.

    What is happening in the Web App log, are there heartbeat packets from TuyaMCU?

    Maybe you need to change baud to 115200?
    Helpful post? Buy me a coffee.
  • #68 21202760
    alfredtorch
    Level 3  
    Thank you for your fast reply.

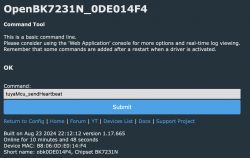
    HeartBeat responded with an OK. Is this the expected result? Does this mean that the baud rate is correct?
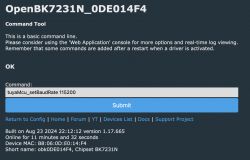
    I changed it to 115200. However there is no value change in the dashboard

    The only thing I did is to upload the firmware and the autostart.bat procedure.
    Is there a crucial step missing?

    Screenshot of OpenBK7231N_0DE014F4 Command Tool showing confirmation of the tuyaMcu_sendHeartbeat command. Screenshot of the OpenBK7231N_0DE014F4 command tool interface. User interface showing the status of two switches and measurements of temperature, pH, and other values, all showing 0.00C.
  • ADVERTISEMENT
  • #69 21202813
    p.kaczmarek2
    Moderator Smart Home
    OK just means that console command was sent.

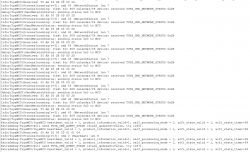
    You need to open the Web App, check the log, and check the log for TuyaMCU information, like heartbeat_valid, etc. Something like:
    
    ExtraDebug:TuyaMCU:TuyaMCU heartbeat_valid = 0, product_information_valid=0, self_processing_mode = 1, wifi_state_valid = 0, wifi_state_timer=0
    

    Enable extradebug log level just to be sure.

    It should be valid for either 9600 baud or 115200...
    Helpful post? Buy me a coffee.
  • #70 21202951
    alfredtorch
    Level 3  
    Good morning,

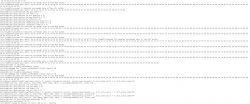
    I had some feedback received from TuyaMCU. I think I'm missing some important steps in the configuration like pinout or...

    Thank you,


    Screenshot of log messages from TuyaMCU. Screenshot of TuyaMCU interface logs containing a series of debugging information about network status and heartbeat.
  • #71 21203038
    p.kaczmarek2
    Moderator Smart Home
    That's very strange, I haven't seen that path used before by the TuyaMCU. It seems it does not respect forced WiFi state yet, so I've added a patch:
    https://github.com/openshwprojects/OpenBK7231...mmit/ead3ef589be69afba614df942647785d778c14f4
    Can you do OTA, then power off and on, and retry?


    PS: so which baud turned out to be ok?
    Helpful post? Buy me a coffee.
  • #72 21203116
    alfredtorch
    Level 3  
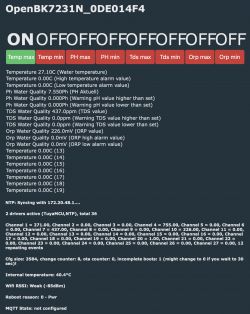
    I uploaded the latest version. And changed the baud rate to 115200. It started to provide some values on the dashboard (even if they are not completely the same as on the display). However at this speed a lot of errors are also thrown. Setting it back to 9600 doesn't change at all, only the debug output is reduced.


    Screenshot of OpenBK7231N interface displaying temperature, pH, TDS, and ORP data.
    Screenshot of the dashboard OpenBK7231N_0DE014F4 displaying various data and indicators. Screenshot of debugging console showing messages related to TuyaMCU interface operation and commands changing transmission speed.
  • #73 21203123
    p.kaczmarek2
    Moderator Smart Home
    The baud setting you had in this post:
    https://www.elektroda.com/rtvforum/topic4061780-60.html#21202951
    was good. Please do NOT change it. Please revert the correct baud setting, save autoexec, and do full power off and on (disconnect device from the grid so MCU reboot) and then check.

    Then retry and report here, along with log screenshots.
    Helpful post? Buy me a coffee.
  • #74 21203138
    alfredtorch
    Level 3  
    Seems to be better working now! 9600 was the right number.

    
    //starte TuyaMCU
    startDriver TuyaMCU
    tuyaMcu_defWiFiState 4
    tuyaMcu_setBaudRate 9600
    //starte set ip to NTP
    startDriver NTP
    ntp_setServer 172.20.48.1
    ntp_timeZoneOfs 2
    setChannelType 1  temperature_div10
    setChannelLabel 1 "Water temperature"
    linkTuyaMCUOutputToChannel 8 val 1
    addRepeatingEvent 15 -1 publishFloat temperatur $CH1/10 0 2 
    
    setChannelType 2 temperature_div10
    setChannelLabel 2 "High temperature alarm value"
    linkTuyaMCUOutputToChannel 102 val 2
    addRepeatingEvent 15 -1 publishFloat temperatur_max $CH2/10 0 2 
    //set value to Channel 102 TuyaMcu
    //set virtual button temp max
    setChannelLabel 20 "Temp max"
    setChannelType 20  Toggle
    setChannel 20 0
    
    setChannelType 3 temperature_div10
    setChannelLabel 3 "Low temperature alarm value"
    linkTuyaMCUOutputToChannel 103 val 3
    addRepeatingEvent 15 -1 publishFloat temperatur_min $CH3/10 0 2 
    //set value to Channel 103 TuyaMcu
    //set virtual button temp min
    setChannelLabel 21 "Temp min"
    setChannelType 21  Toggle
    
    setChannelType 4  Ph
    setChannelLabel 4 "PH Aktuell"
    linkTuyaMCUOutputToChannel 106 val 4
    addRepeatingEvent 15 -1 publishFloat ph $CH4/100 0 2 
    
    setChannelType 5  Ph
    setChannelLabel 5 "Warning pH value higher than set"
    linkTuyaMCUOutputToChannel 107 val 5
    addRepeatingEvent 15 -1 publishFloat ph_max $CH5/100 0 2 
    //set value to Channel 107 TuyaMcu
    //set virtual button ph max
    setChannelLabel 22 "PH max"
    setChannelType 22  Toggle
    
    setChannelType 6  Ph
    setChannelLabel 6 "Warning pH value lower than set"
    linkTuyaMCUOutputToChannel 108 val 6
    addRepeatingEvent 15 -1 publishFloat ph_min $CH6/100 0 2 
    //set value to Channel 108 TuyaMcu
    //set virtual button ph min
    setChannelLabel 23 "PH min"
    setChannelType 23  Toggle
    
    setChannelType 7  Tds
    setChannelLabel 7 "TDS value"
    linkTuyaMCUOutputToChannel 111 bool 7
    addRepeatingEvent 15 -1 publishFloat tds $CH7 0 2 
    
    setChannelType 8  Tds
    setChannelLabel 8 "Warning TDS value higher than set"
    linkTuyaMCUOutputToChannel 112 val 8
    addRepeatingEvent 15 -1 publishFloat tds_max $CH8 0 2 
    //set value to Channel 108 TuyaMcu
    //set virtual button tds max
    setChannelLabel 24 "Tds max"
    setChannelType 24  Toggle
    
    setChannelType 9  Tds
    setChannelLabel 9 "Warning TDS  value lower than set"
    linkTuyaMCUOutputToChannel 113 val 9
    addRepeatingEvent 15 -1 publishFloat tds_min $CH9 0 2 
    //set value to Channel 113 TuyaMcu
    fakeTuyaPacket 55AA03070008710200040000000088
    //set virtual button tds min
    setChannelLabel 25 "Tds min"
    setChannelType 25  Toggle
    
    setChannelType 10  Orp
    setChannelLabel 10 "ORP value"
    linkTuyaMCUOutputToChannel 131 val 10
    addRepeatingEvent 15 -1 publishFloat orp $CH10 0 0 
    
    setChannelType 11  Orp
    setChannelLabel 11 "ORP high alarm value"
    linkTuyaMCUOutputToChannel 132 val 11
    addRepeatingEvent 15 -1 publishFloat orp_max $CH11 0 0 
    //set value to Channel 132 TuyaMcu
    //set virtual button orp max
    setChannelLabel 26 "Orp max"
    setChannelType 26  Toggle
    
    setChannelType 12  Orp
    setChannelLabel 12 "ORP low alarm value"
    linkTuyaMCUOutputToChannel 133 val 12
    addRepeatingEvent 15 -1 publishFloat orp_low $CH12 0 0 
    //set value to Channel 1133 TuyaMcu
    //set virtual button orp min
    setChannelLabel 27 "Orp min"
    setChannelType 27  Toggle
    
    tuyaMcu_sendQueryState
    delay_s 120 // first start wait values
    again:
    delay_s 15
    // temperature values check set  temperatur_max or  temperatur_min Buttom to on or off
    if $CH1>$CH2 then setChannel 20 1 
    if $CH1<$CH2 then setChannel 20 0 
    if $CH1<$CH3 then setChannel 21 1 
    if $CH1>$CH3 then setChannel 21 0 
    // Ph value check set  ph_max or  ph_min Butt


    OpenBK7231N interface display with temperature, pH, and TDS information.
  • #75 21508482
    danededane
    Level 2  
    Hi guys, you seem to know a lot about the PH-W218 WiFi 8-in-1 Water Quality Tester with CB3S Chip.

    My device keeps detecting my PH buffer wrong and I would really just like to make it forget everything and start over.

    Does anyone know how to reset all info the device has about PH calibration?

    I've tried all button combinations but nothing reset the calibration nor factory reset the device completely.
  • #77 21508540
    danededane
    Level 2  
    >>21508535 Hi, yes so far I am.
    I just, right now, took a new pH sensor and tried to calibrate without trouble so maybe it was just defective?
    I still think it's a little odd that it's not possible to like reset the calibration or factory reset the whole thing.
  • #78 21508816
    p.kaczmarek2
    Moderator Smart Home
    Maybe you can force it by removing and wiping data from Tuya app? There is this option - "Remove and wipe data"
    Helpful post? Buy me a coffee.
  • #79 21509970
    danededane
    Level 2  
    >>21508816 I'll try that next time the issue occurs. Thanks.
  • #80 21600487
    Dinner
    Level 4  
    Hello everyone,
    I’ve been following the progress on the above-mentioned pH meter for some time, and I’d like to ask – has anyone actually managed to get this pH meter fully working with OpenBeken, including reading temperature, pH, and EC?

    I’d like to integrate this pH meter into Home Assistant for my aeroponics system, but from the discussion, I’m not entirely sure if it has been successfully done.

    Would it be possible to create a step-by-step guide specifically for this pH meter? I’ve tried flashing it in the past but didn’t get to the point of reading any values. Unfortunately, I haven’t been able to find any other reliable instructions for this particular device.

    Thank you for your help!
  • #81 21600492
    p.kaczmarek2
    Moderator Smart Home
    Hey, have you tried the latest autoexec.bat from this thread? Do you have original firmware backup?
    Helpful post? Buy me a coffee.
  • #82 21600508
    Dinner
    Level 4  
    >>21600492 Hi, thanks for the quick reply. Is this the correct code? There are several versions in the thread, and I’m not sure which one contains the correct values.
    I’ll be ordering a new device where I plan to set this up, so as soon as I can, I’ll back up the original firmware (without connecting to the Tuya Cloud) and let you know.

    Is it possible to flash other types of pH meters from Yieryi in the same way? For example, this one:
    https://www.yieryi.com/products/real-time-water-quality-monitor

    //starte TuyaMCU
    startDriver TuyaMCU
    tuyaMcu_defWiFiState 4
    tuyaMcu_setBaudRate 9600
    //starte set ip to NTP
    startDriver NTP
    ntp_setServer 172.20.48.1
    ntp_timeZoneOfs 2
    setChannelType 1  temperature_div10
    setChannelLabel 1 "Water temperature"
    linkTuyaMCUOutputToChannel 8 val 1
    addRepeatingEvent 15 -1 publishFloat temperatur $CH1/10 0 2 
    
    setChannelType 2 temperature_div10
    setChannelLabel 2 "High temperature alarm value"
    linkTuyaMCUOutputToChannel 102 val 2
    addRepeatingEvent 15 -1 publishFloat temperatur_max $CH2/10 0 2 
    //set value to Channel 102 TuyaMcu
    //set virtual button temp max
    setChannelLabel 20 "Temp max"
    setChannelType 20  Toggle
    setChannel 20 0
    
    setChannelType 3 temperature_div10
    setChannelLabel 3 "Low temperature alarm value"
    linkTuyaMCUOutputToChannel 103 val 3
    addRepeatingEvent 15 -1 publishFloat temperatur_min $CH3/10 0 2 
    //set value to Channel 103 TuyaMcu
    //set virtual button temp min
    setChannelLabel 21 "Temp min"
    setChannelType 21  Toggle
    
    setChannelType 4  Ph
    setChannelLabel 4 "PH Aktuell"
    linkTuyaMCUOutputToChannel 106 val 4
    addRepeatingEvent 15 -1 publishFloat ph $CH4/100 0 2 
    
    setChannelType 5  Ph
    setChannelLabel 5 "Warning pH value higher than set"
    linkTuyaMCUOutputToChannel 107 val 5
    addRepeatingEvent 15 -1 publishFloat ph_max $CH5/100 0 2 
    //set value to Channel 107 TuyaMcu
    //set virtual button ph max
    setChannelLabel 22 "PH max"
    setChannelType 22  Toggle
    
    setChannelType 6  Ph
    setChannelLabel 6 "Warning pH value lower than set"
    linkTuyaMCUOutputToChannel 108 val 6
    addRepeatingEvent 15 -1 publishFloat ph_min $CH6/100 0 2 
    //set value to Channel 108 TuyaMcu
    //set virtual button ph min
    setChannelLabel 23 "PH min"
    setChannelType 23  Toggle
    
    setChannelType 7  Tds
    setChannelLabel 7 "TDS value"
    linkTuyaMCUOutputToChannel 111 bool 7
    addRepeatingEvent 15 -1 publishFloat tds $CH7 0 2 
    
    setChannelType 8  Tds
    setChannelLabel 8 "Warning TDS value higher than set"
    linkTuyaMCUOutputToChannel 112 val 8
    addRepeatingEvent 15 -1 publishFloat tds_max $CH8 0 2 
    //set value to Channel 108 TuyaMcu
    //set virtual button tds max
    setChannelLabel 24 "Tds max"
    setChannelType 24  Toggle
    
    setChannelType 9  Tds
    setChannelLabel 9 "Warning TDS  value lower than set"
    linkTuyaMCUOutputToChannel 113 val 9
    addRepeatingEvent 15 -1 publishFloat tds_min $CH9 0 2 
    //set value to Channel 113 TuyaMcu
    fakeTuyaPacket 55AA03070008710200040000000088
    //set virtual button tds min
    setChannelLabel 25 "Tds min"
    setChannelType 25  Toggle
    
    setChannelType 10  Orp
    setChannelLabel 10 "ORP value"
    linkTuyaMCUOutputToChannel 131 val 10
    addRepeatingEvent 15 -1 publishFloat orp $CH10 0 0 
    
    setChannelType 11  Orp
    setChannelLabel 11 "ORP high alarm value"
    linkTuyaMCUOutputToChannel 132 val 11
    addRepeatingEvent 15 -1 publishFloat orp_max $CH11 0 0 
    //set value to Channel 132 TuyaMcu
    //set virtual button orp max
    setChannelLabel 26 "Orp max"
    setChannelType 26  Toggle
    
    setChannelType 12  Orp
    setChannelLabel 12 "ORP low alarm value"
    linkTuyaMCUOutputToChannel 133 val 12
    addRepeatingEvent 15 -1 publishFloat orp_low $CH12 0 0 
    //set value to Channel 1133 TuyaMcu
    //set virtual button orp min
    setChannelLabel 27 "Orp min"
    setChannelType 27  Toggle
    
    tuyaMcu_sendQueryState
    delay_s 120 // first start wait values
    again:
    delay_s 15
    // temperature values check set  temperatur_max or  temperatur_min Buttom to on or off
    if $CH1>$CH2 then setChannel 20 1 
    if $CH1<$CH2 then setChannel 20 0 
    if $CH1<$CH3 then setChannel 21 1 
    if $CH1>$CH3 then setChannel 21 0 
    // Ph value check set  ph_max or  ph_min Butt

Topic summary

The discussion focuses on changing the firmware of the PH-W218 WiFi 8-in-1 Water Quality Tester equipped with a CB3S chip, which uses a TuyaMCU architecture. Users share experiences and solutions for flashing the device with OpenBeken firmware, integrating it with Home Assistant, and handling TuyaMCU datapoints (dpIDs) for various water quality parameters such as temperature, pH, TDS, ORP, salinity, and others. Key technical points include establishing reliable UART communication between the WiFi module and the secondary MCU, setting the correct baud rate (commonly 9600), and ensuring physical RX/TX connections are intact to receive TuyaMCU heartbeat packets. Firmware backup and restoration using BK7231GUIFlashTool is recommended before flashing. Configuration involves scripting autoexec.bat with commands to start drivers, define channel types, link dpIDs, and publish data with proper formatting and decimal precision. Challenges discussed include initial lack of data updates due to connection issues, formatting numeric values correctly, and occasional unreliability of tuyaMcu_sendState commands. Users also explore disabling unnecessary drivers like tmSensor and managing button labels. OTA updates and applying recent OpenBeken commits add support for missing channel types and improve functionality. For calibration reset issues on the original Tuya firmware, suggestions include using the Tuya app's "Remove and wipe data" option. Overall, successful firmware replacement and integration require careful hardware inspection, correct UART settings, and tailored configuration scripts to map sensor data accurately to Home Assistant.
Summary generated by the language model.
ADVERTISEMENT