For the most common devices based on platforms supported by OpenBeken, the general firmware releases cater to most users' needs. Occasionally a device comes up that can only be partially made working with the standard firmware. Devices like the TH03 temperature and humidity sensor with segment display driven by a GN6932. To save space, the GN6932 driver was disabled by default.
For Beken firmwares, and others, enablement of a driver usually requires a change to the SDK, which are in submodules of the main app, in conjunction with a change to code in the main app. This typically requires creating your own fork of the main app and submodule, cloning to your PC, making the required changes to both forks, messing around with Git to get those changes in your submodule fork pushed upstream into the main app so you can eventually open a PR (pull request) to initiate a firmware build.
Thanks to @max4elektroda the process is a little easier now and can be completed in the browser. The idea was conceived here and later detailed here after release.
Using this new technique, the process of making a change to the OpenBK7231N submodule code through to downloading your compiled custom binaries will now be demonstrated. This demonstration relates to changes required to get OpenBeken fully working on a Moes Tuya Matter bulb but it serves as a template for the process to follow to make any number of customisations to OpenBeken.
Anyone wanting to convert their Moes Tuya Matter Beken device to OpenBeken, with the correct TLV partition address set in the build, no longer has to use the older binaries in PR (pull request) 1340 or mess around in the OpenBK7321N submodule, pushing changes upstream to a PR in the main app to start the build workflow. Changes can be made within the main app that are then applied to the submodule at build time.
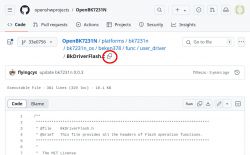
PR 1340 required changes to BkDriverFlash.c here https://github.com/openshwprojects/OpenBK7231..._os/beken378/func/user_driver/BkDriverFlash.c
Create your own custom build on the latest code
-Register for a GitHub account and login
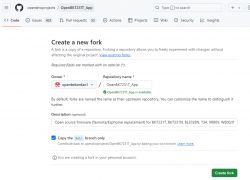
-Navigate to https://github.com/openshwprojects/OpenBK7231T_App and create your own fork of the main app

-Customize your fork name or stick with the original
-In your fork navigate to the platforms folder then BK7231N
-Click Add file -> Create new file

-Type "override/" then the name of each folder of the rest of the submodule path followed by a "/" until you get the empty file to create - "BkDriverFlash.c" in this case.
Eventually you'll have created this path and file sdk/OpenBK7231N/platforms/bk7231n/bk7231n_os/beken378/func/user_driver/BkDriverFlash.c under OpenBK7231T_App/platforms/BK7231N (Note: I missed the c in "func" in my screenshots - so imagine it's there!)

-Copy the raw content of the real BkDriverFlash.c from the submodule location into the empty file space just created -
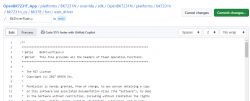
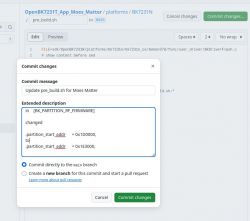
-Make the required changes to the content of the file - in this case we're changing the start address of the BK_PARTITION_RF_FIRMWARE from 0x1D0000 to 0x1E3000
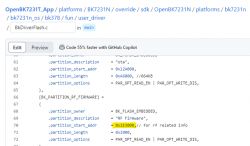
-Commit your changes, giving your commit a short meaningful descriptive name
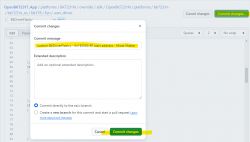
You'll see that your file is created and your main branch is 1 commit ahead of the base repository.

-Navigate back up to BK7231N folder and open the prebuild.sh file

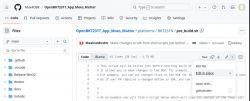
-Edit this file by clicking the pencil icon on the right and then uncomment (remove the "#" from the beginning of) lines 11, 12, 14, 15, 16, 17, 19, 23, 25, 26, 27 and 29 and click "commit changes...". Use default or set custom commit message for this change.
-navigate to the root of your fork and you'll see you're now 2 commits ahead of the base repo. The "2 commits ahead" link is clickable where you'll see a summary of your changes
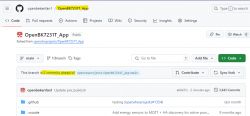
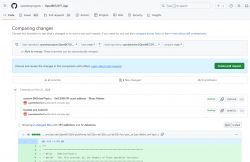
-Create a pull request to the base repository. Give it a decent title, description optional, and finally submit the PR with "Create pull request" at the bottom
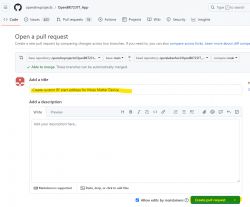
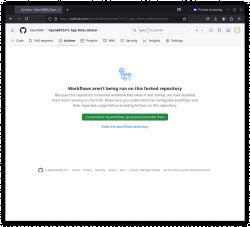
-If this is your first PR then you'll have to wait for the administrator to approve the build. You'll see your PR listed in here https://github.com/openshwprojects/OpenBK7231T_App/pulls and the build paused under Actions https://github.com/openshwprojects/OpenBK7231T_App/actions


-Once approved, the build will run and if all is well, successfully.
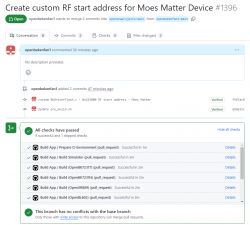
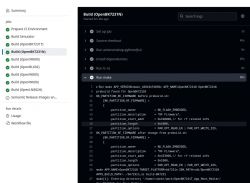
-Review the status of the override script success by expanding Build (platform you made changes to) -> Run make
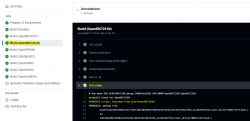
Example success:
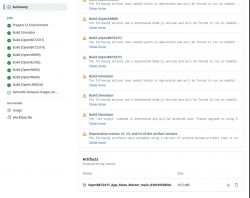
To get to your binaries click one of the blue "Details" links and navigate to the bottom of the "Summary" page
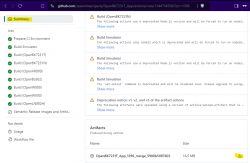
The zip file will contain all platform binaries even though your changes are only effective in the platform to which a change was made - BK7231N in this case
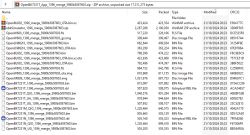
Your custom firmware is ready to be OTA or UART flashed to your device.
For Beken firmwares, and others, enablement of a driver usually requires a change to the SDK, which are in submodules of the main app, in conjunction with a change to code in the main app. This typically requires creating your own fork of the main app and submodule, cloning to your PC, making the required changes to both forks, messing around with Git to get those changes in your submodule fork pushed upstream into the main app so you can eventually open a PR (pull request) to initiate a firmware build.
Thanks to @max4elektroda the process is a little easier now and can be completed in the browser. The idea was conceived here and later detailed here after release.
Using this new technique, the process of making a change to the OpenBK7231N submodule code through to downloading your compiled custom binaries will now be demonstrated. This demonstration relates to changes required to get OpenBeken fully working on a Moes Tuya Matter bulb but it serves as a template for the process to follow to make any number of customisations to OpenBeken.
Anyone wanting to convert their Moes Tuya Matter Beken device to OpenBeken, with the correct TLV partition address set in the build, no longer has to use the older binaries in PR (pull request) 1340 or mess around in the OpenBK7321N submodule, pushing changes upstream to a PR in the main app to start the build workflow. Changes can be made within the main app that are then applied to the submodule at build time.
PR 1340 required changes to BkDriverFlash.c here https://github.com/openshwprojects/OpenBK7231..._os/beken378/func/user_driver/BkDriverFlash.c
Create your own custom build on the latest code
-Register for a GitHub account and login
-Navigate to https://github.com/openshwprojects/OpenBK7231T_App and create your own fork of the main app

-Customize your fork name or stick with the original

-In your fork navigate to the platforms folder then BK7231N
-Click Add file -> Create new file

-Type "override/" then the name of each folder of the rest of the submodule path followed by a "/" until you get the empty file to create - "BkDriverFlash.c" in this case.
Eventually you'll have created this path and file sdk/OpenBK7231N/platforms/bk7231n/bk7231n_os/beken378/func/user_driver/BkDriverFlash.c under OpenBK7231T_App/platforms/BK7231N (Note: I missed the c in "func" in my screenshots - so imagine it's there!)

-Copy the raw content of the real BkDriverFlash.c from the submodule location into the empty file space just created -

-Make the required changes to the content of the file - in this case we're changing the start address of the BK_PARTITION_RF_FIRMWARE from 0x1D0000 to 0x1E3000

-Commit your changes, giving your commit a short meaningful descriptive name

You'll see that your file is created and your main branch is 1 commit ahead of the base repository.

-Navigate back up to BK7231N folder and open the prebuild.sh file

-Edit this file by clicking the pencil icon on the right and then uncomment (remove the "#" from the beginning of) lines 11, 12, 14, 15, 16, 17, 19, 23, 25, 26, 27 and 29 and click "commit changes...". Use default or set custom commit message for this change.
-navigate to the root of your fork and you'll see you're now 2 commits ahead of the base repo. The "2 commits ahead" link is clickable where you'll see a summary of your changes


-Create a pull request to the base repository. Give it a decent title, description optional, and finally submit the PR with "Create pull request" at the bottom

-If this is your first PR then you'll have to wait for the administrator to approve the build. You'll see your PR listed in here https://github.com/openshwprojects/OpenBK7231T_App/pulls and the build paused under Actions https://github.com/openshwprojects/OpenBK7231T_App/actions


-Once approved, the build will run and if all is well, successfully.

-Review the status of the override script success by expanding Build (platform you made changes to) -> Run make

Example success:
Code: Text
To get to your binaries click one of the blue "Details" links and navigate to the bottom of the "Summary" page

The zip file will contain all platform binaries even though your changes are only effective in the platform to which a change was made - BK7231N in this case

Your custom firmware is ready to be OTA or UART flashed to your device.
Cool? Ranking DIY


