logo elektroda
logo elektroda
X
logo elektroda

How does Home Assistant Discovery work? JSON format, sensors, device classes, units

p.kaczmarek2 1104 13
ADVERTISEMENT
Treść została przetłumaczona polish » english Zobacz oryginalną wersję tematu
📢 Listen (AI):
  • Home Assistant logo on a blue background. .
    Here I will show the inner workings of MQTT-based HASS Discovery, a way for Home Assistant to automatically detect and configure devices. HASS Discovery only requires our device to be connected to the MQTT broker in HA. After that, our device can already be detected. In order for the discovery to take place, our device needs to publish a properly formatted text in JSON format to a specific subject from Discovery. This JSON contains information describing the entity, i.e. its type, name, icon, entity and the associated MQTT topics, among others, the topic for reading the value (listening) and the topic for setting the new value (from the HA).

    These types of mechanisms are best presented in practice, so I suggest starting with practice. Let's try firing up some Discovery and take a look at what is being sent. Fortunately, there is a ready-made tool in Home Assistant to listen in on MQTT communications. It comes with Mosquitto broker integrations:
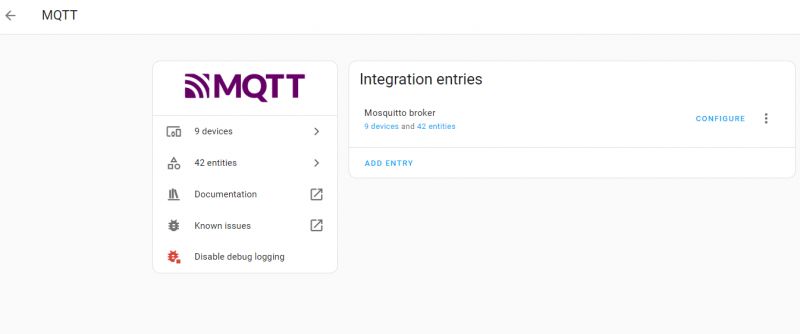
    MQTT Integration Interface in Home Assistant .
    Then we click Configure:
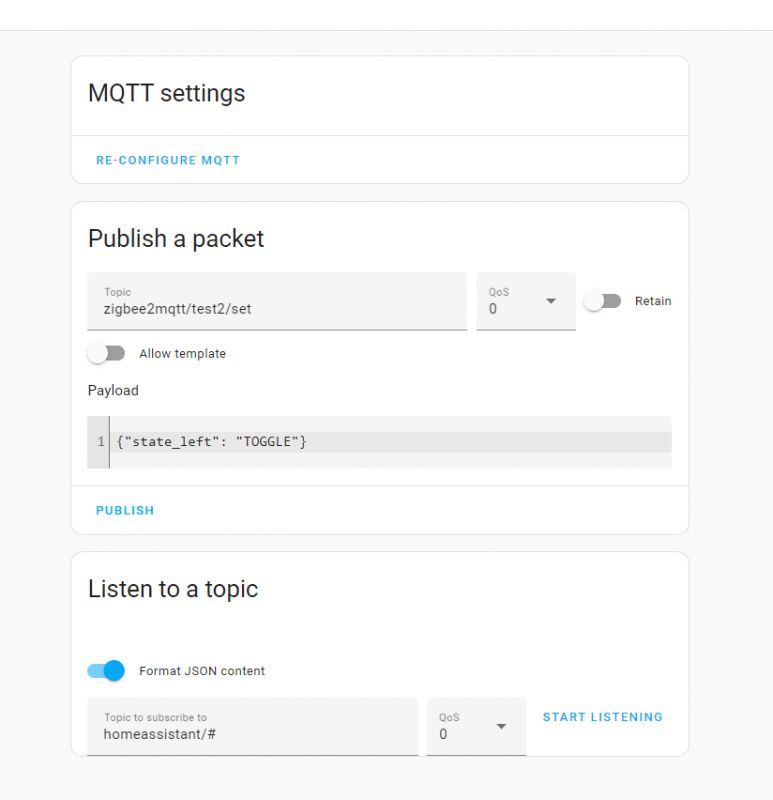
    MQTT configuration screen with options for publishing and listening to topics. .
    This brings us to the tool that allows us to publish packages and listen for publications.
    Now it's time to listen to something.
    Just a note - of course, I'm assuming that the user knows the basics of HA, MQTT, or JSON there.... The inner workings of Discovery are already a bit advanced, but also a worthy topic.
    It's also worth looking at the HA documentation if you have questions.
    So, Home Assistant Discovery by default is based on the subject homeassistant , we append a multi-level wildcard behind it, i.e. #, so that it listens to all matching subjects:
    
    homeassistant/#
    
    .
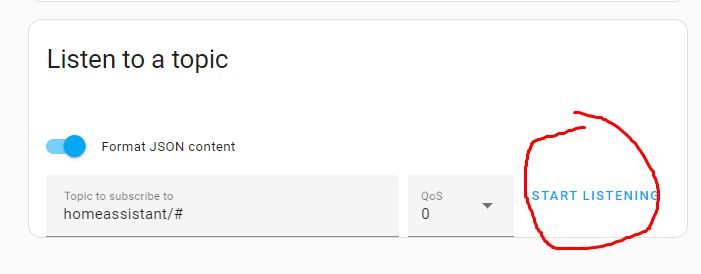
    And then we click Start Listening:
    Screenshot of Home Assistant's MQTT topic listening tool window. .
    Now it's time to do some Discovery - e.g. from within OpenBeken:


    .
    For the example, I used a simulated OBK device with two channels (relays).
    Let's see what such a thing "caught" with MQTT:
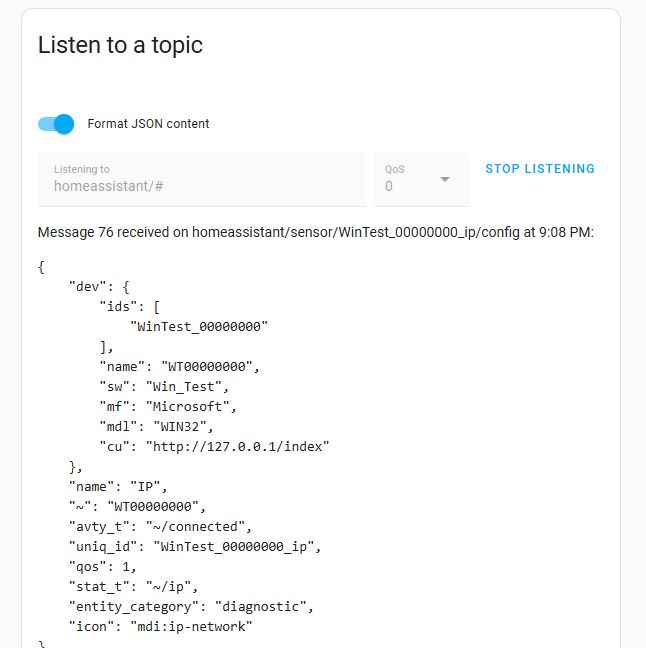
    MQTT communication monitoring tool panel with a visible message. .
    Here we have a separate publish for each separate entity.
    Let's start with the IP address. Topic (the so-called "mqtt topic"):
    
    homeassistant/sensor/WinTest_00000000_ip/config
    
    .
    Content (so-called "mqtt payload"):
    Code: JSON
    Log in, to see the code
    .
    Here we have, in sequence:
    - "dev" - section describing the device, its ID, name, software version (sw), manufacturer (mf), model (mdl), cu (panel URL)
    - "name" - entity name, here "IP"
    - "~" - abbreviation for the MQTT topic path, "WT00000000". This allows you to write ~/ip instead of the full "WT00000000/ip"
    - "avty_t" - the topic for the availability status, "~/connected", i.e. "WT00000000/connected". On this topic, the device reports its presence.
    - "uniq_id" - unique identifier of the entity in the HA, "WinTest_00000000_ip"
    - "qos" - Quality of Service level for MQTT, here "1" (guaranteed to be delivered at least once)
    - "stat_t" - the topic on which the entity value is published, "~/ip", i.e. "WT00000000/ip". Home Assistant here only listens for changes on this topic.
    - "entity_category" - entity category, "diagnostic", i.e. HA treats this as diagnostic information
    - "icon" - an icon in HA, "mdi:ip-network", which stands for the network icon from Material Design Icons (MDI)
    It is worth noting that abbreviations are used here, making the JSON shorter and easier for the microcontroller to generate and publish.
    Similarly, we have separate entities for different device parameters, e.g. for the SSID:
    
    homeassistant/sensor/WinTest_00000000_ssid/config
    
    .
    Content:
    Code: JSON
    Log in, to see the code
    .
    Here only there is a different "state_topic" ("stat_t") and a different icon.
    Similarly for uptime:
    
    homeassistant/sensor/WinTest_00000000_uptime/config
    

    Content:
    Code: JSON
    Log in, to see the code
    .
    Here the unit of measurement is entered - "unit_of_meas", in this example it is seconds. In addition, the entity class, "duration", i.e. the period of time, and the value type "total_increasing" are specified, meaning that the value will increase continuously.

    Similarly, the temperature of the device (from Beken's internal thermometer) is also specified:
    
     homeassistant/sensor/WinTest_00000000_temp/config
    
    .
    Content:
    Code: JSON
    Log in, to see the code
    .
    Here, however, the unit is changed - °C - and the type of measurement is changed, here it is just that, a measurement, or 'measurement'.
    In a similar way, this whole section is created:
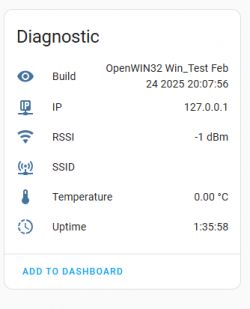
    Diagnostic panel displaying information about the device, including version, IP address, RSSI, SSID, temperature, and uptime. .
    Forgive the deficiencies in the screenshot, I was testing on the Simulator.

    It's now time to see something that supports both writing and reading. Relay. Its state can Home Assistant both set and read.
    
     homeassistant/switch/WinTest_00000000_relay_2/config
    
    .
    Content:
    Code: JSON
    Log in, to see the code
    .
    We have some new fields here:
    - "pl_on", or "payload_on", a value that sets the relay to on
    - "pl_off", as above, analogous to off
    - "stat_t" - "state_topic", the relay's state topic, this is where HA listens for changes
    - "cmd_t" - "command_topic", command topic, this is where the Home Assistant sends a new state when the user wants to change the state of the relay

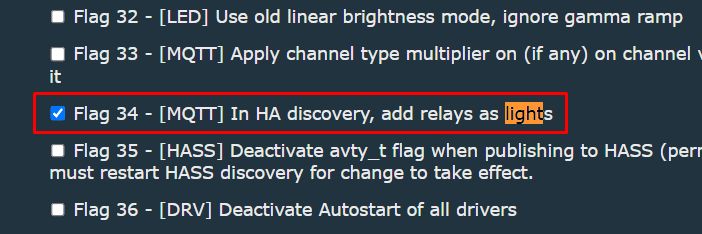
    Now a curiosity. This is what relays look like, but what if we turn on light mode in the OBK? There is a flag for that:

    Screenshot of MQTT flag configuration for HA Discovery .
    Let's check. I have performed HASS Discovery again:
    
    homeassistant/light/WinTest_00000000_light_2/config
    
    .
    Code: JSON
    Log in, to see the code
    .
    So Home Assistant has lights and relay mode separately.... although you could probably just as well change the icon - but here it's also about the entity type itself, those "lights" after the slash in the publish subject.

    Now, it would be possible to go more deeply into the topic of lights, but I decided I'd leave that for now. This will be covered separately, as there are more topics out there.

    In the meantime, I would like to show a few more options for sensors, sensors. In the OBK we have channels for this.
    Let's set up:
    
    setChannelType 5 Motion
    setChannelType 6 Humidity
    setChannelType 7 Temperature_div10
    setChannelType 8 Voltage_div100
    
    .
    Let's perform another Discovery.
    
    homeassistant/sensor/WinTest_00000000_humidity_6/config
    
    .
    Code: JSON
    Log in, to see the code
    .
    Humidity - the unit of measurement is percentages. Simple.
    Let's look further.
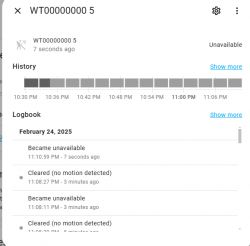
    Movement.
    
    homeassistant/binary_sensor/WinTest_00000000_binary_sensor_5/config
    
    .
    Code: JSON
    Log in, to see the code
    .
    Here only the class is set - it is the class that provides the corresponding icon.
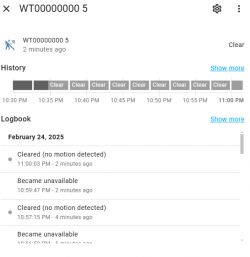
    View of motion history for device WT00000000 5 in Home Assistant

    Now a more interesting thing - a temperature type, but divisible by 10. This comes from the fact that TuyaMCU operates on integers and this type of value is used there. Topic:
    
    homeassistant/sensor/WinTest_00000000_temperature_7/config
    
    .
    Code: JSON
    Log in, to see the code
    .
    This is where a new field appears - 'val_tpl'. This is short for "value_template", which means value template. It defines how the value ("value") is formatted before being displayed. You can conveniently test these templates in Developer Tools -> Templates, but about that another time:
    Screenshot of Home Assistant developer tools showing the template editor. .

    What's left is the voltage - also from TuyaMCU, divided by 100:
    
     homeassistant/sensor/WinTest_00000000_voltage_8/config 
    
    .
    Code: JSON
    Log in, to see the code
    .
    There is rather nothing new here - the value template is similar to that for temperature, just a different multiplier.

    That's enough for today.
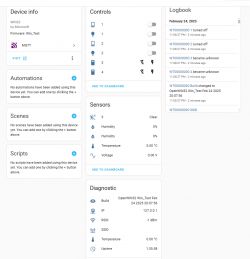
    Now you know more or less how it works that the Home Assistant is able to detect devices on its own. This way, they do not have to be manually added to configuration.yaml. Home Assistant Discovery relies on the device itself publishing information about its entities separately in JSON format under the subject subordinate to "homeassistant/". These JSONs describe their parameters as well as subjects, values, types, icons and entities, and even templates for processing the values on receipt. Home Assistant parses this JSON and then creates the entities and devices itself in MQTT devices. For example:
    List of devices connected via MQTT in Home Assistant. Home Assistant device control panel with device info, controls, sensors, and logbook. Screenshot from Home Assistant platform showing device status. .
    And you can already create automations from these:
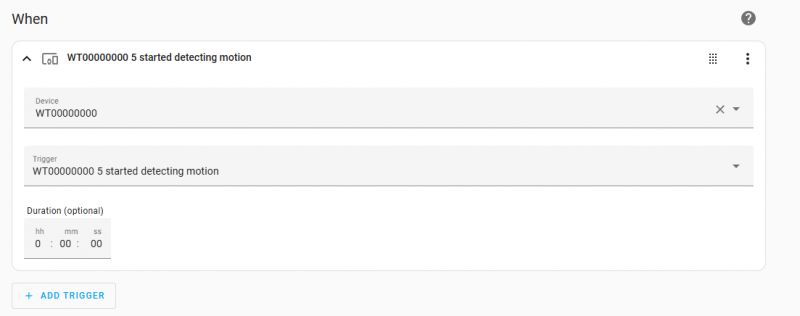
    Configuration of a motion detection trigger in Home Assistant. .
    In the next section, I will already try to look at a more specific use case, namely the handling of coloured LED lights, operating in both RGB colour and white temperature (CCT) modes.
    Do you use Home Assistant Discovery, or perhaps you happen to add devices to configuration.yaml yourself? .
    PS: For a complete list of available keys, options and icons, I refer you to the HA documentation, especially as these may change over time... .

    Cool? Ranking DIY
    Helpful post? Buy me a coffee.
    About Author
    p.kaczmarek2
    Moderator Smart Home
    Offline 
    p.kaczmarek2 wrote 12451 posts with rating 10298, helped 585 times. Been with us since 2014 year.
  • ADVERTISEMENT
  • #2 21456106
    krzbor
    Level 27  
    @p.kaczmarek2 - on the Controls tab you have the switches. 1 and 2 look normal, while 3 and 4 are flashing. I've managed to solve the mystery of why this is happening - I'm curious to see if you've managed :) too.
  • ADVERTISEMENT
  • #3 21456270
    p.kaczmarek2
    Moderator Smart Home
    This problem has come up on the forum in the context of OBK. Users have reported that there are flashes (as it sounds like) when the HA restarts, and only when the OBK publishes its state do they turn into a toggle. For this reason it seems to me that the lightning is until the HA knows the state of the device?
    Reddit confirms:
    Comment by user hyper_dmg on a forum about integration and icons in Home Assistant. .
    And what do you think yourself and where have you encountered this problem?
    Helpful post? Buy me a coffee.
  • #4 21456286
    krzbor
    Level 27  
    I have discovered why this happens. In the beginning there are lightning bolts. In order for them to turn into a normal toggle - and they turn automatically and we have no control over it - there must be a "state_topic" specified and, in addition, such a "state_topic" must really exist. It surprised me that HA checks the existence of such a "topic".
    The idea is that a normal switch must be verifiable, i.e. there must be a "topic" that feedbacks the state.
  • ADVERTISEMENT
  • #5 21456303
    p.kaczmarek2
    Moderator Smart Home
    What do you mean by "exist" in the context of "state_topic"? From what we have tested with users, we have flashed in OBK until OBK publishes its state under "state_topic".

    To put it another way:
    1. it is all ok in HA, we operate on the device, etc., HASS Discovery was done earlier
    2. we do a reboot of the HA
    3. there are "flashes" in HA
    4. the "lightning bolts" disappear the moment OBK first publishes the state of the entity on "state_topic"
    Helpful post? Buy me a coffee.
  • #6 21456336
    krzbor
    Level 27  
    "Exist" in the sense that some "xxx/yyyy" cannot be given. In other words, it is exactly as you describe - the HA must receive the state via the "state_topic" message and does not settle for the mere declaration (existence) of "state_topic".
  • ADVERTISEMENT
  • #7 21464476
    walkowiakmariusz8989
    Level 1  
    p.kaczmarek2 wrote:
    homeassistant/sensor/WinTest_00000000_humidity_6/config
    .
  • #8 21464483
    p.kaczmarek2
    Moderator Smart Home
    @walkowiakmariusz8989 what do you mean by quoting this passage?

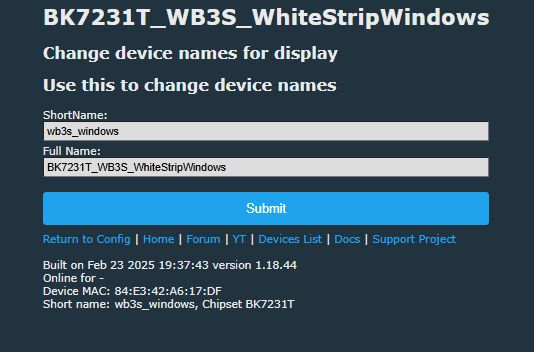
    The mysterious "WinTest_00000000" comes from the fact that this was tested in the OpenBeken Simulator, which runs on Windows. And the zeros are the zero MAC address.... on the BK7231 platform it would be OpenBK7231_ , on the LN882H it would be OpenLN882H, and so on....
    OpenBeken IoT device simulator - first early alpha version for testing .
    And you can still change it later if you want a different device name:
    Screenshot of the OpenBeken IoT simulator showing device name change. .
    Helpful post? Buy me a coffee.
  • #9 21471747
    lexx_
    Level 12  
    I have been experimenting with Discovery themes in Home Assistant for some time now and have encountered a problem that I have not yet managed to solve. The issue is on what basis (and why) some names or classes in Home Assistant are translated into Polish, while others remain in the original.

    I have several devices connected to MQTT that publish topics with a similar configuration. I have noticed that humidity topics, for example, are displayed as 'Humidity' once and as 'Humidity' another time. For example, SUPLI devices are not translated into Polish, while most Zigbee topics are. For my own themes, Home Assistant does not translate either, leaving them in English.
  • #10 21473007
    krzbor
    Level 27  
    lexx_ wrote:
    For example, devices from SUPLI are not translated into Polish, while most Zigbee topics are.
    .
    And how do you have Zigbee devices connected to the HA?
  • #11 21473499
    lexx_
    Level 12  
    >>21473007 Via Zigbe2MQTT. There, a separate topic is created for each device, and in Zigbe2MQTT itself Home Assistant is enabled, so that discovery topics are additionally created.
  • #12 21477466
    krzbor
    Level 27  
    lexx_ wrote:
    Through Zigbe2MQTT
    .
    Start MQTT-Explorer and connect to the MQTT broker with it. Then restart the Z2M. After the restart, Z2M sends "discovery". See if it sends in Polish or English.
  • Helpful post
    #13 21478458
    lexx_
    Level 12  
    krzbor wrote:
    .
    Start MQTT-Explorer and connect to the MQTT broker with it. Then restart the Z2M. After the restart, Z2M sends "discovery". See if it sends in Polish or English.
    I thought about that too, but no, in MQTT explorer everything is in English. In addition, HA would have to "expose" information about what language the user is using, so that Zigbe2MQTT could use this information when exposing topics. And since there may be several users, and each may set a different language, I would consider this solution unrealistic. I am betting, however, that HA translates the names of typical sensors for itself on some basis, just not sure on what basis.
    Example sensor from Zigbe2MQQT:
    Icons of temperature and humidity sensors with values. .
    Example sensor from Supli:
    Screen showing sensors displaying humidity and temperature in a garage door. .
    And finally "my" sensors with ESP which connects directly to MQTT and publishes its topics:
    Thermometer icon with the text Temperature and value 24°C. .

    Added after 2 [hours] 12 [minutes]: .

    lexx_ wrote:
    I'm betting, however, that HA is translating the names of typical sensors to itself on some basis, just not sure on what.
    .
    I solved the topic, and the solution turned out to be hidden in the documentation.
    HA takes the entity name from:
    1. the device name,
    2. the translation key,
    3. the device class.

    If we put "name" in the discovery subject, it is the one that will be displayed:
    Code: JSON
    Log in, to see the code
    .
    And if we omit "name", the HA will use the device class to display the name and, incidentally, translate it into the language used in the user interface:
    Code: JSON
    Log in, to see the code
    .
    Humidity icon with label and percentage value. .

    So as long as we use typical sensors for "typical" applications, "name" can be omitted.
  • #14 21478737
    krzbor
    Level 27  
    lexx_ wrote:
    I thought about that too, but no, in MQTT explorer everything is in English.
    .
    It matters what is sent in "discovery". Have you checked the "discovery" messages or the data messages? The MQTT discovery messages are best captured by restarting the Z2M (it is available in the browser under "Tools"). My Z2M in the browser has a Polish interface so it knows what language I am using.
📢 Listen (AI):

Topic summary

The discussion explains the operation of Home Assistant (HA) MQTT Discovery, which enables automatic detection and configuration of devices by publishing JSON-formatted messages to specific MQTT discovery topics. These messages define entities with parameters such as type, name, icon, device class, and MQTT topics for state reading and command setting. A key insight is that for switches to function correctly and display as toggles rather than flashing icons, a valid and actively publishing "state_topic" must exist; HA verifies the actual receipt of state messages, not just the declaration of the topic. The conversation also addresses language localization issues in HA, noting that some sensor names are translated based on the discovery message content and device integration, with Zigbee devices connected via Zigbee2MQTT showing translations influenced by the HA interface language, while custom MQTT devices and SUPLI sensors remain untranslated. Tools like MQTT Explorer and HA's built-in MQTT monitoring assist in analyzing discovery and data messages. The OpenBeken IoT device simulator is mentioned as a testing platform, with device names reflecting platform-specific prefixes such as OpenBK7231 or OpenLN882H.
Summary generated by the language model.
ADVERTISEMENT