logo elektroda
logo elektroda
X
logo elektroda

Avatto SWT60 Smart Watering Timer: Teardown, Constant Restarts and Firmware Analysis

Cramp1017 3195 25
Best answers

What hardware architecture does the Avatto SWT60 watering timer use, and how can I access its firmware/debug interface for OpenBeken work?

The SWT60 appears to be built around an Allwinner XR806 Wi‑Fi SoC plus a BAT32G127 MCU, so it is not just a generic TuyaMCU board [#21148498][#21148584] You can get boot logs on UART2, and the XR806 download mode seems to be entered by pulling PB02 low; with the older PhoenixMC tool the device could be put into bootloader mode and memory could be dumped, but the flash readback came back all zeros, which may point to flash protection [#21148711][#21148767][#21148871] The earlier guess was TuyaMCU, so the standard TuyaMCU/OpenBeken guide was suggested first, but the teardown evidence later overrode that assumption [#21147957][#21148498] The device is a good candidate for XR806 OpenBeken support testing [#21148707] A Tuya cloud OTA package was later recovered as reference material, including a 1,167,192-byte OTA image and a smaller 145 kB differential file [#21441811]
Generated by the language model.
ADVERTISEMENT
  • #1 21147933
    Cramp1017
    Level 4  
    Hi,
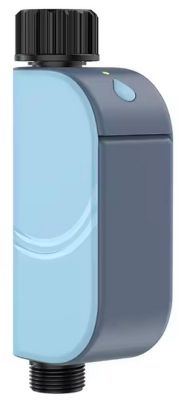
    I have bought an Avatto SWT60 Smart Watering Timer Irrigation timer.

    I paired it to the SmartLife app, and extracted the local key from my Tuya cloud project. However, the device constantly restarts with a hardware watchdog reset reason, and it is only controllable via wifi for mere seconds before each restart (so 2-3 seconds in every 2-3 minutes). The manufacturer didn't look into the issue, they simply refunded me instead of fixing the problem. I'd like to make use of the device, hence I'm considering using OpenBeken.

    Has anyone ever encountered this device? Is it using a dedicated microcontroller + a tuya board, or using the tuya board as the brain?

    Attached is a picture of the available test pads.

    Avatto SWT60 smart irrigation timer held in hand. Image of the interior of the Avatto SWT60 smart irrigation timer with visible test pads.

    I'd like to contribute to the development of OpenBeken by dumping the firmware, and maybe trying to analyze whatever's in the firmware. I have a logic analyzer, oscilloscope, multimeter, so all the tools needed to get information that is required to analyze this product.
  • ADVERTISEMENT
  • #2 21147957
    p.kaczmarek2
    Moderator Smart Home
    Sure, let's get this supported together. Just... how do you know it gets restarted because of the watchdog? Tuya logs?

    This is most likely a TuyaMCU device, so this guide applies:
    https://www.elektroda.com/rtvforum/topic4038151.html
    Helpful post? Buy me a coffee.
  • #3 21147996
    Cramp1017
    Level 4  
    >>21147957
    Okay, so I poked around with my multimeter (will poke around with an oscilloscope & logic analyzer tomorrow), the 5 pin port looked very interesting.
    Pin1: 3V3
    Pin2, 3: Pulled low
    Pin4: GND
    Pin5: Pulled high

    How could I identify with a logic analyzer which port is TX? I guess I should get some output at boot, correct?

    With regards to the watchdog, see the following (unfortunately Mandarin since I made the screenshot for the manufacturer) screenshot:
    Screenshot of device log with hardware watchdog reset errors in Mandarin.
    The error reason is 'hardware watchdog reset' and it happens in jittery, but periodical manner.
  • #4 21148045
    divadiow
    Level 38  
    what does the inside look like? please post pictures.
  • ADVERTISEMENT
  • #5 21148498
    Cramp1017
    Level 4  
    >>21148045
    I tried taking it apart, unfortunately the internal screws are covered with silicone and they are not accessible, only by destroying the water seal.

    Added after 39 [minutes]:

    >>21148498
    Given I got refunded for it and I had no use for it without wifi, in the name of science I sacrificed the poor thing. (Ignore the mosfet that got destroyed in the process :D)
    Close-up of a circuit board with an Allwinner XR806 chip. Close-up of a motherboard with visible electronic components and UART test points. Close-up of a circuit board with visible components and markings. Close-up of a printed circuit board showing test points UART2_RX, UART2_TX, and GND, with a PS_3V3 marking. Motherboard with various electronic components, including an Allwinner XR806 SoC chip.

    It has an Allwinner XR806 SoC, and the most of the UART test points are not accessible without breaking the device.
  • #6 21148584
    divadiow
    Level 38  
    ooh! an XR806. I've been angling to get to one to try the XR809 build on, though the XR806 does have a different SDK I think.

    Interesting.

    That BAT32G127 MCU is also seen in this https://www.elektroda.com/rtvforum/topic4064181.html

    One or more of those RX/TX pads must be good for boot log capture and then maybe firmware dump? Assuming you can get it into uart download mode.

    Added after 38 [minutes]:

    looks like only PB02 needs to be pulled low to get XR806 into download mode, as opposed to PB02 and PB03 on XR809
  • #7 21148686
    p.kaczmarek2
    Moderator Smart Home
    If this is TuyaMCU, you can still swap XR806 to ESP or to Beken and still use this device. What is the damaged MOSFET 7002K responsible for?
    Helpful post? Buy me a coffee.
  • #8 21148689
    Cramp1017
    Level 4  
    >>21148686
    What is the damaged MOSFET 7002K responsible for?
    Turning on the valve :D

    It's not waterproof anymore, so it's more or less useless :(
  • ADVERTISEMENT
  • #9 21148707
    divadiow
    Level 38  
    a good candidate for XR806 OBK support testing ;)
  • #10 21148711
    Cramp1017
    Level 4  
    >>21148707
    Okay, I can get boot logs on UART2, can reset the tuya chip by pulling NRST low. But I just cannot get it to go to download mode (https://www.elektroda.com/rtvforum/topic4063735.html - phoenixMC_v3.1.21014b.exe), there's nothing on UART0/1/2 when I pull PB02 low.
  • #12 21148718
    Cramp1017
    Level 4  
    See the bootlog attached.
    bootlo..zip (40.5 kB)You must be logged in to download this attachment.
  • #13 21148767
    Cramp1017
    Level 4  
    >>21148718>>21148713
    I managed to get the board into bootloader mode and connect with the older PhoenixMC. I can dump the memory perfectly, but unfortunately the flash dump is all zeros :(
  • #14 21148871
    p.kaczmarek2
    Moderator Smart Home
    This reminds me of a flash protection, but I don't know if XR806 has this feature. Maybe we need to read more. Alternatively, we can just give up making backup and just try to flash it. Is XR809 firmware compatible with XR806? Or do we have to compile OpenXR809 app with another SDK?
    Helpful post? Buy me a coffee.
  • #16 21148886
    p.kaczmarek2
    Moderator Smart Home
    Is it totally dead? Maybe it would be possible to still capture some TuyaMCU traffic first?
    Helpful post? Buy me a coffee.
  • #17 21148887
    Cramp1017
    Level 4  
    >>21148886
    It's not totally dead, just the screen broke (and of course the water sealing) while I forced it apart. It was fully potted with silicone.
  • ADVERTISEMENT
  • #19 21431244
    divadiow
    Level 38  
    Hi @Cramp1017 do you still have this device?
  • #20 21441811
    divadiow
    Level 38  
    using the pk jbgpnksjxnlpdf9 found in the Tuya config file posted above, we can determine the following from Tuya

    Code: Text
    Log in, to see the code


    interesting is the update and upgrade responses

    Code: Text
    Log in, to see the code


    Code: Text
    Log in, to see the code


    those URLs give us a 2 unique files
    keyryxypduts8upx-1.0.4-1.0.0-1722682007418 and 172119857176074bd1f38.bin the smaller of the two, 145kb, being some kind of differential.
    Code: Text
    Log in, to see the code


    The larger, 1,167,192 bytes, is the OTA update. So now we have an OTA file to use for reference purposes.

    The files will land here eventually https://github.com/openshwprojects/FlashDumps/tree/main/IoT/XR806
  • #21 21813258
    HR86
    Level 2  
    I have bought the same device. Configured it and installed it. The next day it shows blank screen with code Er4 (which is low battery as per manual). Changed the batteries with new ones (although first time they were new as well) yet no luck; it still shows Er4 whenever I insert the batteries (alkaline, good-quality batteries as required in the manual). This thing does not have a reset button on it, and I can't seem to find a way to make it reset (tried pushing buttons while inserting batteries also didn't work).

    Any ideas? :)
    Thank you!
  • #22 21813795
    p.kaczmarek2
    Moderator Smart Home
    Are you referring to factory firmware (Tuya) or OpenBeken?

    From SWT60E FAQ:
    Quote:

    Q: How do I reset the timer to factory settings?

    A: To reset the timer, locate the reset button on the device and hold it down for 10 seconds until the display clears.


    Electronic watering timer with LCD screen, buttons, and icon legend
    Recommended batteries: 4 AA (1.5V) alkaline batteries
    Helpful post? Buy me a coffee.
  • #24 21847181
    divadiow
    Level 38  
    there isn't one. the only reset procedure in the manual is to get the unit back to wifi pairing mode.

    -Press and hold OK for 3 seconds to enter OFF mode
    -While in OFF mode, press and hold Manual for 3 seconds to start network configuration (the Wi-Fi indicator flashes).

    This assumes you're still running factory Tuya firmware.
  • #25 21886190
    divadiow
    Level 38  
    divadiow wrote:
    172119857176074bd1f38.bin


    this OTA file, flashed to a WXU module and fed 3.3v, does boot (KV missing of course and no TuyaMCU to talk to)

    Code: Text
    Log in, to see the code

Topic summary

✨ The Avatto SWT60 Smart Watering Timer experiences frequent hardware watchdog resets, causing it to restart every 2-3 minutes and remain controllable via WiFi only briefly. The device pairs with the SmartLife app and uses a Tuya cloud local key. Internally, it features an Allwinner XR806 SoC and a BAT32G127 MCU, with UART test points mostly inaccessible without damaging the water seal. Attempts to enter UART download mode by pulling PB02 low were initially unsuccessful, but later the board was successfully put into bootloader mode using PhoenixMC software, allowing memory dumps that returned all zeros, suggesting possible flash protection. The damaged MOSFET 7002K controls the valve and its destruction compromised waterproofing. The XR806 SDK differs from XR809, with some community interest in porting OpenBeken firmware to this device. TuyaMCU integration is suspected, and firmware upgrade metadata indicates a version 1.0.0 with SDK optimizations. Further analysis involves capturing boot logs, identifying UART TX lines, and exploring firmware dumping and flashing options despite hardware limitations.
Generated by the language model.

FAQ

TL;DR: XR806 OTA is 1,167,192 bytes; "Update SDK to optimize power consumption." Here’s teardown, UART, bootloader, OTA, and watchdog-reset guidance for Avatto SWT60. For tinkerers needing steps to stop restarts, dump firmware, or test OpenBeken. [Elektroda, divadiow, post #21441811]

Why it matters: It speeds up troubleshooting and salvage of a refunded or unstable smart watering timer.

Quick facts:

Quick Facts

What chips are inside the Avatto SWT60—Tuya board or dedicated MCU?

The board includes an Allwinner XR806 Wi‑Fi SoC and a BAT32G127 microcontroller. That points to a Wi‑Fi module plus a dedicated MCU. “ooh! an XR806” highlighted the platform, and BAT32G127 was identified on the PCB. [Elektroda, divadiow, post #21148584]

Why does my SWT60 keep restarting every few minutes?

One user logged repeated hardware watchdog resets, leaving only 2–3 seconds of Wi‑Fi control every 2–3 minutes. Capture boot logs, verify supply stability, and review firmware options before hardware changes. This pattern suggests firmware or MCU‑module communication faults rather than pure hardware failure. [Elektroda, Cramp1017, post #21147933]

How do I quickly find UART TX/RX on this board?

Attach a logic analyzer and watch for boot messages on power‑up. Users reported boot logs on UART2, which confirms a live TX. Once detected, set your serial adapter to 3.3 V and match the observed baud. [Elektroda, Cramp1017, post #21148711]

What are the five‑pin header signals I can probe safely?

Measured pins were: Pin1 = 3.3 V, Pin4 = GND, two pins pulled low, and one pulled high. Use 3.3 V logic only. Confirm with your meter before connecting a USB‑UART adapter. [Elektroda, Cramp1017, post #21147996]

How can I reset the Tuya Wi‑Fi chip without power‑cycling the whole unit?

Pull the NRST line low momentarily to reset the XR806 module. This method avoids full power removal and helps when iterating boot captures and mode changes. [Elektroda, Cramp1017, post #21148711]

How do I put the XR806 into UART download mode?

Follow these steps:
  1. Hold PB02 low to ground.
  2. Reset or power the XR806 while PB02 stays low.
  3. Release PB02 and connect your UART tool to the bootloader. “Only PB02 needs to be pulled low to get XR806 into download mode.” [Elektroda, divadiow, post #21148584]

Which software can talk to the XR806 bootloader for dumping or flashing?

PhoenixMC connected successfully in bootloader mode. One user achieved a full memory dump using an older PhoenixMC release. If connection fails, recheck wiring, reset timing, and COM parameters. [Elektroda, Cramp1017, post #21148767]

My flash dump is all zeros—what’s going on?

This behavior indicates flash protection or a locked region. “This reminds me of a flash protection.” Try different regions, but expect restrictions on vendor images. Consider proceeding without a backup if you accept the risk. [Elektroda, p.kaczmarek2, post #21148871]

Can I load XR809 firmware on the XR806?

No, they use different SDKs. “There’s another SDK for XR806,” and flashing was confirmed after switching. Build against the XR806 SDK or use the provided tools for that platform. [Elektroda, Cramp1017, post #21148875]

Can I swap XR806 for ESP or Beken and still keep the device usable?

Yes. “You can still swap XR806 to ESP or to Beken and still use this device.” Maintain TuyaMCU serial control to the BAT32G127. Map pins and replicate serial protocol for valve and display. [Elektroda, p.kaczmarek2, post #21148686]

Where can I download official OTA firmware for analysis?

Tuya reports an OTA v1.0.4 with a 1,167,192‑byte full image and a 147,605‑byte diff. URLs were identified, and files were slated for a public dumps repo for XR806 reference. Verify hashes before use. [Elektroda, divadiow, post #21441811]

Is the unit still waterproof after teardown?

No. Screws are buried in silicone and the assembly is fully potted. Opening it destroys the water seal, and collateral damage like a broken screen can occur. Reserve teardown units for bench work only. [Elektroda, Cramp1017, post #21148498]

Which component actually switches the water valve?

A 7002K MOSFET drives the valve. If it is damaged during teardown, the valve will not actuate even if logic works. Replace it before functional tests. [Elektroda, Cramp1017, post #21148689]

Are most UART pads accessible without destroying the enclosure?

Access is limited. Most UART test points are not reachable without breaking the device apart. Plan for micro‑soldering or live probing through the existing header where possible. [Elektroda, Cramp1017, post #21148498]

Can I still capture TuyaMCU serial traffic if the device is partially damaged?

Yes, if it powers up. Sniff the UART between XR806 and the BAT32G127 to log DP frames before flashing or swapping modules. Capture sessions can reveal control registers and timing. [Elektroda, p.kaczmarek2, post #21148886]
Generated by the language model.
ADVERTISEMENT