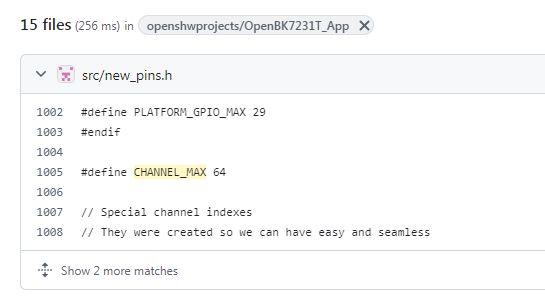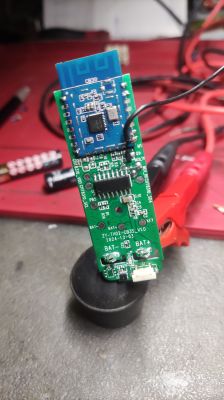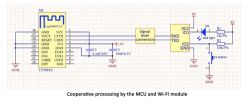
Here I will show you step by step how to configure a TuyaMCU device, how to get dpID list, how to map dpIDs to channels and publish them to Home Assistant and how to create custom page for the device. This topic will cover most of TuyaMCU topics required to get your Tuya device running cloudless with HA.
But first of all - do not flash device first, start with reading this guide. This is because one of dpID extraction methods requires an unflashed device
0. Do generic research
The first step is obviously to figure out what TuyaMCU is. This is why some basic reading is recommended first.
- read our writeup: TuyaMCU protocol - communication between the microcontroller and the WiFi module
- read Tuya docs: https://developer.tuya.com/en/docs/iot/tuya-c...-serial-port-access-protocol?id=K9hhi0xxtn9cb
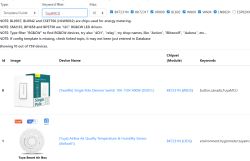
- open our devices list, tick "detailed" checkbox and search for "TuyaMCU", read the found teardowns
- read our autoexec samples page, at least ones related to TuyaMCU https://github.com/openshwprojects/OpenBK7231T_App/blob/main/docs/autoexecExamples.md
For generic OBK knowledge, please:
- read our docs: https://github.com/openshwprojects/OpenBK7231T_App/blob/main/docs/README.md
- watch our flashing guides: https://www.youtube.com/@elektrodacom
1. Check is your device using TuyaMCU
Now you need to know is your device using TuyaMCU. So,
tTry to answer the following questions:
- when you open device case, is there an extra MCU in SOIC or TQFP case (or similiar) near WiFi module?
- is WiFi module connected to MCU via RX1/TX1 (UART1) lines?
- when you do a config extraction with our flasher, does it find a baud setting in the flash?
- when you have flashed your device already, does your device has still functional buttons, even without configuring them in OBK?
- does your device has a screen?
If you answered YES to some of the questions, there is a chance your device is TuyaMCU.
2. Determine baud setting
The best way to find out baud setting is to use our flash tool: our flasher, just get a 2MB flash backup of device taken by UART or just download Tuya config partition via Tuya config extraction in OBK and drag and drop it on the flasher:
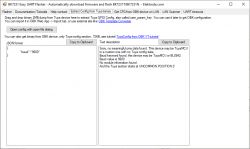
TuyaMCU baud rates are 9600 (default) and 115200 (high speed)
3. Determine the meaning of dpIDs
This is where having a not yet flashed device is handy, but there are mutliple ways. If you haven't flashed device yet:
- you can just get them from Tuya
- if you have an isolated USB to UART converter, and know how to connect it in a safe manner (because device power supply may not be isolated from mains), you can use our TuyaMCU analyzer to sniff the communication and observe which dpIDs are sent when you are doing a particular action in Tuya app, for example, change relay and observe which dpID is sent
If you already flashed OBK:
- you can start the driver and set the TuyaMCU baud in autoexec and then use tuyaMcu_sendQueryState command to get dpIDs from the MCU. Then, you have to observe their values and guess their meanings (for example, if thermometer is showing 21.5C, and one dpID has value 215, then you can suspect it's the temperature)
- you can also search our devices list for similiar devices, maybe some dpID are matching
- you can also use tuyaMcu_sendState command to send something to TuyaMCU, for example, relay value, and observe if it changes on the physical device, see command docs
5. Start the driver and check is there a communication
This is when you already have to flash the device. Earlier steps could be completed without flashing, but now it's the time to change the firmware.
The main issue with changing firmware of TuyaMCU devices is that TuyaMCU uses the same port as the flashing.
This means, that you will have to done something to sever the connection of MCU for the time of the flashing, at least in the most cases.
There are multiple ways to do it:
- cut the traces (RX and TX) leading to MCU and repair them after flashing
- disconnect board with TuyaMCU (if possible, if boards are separate)
- desolder either TuyaMCU or WiFi module (sometimes it's possible)
- desolder resistors on RX/TX traces (if present, some devices don't have them)
Alternatively, you could also try to look up the datasheet of the MCU and check whether it's possible to put it into the RESET state via pulling it low or high.
Futhermote, there are also OTA flashing solutions, but they are not reliable and most of the new devices are patched.
6. Start the driver and check is there a communication
Now it's time to setup a basic autoexec.bat in OBK:
Here is a starting config:
// Start TuyaMCu driver
startDriver TuyaMCU
// set TuyaMCU baud rate
//tuyaMcu_setBaudRate 115200
// set TuyaMCU default wifi state 0x04, which means "paired",
// because some TuyaMCU MCUs will not report all data
// unless they think they are connected to cloud
tuyaMcu_defWiFiState 4
The tuyaMcu_setBaudRate is commented out, please remove comment if needed. This should give you basic TuyaMCU heartbeats and communication in the OpenBeken Web App Log. This should also make tuyaMcu_sendQueryState work.
Do not forget the tuyaMcu_defWiFiState 4 line. By default, OBK sends "paired" state (0x04) only when MQTT is on, but some devices always require the WiFi state to be "paired" (0x04) before sending data. This will control the WiFi LED of the MCU and even may control buzzer. Some devices will send buzzer audio signals when not paired.
7. Map the dpIDs
In OBK, you can map dpIDs to channels.
Channel is like a variable, they can store integers.
You can adjust the way channels are displayed by setting their types, for example:
setChannelType 1 Toggle
This will create a toggle on GUI, and this:
setChannelType 1 temperature
this will create a temperature display.
To see full list of channel types, check: https://github.com/openshwprojects/OpenBK7231T_App/blob/main/docs/channelTypes.md
Still, to get data from MCU, you need to map dpID to channel, so:
// Map given dpID to channel 1
// dpID type value
linkTuyaMCUOutputToChannel 24 val 1
Code above maps dpID 24 to channel 1, with type value.
There are multiple possible types.
There are Tuya types:
- 0-raw
- 1-bool
- 2-value
- 3-string
- 4-enum
- 5-bitmap
And there OBK-specific types. For example, if you want given dpID to always publish over MQTT in the hex form, you can do:
linkTuyaMCUOutputToChannel 24 MQTT
This will publish the value under tm/TYPE/dpID topic every time that TuyaMCU sends it.
There are also special types for compound raw data packets, the sample below is for Voltage + Current + Power raw packet for TAC2121C device:
linkTuyaMCUOutputToChannel 6 RAW_TAC2121C_VCP
The code above will automatically set Voltage, Current and Power channels.
To see complete config samples, check our autoexec samples:
https://github.com/openshwprojects/OpenBK7231T_App/blob/main/docs/autoexecExamples.md
You can also use our devices list:
https://openbekeniot.github.io/webapp/devicesList.html
Enter "TuyaMCU dimmer" in the search field (for example) and search.
So, if you don't know the meaning of dpIDs, the workflow is the following:
1. try to query state from the MCU
2. write config to map received dpIDs to channels
3. save config and reboot
4. observe if the config works, if something is missing, do the adjustements
Do a little steps, one at time, that way you can figure even a complicated device. Don't hesitate to ask on forum if there is a problem.
8. Create a custom GUI
This is purely optional, but if you want to have a custom gui on your device, you can create your own page with HTML and JS and host it on LittleFS:
OpenBeken as a mini HTTP hosting - writing pages in Javascript, Tasmota REST
There is a very useful feature that can be used for this purpose, it's called DP. It can be sent via HTTP from the Javascript on REST page:
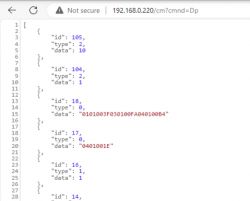
In order for it to work, you need to enable the following flag: flag 46.
This will store last values of dpIDs in hex and allow you accessing them in JSON.
The same command works via MQTT, it will send reply under stat/TuyaMCU/DP.
9. Pair with Home Assistant
There are multiple ways to do the pairing and they strongly depend on your personal preference and your particular device.
The most simple way is to just use automatic HASS Discovery which is creating Hass entities that are based on OBK channel types and their respective name:
The more advanced way is to write YAML config yourself and just put it in the configuration.yaml of your Home Assistant.
There are few good tricks that may help with that, for example, you can use a special argument for linkTuyaMCUOutputToChannel to enable dpID publishing in raw hex form, so it can be processed by HA later:
linkTuyaMCUOutputToChannel 6 MQTT
Set it, save and reboot, and observe what happens in Home Assistant log. You can also use Home Assistant MQTT tool to watch for MQTT packets.
Can you show sample teardown topic for TuyaMCU dimmer?
Well, as I said, please use our devices list, but still, here is a one sample:
OpenBeken and TuyaMCU dimmer - configuration guide/tutorial
And here is a fan device configuration:
BK7231T Treatlife DS03 Fan/Light Dimmer Switch: OTA Flash & Setup Guide (TuyaMCU dpIDs)
And here is power meter teardown:
[BK7231N ] Teardown and flashing of Tomzn TOMPD-63 WIFI (not to be confounded with TOMPD-63LW)
Can you show a sample of custom REST page for device
You can check out our BW-AF1 tutorial:
OpenBeken on BW-AF1 fryer with WiFi - interior, TYWE3S/WB3S, configuration
It has a custom REST page for the fryer control.
Can you show a sample of custom script for device?
Check out our TAC2121C-like setup with charging limit controller:
Home Assistant Integration: Reflashing BK7231N in Tuya Smart DIN-rail Energy Meter TAC2121C
The final script is at the end of the topic.
What about battery powered devices?
Battery powered TuyaMCU devices are special - the MCU controls the power of WiFi module there. MCU only enables WiFi module when it needs to report data. This requires a special driver called tmSensor.
Please see a sample tmSensor guide for more information:
Energy-saving (?) Battery-operated door / window sensor for WiFi DS06
[CB3S/BK7231N] Temperature/Humidity Sensor with TuyaMCU - Diagram, Reverse Enginering
Summary
There are many ways to configure and flash TuyaMCU devices. TuyaMCU dpIDs can be extracted before flashing, either manually (by sniffing the protocol) or automatically from Tuya cloud side. TuyaMCU dpIDs can be also requested and investigated after flashing, with a query state command. TuyaMCU can be configured in a flexible way, either with stock OBK page, or with fully custom REST interface that can be hosted on any OBK device with LittleFS. TuyaMCU devices configured with OBK can be also paired with Home Assistant, both by automatic Home Discovery or by more advanced and flexible manual YAML config. There are also multiple ways to get TuyaMCU data out of OBK device - you can just use OBK channels, or you can use special MQTT dpID link, or you can use DP command to request all dpID values per request. The DP command works both via HTTP and MQTT. You can also script OBK devices to automate your setup, either with or without Home Assistant.
Let us know if you have any TuyaMCU-related questions, we will do our best to help you configure your devices!
Cool? Ranking DIY Helpful post? Buy me a coffee.


