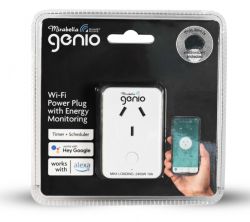
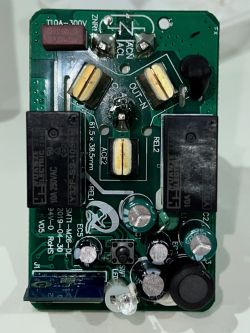
I opened this one up and it has a bit going on, all fairly tight around the board (details below), and was afraid of breaking things to get to the CB2S chip, so I flashed it using tuya-cloudcutter, and the mirabella-genio-i004527-double-plug device and hoped for the best 
It worked, and I got OpenBK7231T_App installed.
This is the profile that I used (manually updated):
Once the configuration is applied, the BL0937 needed to be calibrated. To do this, go to the web interface, click on "Launch Web Application", go to "Logs", and then with a known load and/or meter connected to the outlet, run the following commands:
- VoltageSet <current line voltage> (eg: VoltageSet 243)
- CurrentSet <current current in Amps>
- PowerSet <current power in Watts>
I found I had to do all three to get roughly accurate values. Unfortunately I don't have an old style light I could use, so used a 12v lamp with a coiled transformer (power factor of 97), so still some error there.
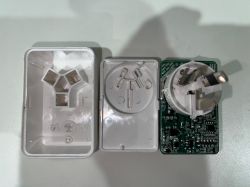
To get it open, I used a very sharp knife to separate the top and bottom all the way around, then carefully pried them apart, there are clips as well, so you need to separate those once it's free from the glue.
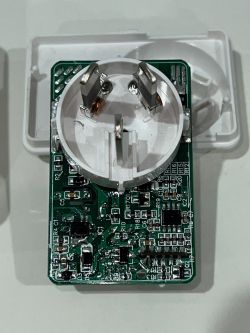
Initially I couldn't get to the bottom of the board, as I couldn't get the board free from the base plastic (that's when I started with tuya-cloudcutter), however afterward I found that I could get it free by using a screwdriver to leverage the board away from the base near the power pins. There is a plastic shroud behind the base that "clicked" free, and it was all apart. Unfortunately this means I didn't get a clean raw dump for cloudcutter, however using the above mentioned template worked.
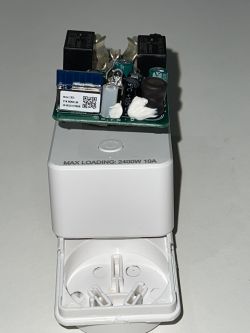
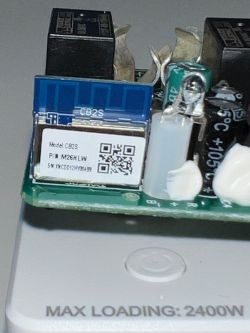
Here are some image of the device opened up:
It worked, and I got OpenBK7231T_App installed.
This is the profile that I used (manually updated):
{
  "vendor": "Tuya",
  "bDetailed": "0",
  "name": "Mirabella Genio Plug with Energy Monitoring",
  "model": "I004526",
  "chip": "BK7231N",
  "board": "CB2S",
  "keywords": [
    "TODO",
    "TODO",
    "TODO"
  ],
  "pins": {
    "6": "BL0937CF1;1",
    "7": "BL0937CF;1",
    "8": "LED_n;1",
    "10": "Btn;1",
    "24": "BL0937SEL;1",
    "26": "Rel;1"
  },
  "image": "https://www.mirabellagenio.com.au/wp-content/uploads/2022/09/I004526-20220720-BLISTER-SHADOW-min-2048x2048.jpg",
  "wiki": "https://www.elektroda.com/rtvforum/topic_YOUR_TOPIC.html"
}
Once the configuration is applied, the BL0937 needed to be calibrated. To do this, go to the web interface, click on "Launch Web Application", go to "Logs", and then with a known load and/or meter connected to the outlet, run the following commands:
- VoltageSet <current line voltage> (eg: VoltageSet 243)
- CurrentSet <current current in Amps>
- PowerSet <current power in Watts>
I found I had to do all three to get roughly accurate values. Unfortunately I don't have an old style light I could use, so used a 12v lamp with a coiled transformer (power factor of 97), so still some error there.
To get it open, I used a very sharp knife to separate the top and bottom all the way around, then carefully pried them apart, there are clips as well, so you need to separate those once it's free from the glue.
Initially I couldn't get to the bottom of the board, as I couldn't get the board free from the base plastic (that's when I started with tuya-cloudcutter), however afterward I found that I could get it free by using a screwdriver to leverage the board away from the base near the power pins. There is a plastic shroud behind the base that "clicked" free, and it was all apart. Unfortunately this means I didn't get a clean raw dump for cloudcutter, however using the above mentioned template worked.
Here are some image of the device opened up:


Cool? Ranking DIY


