![[Youtube] Desoldering WiFi module with hot air - WB3S/CB3S/TYWE3S/etc replacement method tutorial [Youtube] Desoldering WiFi module with hot air - WB3S/CB3S/TYWE3S/etc replacement method tutorial](https://obrazki.elektroda.pl/1784345900_1679827427_thumb.jpg)
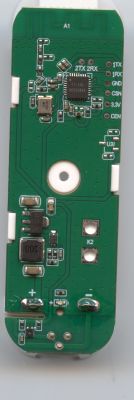
Here's a quick guide showing how to desolder a WiFi module with TYWE3S footprint from a smart device. The guide covers usage of flux, extra leaded solder and IPA PCB cleaner for a reliable WiFi module replacement process. Soldering the WiFi module back in it's place is also shown in the video. Our tutorial can be very useful for anyone willing to swap one WiFi module with another, or just needing to desolder module temporarily to program it or to check the pad markings on the bottom silk screen. No pads were ripped in making of this guide.
Futhermore, the same approach can be of course used for any other, non-IoT device. You can desolder ICs the same way, but here we'll focus on IoT application of the method.
The same method can be used to create a WB3S/CB3S dev boards from ESP dev boards - just replace the module.
![[Youtube] Desoldering WiFi module with hot air - WB3S/CB3S/TYWE3S/etc replacement method tutorial [Youtube] Desoldering WiFi module with hot air - WB3S/CB3S/TYWE3S/etc replacement method tutorial](https://obrazki.elektroda.pl/8492207300_1679827737_thumb.jpg)
Of course, for the shown method the hot air station is required.
If you want to see a tricky method for desoldering such module without hot air, please see here:
https://www.youtube.com/watch?v=fSbeKwCCMHM
The hot air method is more reliable, but it is also possible to use alternate way to remove module without tearing pads.
Thank you for watching. Please remember to visit our Youtube channel page and teardowns list:
https://openbekeniot.github.io/webapp/devicesList.html
https://www.youtube.com/@elektrodacom
You can also see our Youtube playlists page:
https://www.youtube.com/@elektrodacom/playlists
See you!
Cool? Ranking DIY Helpful post? Buy me a coffee.


