Product Information
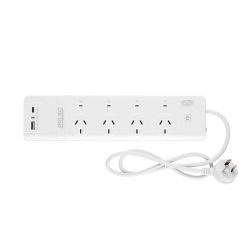
This is a four socket powerboard with in-built USB chargers (USB-A and USB-C, 5v 3.4 amp combined). The four power sockets can be controlled on or off via WiFi, and there is a master On/Off button which - by default using Tuya - turns off all four ports. The model is PB88UHA, and used to come with an ESP8285-based contoller but is now provided with a BK7231T controller.
https://www.bunnings.com.au/arlec-grid-connec...4-outlet-powerboard-with-usb-charger_p0074829


The controller chip is a Tuya WB2S which is just a BK7231T. The form factor for this board is that it is inserted upside down into the main board as shown in the image above, with only the pins showing. For reflashing with OpenBeken, I used solder wick to remove all the solder, then removed the three screws as indicated with the arrows, and removed the WB2S board. Reflashing is as for any WB2S, using the VCC, GND, TXD, RXD and CEN pins. CEN must be wired to the RST pin of your programmer to put the board into programming mode.
Pins are configured as follows in the JSON format within the Web Application:
The above translates to:
-Pin 6: Relay 3
-Pin 7: Relay 2
-Pin 8: Relay 1
-Pin 24: Relay 4
-Pin 10: Button
-Pin11: WiFiLED_n
For the MQTT configuration in Home Assistant, I didn't do anything with the button as I have no need for controlling that or doing anything with it really.
This is a four socket powerboard with in-built USB chargers (USB-A and USB-C, 5v 3.4 amp combined). The four power sockets can be controlled on or off via WiFi, and there is a master On/Off button which - by default using Tuya - turns off all four ports. The model is PB88UHA, and used to come with an ESP8285-based contoller but is now provided with a BK7231T controller.
https://www.bunnings.com.au/arlec-grid-connec...4-outlet-powerboard-with-usb-charger_p0074829


The controller chip is a Tuya WB2S which is just a BK7231T. The form factor for this board is that it is inserted upside down into the main board as shown in the image above, with only the pins showing. For reflashing with OpenBeken, I used solder wick to remove all the solder, then removed the three screws as indicated with the arrows, and removed the WB2S board. Reflashing is as for any WB2S, using the VCC, GND, TXD, RXD and CEN pins. CEN must be wired to the RST pin of your programmer to put the board into programming mode.
Pins are configured as follows in the JSON format within the Web Application:
Code: JSON
The above translates to:
-Pin 6: Relay 3
-Pin 7: Relay 2
-Pin 8: Relay 1
-Pin 24: Relay 4
-Pin 10: Button
-Pin11: WiFiLED_n
For the MQTT configuration in Home Assistant, I didn't do anything with the button as I have no need for controlling that or doing anything with it really.
Cool? Ranking DIY


