logo elektroda
logo elektroda
X
logo elektroda

Flashing 3Stone 100W Smart Light Bulb [BP5758D + WB2L] - Using BK7231T Chip, Alexa Compatible

andy212332 2901 9

TL;DR LABEL_AI_GENERATED

  • Flashing guide for the 3Stone 100W Equivalent WiFi LED color-changing bulb, using BP5758D + WB2L hardware and a BK7231T chip, with Alexa compatibility.
  • The LED board comes out from the small end with a long screwdriver, and the chip pins are reachable from the back, so desoldering is unnecessary.
  • The bulb is a [2023 Upgraded] Smart Light Bulbs pack of 4, model B07HR8GT12, rated 100W equivalent, 10W, 2700K-6500K, RGBCW, and 2.4Ghz only.
  • A 3.3v serial connection provided enough power for flashing, so no separate power supply was needed.
  • Warm and cool LED pins had to be inverted to make the setup work correctly.
AI summary based on the discussion. May contain errors.
ADVERTISEMENT
Listen:
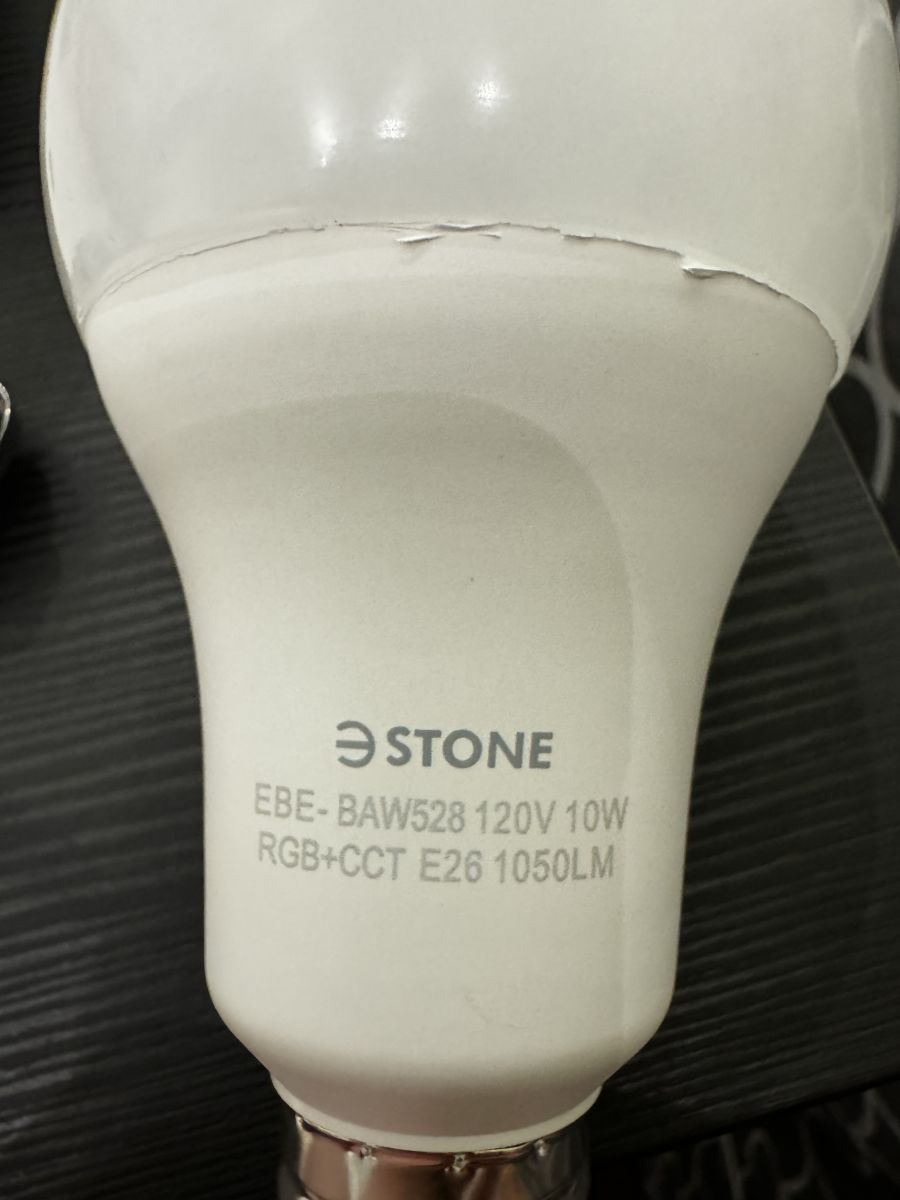
  • Close-up of 3Stone LED bulb showing technical specifications.
    This is a firmware flashing guide for: [2023 Upgraded] Smart Light Bulbs (Pack of 4), 3Stone 100W Equivalent WiFi LED Color Changing Bulb Dimmable 2700K-6500K RGBCW, Works with Alexa, Google Home 2.4Ghz Only, A21 10W E26 Tunable White No Hub

    Bought from: https://www.amazon.com/gp/product/B07HR8GT12
    Screenshots:
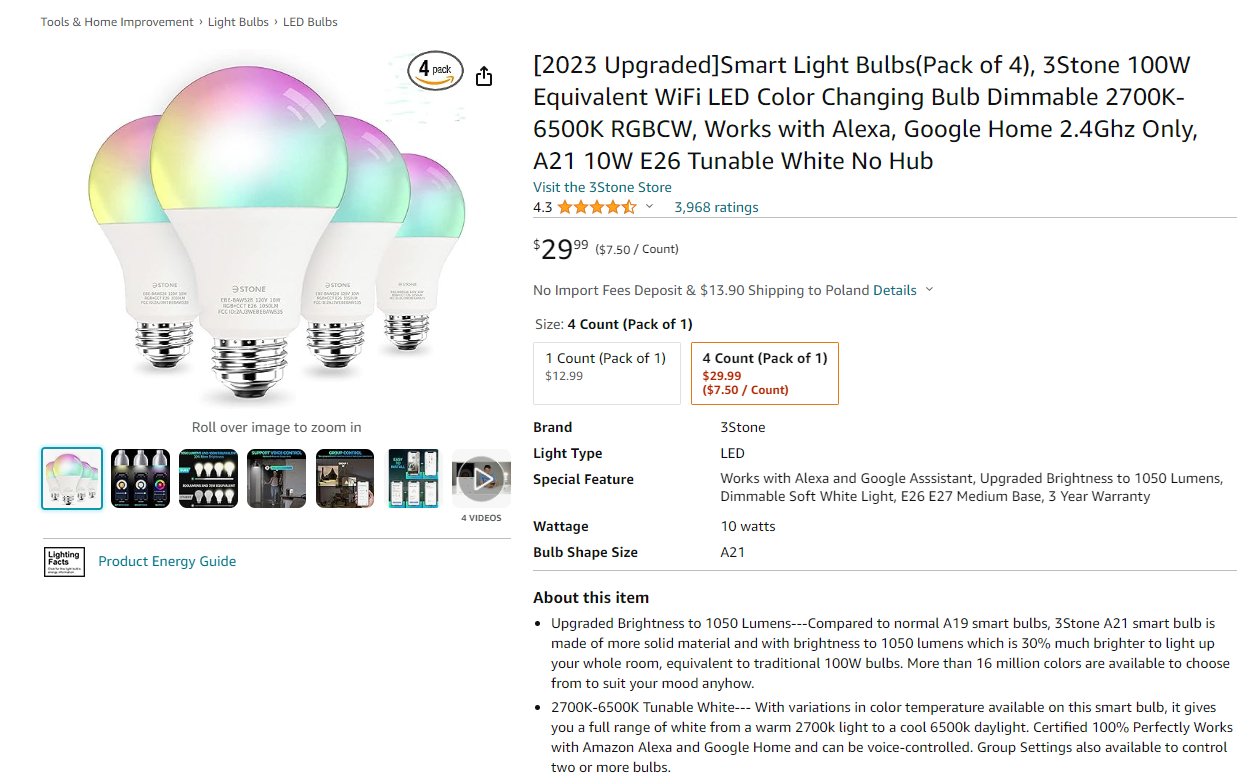
    Image of product 3Stone Smart Light Bulbs (4 pack), 100W equivalent, color-changing, dimmable.
    Product ASIN B07HR8GT12

    Followed the instructions here with some minor changes: https://www.youtube.com/watch?v=2e1SUQNMrgY


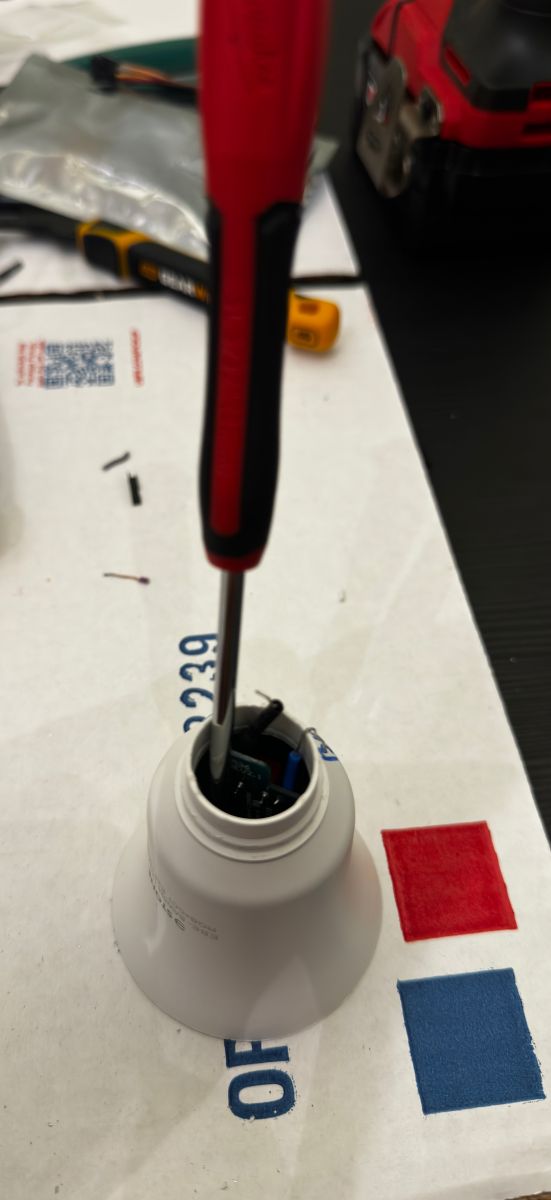
    - Removed the LED board by using a long screwdriver and pushing down from the small end of the bulb. Trying to pry from the top will just break the plastic.
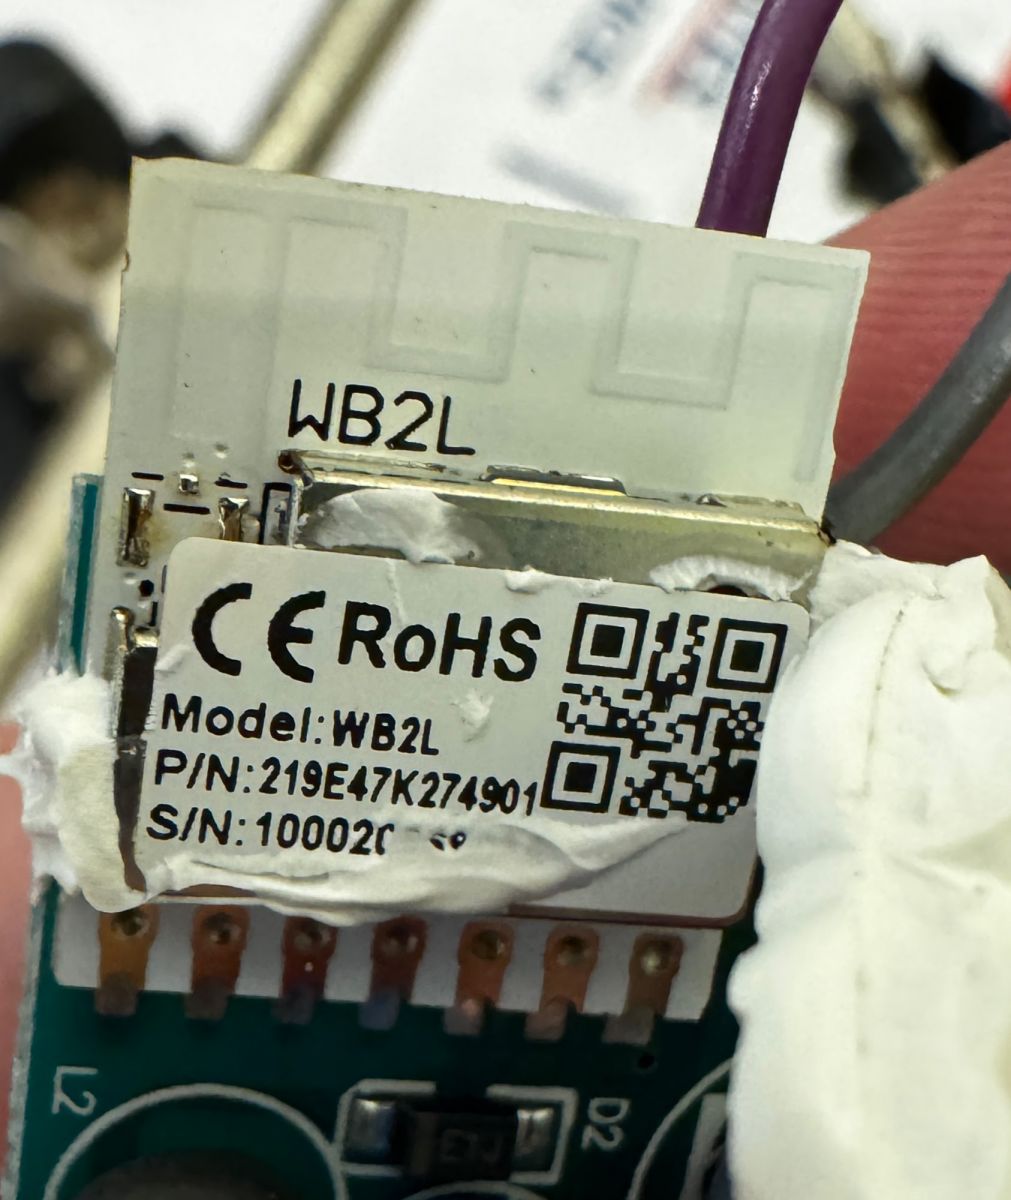
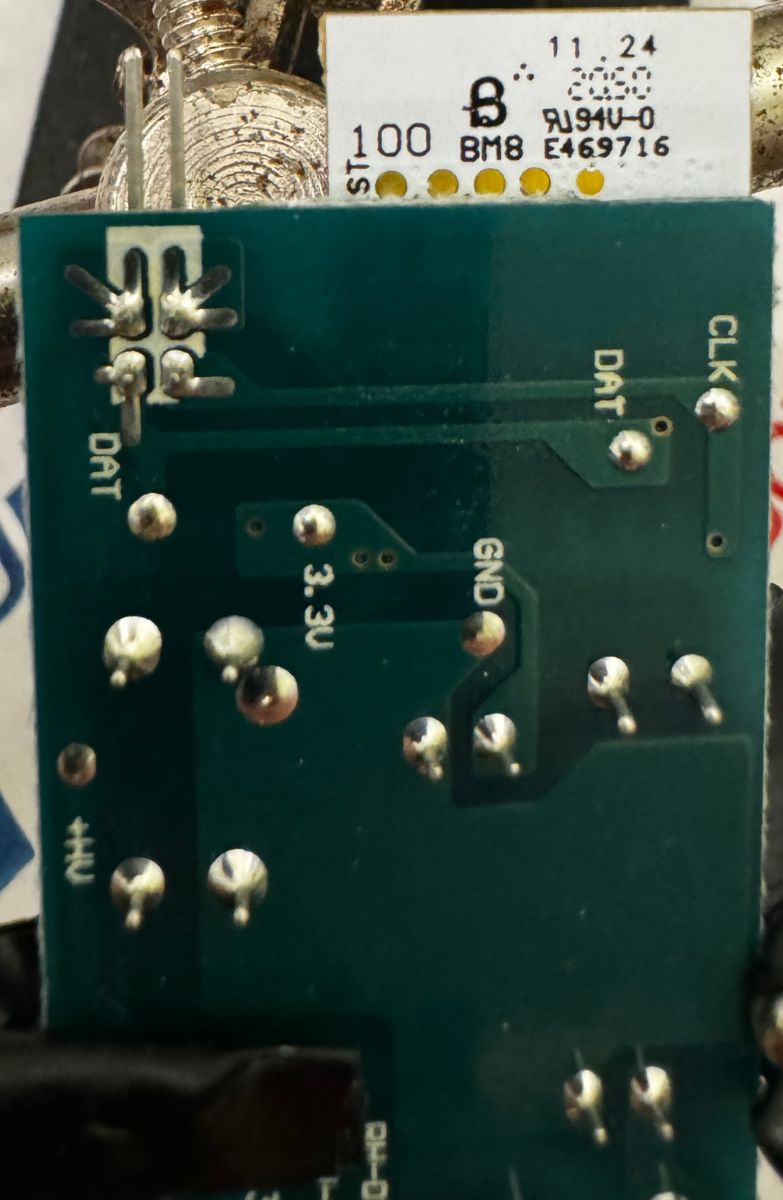
    - No need to desolder the chip, you can get to the pins from the back.
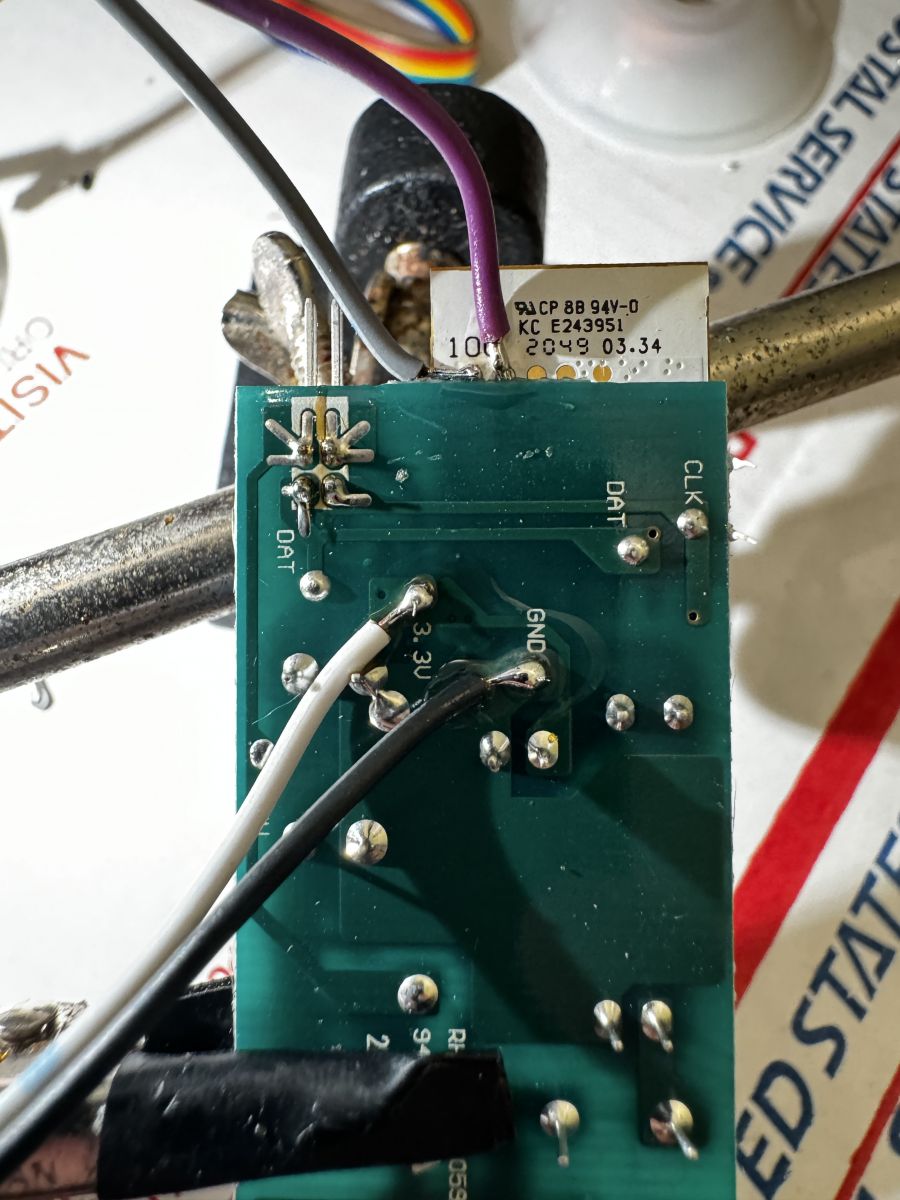
    - Did not have to use a separate power supply, 3.3v from the serial worked fine.
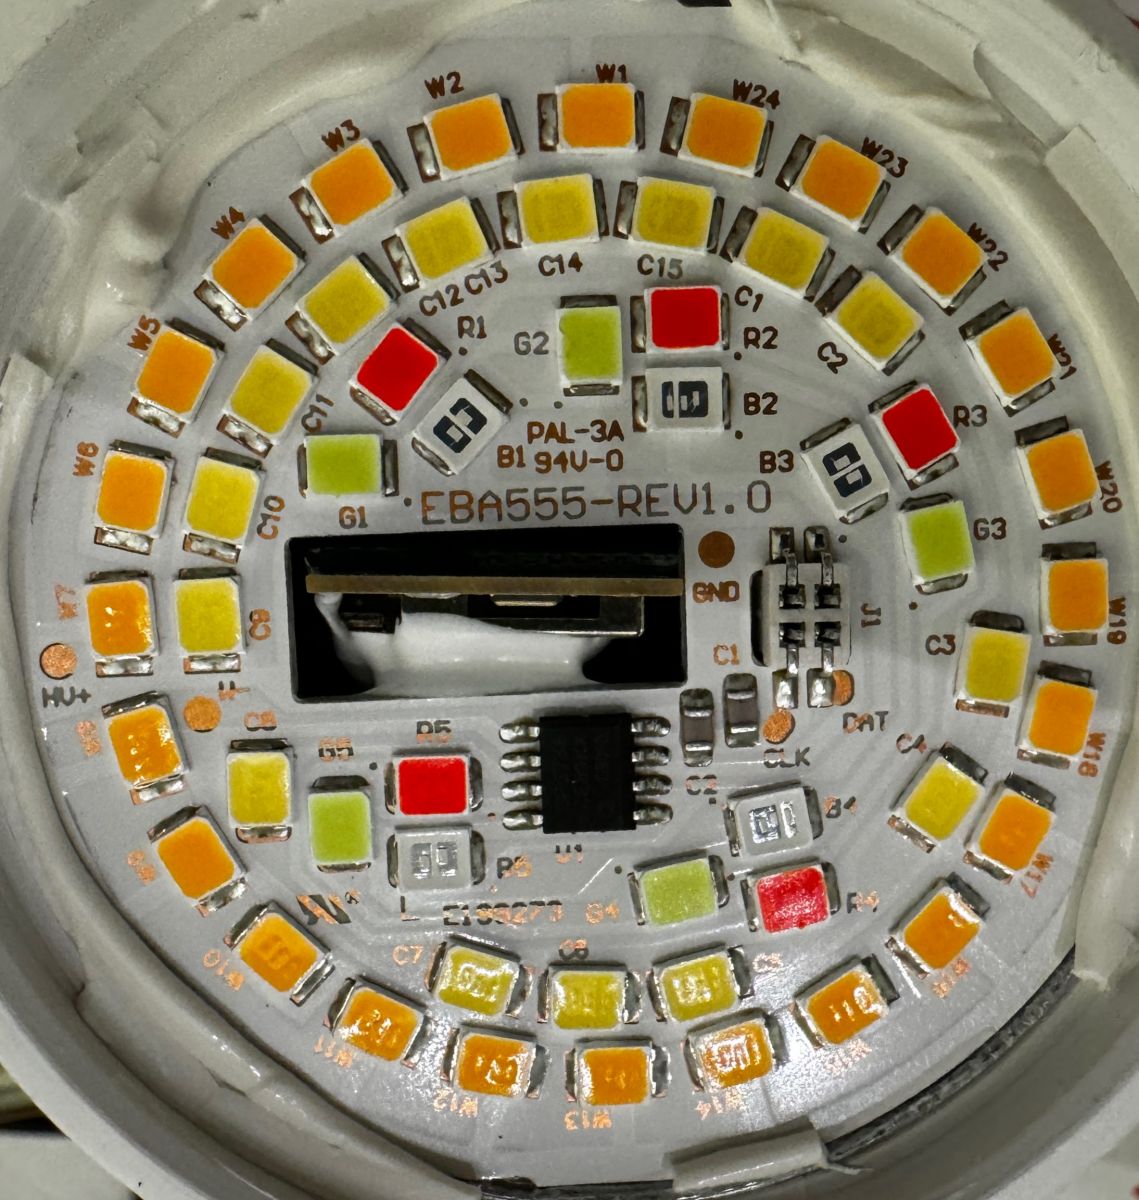
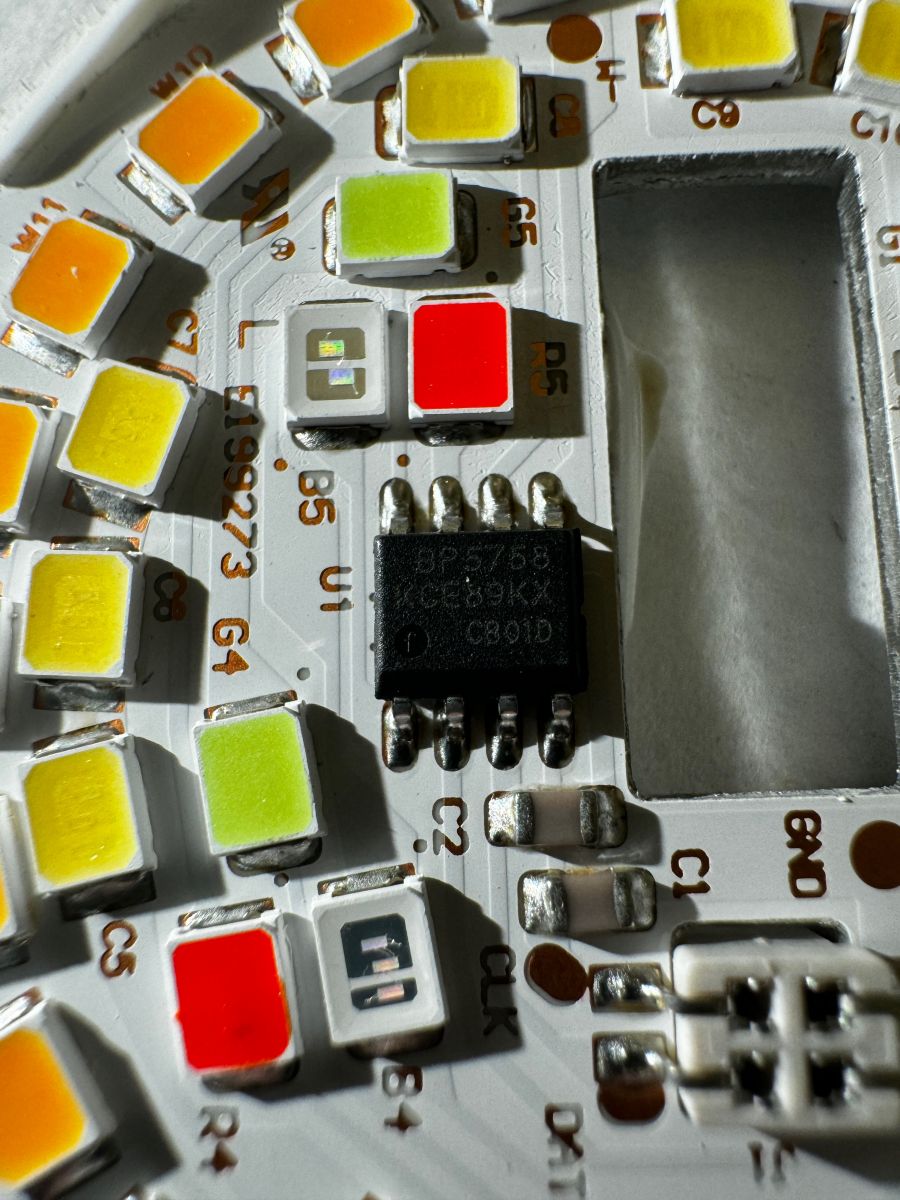
    - Had to invert the Warm/Cool LED pins,
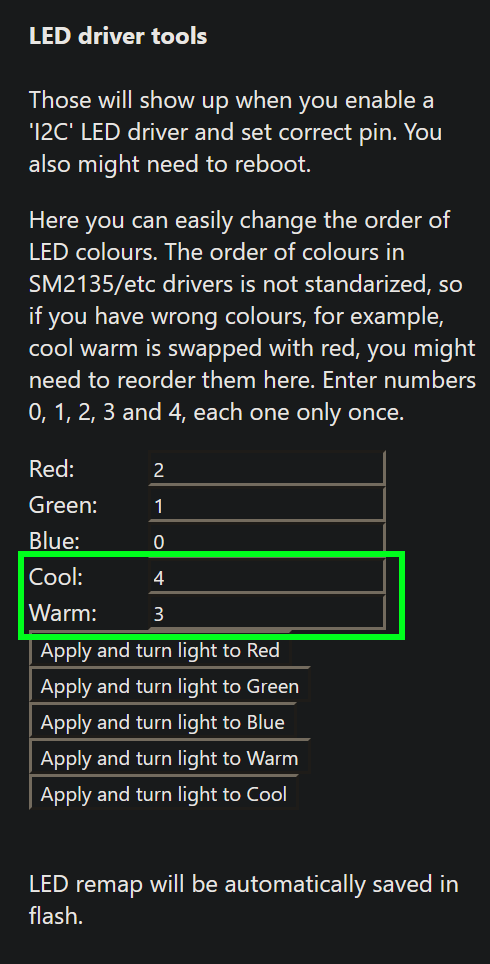

    Screenshot of LED driver tools interface.


    Code: JSON
    Log in, to see the code


    Close-up of 3Stone LED bulb showing technical specifications.
    Close-up of an electronic module labeled WB2L.
    Close-up of the LED layout on a light bulb's printed circuit board.
    LED board with multicolored diodes and BP5758 chip.
    Screwdriver inserted inside the case of a smart light bulb.
    Image of the electronic circuit for flashing the firmware of a 3Stone LED bulb.
    Circuit board with wires soldered for firmware flashing of the integrated circuit.

    Cool? Ranking DIY
    About Author
    andy212332
    Level 3  
    Offline 
    andy212332 wrote 5 posts with rating 1. Been with us since 2023 year.
  • ADVERTISEMENT
  • Desoldering WB2L makes flashing easier

    #2 20778694
    p.kaczmarek2
    Moderator Smart Home
    Posts: 14797
    Help: 659
    Rate: 12955
    You were very lucky that the programming pads were accessible just by a fraction of the board. It really makes the job easier, but I still really like desoldering WB2L just like on the video you linked.

    Now you can buy multiple those bulbs and use them in, for example, DGR:
    https://www.youtube.com/watch?v=e1xcq3OUR5M&ab_channel=Elektrodacom

    Anyway, thank you for posting the guide! I have slightly modified your topic, but in general, it's informative and helpful. Feel free to post any other device teardowns you can.
    Helpful post? Buy me a coffee.
  • ADVERTISEMENT
  • #3 20780843
    andy212332
    Level 3  
    Posts: 5
    Rate: 1

    Do you know if it's possible to make the bulbs brighter? I think that the bulbs were much brighter when they had the original Tuya firmware.
  • ADVERTISEMENT
  • Adjusting BP5758D current limit to brighten bulb

    #4 20780854
    p.kaczmarek2
    Moderator Smart Home
    Posts: 14797
    Help: 659
    Rate: 12955
    Yes, it is possible to make this kind of bulb brighter, you need to adjust the current limit of BP5758D. This can be done via console command, namely BP5758D_Current
    Screenshot of documentation regarding the BP5758D_Current command and its function.
    However, following command must be used with extreme caution because you may overcurrent your LEDs. That may damage them or at least shorten their lifespan significantly.

    Added after 16 [seconds]:

    Please refer to our docs for a full commands list:
    https://github.com/openshwprojects/OpenBK7231T_App/blob/main/docs/commands.md
    Helpful post? Buy me a coffee.
  • Querying the default BP5758D current value

    #5 20780857
    andy212332
    Level 3  
    Posts: 5
    Rate: 1

    Thanks, I'll check it out.

    Added after 13 [minutes]:

    p.kaczmarek2 wrote:
    Yes, it is possible to make this kind of bulb brighter, you need to adjust the current limit of BP5758D. This can be done via console command, namely BP5758D_Current
    Screenshot of documentation regarding the BP5758D_Current command and its function.
    However, the following command must be used with extreme caution because you may overcurrent your LEDs. That may damage them or at least shorten their lifespan significantly.

    Added after 16 [seconds]:

    Please refer to our docs for a full commands list:
    https://github.com/openshwprojects/OpenBK7231T_App/blob/main/docs/commands.md


    Sorry to bother again, but is there a command to get the default current value? Just trying to see where it starts out at.
  • BP5758D default current values and conversion formula

    #6 20781981
    p.kaczmarek2
    Moderator Smart Home
    Posts: 14797
    Help: 659
    Rate: 12955
    Hello @andy212332 ,
    if you look at our driver source code, here:
    https://github.com/openshwprojects/OpenBK7231T_App/blob/main/src/driver/drv_bp5758d.c
    You can see that default values are:
    Code: C / C++
    Log in, to see the code

    Which are resolved to:
    Code: C / C++
    Log in, to see the code

    Futhermore, when decoding user-given current value to BP's internal one, we are using the following formula:
    Code: C / C++
    Log in, to see the code

    I hope that answers your question. If not, let me know how can I help you futher.
    Helpful post? Buy me a coffee.
  • ADVERTISEMENT
  • #7 20785008
    andy212332
    Level 3  
    Posts: 5
    Rate: 1
    Thanks, "BP5758D_Current 40 40" seems to be around the same brightness as what it originally had.
  • #8 20785584
    p.kaczmarek2
    Moderator Smart Home
    Posts: 14797
    Help: 659
    Rate: 12955
    Very well. You can now use that setting to regain full brightness.

    On a side note, I would also recommend looking into the PowerSave 1 command, which may slightly reduce the heating and the power consumption of the WiFi module .
    Helpful post? Buy me a coffee.
  • #9 20785585
    andy212332
    Level 3  
    Posts: 5
    Rate: 1
    ok I'll enable that too
Listen:

Topic summary

LABEL_AI_GENERATED
The discussion revolves around flashing the firmware of the 3Stone 100W Smart Light Bulb, which utilizes the BK7231T chip and is compatible with Alexa. Users share a guide detailing the process, including removing the LED board and accessing the programming pads without desoldering the chip. Adjustments to the brightness are possible by modifying the current limit of the BP5758D chip using console commands, with caution advised to avoid damaging the LEDs. The default current values are provided, and users discuss achieving brightness levels similar to the original firmware. Additional commands for power saving are also recommended.
AI summary based on the discussion. May contain errors.

FAQ LABEL_AI_GENERATED

TL;DR: For people flashing a 3Stone 100W-equivalent RGBCW bulb, this guide shows that 3.3V serial power was enough and that “extreme caution” is required when raising BP5758D current. It solves two common problems after OpenBK7231T flashing: safe board access without desoldering and restoring brightness close to the original Tuya firmware. [#20780854]

Why it matters: This thread gives a device-specific path for opening, wiring, configuring, and tuning a BK7231T/WB2L bulb without guessing.

Flashing approach Main benefit Main drawback Thread-specific note
Exposed pads from the back Faster, no module desoldering Access depends on pad exposure Worked on this bulb; 3.3V from serial was enough
Desolder WB2L module More controlled physical access More work and heat Preferred by the responder despite this bulb's accessible pads

Key insight: The biggest practical fix was not the flash itself, but post-flash tuning: invert warm/cool LED pins if needed, then raise BP5758D_Current carefully to recover brightness near stock behavior. [#20778353]

Quick Facts

  • 3Stone A21 bulb details in the posted config include BK7231T, WB2L, BP5758D, E26, 10W, and 2700K-6500K white range, with product ASIN B07HR8GT12. [#20778353]
  • The successful flash used 3.3V from the serial adapter only; the poster did not need a separate bench supply for this bulb. [#20778353]
  • The posted pin map assigns GPIO7 = BP5758D_DAT and GPIO8 = BP5758D_CLK for this board. [#20778353]
  • OpenBK7231T defaults both RGB and CW BP5758D channel current to 14mA, then lets you increase output with BP5758D_Current. [#20781981]
  • A user-reported setting of BP5758D_Current 40 40 gave brightness roughly comparable to the original Tuya firmware, while PowerSave 1 was recommended to slightly reduce Wi-Fi heat and power draw. [#20785008]

How do I flash a 3Stone 100W equivalent RGBCW smart bulb with a BK7231T chip and WB2L board using OpenBK7231T?

You can flash it by opening the bulb, reaching the WB2L pads from the back, and powering the board from 3.3V serial. 1. Push the LED board out from the small end with a long screwdriver. 2. Connect to the accessible programming pads without desoldering the module. 3. After flashing, use the posted map with GPIO7 = BP5758D_DAT and GPIO8 = BP5758D_CLK, then invert warm/cool pins if required. [#20778353]

What's the safest way to open the 3Stone A21 WiFi bulb and remove the LED board without breaking the plastic?

Push the LED board down from the small end of the bulb with a long screwdriver. Do not pry from the top, because the poster said that approach “will just break the plastic.” This method removed the board on the A21 10W E26 bulb without needing to attack the top housing first. [#20778353]

Why do some 3Stone smart bulbs need the warm and cool LED pins inverted after flashing custom firmware?

Some bulbs need the warm and cool outputs swapped because the physical LED channel order does not match the first post-flash configuration. In this specific 3Stone bulb, the installer reported that they “had to invert the Warm/Cool LED pins” to make white channels behave correctly after flashing OpenBK7231T. [#20778353]

What pin configuration should I use for a 3Stone bulb with BP5758D on GPIO7 and GPIO8?

Use GPIO7 for BP5758D_DAT;0 and GPIO8 for BP5758D_CLK;0. That mapping appears in the posted JSON configuration for the 3Stone 100W equivalent, 10W, A21, E26 RGBCW bulb with a BK7231T chip and WB2L board. [#20778353]

How can I access the WB2L programming pads from the back of the board without desoldering the module?

You can access them because a fraction of the board leaves the programming pads reachable from the back side. The responder explicitly noted that this bulb was “very lucky” in that respect, and the original poster confirmed they could flash it without desoldering the WB2L module. [#20778694]

Which approach is better for flashing this bulb: desoldering the WB2L module or using the exposed programming pads from the back?

Using the exposed back pads is better for this exact bulb if they are reachable. It avoided desoldering and still worked with 3.3V serial power alone. The responder still said they personally liked desoldering the WB2L as shown in the linked video, so back-pad access is easier here, while desoldering remains a preferred controlled method for some users. [#20778694]

Why does a flashed 3Stone BP5758D bulb sometimes look dimmer than it did on the original Tuya firmware?

It can look dimmer because OpenBK7231T may start with a lower BP5758D current setting than the original Tuya firmware used. The thread later identified the default OpenBK7231T current as 14mA for both RGB and CW, and the user reported the bulb looked brighter on stock firmware before tuning. [#20781981]

How do I use the BP5758D_Current command to make an OpenBeken-flashed 3Stone bulb brighter?

Use the console command BP5758D_Current to raise the BP5758D current limit. Start with small increases, test brightness, and stop if the bulb runs hotter than expected. The responder warned to use this command with “extreme caution” because overcurrent can damage LEDs or shorten their lifespan significantly. [#20780854]

What is the default BP5758D current value in OpenBK7231T for RGB and CW channels?

The default is 14mA for RGB and 14mA for CW. The source code excerpt posted in the thread shows g_chosenCurrent_rgb = BP5758D_14MA; and g_chosenCurrent_cw = BP5758D_14MA;, so both channel groups start from the same default current. [#20781981]

How do the BP5758D current values like 14mA, 40, 65mA, and 90mA map to the driver's internal settings?

The driver maps these values through named constants and a conversion rule. BP5758D_14MA equals 0x0E; BP5758D_65MA equals 0x63; BP5758D_90MA equals 0x7C. For user input, the thread shows CONVERT_CURRENT_BP5758D(curVal) (curVal>63) ? (curVal+34) : curVal;, so values above 63 get offset internally by 34. [#20781981]

What brightness setting gives a 3Stone 100W Alexa-compatible bulb roughly the same output as the original firmware?

BP5758D_Current 40 40 gave roughly the same brightness as the original firmware in this bulb. That result came from direct user testing on the flashed 3Stone 100W equivalent Alexa-compatible lamp after comparing OpenBeken output with the original Tuya behavior. [#20785008]

What risks should I watch for when increasing BP5758D current on an RGBCW LED bulb?

The main risk is LED overcurrent. That can damage the LEDs immediately or shorten lifespan over time. This is the clear failure case in the thread, and it matters more once you move past the 14mA defaults toward higher values such as 40, 65mA, or 90mA-class settings. [#20780854]

How does the PowerSave 1 command help on BK7231T smart bulbs, and what trade-offs should I expect?

PowerSave 1 can slightly reduce Wi-Fi module heating and power consumption. The thread does not quantify the drop, so the safe takeaway is modest efficiency improvement rather than a dramatic brightness or network change. Use it as a low-risk optimization after you restore the bulb’s brightness setting. [#20785584]

What is the BP5758D LED driver, and what role does it play in a 3Stone RGBCW smart bulb?

The BP5758D controls the bulb’s LED channel current and therefore its brightness behavior. “BP5758D is an LED driver that sets output current for RGB and cold/warm white channels, using programmable internal current values rather than fixed passive-only control.” In this bulb, it is driven through GPIO7 data and GPIO8 clock assignments. [#20781981]

What is the WB2L module in Tuya-style smart bulbs, and how does it relate to the BK7231T chip?

The WB2L is the bulb’s wireless control module, and this thread identifies it as the board carrying the BK7231T chip used for flashing and custom firmware. “WB2L is a Tuya-style Wi-Fi module that hosts the main control chip, exposes programming pads, and connects firmware logic to drivers such as the BP5758D.” [#20778353]
AI summary based on the discussion. May contain errors.
ADVERTISEMENT