logo elektroda
logo elektroda
X
logo elektroda

[BK7231N / WB3S] Teardown and flashing of LEDVANCE SMART+ PLANON PLUS tunable white 30x30 45x45 30x6

mawe22 2961 6
ADVERTISEMENT

  • I got 3 LEDVANCE 60x60 LED panels with different software versions (1.1.6 and 2.9.16)
    All of them with WB3S modules, WIFI flashable with tuya-cloudcutter
    According to the manual there are different sizes available: 30x30 45x45 30x60 60x60 120x30

    Flashing has been done with tuya-cloudcutter as follows:
    * By firmware version and name
    * 2.9.16 - BK7231T / oem_bk7231s_light_ty (or)
    * 1.1.6 - BK7231T / oem_bk7231s_light_ty

    "Slow blinking mode" is done by either disconnection from tuya-cloud via app and/or via 10x power-off-on cycles. (5x starts fast blinking mode).
    The Cycles should be done with frequency of around 1 second (1/2 sec off, 1/2 sec on). A little bit faster or much slower will fail the mode switch I figured out. -- Took me some times ;-)

    After flashing:
    * Find new Accesspoint and connect to
    * Open your browser: http://192.168.4.1 and configure your WIFI
    * reboot
    * Find new (WIFI) IP address and connect to via browser
    * go to WEBAPP -> config
    * set: Pin6: PWM_n ; Pin8: PWN; Flag: 5888 -> Save Pins
    * OTA -> Make Upgrade (select Download, Download, select Disk, Start OTA)
    * at standard webpage -> Config -> Configure Names -> Set a short- and long name for your newborn baby
    * (optional) Configure MQTT, Home Assistant, etc.
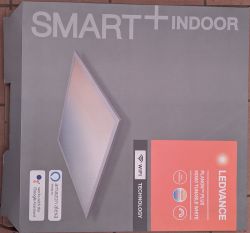
    LEDVANCE SMART+ PLANON PLUS tunable white packaging.
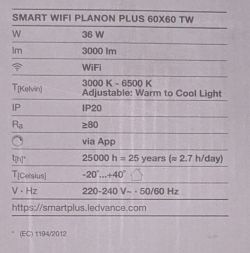
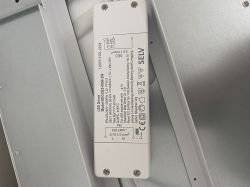
    Technical specifications of the LEDVANCE SMART+ PLANON PLUS 60x60 TW LED panel
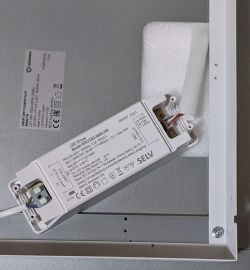
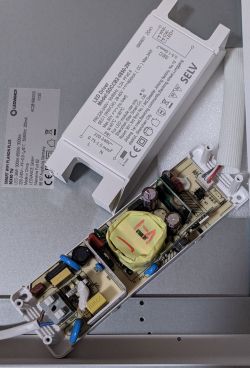
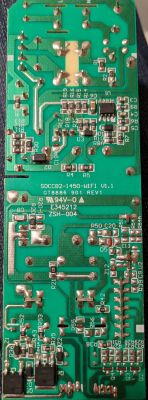
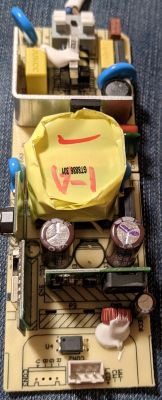
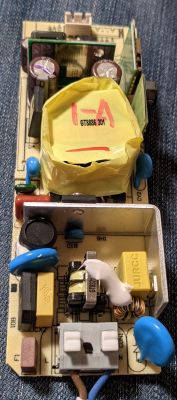
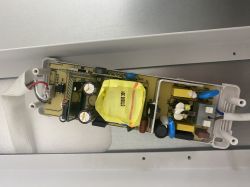
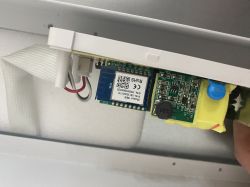
    LEDVANCE LED driver connected to an LED panel. Close-up of the interior of an LED panel showing electronic components and a LEDVANCE label. Close-up of a PCB from an LED panel with electronics and components. Printed circuit board with WB3S module. Electronic board with components and markings Close-up view of an LED module circuit board with component markings. Close-up of an LED printed circuit board with various electronic components and markings. LED module circuit board with various electronic components.
    Code: JSON
    Log in, to see the code


    [EDIT] Thanks for the great Job you have done (!) guys and many thanks for this forum (hosting, content, etc.)

    Cool? Ranking DIY
    About Author
    mawe22
    Level 4  
    Offline 
    mawe22 wrote 8 posts with rating 1, helped 1 times. Been with us since 2023 year.
  • ADVERTISEMENT
  • #2 20890740
    p.kaczmarek2
    Moderator Smart Home
    That's a very interesting device design, it reminds me of a laptop power supply. I haven't seen that kind of Plafon device yet.

    Your template has been submitted:
    https://github.com/OpenBekenIOT/webapp/commit/8ce05a4ca160220fffc51f9356bc69d3976ff412
    It should be soon live at:
    https://openbekeniot.github.io/webapp/devicesList.html

    It's also interesting to see that this device uses PWM_n for one of the colors. Can you please attach here Tuya JSON as well, so I can investigate how it looks like there?
    https://www.youtube.com/watch?v=WunlqIMAdgw
    I am asking because our template importer is not yet able to automatically detect PWM_n setting and I would like to improve it.
    Helpful post? Buy me a coffee.
  • ADVERTISEMENT
  • #3 20891200
    mawe22
    Level 4  

    p.kaczmarek2 wrote:
    That's a very interesting device design, it reminds me of a laptop power supply. I haven't seen that kind of Planon device yet.

    Yes, That was my first impression, too.
    p.kaczmarek2 wrote:

    Your template has been submitted:

    Many thanks for your ultra galactic fast response.
    p.kaczmarek2 wrote:

    It's also interesting to see that this device uses PWM_n for one of the colors. Can you please attach here Tuya JSON as well, so I can investigate how it looks like there?

    I'm a little bit too busy, now. Maybe I can do it next week.
    p.kaczmarek2 wrote:

    I am asking because our template importer is not yet able to automatically detect PWM_n setting and I would like to improve it.

    I'll support you as much as I can.
    I had no success with enhancing tuya-cloudcutter. They have an extra repository for device profiles but I don't know the exact syntax to create a new profile. Do you have some suggestions where to find some information?
  • ADVERTISEMENT
  • #4 20891213
    p.kaczmarek2
    Moderator Smart Home
    You have already flashed this device via Tuya-cloudcutter, so they don't need your 2MB flash dump . The only way you can contribute is by showing us Tuya JSON so we can check how PWM_n is decoded. Of course, take your time, there is no hurry
    Helpful post? Buy me a coffee.
  • #5 20921902
    mawe22
    Level 4  
    >>20890740
    sent you PM
  • #6 20922281
    p.kaczmarek2
    Moderator Smart Home
    Here is decrypted config:
    Code: JSON
    Log in, to see the code

    Here is textual description:
    
    Device configuration, as extracted from Tuya: 
    - LED Cool (Channel 4) on P8
    - LED Warm (Channel 5) on P6
    - PWM Frequency4000
    Device seems to be using WB3S module, which is using BK7231T.
    And the Tuya section starts at UNCOMMON POSITION 0
    

    Are you really sure that it works better with PWM_n instead of PWM?
    Helpful post? Buy me a coffee.
  • ADVERTISEMENT
  • #7 21395313
    Smartobias
    Level 1  
    >>20890740

    Hello,

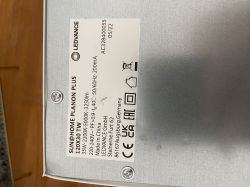
    i just got the LEDVANCE SUN@Home PLANON PLUS (120x30)
    (Different product line with CRI95 LEDs)

    it seems to use the exact same Driver

    Nameplate of LEDVANCE SUN@Home PLANON PLUS with technical specifications.
    LED driver located on the back of an LED panel.
    Close-up of the LED driver inside the LEDVANCE Planon Plus lighting.
    LED driver board inside LEDVANCE SUN@Home PLANON PLUS fixture.

Topic summary

The discussion revolves around the teardown and flashing process of LEDVANCE SMART+ PLANON PLUS tunable white LED panels, specifically models with WB3S modules. Users share their experiences with different firmware versions (1.1.6 and 2.9.16) and the flashing process using tuya-cloudcutter. Key steps include entering a "slow blinking mode" through power cycling, connecting to a new access point, and configuring Wi-Fi settings via a web interface. The conversation also touches on the importance of PWM_n settings for color control and the need for a Tuya JSON file for further investigation. Users express a willingness to assist in improving device profiles and share decrypted configuration data for analysis.
Summary generated by the language model.
ADVERTISEMENT