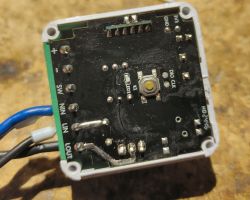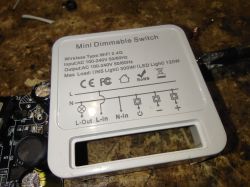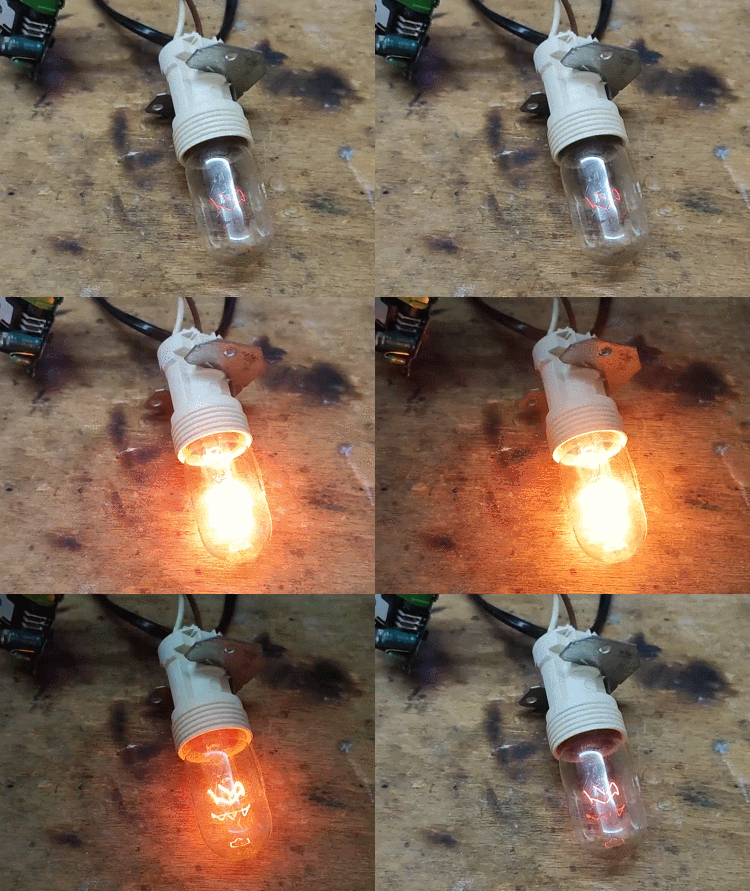
Today it`s fun again reverse engineering . The Tuya FS-05R dimmer was sent to me by a reader asking me to decipher the UART protocol of communication between the WiFi module and the microcontroller responsible for dimming. Contrary to appearances, this is not a typical dimmer based on TuyaMCU , just like EDM-01AA-EU , the protocol in this product is non-standard. Here I will describe how I intercepted and decrypted this communication. The topic will also include a presentation of subsequent scripting of the operation of this dimmer OBK so that it can work with Home Assistant.
FS-05R dimmer
This dimmer first appeared in the topic on our English-language website . He managed to read the dunk with our flasher , which allowed us to preview Tuya`s JSON:
Code: JSON
This JSON usually contains either the baud setting for TuyaMCU or the GPIO roles. Here it is unusual, because we have this and that here. We have baud rate:
Code: JSON
and we also have GPIO roles:
Code: JSON
This is unusual, because in the case of TuyaMCU the MCU itself controls everything, the buttons and LEDs too, so usually the WiFi module does not use the GPIO at all.
Short tests on that topic showed that this is not a TuyaMCU product and the baud rate refers to something else.
The work got stuck, so the reader sent me the equipment so I could examine it myself:
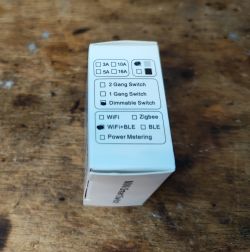
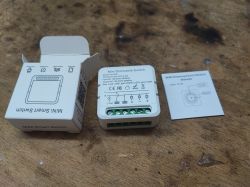
Instruction:


Thank you for sending me the equipment! Time for analysis.
Interior of the FS-05R
The first thing that catches your eye after looking inside is: invalid CB2S description layer : :
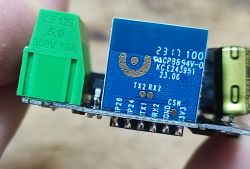
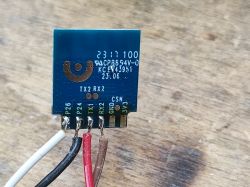
Location of 3.3V (VDD) and GND is incorrect .
I`ve checked it many times, and it`s not the first time I`ve come across a poorly described CB2S, and I know that the correct schedule is available on the Tuya website:
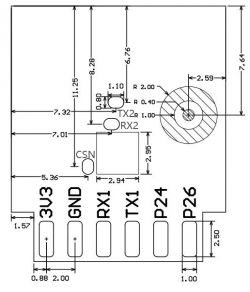
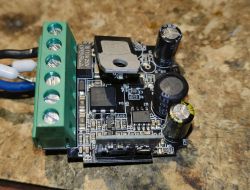
Plus - here`s the interior:
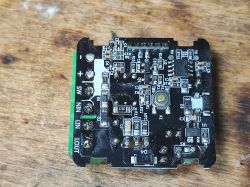
Here we have a non-isolated step down converter which, interestingly, directly powers the microcontroller itself. There is no additional LDO AMS1117-3.3V here, as is usually the case.
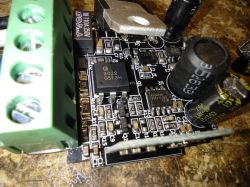
Additionally, you can see that the CB2S WiFi module is connected to the element in the SOIC8 housing via RX and TX lines.
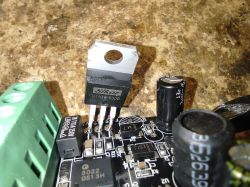
Now the view from above:
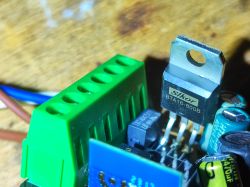
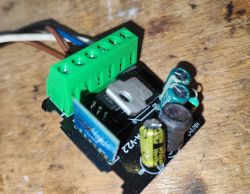
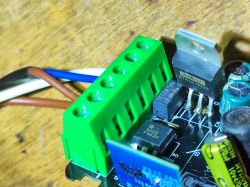
Dimming is performed on the BTA16-800B triac, which is controlled by 3022 F462H.
Interception of FS-05R communication
I decided on a method based on the Sigrok analyzer, similarly to the one above this topic .
Normally there would be a problem here, because you cannot connect the analyzer to a system powered from the mains, you would have to use special opto-isolation systems/modules, but I powered the whole thing from 3.3V and the arrangement started anyway:
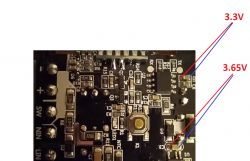
Here is the traffic on TX/RX:

While the MCU is idle, it sends something to us...
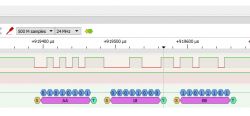

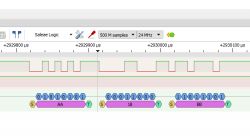
It sends three bytes with the AA header, which I associate with the BL0942 protocol. This is not TuyaMCU.
But what happens when we press the button?
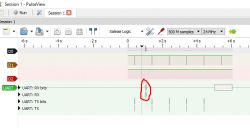
When you press the button, the WiFi module sends something to the MCU:
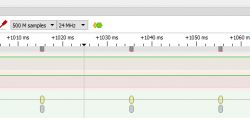
Wait, heading 55 AA? This looks like TuyaMCU though! This protocol must be some simplified version of it.

Let`s see what mine says TuyaMCU analyzer
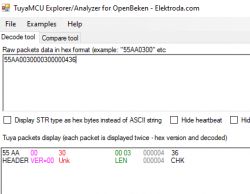
This is a TuyaMCU compatible package , even the checksum is calculated correctly.
I collected some of these packages and noticed that second and third bytes payload changes when I press the button - maybe the brightness levels?
Changing the FS-05R load
CB2S communicates with the MCU via the UART port used for programming, so you need to desolder CB2S. You need flux and braid.
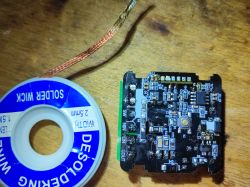
I program with my flasher:
https://github.com/openshwprojects/BK7231GUIFlashTool
Desoldered, cables need to be connected ignoring the descriptive layer, looking at the catalog note : :
Whole system:
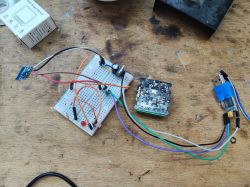
After uploading, we solder the module into place.
Configuration for OBK FS-05R
My first experiment was to create a script that sends hard-captured UART packets:
startDriver TuyaMCU
tuyaMcu_setBaudRate 115200

[inContentAd]

again:
delay_s 1
uartSendHex 55AA0030000300000638
delay_s 1
uartSendHex 55AA0030000300000032
goto again
Everything works, the dimmer responds:
Then I added a wrapper for sending TuyaMCU commands so as not to have to provide the checksum and header in the script, now the last byte is counted automatically:
startDriver TuyaMCU
tuyaMcu_setBaudRate 115200

again:
delay_s 1
tuyaMcu_sendCmd 0x30 000000
delay_s 1
tuyaMcu_sendCmd 0x30 0001FF
goto again
The syntax of tuyaMcu_sendCmd is very simple. The first argument is the TuyaMCU command number and the second is its payload. The checksum is calculated automatically.
Effect:
Here you can also see that the smooth transition effect is handled by the MCU itself, not the WiFi module.
Now it`s time to turn this proof of concept demo into something functional .
OBK allows you to define channel types and create simple scripts, you can read about it in the documentation:
https://github.com/openshwprojects/OpenBK7231T_App/tree/main/docs
Based on this, I prepared the following script:
// this is not really tuyaMCU but we will treat it as such
startDriver TuyaMCU
// set baud rate
tuyaMcu_setBaudRate 115200

// create a toggle and a dimmer
setChannelType 1 toggle
setChannelType 2 dimmer256


// invoke refresh on change
addEventHandler OnChannelChange 1 startScript autoexec.bat refresh
addEventHandler OnChannelChange 2 startScript autoexec.bat refresh


refresh:
// channel 5 is temporary variable, from 0 to 255*3, multiplied also by toggle value
setChannel 5 $CH2*3*$CH1
// split into two bytes
setChannel 3 $CH5/256
setChannel 4 $CH5%256
// send the two bytes
tuyaMcu_sendCmd 0x30 00$CH3$$CH4$
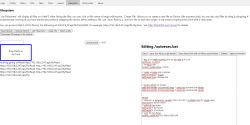
This script creates a dimmer controller on foot that supports both turning it on and off, as well as changing the brightness level. The brightness level is remembered after turning it off and on. It`s all about the scripts. The brightness level is manually split into two bytes and sent in the packet already discussed.
This is what it looks like in LittleFS:
And on the panel:
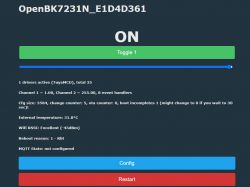
Thanks to the new Home Assistant Discovery system, a dimmer scripted in this way will be seen automatically by HA, without writing Yaml!
We are adding the missing FS-05R buttons
I almost forgot about the buttons that are worth adding here too. I mean a separate GPIO responsible for turning on and increasing and decreasing the brightness:
Code: JSON
Just set their roles Btn_ScriptOnly . Then we add button events to autoexec.bat, according to the pattern:
addEventHandler [Event] [PinIndex] [Command]
More examples: https://github.com/openshwprojects/OpenBK7231T_App/blob/main/docs/autoexecExamples.md
According to my script, the channel responsible for the on-off state is 1.
So, for the on-off button, P7, I propose:
addEventHandler OnClick 7 toggleChannel 1
Alternatively, you can set P7 to the Btn role and give it channel 1, and you can also set the flags to respond immediately to button presses.
For the + and - buttons, I suggest:
addEventHandler OnHold 26 addChannel 2 10 0 255
Of course, we change the added value for this second button from 10 to -10, so that it subtracts instead of adding.
Let me remind you of the addChannel syntax:
addChannel [Channel] [ValueToAd] [MinClamp] [MaxClamp]
Although in fact it could be combined into one button and set its events separately:
- OnClick toggles OnOff
- OnHold e.g. increases the brightness level
- and e.g. OnDblClick can set full brightness automatically
Summary
Typically, Tuya dimmers are based on the TuyaMCU protocol. In this case it was a bit different, the protocol here is simplified. The WiFi module sends a single packet, somewhat compatible with TuyaMCU, and the MCU responds with something, but I have not analyzed the format of the response data (or maybe prompt?). There is certainly no exchange here heartbeats be dpID as in normal TuyaMCU, there is only this one packet with checksum.
Operating this dimmer in OpenBeken turned out to be quite simple, because the existing OBK scripting language fully coped with the new task. Scriptable channel types (here on/off state and dimmer) allow you to easily handle the logic of such a dimmer in the script itself, even with button operation.
PS: it is also worth reading a related topic where the dimmer protocol was also based on UART, but was not based on TuyaMCU: WXDM2 dual dimmer - reverse engineering - weird UART protocol
Cool? Ranking DIY Helpful post? Buy me a coffee.


