 .
.
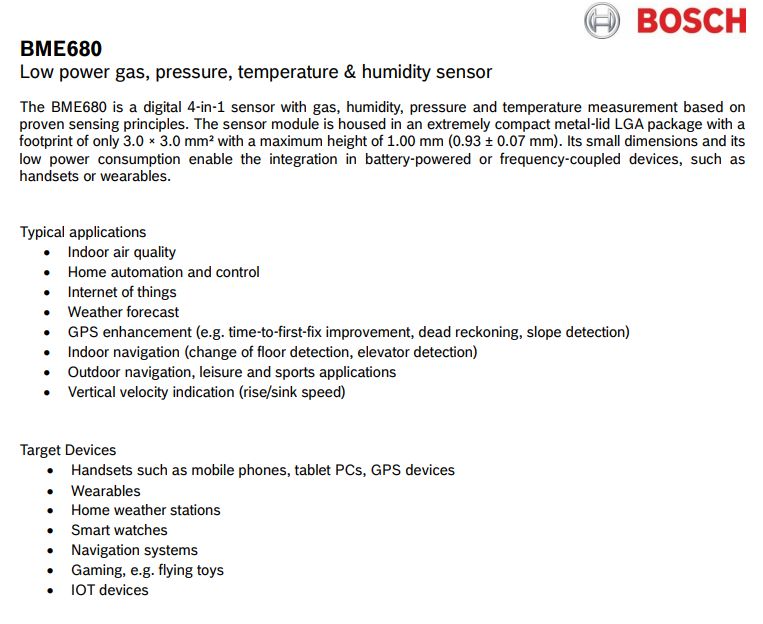
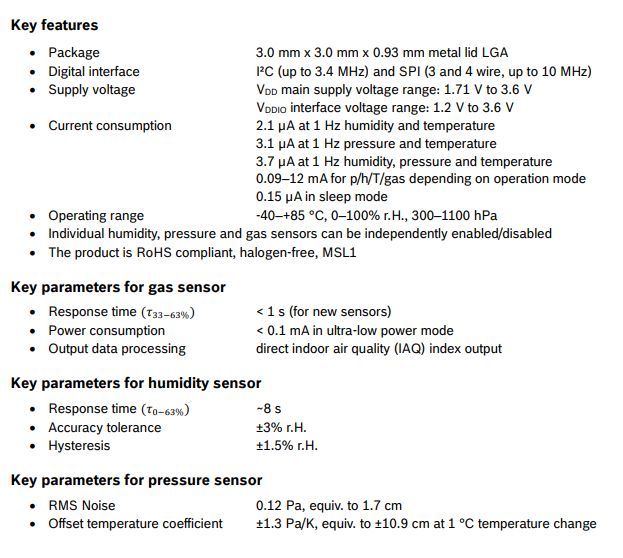
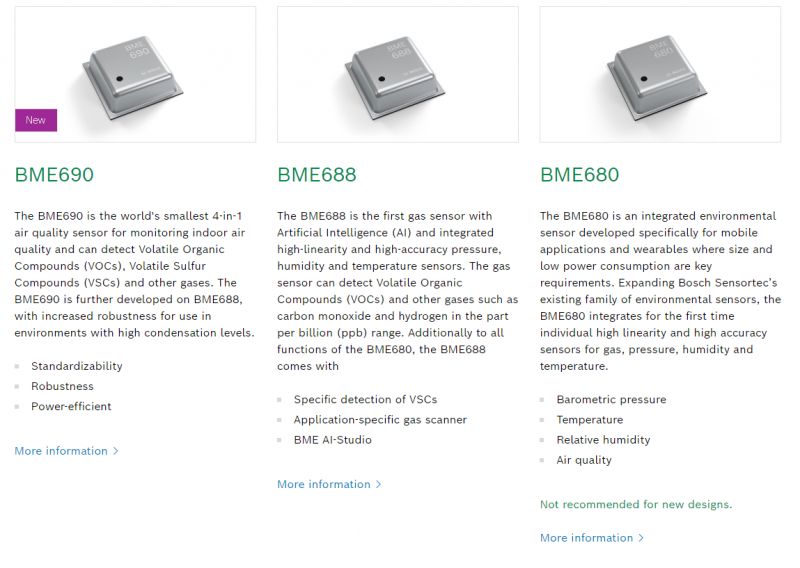
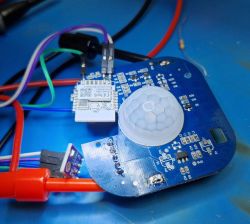
The BME280 is an enhanced version of the BMP280, which is capable of measuring humidity in addition to pressure and temperature. OBK allows you to easily add BME/BMP sensors to any smart device, the measurements from which can then be sent to Home Assistant or to our HTTP server via, for example, GET or POST requests. All fully scriptable. Here, I will show how to add the just-mentioned BME280 to a device with two free GPIOs, such as an LED bar controller, a PIR motion sensor, a garage door controller or just a simple "smart" relay.
The module with the BMP280 can be bought in our country for as little as £5, while the BME280 is slightly more expensive - around £20.
Step 1: Uploading the OBK
OBK started with BK7231N and BK7231T platforms, but now also works even on W800, W600, BL602, XR809, LN882H and even on ESP32. So first we upload the OBK according to the instructions from:
https://github.com/openshwprojects/OpenBK7231T_App
or from:
https://openbekeniot.github.io/webapp/devicesList.html
depending on what platform you have.
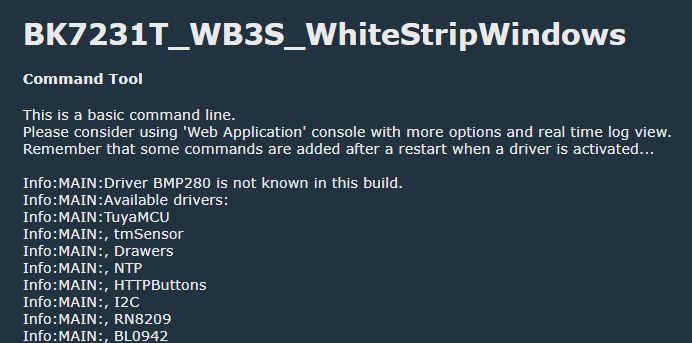
If the uploaded binary file does not contain the BMP280 driver, which can be checked with the command "startDriver BMP280", as below:
 .
.
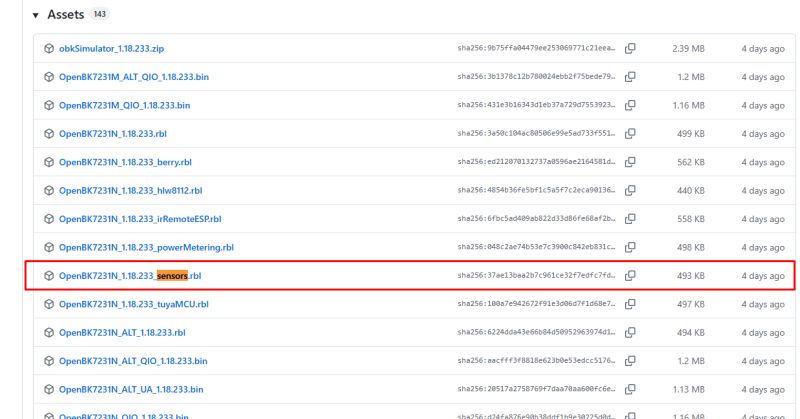
This we can look for a version with BMP280 enabled in Pull Requests on Github and download the binaries from there, or independently enable in obk_config.h for our platform ENABLE_DRIVER_BMP280 , create a PR and download the online compiled binaries from there. Details:
System online builds OpenBeken - firmware compilation for all platforms on Github .
Step 2: Connecting the BME280 .
The BMP280 controller also supports the BME280. We connect the sensor to the free pins, and remember the power supply. Then, in autoexec.bat:
We enter:
//startDriver BMP280 [CLK] [DATA] [ChannelForTemp] [ChannelForPressure] [ChannelForHumidity] [Adr8bit]
startDriver BMP280 7 8 3 4 5 0x76
The meaning of the arguments as in the commentary. We determine the CLK and DATA pins for the I2C bus. The number 7 in the example code snippet means P7 on the Beken platform, for other platforms it is worth looking at the Pins tab and there is a numbering spread. Then we specify the channel indexes for temperature, pressure and humidity.
The controller, named BMP280, also supports BME280 and automatically detects which type of sensor is connected.
Step 3: Channel types and Home Assistant Discovery .
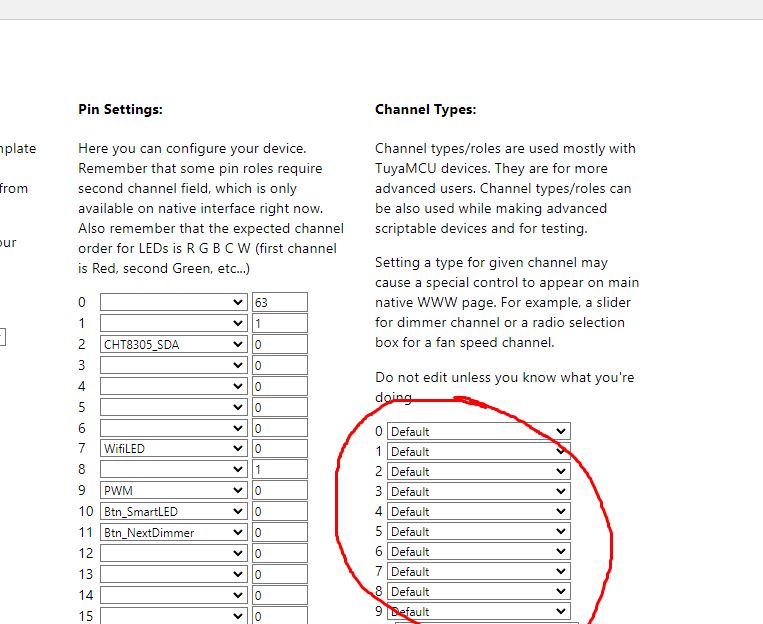
It is now necessary to set the selected channels to the appropriate role (Temperature, Pressure, Humidity, etc.). This is done in the Web App:
 .
.
Next, Home Assistant Discovery can be performed to make the whole thing appear in HA.
Home Assistant Discovery is based on channel types, so setting these up is essential.
In autoexec.bat you can still give the channels names by setChannelLabel , for more information:
https://github.com/openshwprojects/OpenBK7231T_App/blob/main/docs/commands.md
https://github.com/openshwprojects/OpenBK7231T_App/blob/main/docs/autoexecExamples.md
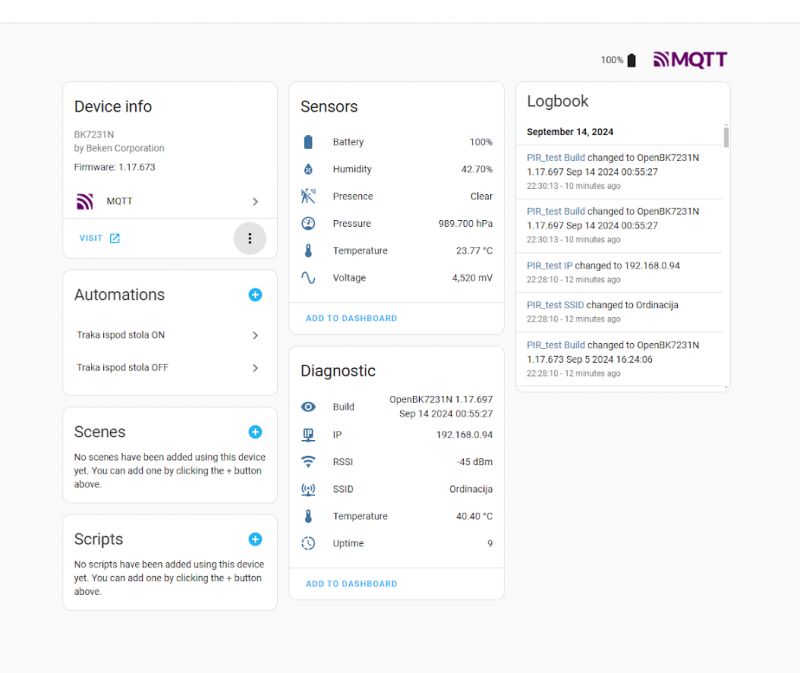
This is what the paired device looks like in the PIR sensor + BME280 version:
 .
.
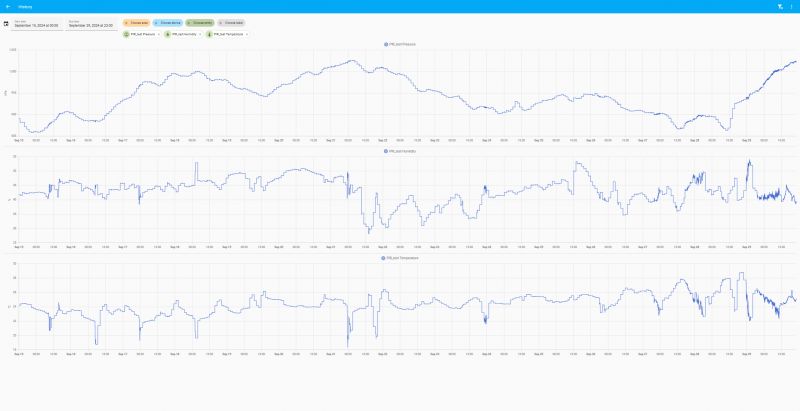
In this way, graphs of the collected measurements can be obtained in Home Assistant:
 .
.
Example of modification: PIR sensor + BME280 .
In the manner described here, we have modified the PIR sensor that I have previously described:
[CBU/BK7231N] Tuya PIR motion sensor Kraslaw 120°, deep sleep, battery powered .
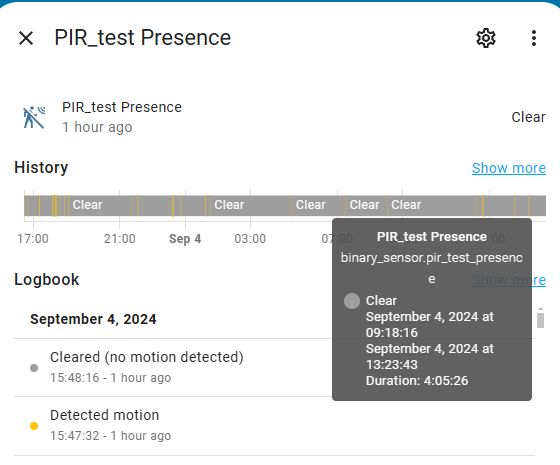
We modified it to be USB-powered, which relieves us of the problem of power saving. The Temperature, Humidity, Pressure channels were added to the Presence - Presence channel, and we gave the corresponding pin the role of dInput, which is a digital input - 1 or 0. The result:
 .
.
The device correctly performs a number of functions, and what's more, it can either be scripted additionally in OpenBeken (e.g. when a given temperature is exceeded, it switches on a relay or sends a GET packet to another device), or in Home Assistant (just like any other device in HA).
Summary .
This was one of the arguments for changing the firmware of smart devices. After such a change, it is easy to add new features to them that were not foreseen by the manufacturer. Such a BMP280 can be bought for just a few zlotys, and then you just need to solder it and configure it to get additional measurements in Home Assistant and so can be done for every room in the house, no need to buy a separate IoT device for such measurements.
After such a change, it would also be possible to display graphs in the OBK itself based on the new Charts controller:
Charts in OpenBeken - configurable measurement history hosted on an IoT device .
The possibilities are great. Have any of you also done this type of modification before?
PS: I have run the BMP280 with a PIC before in the topic about building a clock .
Cool? Ranking DIY Helpful post? Buy me a coffee.


