logo elektroda
logo elektroda
X
logo elektroda

Arlec Grid Connect PC191HA Plug-In Socket with Energy Meter Teardown

jessemclachlan 12816 72
ADVERTISEMENT
  • #31 20571726
    p.kaczmarek2
    Moderator Smart Home
    Where is that button connected, is it on UART1 port? Does it have an onboard pull up resistor?

    Wait, are you saying that Quick Connect flag is also problematic for you? All that it does is connect to WiFi faster, without extra 5 seconds delay.
    Helpful post? Buy me a coffee.
  • ADVERTISEMENT
  • #32 20571950
    tonyb62
    Level 8  
    No, it was a thought about how the Flag37 works and if having the flag active could be a cause leading to a incomplete firmware update.

    Because i notice that when updating the firmware the reset was quick and each subsequent reset from the GUI was quick with an unscessful firmware update (still showing old version number) but when removing the device from the power point and holding the button down, the power cycle was long, no wifi light until a good 5secs after power on and the firmware update was successful (Version number updates & wifi light is configured WiFiLED_n).

    Take it with a grain of salt, i'm software illiterate but hardware savy.

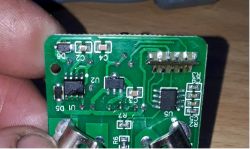
    It does appear there is a pullup resistor on the V2 for the button that i can see in the photo's but I didn't fully trace out the circuit, RXD1 is connected to WiFiLED_n and TXD1 is connected to Btn. I can split another unit open if you want further details.
    Arlec Grid Connect PC191HA Plug-In Socket with Energy Meter Teardown Arlec Grid Connect PC191HA Plug-In Socket with Energy Meter Teardown
  • #33 20571998
    p.kaczmarek2
    Moderator Smart Home
    Well, I don't have this device at hand, but here's what can be inferred from your experience:
    - the device fails to update unless button on TXD1 is hold
    - TXD1 has also a pull up resistor, which means that TXD1 by default has a high state, unless a button is hold (then it's low)
    I also know from my experience that I never had OTA failures on my devices, but they don't have a pull up resistor on TXD1.
    I also know that, in OpenBeken, the Button role enables internal pull up on GPIO, so external resistor is not needed.

    So here are two things to try:
    - remove button role from TXD1 - is OTA still broken?
    - remove the physical pull up resistor from TXD1 (don't worry, button will still work, due to programmable internal pull ups) - is OTA still broken?
    If anyone can do these tests (and in a reliable way, several times, to make sure the test result is not a random fluke), please do! This will shed some light on the issue.

    TLDR: it looks like a high state on TXD1 at reboot time breaks OTA?
    Helpful post? Buy me a coffee.
  • #34 20572091
    tonyb62
    Level 8  
    p.kaczmarek2 wrote:
    Well, I don't have this device at hand, but here's what can be inferred from your experience:
    - the device fails to update unless button on TXD1 is hold
    - TXD1 has also a pull up resistor, which means that TXD1 by default has a high state, unless a button is hold (then it's low)
    I also know from my experience that I never had OTA failures on my devices, but they don't have a pull up resistor on TXD1.
    I also know that, in OpenBeken, the Button role enables internal pull up on GPIO, so external resistor is not needed.

    So here are two things to try:
    - remove button role from TXD1 - is OTA still broken?
    - remove the physical pull up resistor from TXD1 (don't worry, button will still work, due to programmable internal pull ups) - is OTA still broken?
    If anyone can do these tests (and in a reliable way, several times, to make sure the test result is not a random fluke), please do! This will shed some light on the issue.

    TLDR: it looks like a high state on TXD1 at reboot time breaks OTA?


    I can try with both version, I'll start with the originals first.
    Is there any issues with downgrading and upgrading firmware repeatly?

    I'm want to use these units for ceiling lights so this would be good to figure out before making them inaccessible.
  • #35 20572103
    p.kaczmarek2
    Moderator Smart Home
    At one certain point of time, about a week or two ago, we have updated config structure to version 4, so downgrading to much older version will bring back device to AP mode and clear config. This is the only downgrade risk I can think of.
    Helpful post? Buy me a coffee.
  • #36 20572215
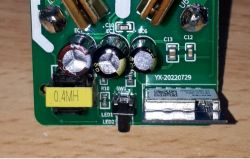
    tonyb62
    Level 8  
    p.kaczmarek2 wrote:
    At one certain point of time, about a week or two ago, we have updated config structure to version 4, so downgrading to much older version will bring back device to AP mode and clear config. This is the only downgrade risk I can think of.

    I'll stay inside the version 4 config structure? It would make it easier not having to re-setup the device.
    I'll go back a weeks release and then upgrade to current.
  • #37 20572269
    p.kaczmarek2
    Moderator Smart Home
    The config-breaking change (but only when downgrading! update is working correctly) happened on Apr 29, 2023. So if you want to test without losing config, avoid versions that were released in April.
    Helpful post? Buy me a coffee.
  • ADVERTISEMENT
  • #38 20573562
    tonyb62
    Level 8  
    p.kaczmarek2 wrote:
    Well, I don't have this device at hand, but here's what can be inferred from your experience:
    - the device fails to update unless button on TXD1 is hold
    - TXD1 has also a pull up resistor, which means that TXD1 by default has a high state, unless a button is hold (then it's low)
    I also know from my experience that I never had OTA failures on my devices, but they don't have a pull up resistor on TXD1.
    I also know that, in OpenBeken, the Button role enables internal pull up on GPIO, so external resistor is not needed.

    So here are two things to try:
    - remove button role from TXD1 - is OTA still broken?
    - remove the physical pull up resistor from TXD1 (don't worry, button will still work, due to programmable internal pull ups) - is OTA still broken?
    If anyone can do these tests (and in a reliable way, several times, to make sure the test result is not a random fluke), please do! This will shed some light on the issue.

    TLDR: it looks like a high state on TXD1 at reboot time breaks OTA?


    Annoyingly i'm unable to recreate the original issue with either Version 1 or Version 2.
    Downgrading software 1.17.104 to 1.17.101, upgrading to 1.17.105 downgrading to 1.17.78 then upgrading to 1.17.105
    Each time software change was successful.
  • #39 20573566
    p.kaczmarek2
    Moderator Smart Home
    There were no changes in OTA mechanism for a very long time. Maybe you have a different hardware or something. I have no idea, but OTA mechanism wasn't changed at all recently.
    Helpful post? Buy me a coffee.
  • #40 20581092
    davidcollett
    Level 2  
    >>20570027

    Thanks for the info tonyb62. I grabbed a series 2 from bunnings today and used tuya cloudcutter per your instructions to flash libretiny-esphome. Basic functions are working fine (button, led, relay), however I'm not getting anything from the BL0937. Can you confirm that you've tested energy metering with the pinout you have posted? (sel=6, cf=8, cf1=7) ?

    Perhaps there is an issue with libretiny-esphome and this component (BL0937), though I've used it on other plugs with upstream esphome (on esp-based devices), perhaps I should try openbeken.

    Thanks,
    Dave
  • #41 20581103
    p.kaczmarek2
    Moderator Smart Home
    There is no need for guessing. Please flash OpenBeken and then use the Web App -> Flash tab to download current Tuya config partition so we know how BL0937 should be really configured. This will work for most of the devices and this will give you reliable template.

    BK7231GUIFlashTool can easily extract CFG from Tuya Config and OpenBeken does not overwrite it.
    Helpful post? Buy me a coffee.
  • #42 20582477
    tonyb62
    Level 8  
    davidcollett wrote:
    >>20570027

    Thanks for the info tonyb62. I grabbed a series 2 from bunnings today and used tuya cloudcutter per your instructions to flash libretiny-esphome. Basic functions are working fine (button, led, relay), however I'm not getting anything from the BL0937. Can you confirm that you've tested energy metering with the pinout you have posted? (sel=6, cf=8, cf1=7) ?

    Perhaps there is an issue with libretiny-esphome and this component (BL0937), though I've used it on other plugs with upstream esphome (on esp-based devices), perhaps I should try openbeken.

    Thanks,
    Dave


    I created a separate thread for the V2 - https://www.elektroda.com/rtvforum/topic3976320.html
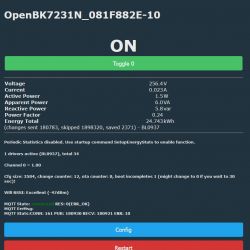
    I do have the BL0937 reporting current. This is stats shown from my drier. I am using openbeken on all my BK7231N & BK7231T devices.
    Arlec Grid Connect PC191HA Plug-In Socket with Energy Meter Teardown
  • #43 20582492
    davidcollett
    Level 2  
    Thanks Folks,

    I've flashed OpenBeken and my V2 is reporting power values as expected using your config. I'll raise this issue with libretiny.

    Thanks again,
    Dave
  • ADVERTISEMENT
  • #44 20582554
    p.kaczmarek2
    Moderator Smart Home
    Thank you, I am happy to hear it's working for you. Next time, please avoid untested/unreliable solutions. Have fun with OBK.

    If you have any feature requests or improvement ideas, let me know. We are here to help.
    Helpful post? Buy me a coffee.
  • #45 20763912
    wolfieeewolf
    Level 11  
    Has anyone calibrated their device?

    I have a few different energy meters, and I'm seeing about a 4 to 6-watt difference with this device compared to my Tapo P110.

    I have a 13W Ikea bulb that on my Tapo P110 reads between 12 to 12.5 watts, and with this device, it reads between 16.5 to 18 watts.

    I haven't got anything that I can use as a resistive load like an electric heater/blanket or an old incandescent bulb, so I can't really set anything that would be correct.

    I did try setting my device to:

    Resistive load device used: Ikea LED bulb 13W - Not a resistive load - Using 12.5W on average, so I did the calculation on that
    Voltage: 240V - Australian Standard Voltage
    Current: 0.0521A
    Power: 12.504W

    The device now reads the correct wattage for the Ikea LED bulb. I have tested it with a few other bulbs, and it appears to be "close enough" but I have changed the "voltage set" values on two of my other devices, and they are way off with these settings. I'm not sure why it doesn't read the same when all the devices gave the same wattage before the "voltage set" value was changed.

    I understand that not calibrating with a resistive load might be throwing things off, but the wattage was double the power draw on the two other devices, which doesn't really make sense to me.

    I was wondering what everyone has found. Is there some consistency?

    Maybe we can try to see if we can get a base set of values for everyone to use.

    If you can reply with your "voltage set" values, I think together we can get a baseline that would be close enough for most people to set their device to.

    If you could use this template, it would be easy to table and get an average.

    Resistive load device used:
    Voltage:
    Current:
    Power:
  • #46 20763929
    p.kaczmarek2
    Moderator Smart Home
    I heard that PowerSave on BL0937 devices might actually lower the accuracy. Do you have powerSave 1 set?
    Helpful post? Buy me a coffee.
  • #47 20763932
    wolfieeewolf
    Level 11  
    p.kaczmarek2 wrote:
    Do you have powerSave 1 set?


    No powersave on at all.

    also is there a way to reset the voltage set to default or do I need to reset the device?
  • #48 20763939
    p.kaczmarek2
    Moderator Smart Home
    The "default" of voltage you've set is the value that worked for me on one of my devices. There is no "true default" that is all reliable and good.
    Helpful post? Buy me a coffee.
  • #49 20763960
    wolfieeewolf
    Level 11  
    Sorry probably wasn't clear with what I meant about "default" settings. What I meant to say was is there a way to clear the settings that I placed in the "voltage set"? The values I have put in are not working right and I need to clear it out to what I guess should be the so-called "default/factory settings" values/configuration. Like using a command like "Voltage Set Clear". I hope that makes sense.
  • #50 21035577
    gen_mheloy
    Level 5  
    Hi,

    can I flash this directly without removing the chip from the unit?
    will the USB 3.3v enough to supply power to the chip?

    I tried to use cloudclutter for this unit but it failed somewhere in the middle so I cannot use it. Its just solid red (Ithink)
    thinking of manually reflashing without removing it from the board
  • #51 21035769
    wolfieeewolf
    Level 11  
    Just check what series of devices you have. There are two different versions.

    I also found I had issues with using Cloudcutter on a Raspberry Pi and had to switch to Ubuntu to flash as it was faster and didn't timeout as the Pi can do.

    I also have found that I've had issues with my device constantly rebooting and have become non-usable when I flashed the series 2 version (BK7231N) with the Raspberry Pi. No issues with the Ubuntu flashed ones. Mind you the ones that I'm having the issues with failed to be flashed several times on the Raspberry Pi. Thankfully I only tried to flash 2 devices out of the 4 I had with the Pi.

    Hopefully, you don't have issues with them rebooting. It didn't happen right away. Took a few months for the problem to start. Not sure if it's a firmware issue or not but seems highly likely some kind of error happened with Cloudcutter when they failed to flash that causes the devices to reboot. Maybe something got overwritten in the bootloader or its memory gets full and crashes causing a reboot. I have no idea. I just know that the two devices I have are unusable. I could OTA update them but with one rebooting constantly and the other one basically dead, I don't think they are savable.

    I have 4 BK7231T devices that have no issues so hopefully you have that version. It seems all the issues are with the BK7231N version.

    I have this setup in my autoexec.bat and it works well

    
    -- Start NTP driver and set time zone offset
    startDriver NTP
    ntp_timeZoneOfs +10:00
    
    -- Enable power saving
    powerSave 1
    
    -- Setup Energy Statistics
    SetupEnergyStats 1 60 60


    Just be sure before you OTA update you copy the autoexec.bat for the BK7231T version as it deletes on update.

    You will also have to pull the plug out from the power point wait 5 seconds then hold the little button on top down while reinserting the plug for the update to work. Sometimes it takes a few goes to get it to update but I found this to work 90% of the time. Again only have to do this with the BK7231T version.
  • #52 21036090
    p.kaczmarek2
    Moderator Smart Home
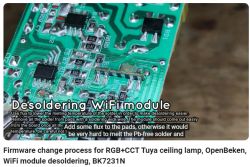
    Even if you have to remove the CB2S/WB2S from the unit, it's not usually a big a problem. We have some guides showing that process. All you need is a soldering iron, some flux, some Pb solder, and soldering wick wire. Check out this CB2S-based lamp flashing guide:


    Close-up of a circuit board with a WiFi module being prepared for desoldering.
    Helpful post? Buy me a coffee.
  • #53 21038285
    gen_mheloy
    Level 5  
    >>21035769

    Hi,

    I have 1 of the version T and 4 of the version N... 3 out of the 4 are working fine witht the use of cloudcutter... the 4rth is doing solid red and have opened it to try to flash manually but no luck. now 1 of the N version is not working as well... no lights and also the relays arent responding when I pressed the button on top...

    So as of now I 1 T version working with OpenBeken and 2 N Version with OpenBeken

    Added after 2 [minutes]:

    p.kaczmarek2 wrote:
    Even if you have to remove the CB2S/WB2S from the unit, it's not usually a big a problem. We have some guides showing that process. All you need is a soldering iron, some flux, some Pb solder, and soldering wick wire. Check out this CB2S-based lamp flashing guide:


    Thanks kaczmarek2, yup waiting for the wick to be delivered so I can remove it correctly
  • #54 21038490
    wolfieeewolf
    Level 11  
    Glad you got a few working. The N version seems to be the one with all the issues

    gen_mheloy wrote:
    N version is not working as well... no lights and also the relays arent responding when I pressed the button on top...


    I have one of mine that does the same thing. I can't access the webapp with mine. Tried to put it in safe mode but it appears to be dead. Will have to open it to see if I can flash manually. Does it reboot the device when you press the button? Make sure you are using the series 2 N version profile in the config as they are different.

    N Profile should be

    Pin 6: BL0937SEL on channel 0
    Pin 7: BL0937CF1 on channel 0
    Pin 8: BL0937CF on channel 0
    Pin 10: Btn on channel 0
    Pin 24: Rel on channel 0
    Pin 26: WifiLED on channel 0


    What are you using to flash the chip? I use a CH340G or a FTDI Basic Breakout - 3.3V. I also use a BDM frame with probes and I find that makes it super easy to line up the pins.

    Be sure you are using the CB2S pin layout for your N version as well. It's a different chip to the T version
  • #55 21038636
    p.kaczmarek2
    Moderator Smart Home
    Yes, the same problem is present on CB3S and WB3S, they pinouts (except the basic power supply, UART, etc) does not match.
    Helpful post? Buy me a coffee.
  • #57 21039640
    wolfieeewolf
    Level 11  
    gen_mheloy wrote:
    I'm using this one. I also used this for flashing my sonoff basic before to tasmota. I hope its ok
    https://www.lyonscomputer.com.au/Electronic-M...FT232L/USB-to-TTL-UART-YP-05-FTDI-FT232L.html


    This device is good. I find I have more success flashing with the FTDI than the serial one. Probably depends on the chip to but if one doesn't work I just use the other.

    gen_mheloy wrote:
    This plug was working for about 2-3 months and just recently not responding... plugging and unplugging isn't helping.


    This is exactly what happened with mine. Mine started to reboot then after a while just stopped working. The device works fine until you push the power button on top then it reboots itself. Not sure if if a bad relay or the firmware. My other one was doing this for a while and now won't even boot up. I can see there is power as the red light is on but nothing else.

    I do recall reading about others having issues with energy meters from a different brand rebooting. #949 and #874.

    Maybe this device could be doing what these other ones are.

    I would like to test it with ESPhome on there but unfortunately, they only support the T version. Don Burch on the home assistant forums was trying to get it to work but It looks like it's in the too hard basket for now.
  • #58 21040293
    p.kaczmarek2
    Moderator Smart Home
    wolfieeewolf wrote:

    gen_mheloy wrote:
    This plug was working for about 2-3 months and just recently not responding... plugging and unplugging isn't helping.


    This is exactly what happened with mine. Mine started to reboot then after a while just stopped working. The device works fine until you push the power button on top then it reboots itself. Not sure if if a bad relay or the firmware. My other one was doing this for a while and now won't even boot up. I can see there is power as the red light is on but nothing else.

    This is a known issue and many products suffer from that. This is most likely a faulty low-ESR capacitor at the buck converter. The fault may happen quicker if you don't use PowerSave 1 and your device has especially cheap design.
    How to fix a smart device that is chirping, squeaking and making strange sounds?
    Helpful post? Buy me a coffee.
  • ADVERTISEMENT
  • #59 21040890
    wolfieeewolf
    Level 11  
    p.kaczmarek2 wrote:
    This is a known issue and many products suffer from that. This is most likely a faulty low-ESR capacitor at the buck converter. The fault may happen quicker if you don't use PowerSave 1 and your device has especially cheap design.


    I opened the power meter and this is exactly what has happened. The one that restarts when you push the power button has one capacitor that is very swollen on top. The other one looks fine but testing with a multimeter says it's dead. I tried to reflash the chip but it's still not working. I have been running powerSave 1 since I flashed the device so it looks like it's only a matter of time before they all start going. The problem seems to only be with the series 2 N version so maybe they cheaped out on the capacitors to save some money. They are Arlec branded and Arlec is known for cheapness.

    I could replace the capacitors with better ones but it's not really worth the effort. If someone wants to give it a go then let me know and we can work something out.

    I can buy new Tapo ones for about $20. I think I'll go out and buy some to replace them should any more break.
  • #60 21041025
    p.kaczmarek2
    Moderator Smart Home
    Replacing capacitor is very easy, why don't you try it out? Just get a good replacement, a low-ESR one. I could repair your devices but as far as I remember you are located very far from my country (Poland). Still, maybe I could make a YT video about that.

    Btw if you can, please submit a photo showing how that degraded capacitor looks like, so other users and beginners can see what to watch for.
    Helpful post? Buy me a coffee.

Topic summary

The discussion revolves around the Arlec Grid Connect PC191HA Smart Plug-In Socket with Energy Meter, focusing on a teardown and firmware flashing process using Cloudcutter and OpenBeken. Users share experiences with the device's internal components, including the BK7231T chip and the BL0937 energy meter. Issues with firmware updates, button functionalities, and energy measurement accuracy are addressed. Users report varying success with flashing methods, including the need for specific pin configurations and troubleshooting steps for devices that fail to update or operate correctly. Capacitor failures are noted as a common issue, particularly in the Series 2 models, prompting discussions on replacement and repair strategies.
Summary generated by the language model.
ADVERTISEMENT