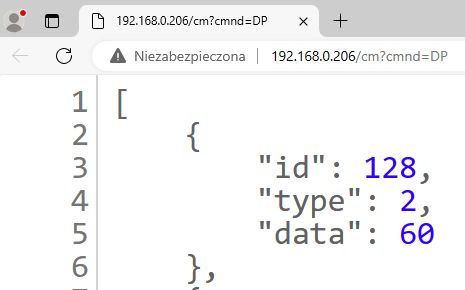
OpenBeken is able to request and list all available dpIDs of TuyaMCU devices. This can be used for futher processing of the data in Home Assistant. The following tutorial assumes that you have already flashed your device and wants to get dpIDs, if you haven't flashed it already, please consider alternate dpID extraction methods described in this topic:
TuyaMCU flashing, setup and configuration guide - configure dpIDs for Home Assistant
ADVERTISEMENT
Before we proceed, you need to have a basic TuyaMCU config working. So, start driver, setup baud (if needed), and force 0x04 (paired) WiFi state emulation for the MCU:
startDriver TuyaMCU
// set TuyaMCU baud rate
//tuyaMcu_setBaudRate 115200
// emulate being connected to cloud
tuyaMCU_defWiFiState 4
if you don't know how to setup autoexec.bat, see this tutorial:
So now, once you have this autoexec.bat and you have rerun it or rebooted device, you can assign the following command in the console:
tuyaMcu_sendQueryState
Once you do, you should get a large reply from TuyaMCU:
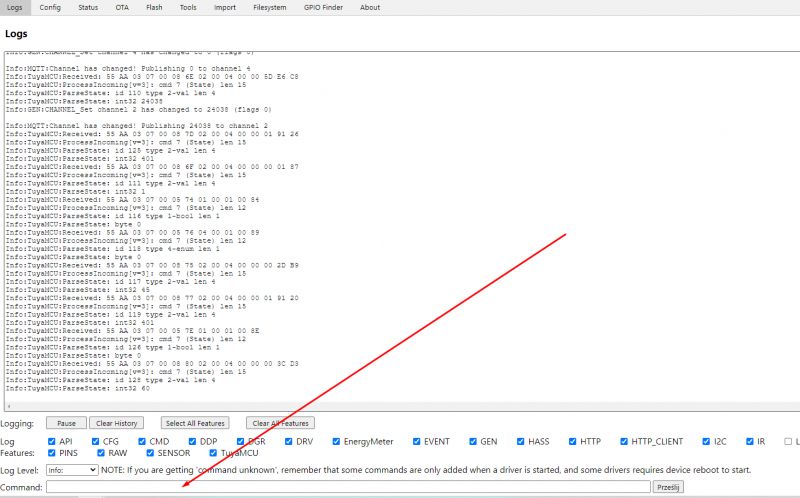
It will be something like:
Info:TuyaMCU:Received: 55 AA 03 07 00 08 7D 02 00 04 00 00 01 91 26
Info:TuyaMCU:ProcessIncoming[v=3]: cmd 7 (State) len 15
Info:TuyaMCU:ParseState: id 125 type 2-val len 4
Info:TuyaMCU:ParseState: int32 401
Info:TuyaMCU:Received: 55 AA 03 07 00 08 6F 02 00 04 00 00 00 01 87
Info:TuyaMCU:ProcessIncoming[v=3]: cmd 7 (State) len 15
Info:TuyaMCU:ParseState: id 111 type 2-val len 4
Info:TuyaMCU:ParseState: int32 1
Info:TuyaMCU:Received: 55 AA 03 07 00 05 74 01 00 01 00 84
Info:TuyaMCU:ProcessIncoming[v=3]: cmd 7 (State) len 12
Info:TuyaMCU:ParseState: id 116 type 1-bool len 1
Info:TuyaMCU:ParseState: byte 0
Info:TuyaMCU:Received: 55 AA 03 07 00 05 76 04 00 01 00 89
Info:TuyaMCU:ProcessIncoming[v=3]: cmd 7 (State) len 12
Info:TuyaMCU:ParseState: id 118 type 4-enum len 1
Info:TuyaMCU:ParseState: byte 0
Info:TuyaMCU:Received: 55 AA 03 07 00 08 75 02 00 04 00 00 00 2D B9
Info:TuyaMCU:ProcessIncoming[v=3]: cmd 7 (State) len 15
Info:TuyaMCU:ParseState: id 117 type 2-val len 4
Info:TuyaMCU:ParseState: int32 45
Info:TuyaMCU:Received: 55 AA 03 07 00 08 77 02 00 04 00 00 01 91 20
Info:TuyaMCU:ProcessIncoming[v=3]: cmd 7 (State) len 15
Info:TuyaMCU:ParseState: id 119 type 2-val len 4
Info:TuyaMCU:ParseState: int32 401
Info:TuyaMCU:Received: 55 AA 03 07 00 05 7E 01 00 01 00 8E
Info:TuyaMCU:ProcessIncoming[v=3]: cmd 7 (State) len 12
Info:TuyaMCU:ParseState: id 126 type 1-bool len 1
Info:TuyaMCU:ParseState: byte 0
Info:TuyaMCU:Received: 55 AA 03 07 00 08 80 02 00 04 00 00 00 3C D3
Info:TuyaMCU:ProcessIncoming[v=3]: cmd 7 (State) len 15
Info:TuyaMCU:ParseState: id 128 type 2-val len 4
Info:TuyaMCU:ParseState: int32 60
the reply may be truncated in log, but we have a better mechanism to recover it.
Now, go to the flags and set 46 and 47:
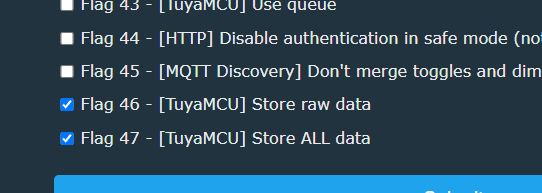
Those flags will enable a TuyaMCU dpID storage on OBK side. This will allow you to run DP command.
Now, once those flags are set, rerun tuyaMcu_sendQueryState
The received dpID values are now stored by OBK. Access them via HTTP command:
http://192.168.0.206/cm?cmnd=DP
Here is how it looks like on my device:
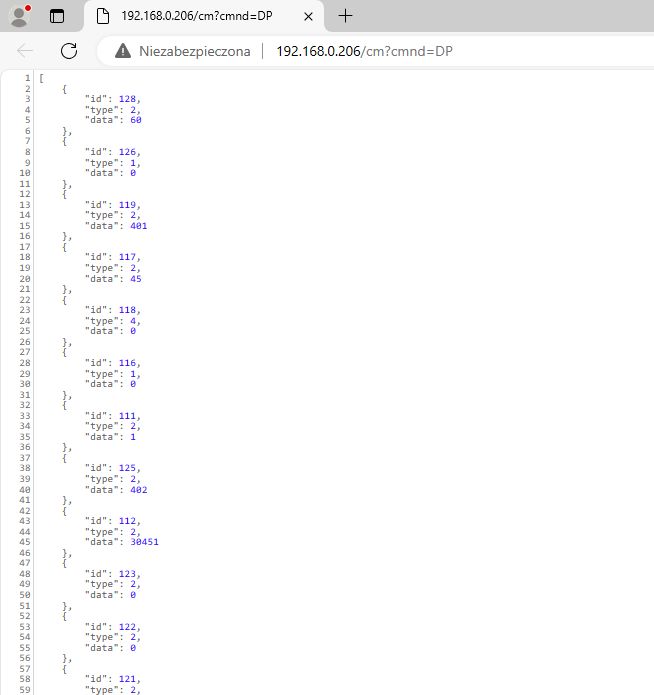
They are in JSON format and you can also get the same result via MQTT:
Code: JSON
This means that you can process them either in Home Assistant (via MQTT) or in your application (via HTTP) or even from HTML page hosted on OBK itself (again, via HTTP rest API). You don't even need to configure OBK channels, you get direct access to dpIDs.
And that's it! If you want to learn more about TuyaMCU and OBK, please consider reading related topics:
TuyaMCU flashing, setup and configuration guide - configure dpIDs for Home Assistant
OpenBeken as a mini HTTP hosting - writing pages in Javascript, Tasmota REST
TuyaMCU analyzer - UART packet decoder for Tuya devices - dpID detector
You can also search for TuyaMCU on our devices list and on our forum:
https://openbekeniot.github.io/webapp/devicesList.html
https://www.elektroda.com/rtvforum/find.php?q=tuyamcu
Don't forget our autoexec.bat examples page:
https://github.com/openshwprojects/OpenBK7231T_App/blob/main/docs/autoexecExamples.md
Let me know if you have any questions, I will be happy to help you with getting your devices running cloud free, in a privacy-respecting way.
Cool? Ranking DIY Helpful post? Buy me a coffee.


