logo elektroda
logo elektroda
X
logo elektroda

Avatto DMS16-W1 CBU Dimmer + Puya PY32F002A MCU: OpenBeken Flashing and Autoexec Setup

divadiow 2907 61
ADVERTISEMENT
📢 Listen (AI):
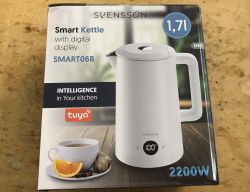
  • Hello. It's me again with another device. This is the Avatto DMS16-W1 1-channel dimmer smart switch with CBU talking to a Puya PY32F002A (TSSOP-20) MCU.

    Box on a blue table background with the text Smart Dimmer Module. Packaging of Avatto DMS16-W1 single-channel smart dimmer switch. 1-channel Wi-Fi dimmer module Avatto DMS16-W1 Components of the Avatto DMS16-W1 smart dimmer switch on a blue mat. 1-channel smart switch Avatto DMS16-W1 on a blue background PCB of Avatto DMS16-W1 smart dimmer switch with components. Photo of Avatto DMS16-W1 smart dimmer switch with electronic components. Close-up view of a smart dimmer switch Avatto DMS16-W1 showing the CBU module and electronic components. 1-channel smart dimmer switch Avatto DMS16-W1 with CBU module and electronic components. Avatto DMS16-W1 module with CBU and Puya MCU on a blue background Avatto DMS16-W1 smart dimmer switch board on a blue background Avatto DMS16-W1 smart dimmer switch on a blue background Avatto DMS16-W1 smart dimmer switch with a CBU module on a blue background. Close-up of the Avatto DMS16-W1 smart dimmer switch circuit board.

    The Puya MCU is well documented and has had some interesting followings on Elektroda https://www.elektroda.com/rtvforum/topic3946116.html

    Code: Text
    Log in, to see the code


    CBU log out from power-on

    Code: Text
    Log in, to see the code

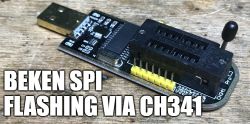
    After de-soldering the CBU riser the factory firmware was dumped using Easy Flasher, attached. The extracted config was "baud":"115200".

    With a multimeter I determine the following traces

    The photo shows the Avatto DMS16-W1 smart dimmer switch with a Puya PY32F002A microcontroller in a TSSOP-20 package.

    so I have everything I need to capture communications between the Puya and the CBU and potentially to use J-Link to read the flash of the Puya. Sadly I was not able to get a connection from J-Link to the MCU despite my best efforts. Even with NRST-reset pulled low.

    SEGGER J-Flash programming interface showing connection error

    Moving onto the communication between the CBU and the Puya, TuycaMCU Analyser was a winner for capturing all I could toggle and set within the official Tuya app. Those features being:

    App interface for controlling a dimmer module with brightness set to 19%. Power-on status setting screen in mobile app Mobile app interface for setting the dimmer brightness range. Device update screen showing no updates available. App interface for setting the dimmer brightness range with switch type selection.

    And with the CBU rise de-soldered we can easily switch between OpenBeken and the factory firmware to recheck default behaviour by removing the Puya from the equation in this setup:
    Electronic projects on a desk with various modules and cables connected to devices.

    And with two USB-TTL adaptors in the mix we can capture communications in real-time when setting up OBK autoexec.

    Screenshot of TuyaMCU Explorer software analyzing communication between modules.

    The full extent of the dpIDs being

    Code: Text
    Log in, to see the code


    Code: Text
    Log in, to see the code


    I did not see dpIDs 13 and 47 in all my fiddling in the Tuya app trying every function, boot communication or tuyaMcu_sendQueryState.

    Fast-forward to the current state of the autoexec

    Code: Text
    Log in, to see the code


    which gives us

    OpenBK7231N interface with various switch and control options.

    The countdown to power-on timer field numerical value will change every ~30s as the CBU receives an update from the MCU on time remaining.

    This is as far as I have gone for now. Most functions appear to be working in OpenBeken, though I've not yet tested with mains power and an incandescent bulb. Certainly the communications I'm watching in the MCU analyser mirror what was seen in factory firmware.

    There is one thing I don't yet know how to replicate. The brightness range, dpID3, allows you to customise the range from both ends. This is this screen in the Tuya app

    App screen for setting the dimmer brightness range.

    The yellow indicator can be toggled from the left to right to reduce the minimum, as well as from right to left to reduce maximum. This can be seen in factory with these comms. It also involves dpID 2, I'm not sure how this can be replicated in OBK.

    Screenshot showing communication between Wi-Fi module and device, displaying data related to dimmer settings.

    One thing I did notice was that although I've set the dimmer range to tuyaMcu_setDimmerRange 200 1000, same as factory, OpenBeken only displays a fixed 0-100 value range in the GUI for that channel when using the slider. It does however communicate the right values to the MCU.

    OpenBeken software configuration interface with sliders and control buttons. Log of communication between the WiFi module and device, with yellow indicators highlighting values 200 and 1000.

    suggestions for improvement welcome!

    Cool? Ranking DIY
    About Author
    divadiow
    Level 36  
    Offline 
    divadiow wrote 3766 posts with rating 642, helped 314 times. Live in city Bristol. Been with us since 2023 year.
  • ADVERTISEMENT
  • #2 21164833
    p.kaczmarek2
    Moderator Smart Home
    Thank you for detailed presentation. This min/max (range) control seems like a very custom component, we don't have such channel type in firmware yet, especially that it would need to handle two dpIDs... maybe, alternatively, we could just use two channels and create sliders for them? One slider called "max" and second "min"?

    Of course, you can also do better UI with REST page:
    https://www.elektroda.com/rtvforum/topic3971355.html
    Helpful post? Buy me a coffee.
  • ADVERTISEMENT
  • #3 21173417
    tomik67
    Level 12  
    I recently received an identical AVATTO dimmer with the designation DMS 16-Y1 instead of W1.
    An interesting feature of this version is a timer that counts down the time until the light is switched off.
    I tested it on a traditional incandescent bulb and it works great, I need to test it to see how it works with dimmable power supplies and LED bulbs.

    What I was able to detect:

    dpID Type VCnt Values
    1 Bool(1) 2 0, 1 Power 0/OFF, 1/ON
    2 Val(2) 18 Min=200, max=1000 Brigtnes
    3 Val(2) 18 Min=10 (1%-100%), max=500 (50%-100%) Brightness range set (minimum brightness value)
    4 Enum(4) 1 Switch type.: 0-Seesaw Toogle Switch, 1-Seesaw Sync Switch, 2-Kick Back Switch
    14 Enum(4) 1 Power-on Status Settings.: 0-Power-on OFF, 1-Power-on ON, 2-Power-on Memory
    6 Val(2) 1 Timer, seconds value

    {
    	"baud":"115200}",
    	"ap_passwd":"null",
    	"country_code":"null",
    	"bt_mac":"null",
    	"bt_hid":"null",
    	"prod_test":"false",
    	"fac_pin":"kszhpwrtdpznkpi70Atls_ca_cnt0SAmf_test_closetrue<NBastro_timer{timestamp",
    	"index":"0}0qAgw_di?1LAgw_wsm{abi",
    	"id":"null",
    	"swv":"2.1.17",
    	"bv":"40.00",
    	"pv":"2.2",
    	"lpv":"3.4",
    	"pk":"chfpey4klfcp1ipl",
    	"firmk":"key83r5jq9qqeaxt",
    	"cadv":"1.0.5",
    	"cdv":"1.0.0",
    	"dev_swv":"1.0.3",
    	"s_id":"null",
    	"dtp":"9",
    	"sync":"0",
    	"attr_num":"1",
    	"mst_tp_0":"9",
    	"mst_ver_0":"1.0.3",
    	"mst_md5_0":"null",
    	"mst_tp_1":"0",
    	"mst_ver_1":"null",
    	"mst_md5_1":"null",
    	"mst_tp_2":"0",
    	"mst_ver_2":"null",
    	"mst_md5_2":"null",
    	"mst_tp_3":"0",
    	"mst_ver_3":"null",
    	"mst_md5_3":"null",
    	"mst_tp_4":"0",
    	"mst_ver_4":"null",
    	"mst_md5_4":"null",
    	"mst_tp_5":"0",
    	"mst_ver_5":"null",
    	"mst_md5_5":"null",
    	"mst_tp_6":"0",
    	"mst_ver_6":"null",
    	"mst_md5_6":"null",
    	"mst_tp_7":"0",
    	"mst_ver_7":"null",
    	"mst_md5_7":"null",
    	"mst_tp_8":"0",
    	"mst_ver_8":"null",
    	"mst_md5_8":"null",
    	"md":"0",
    	"random":"0",
    	"wfb64":"1",
    	"stat":"0",
    	"token":"null",
    	"region":"null",
    	"reg_key":"null",
    	"dns_prio":"00{uuid",
    	"psk_key":"NqpUFtRz0KpOTePCePKZjlsLIJu2Jps3uPfXt",
    	"auth_key":"0kRx0y3KntpG1MFX4WwZJNDTq5JqLo0q",
    	"ap_ssid":"SmartLife",
    	"mst_ver_9":"null",
    	"mst_md5_9":"null }{abi",
    	"mst_tp_9":"0",
    	"ssid":"null",
    	"passwd":"null",
    	"mode":"rw",
    	"property":"{type",
    	"{type":"obj",
    	"max":"1000",
    	"scale":"0",
    	"step":"1",
    	"type":"value}",
    	"lckey":"^ANYmz^YUwo~h7z-",
    	"h_url":"http",
    	"h_ip":"18.193.219.35",
    	"hs_url":"null",
    	"hs_ip":"null",
    	"hs_psk":"https",
    	"hs_psk_ip":"18.195.249.137",
    	"mqs_url":"null",
    	"mqs_ip":"null",
    	"mq_url":"m2.tuyae u.com",
    	"mq_ip":"3.66.126.37",
    	"ai_sp":"null",
    	"ai_sp_ip":"null",
    	"mq_psk":"m2.tuyaeu.com",
    	"mq_psk_ip":"3.66.126.37",
    	"lp_url":"baal.tuyaeu.com",
    	"lp_ip":"18.193.97.90",
    	"time_z":"+01",
    	"s_time_z":"[[1711846800",
    	"wx_app_id":"null",
    	"wx_uuid":"null",
    	"dy_tls_m":"0",
    	"cloud_cap":"1025",
    	"psk21_key":"null }{nc_tp",
    	"ap_s{baud":"115200}",
    	"{key":"C|wn~+{bL'e8~R;V"
    }
    .
  • #4 21440751
    groove6j
    Level 9  
    I have the same dimmer switch, only it's the 2CH model. So I see mostly things are working fine with the 1CH unit, I will try out flashing my unit and report my findings. Seems like just the right dpIDs need finding.

    1CH version:
    Orange 1CH Zigbee dimmer module with technical specifications.
    Mine is this:
    Orange 2-channel Wi-Fi dimmer module with electrical connections.
  • #5 21441002
    divadiow
    Level 36  
    you could sniff out the additional dpID(s)
    https://www.elektroda.com/rtvforum/topic3970199.html
    https://www.elektroda.com/rtvforum/topic4038151.html

    https://github.com/openshwprojects/OpenBK7231T_App?tab=readme-ov-file#features

    or post your full factory firmware dump (or send it to me to reset if you joined it to wifi/Tuya) or extract the config data if you've already converted to OBK without backup

    OpenBK7231N control panel with status information and configuration buttons.
  • ADVERTISEMENT
  • #6 21441155
    groove6j
    Level 9  
    >>21441002
    I already flashed it.
    Here is the full 2MB dump of Tuya FW. I had it connected to WiFi if it matters.

    Anyways it seems that things are very similar, because when using your autoexec.bat:
    *both physical switches work (on both CH's/lamps)
    *CH1 dimming and switching works from webui

    Just have to find the dpIDs for CH2 for basic functionality to work.

    edit:
    Looks like CH2 continues from dpID7, very logical. I'll write up the new autoexec.
    
    switch_led_1   Boolean   
    
    "{true,false}"
    
    bright_value_1   Integer   
    
    {
      "min": 10,
      "max": 1000,
      "scale": 0,
      "step": 1
    }
    
    brightness_min_1   Integer   
    
    {
      "min": 10,
      "max": 1000,
      "scale": 0,
      "step": 1
    }
    
    brightness_max_1   Integer   
    
    {
      "min": 10,
      "max": 1000,
      "scale": 0,
      "step": 1
    }
    
    countdown_1   Integer   
    
    {
      "unit": "s",
      "min": 0,
      "max": 86400,
      "scale": 0,
      "step": 1
    }
    
    switch_led_2   Boolean   
    
    "{true,false}"
    
    bright_value_2   Integer   
    
    {
      "min": 10,
      "max": 1000,
      "scale": 0,
      "step": 1
    }
    
    brightness_min_2   Integer   
    
    {
      "min": 10,
      "max": 1000,
      "scale": 0,
      "step": 1
    }
    
    brightness_max_2   Integer   
    
    {
      "min": 10,
      "max": 1000,
      "scale": 0,
      "step": 1
    }
    
    countdown_2   Integer   
    
    {
      "unit": "s",
      "min": 0,
      "max": 86400,
      "scale": 0,
      "step": 1
    }
    
    relay_status   Enum   
    
    {
      "range": [
        "0",
        "1",
        "2"
      ]
    }


    {
      "result": {
        "model": "{\"modelId\":\"eyjoc4\",\"services\":[{\"actions\":[],\"code\":\"\",\"description\":\"\",\"events\":[],\"name\":\"默认服务\",\"properties\":[{\"abilityId\":1,\"accessMode\":\"rw\",\"code\":\"switch_led_1\",\"description\":\"\",\"extensions\":{\"iconName\":\"icon-power\",\"attribute\":\"1539\"},\"name\":\"开关1\",\"typeSpec\":{\"type\":\"bool\"}},{\"abilityId\":2,\"accessMode\":\"rw\",\"code\":\"bright_value_1\",\"description\":\"\",\"extensions\":{\"iconName\":\"icon-dp_half\",\"attribute\":\"1666\"},\"name\":\"亮度值1\",\"typeSpec\":{\"type\":\"value\",\"max\":1000,\"min\":10,\"scale\":0,\"step\":1}},{\"abilityId\":3,\"accessMode\":\"rw\",\"code\":\"brightness_min_1\",\"description\":\"\",\"extensions\":{\"iconName\":\"icon-liangdu1\",\"attribute\":\"1760\"},\"name\":\"最小亮度1\",\"typeSpec\":{\"type\":\"value\",\"max\":1000,\"min\":10,\"scale\":0,\"step\":1}},{\"abilityId\":4,\"accessMode\":\"rw\",\"code\":\"led_type_1\",\"description\":\"\",\"extensions\":{\"iconName\":\"icon-dp_box2\",\"scope\":\"\",\"attribute\":\"1760\"},\"name\":\"开关类型1\",\"typeSpec\":{\"type\":\"enum\",\"range\":[\"flip\",\"sync\",\"button\"]}},{\"abilityId\":5,\"accessMode\":\"rw\",\"code\":\"brightness_max_1\",\"description\":\"\",\"extensions\":{\"iconName\":\"icon-dp_sun\",\"attribute\":\"1760\"},\"name\":\"最大亮度1\",\"typeSpec\":{\"type\":\"value\",\"max\":1000,\"min\":10,\"scale\":0,\"step\":1}},{\"abilityId\":6,\"accessMode\":\"rw\",\"code\":\"countdown_1\",\"description\":\"\",\"extensions\":{\"iconName\":\"icon-dp_time2\",\"attribute\":\"1667\"},\"name\":\"倒计时1\",\"typeSpec\":{\"type\":\"value\",\"max\":86400,\"min\":0,\"scale\":0,\"step\":1,\"unit\":\"s\"}},{\"abilityId\":7,\"accessMode\":\"rw\",\"code\":\"switch_led_2\",\"description\":\"\",\"extensions\":{\"iconName\":\"icon-power\",\"attribute\":\"1027\"},\"name\":\"开关2\",\"typeSpec\":{\"type\":\"bool\"}},{\"abilityId\":8,\"accessMode\":\"rw\",\"code\":\"bright_value_2\",\"description\":\"\",\"extensions\":{\"iconName\":\"icon-dp_half\",\"attribute\":\"1154\"},\"name\":\"亮度值2\",\"typeSpec\":{\"type\":\"value\",\"max\":1000,\"min\":10,\"scale\":0,\"step\":1}},{\"abilityId\":9,\"accessMode\":\"rw\",\"code\":\"brightness_min_2\",\"description\":\"\",\"extensions\":{\"iconName\":\"icon-liangdu1\",\"attribute\":\"1248\"},\"name\":\"最小亮度2\",\"typeSpec\":{\"type\":\"value\",\"max\":1000,\"min\":10,\"scale\":0,\"step\":1}},{\"abilityId\":10,\"accessMode\":\"rw\",\"code\":\"led_type_2\",\"description\":\"\",\"extensions\":{\"iconName\":\"icon-dp_box2\",\"scope\":\"\",\"attribute\":\"1248\"},\"name\":\"开关类型2\",\"typeSpec\":{\"type\":\"enum\",\"range\":[\"flip\",\"sync\",\"button\"]}},{\"abilityId\":11,\"accessMode\":\"rw\",\"code\":\"brightness_max_2\",\"description\":\"\",\"extensions\":{\"iconName\":\"icon-dp_sun\",\"attribute\":\"1248\"},\"name\":\"最大亮度2\",\"typeSpec\":{\"type\":\"value\",\"max\":1000,\"min\":10,\"scale\":0,\"step\":1}},{\"abilityId\":12,\"accessMode\":\"rw\",\"code\":\"countdown_2\",\"description\":\"\",\"extensions\":{\"iconName\":\"icon-dp_time2\",\"attribute\":\"1154\"},\"name\":\"倒计时2\",\"typeSpec\":{\"type\":\"value\",\"max\":86400,\"min\":0,\"scale\":0,\"step\":1,\"unit\":\"s\"}},{\"abilityId\":13,\"accessMode\":\"rw\",\"code\":\"work_mode\",\"description\":\"\",\"extensions\":{\"iconName\":\"icon-dp_mode\",\"attribute\":\"1024\"},\"name\":\"模式\",\"typeSpec\":{\"type\":\"enum\",\"range\":[\"light_white\"]}},{\"abilityId\":14,\"accessMode\":\"rw\",\"code\":\"relay_status\",\"description\":\"\",\"extensions\":{\"iconName\":\"setting icon-setting\",\"attribute\":\"1760\"},\"name\":\"上电状态记忆\",\"typeSpec\":{\"type\":\"enum\",\"range\":[\"off\",\"on\",\"memory\"]}}]}]}"
      },
      "success": true,
      "t": 1739658888879,
      "tid": "10794136ebed11efbbcac2b21b10ca93"
    }


    This seems to work:
    
    startdriver tuyamcu
    tuyaMcu_setBaudRate 115200
    tuyaMcu_defWiFiState 4
    
    
    //-------CH1-------
    
    // Power On/Off dpID 1  - Channel 1
    setChannelType 1 toggle
    setChannelLabel 1 "On/Off"
    // linkTuyaMCUOutputToChannel dpId verType tgChannel
    linkTuyaMCUOutputToChannel 1 bool 1
    
    
    // Brightness dpID 2  - Channel 2
    setChannelType 2 Dimmer
    //Set dimmer range 
    tuyaMcu_setDimmerRange 200 1000
    // linkTuyaMCUOutputToChannel dpId verType tgChannel
    linkTuyaMCUOutputToChannel 2 val 2
    
    //Start httpButtons Driver
    startDriver httpButtons
    
    //Switch Type SeeSaw Toggle dpId=4 Enum V=0
    alias switchtype1 uartsendhex 55AA000600050404000100
    setButtonEnabled 1 1
    setButtonLabel 1 "Switch Type CH1: SeeSaw Toggle"
    setButtonCommand 1 "switchtype1"
    setButtonColor 1 "#DC0077"
    
    //Switch Type SeeSaw Sync dpId=4 Enum V=1
    alias switchtype2 uartsendhex 55AA000600050404000101
    setButtonEnabled 2 1
    setButtonLabel 2 "Switch Type CH1: SeeSaw Sync"
    setButtonCommand 2 "switchtype2"
    setButtonColor 2 "#DC0077"
    
    //Switch Type dpId=4 Enum V=2
    alias switchtype3 uartsendhex 55AA000600050404000102
    setButtonEnabled 3 1
    setButtonLabel 3 "Switch Type CH1: Kickback"
    setButtonCommand 3 "switchtype3"
    setButtonColor 3 "#DC0077"
    
    //Switch Type dpId=6 Enum V=<seconds>
    setChannelType 6 Textfield
    setChannelLabel 6 ":non-persistent countdown in seconds to power ON. Set 0 to cancel."
    // linkTuyaMCUOutputToChannel dpId verType tgChannel
    linkTuyaMCUOutputToChannel 6 val 6
    
    //-------CH2-------
    
    // Power On/Off dpID 7  - Channel 7
    setChannelType 7 toggle
    setChannelLabel 7 "On/Off"
    // linkTuyaMCUOutputToChannel dpId verType tgChannel
    linkTuyaMCUOutputToChannel 7 bool 7
    
    
    // Brightness dpID 8  - Channel 8
    setChannelType 8 Dimmer
    //Set dimmer range 
    tuyaMcu_setDimmerRange 200 1000
    // linkTuyaMCUOutputToChannel dpId verType tgChannel
    linkTuyaMCUOutputToChannel 8 val 8
    
    //Switch Type SeeSaw Toggle dpId=10 Enum V=0
    alias switchtype4 uartsendhex 55AA000600050404000100
    setButtonEnabled 4 1
    setButtonLabel 4 "Switch Type CH2: SeeSaw Toggle"
    setButtonCommand 4 "switchtype4"
    setButtonColor 4 "#DC0077"
    
    //Switch Type SeeSaw Sync dpId=10 Enum V=1
    alias switchtype5 uartsendhex 55AA000600050404000101
    setButtonEnabled 5 1
    setButtonLabel 5 "Switch Type CH2: SeeSaw Sync"
    setButtonCommand 6 "switchtype5"
    setButtonColor 5 "#DC0077"
    
    //Switch Type dpId=10 Enum V=2
    alias switchtype6 uartsendhex 55AA000600050404000102
    setButtonEnabled 6 1
    setButtonLabel 6 "Switch Type CH2: Kickback"
    setButtonCommand 6 "switchtype6"
    setButtonColor 6 "#DC0077"
    
    //Switch Type dpId=12 Enum V=<seconds>
    setChannelType 12 Textfield
    setChannelLabel 12 ":non-persistent countdown in seconds to power ON. Set 0 to cancel."
    // linkTuyaMCUOutputToChannel dpId verType tgChannel
    linkTuyaMCUOutputToChannel 12 val 12
    
    
    //-------Additional dpIDs-------
    
    // Power-On State dpID 14  - Channel 14
    setChannelType 14 OffOnRemember
    setChannelLabel 14 "Power-On State"
    // linkTuyaMCUOutputToChannel dpId verType tgChannel
    linkTuyaMCUOutputToChannel 14 enum 14


    Could we get brightness_min and brightness_max to work? dpIDs 3 and 5 (9 and 11 for the 2CH version respectively)
  • ADVERTISEMENT
  • #7 21544103
    przemsi_ele
    Level 11  
    Good job
    TuyaMCU is a great tool.
    I found another CBU and restore original tuya firmware for testing.

    My 2 channel wifi avatto dimmer software version

    Text on white background: Moduł główny: v3.1.17 Moduł MCU: v1.0.4.

    my autoexec.bat
    
    startdriver tuyamcu
    tuyaMcu_setBaudRate 115200
    tuyaMcu_defWiFiState 4
    
    //-------CH1-------
    
    // Power On/Off dpID 1  - Channel 1
    setChannelType 1 toggle
    setChannelLabel 1 "CH1 On/Off"
    // linkTuyaMCUOutputToChannel dpId verType tgChannel
    linkTuyaMCUOutputToChannel 1 bool 1
    
    
    // Brightness dpID 2  - Channel 2
    setChannelType 2 Dimmer
    //Set dimmer range 
    tuyaMcu_setDimmerRange 200 1000
    // linkTuyaMCUOutputToChannel dpId verType tgChannel
    linkTuyaMCUOutputToChannel 2 val 2
    
    //Start httpButtons Driver
    startDriver httpButtons
    
    //Switch Type SeeSaw Toggle dpId=4 Enum V=0
    alias switchtype1 uartsendhex 55AA00060005040400010013
    setButtonEnabled 1 1
    setButtonLabel 1 "Switch Type CH1: SeeSaw Toggle"
    setButtonCommand 1 "switchtype1"
    setButtonColor 1 "#DC0077"
    
    //Switch Type SeeSaw Sync dpId=4 Enum V=1
    alias switchtype2 uartsendhex 55AA00060005040400010114
    setButtonEnabled 2 1
    setButtonLabel 2 "Switch Type CH1: SeeSaw Sync"
    setButtonCommand 2 "switchtype2"
    setButtonColor 2 "#DC0077"
    
    //Switch Type dpId=4 Enum V=2
    alias switchtype3 uartsendhex 55AA00060005040400010215
    setButtonEnabled 3 1
    setButtonLabel 3 "Switch Type CH1: Kickback"
    setButtonCommand 3 "switchtype3"
    setButtonColor 3 "#DC0077"
    
    //Switch Type dpId=6 Enum V=<seconds>
    setChannelType 6 Textfield
    setChannelLabel 6 ":non-persistent countdown in seconds to power ON. Set 0 to cancel."
    // linkTuyaMCUOutputToChannel dpId verType tgChannel
    linkTuyaMCUOutputToChannel 6 val 6
    
    //-------CH2-------
    
    // Power On/Off dpID 7  - Channel 7
    setChannelType 7 toggle
    setChannelLabel 7 "CH2 On/Off"
    // linkTuyaMCUOutputToChannel dpId verType tgChannel
    linkTuyaMCUOutputToChannel 7 bool 7
    
    
    // Brightness dpID 8  - Channel 8
    setChannelType 8 Dimmer
    //Set dimmer range 
    tuyaMcu_setDimmerRange 200 1000
    // linkTuyaMCUOutputToChannel dpId verType tgChannel
    linkTuyaMCUOutputToChannel 8 val 8
    
    //Switch Type SeeSaw Toggle dpId=10 Enum V=0
    alias switchtype4 uartsendhex 55AA000600050A0400010019
    setButtonEnabled 4 1
    setButtonLabel 4 "Switch Type CH2: SeeSaw Toggle"
    setButtonCommand 4 "switchtype4"
    setButtonColor 4 "#DC0077"
    
    //Switch Type SeeSaw Sync dpId=10 Enum V=1
    alias switchtype5 uartsendhex 55AA000600050A040001011A
    setButtonEnabled 5 1
    setButtonLabel 5 "Switch Type CH2: SeeSaw Sync"
    setButtonCommand 6 "switchtype5"
    setButtonColor 5 "#DC0077"
    
    //Switch Type dpId=10 Enum V=2
    alias switchtype6 uartsendhex 55AA000600050A040001021B
    setButtonEnabled 6 1
    setButtonLabel 6 "Switch Type CH2: Kickback"
    setButtonCommand 6 "switchtype6"
    setButtonColor 6 "#DC0077"
    
    //Switch Type dpId=12 Enum V=<seconds>
    setChannelType 12 Textfield
    setChannelLabel 12 ":non-persistent countdown in seconds to power ON. Set 0 to cancel."
    // linkTuyaMCUOutputToChannel dpId verType tgChannel
    linkTuyaMCUOutputToChannel 12 val 12
    
    
    //-------Additional dpIDs-------
    
    // Power-On State dpID 14  - Channel 14
    setChannelType 14 OffOnRemember
    setChannelLabel 14 "Power-On State"
    // linkTuyaMCUOutputToChannel dpId verType tgChannel
    linkTuyaMCUOutputToChannel 14 enum 14


    I used TuyaMCU to check payload that change type of a externall switch, it worked.
    For my software version payload looks:

    kickback1      55AA00060005040400010215
    Received by WiFi module:
    55 AA   03   07      00 05   04 04 00 01 02       19   
    HEADER   VER=03   State      LEN   dpId=4 Enum V=2   CHK   
    
    Sent by WiFi module:
    55 AA   00   06      00 05   0404000102   15   
    HEADER   VER=00   SetDP      LEN   dpId=4 Enum V=2      CHK
    
    
    toggle1         55AA00060005040400010013
    Received by WiFi module:
    55 AA   03   07      00 05   04 04 00 01 00       17   
    HEADER   VER=03   State      LEN   dpId=4 Enum V=0   CHK   
    
    Sent by WiFi module:
    55 AA   00   06      00 05   0404000100   13   
    HEADER   VER=00   SetDP      LEN   dpId=4 Enum V=0      CHK   
    
    
    sync1         55AA00060005040400010114   
    Sent by WiFi module:
    55 AA   00   06      00 05   0404000101   14   
    HEADER   VER=00   SetDP      LEN   dpId=4 Enum V=1      CHK   
    
    Received by WiFi module:
    55 AA   03   07      00 05   04 04 00 01 01       18   
    HEADER   VER=03   State      LEN   dpId=4 Enum V=1   CHK   


    toggle2         55AA000600050A0400010019
    //R 10.05.2025 15:47:42 WiFi received:
    55AA030700050A040001001D
    //S 10.05.2025 15:47:42 WiFi sent:
    55AA000600050A0400010019


    kick2          55AA000600050A040001021B
    //R 10.05.2025 15:45:30 WiFi received:
    55AA030700050A040001021F
    //S 10.05.2025 15:45:30 WiFi sent:
    55AA000600050A040001021B
    
    sync2         55AA000600050A040001011A
    //R 10.05.2025 15:47:00 WiFi received:
    55AA03070005070100010017
    //S 10.05.2025 15:47:00 WiFi sent:
    55AA000600050A040001011A
    //R 10.05.2025 15:47:00 WiFi received:
    55AA030700050A040001011E


    i am waiting for min max brightness slider
    thx
  • #8 21706213
    sp4rk1e
    Level 10  
    thanks for your autoexec.bat files. I recently bought the 1CH and 2CH version of this dimmer. Both basically work.

    1CH and 2CH Wi-Fi dimmer modules on a wooden surface

    What I don't understand:

    with the external switch I only can change the on/off state of the channel. But NOT the brightness (as usual).

    Is that correct for these type of dimmers? Do I miss something?
  • #9 21706328
    p.kaczmarek2
    Moderator Smart Home
    Did you check them with factory firmware first?

    I didn't have this particular model on my side, but the physical switch is connected to the MCU and not to the WiFi module, so I would assume that functionality is the same as in the factory firmware.
    Helpful post? Buy me a coffee.
  • #10 21706336
    sp4rk1e
    Level 10  
    That's what I think even the behavior is strange though.. After unpacking, I went straight to the flashing :-) So I unfortunately have no comparison to the factory firmware
  • #11 21706449
    p.kaczmarek2
    Moderator Smart Home
    I don't remember seeing dimmers controllable with brightness via toggle switch. I only saw them with buttons. So:
    
    
    9. **DP 47:**
       - **Code:** switch_type (开关类型 [switch type])
       - **Type:** ENUM(rw)
       - **Value Range:** "flip", "sync", "button"
    

    Maybe it can work, but only if you set button here?
    And then use a momentary button...
    Helpful post? Buy me a coffee.
  • #12 21706461
    sp4rk1e
    Level 10  
    that's what I already tried. It took me a while to figure out what 'sync' should mean in this context. But finally all 3 worked. But none was suitable to dim the light. Just switch on/off.
  • #13 21706470
    p.kaczmarek2
    Moderator Smart Home
    Well, what are your DIY skills?

    Maybe we could try to connect button directly to WiFi module and then program it to change brightness?
    Helpful post? Buy me a coffee.
  • #14 21706499
    sp4rk1e
    Level 10  
    ah, good idea

    directly connecting the switch/button to the WiFi module is easy for this hardware. In particular terminal 'N' is already connected with the ground of the 3.3V circuit. It means digital ground is accessible from the outside. I then will remove the other terminal 'S1' from the current conductive tracks and connect it straight to some suitable input of the WiFi module.
  • #15 21706515
    p.kaczmarek2
    Moderator Smart Home
    Ok, so your brightness control already works from OBK, right? So, in which channel is the brightness? Can you run:
    
    addChannel 2 10
    

    to, for example, add 10 to channel 2, to increase brightness by 10? For now, from command console
    Helpful post? Buy me a coffee.
  • #16 21706564
    sp4rk1e
    Level 10  
    I'm completely new to openBK. I first had to remove some leftovers from my previous tries :-) Finally I setup everything new.

    What now works is: 'addChannel 2 10' increases the brightness by 10. And the Pin Doc P28 shows a level change from HIGH -> LOW if I press the button. So far so good.

    I weakly remember there are some nice examples documented in the source repos. I'll find a solution how to continue...
  • #17 21706567
    p.kaczmarek2
    Moderator Smart Home
    Now, the addChannel is smarter than just adding value. It can also wrap around. Look:
    Table with AddChannel function description, syntax, and usage
    What is the range of dimmer here? 0 to 1000?
    So, if you do:
    
    AddChannel 2 100 0 1000 1
    

    do you get "wrap around" at 1000?

    If so... then you can probably script hold and click (and double click?) events.
    https://www.elektroda.com/rtvforum/topic3946427.html
    Helpful post? Buy me a coffee.
  • #18 21706579
    sp4rk1e
    Level 10  
    nice!
    I first set

    
    tuyaMcu_setDimmerRange 0 1000


    it appears something with wrapping is going wrong:

    
    AddChannel 2 10 0 1000 0
    
    Debug:TuyaMCU:ApplyMapping: mapped dp 2 value 1000 to 100
    Info:GEN:CHANNEL_AddClamped channel 2 has changed to 110
    Info:GEN:CHANNEL_Set channel 2 has changed to 110 (flags 0)
    Debug:TuyaMCU:OnChannelChanged: mapped value 110 (OpenBK7231T_App range) to 1080 (TuyaMCU range)
    Info:MQTT:Channel has changed! Publishing 110 to channel 2
    Info:CMD:[WebApp Cmd 'AddChannel 2 10 0 1000 0' Result] OK
    Info:TuyaMCU:Received: 55 AA 03 07 00 08 02 02 00 04 00 00 04 38 55
    Info:TuyaMCU:ProcessIncoming[v=3]: cmd 7 (State) len 15
    Info:TuyaMCU:ParseState: id 2 type 2-val len 4
    Info:TuyaMCU:ParseState: int32 1080
    Debug:TuyaMCU:ApplyMapping: mapped dp 2 value 1080 to 110
    Info:GEN:No change in channel 2 (still set to 110) - ignoring


    AddChannel 2 10 0 1000 1
    
    Debug:CMD:cmd [AddChannel 2 10 0 1000 1]
    Info:GEN:CHANNEL_AddClamped channel 2 has changed to 120
    Info:GEN:CHANNEL_Set channel 2 has changed to 120 (flags 0)
    Debug:TuyaMCU:OnChannelChanged: mapped value 120 (OpenBK7231T_App range) to 1160 (TuyaMCU range)
    Info:MQTT:Channel has changed! Publishing 120 to channel 2 
    Info:CMD:[WebApp Cmd 'AddChannel 2 10 0 1000 1' Result] OK
    Info:TuyaMCU:Received: 55 AA 03 07 00 08 02 02 00 04 00 00 04 88 A5 
    Info:TuyaMCU:ProcessIncoming[v=3]: cmd 7 (State) len 15
    Info:TuyaMCU:ParseState: id 2 type 2-val len 4
    Info:TuyaMCU:ParseState: int32 1160
    Debug:TuyaMCU:ApplyMapping: mapped dp 2 value 1160 to 120
    Info:GEN:No change in channel 2 (still set to 120) - ignoring
    
    
  • #19 21706597
    p.kaczmarek2
    Moderator Smart Home
    Ok, you also need to be able to do on and off. Do you have a command for that? Probably toggleChannel?

    And then, look here:
    https://www.elektroda.com/rtvforum/topic3946427.html
    You can script it to:
    - add brightness on hold (on hold repeat)
    - toggle on/off on click.
    You can also do double click event handler to set 100% light.
    Helpful post? Buy me a coffee.
  • #20 21706610
    sp4rk1e
    Level 10  
    ok, sometimes simply adding 1 by:

    
    AddChannel 2 1


    causes huge steps in brightness change. The same with small negative values like 'AddChannel 2 -1'
    I first will have a look what's going on there..
  • #21 21706638
    p.kaczmarek2
    Moderator Smart Home
    Interesting. I'd suggest testing with setChannel first. So, set value 1, then 2, then 3, etc. And observe.
    Helpful post? Buy me a coffee.
  • #22 21706849
    sp4rk1e
    Level 10  
    I'm done with it for now. Basically it works. But there is room for improvement.

    In particular when dimming the brightness of the bulb sporadically flashes with some very high value for fractions of a second. But falls back to the expected brightness afterwards. Logging of the values on the serial interf. does not reflect this jump.
    Maybe we can't hammer the Tuya interface with such command rates? I don't know.

    wrapping the dimming values now works at both ends of the given range. Thanks to @p.kaczmarek2 for all the advice

    autoexec.bat:
    
    // because standard S1 functionality allows only switching but not dimming
    // we replace S1 by a push button connected between P28 of the
    // WIFi module and ground
    
    // short press now switches on/off
    // longpress is dimming either up or down
    // doublepress toggles dim direction forward/backward
    
    startdriver tuyamcu
    tuyaMcu_setBaudRate 115200
    tuyaMcu_defWiFiState 4
    
    //SetButtonTimes 10 3 5           // default
    //SetButtonTimes 10 3 3           // appears to be too much for the module?
    
    // P28 connected to the push button
    SetPinChannel 28 35
    SetPinRole 28 Btn
    // define dim stepsize
    SetChannel 34 3
    addEventHandler OnClick    28 toggleChannel 1
    // clamping appears to refer to GUI view of values
    addEventHandler OnHold     28 addChannel  2  $CH34 0 100 1
    // reverse direction on double click
    addEventHandler OnDblClick 28 setChannel 34 -$CH34
    
    // Power On/Off dpID 1  - Channel 1
    setChannelType 1 toggle
    setChannelLabel 1 "CH1 On/Off"
    // linkTuyaMCUOutputToChannel dpId verType tgChannel
    linkTuyaMCUOutputToChannel 1 bool 1
    
    // Brightness dpID 2  - Channel 2
    setChannelType 2 Dimmer
    //Set dimmer range
    //                       0 100                              <= GUI view
    //                                                          <= hardware view
    tuyaMcu_setDimmerRange  90 600
    // linkTuyaMCUOutputToChannel dpId verType tgChannel
    linkTuyaMCUOutputToChannel 2 val 2
    
    startDriver httpButtons
    
    //Switch Type dpId=6 Enum V=<seconds>
    setChannelType 6 Textfield
    setChannelLabel 6 ":non-persistent countdown in seconds to power ON. Set 0 to cancel."
    // linkTuyaMCUOutputToChannel dpId verType tgChannel
    linkTuyaMCUOutputToChannel 6 val 6
    
    // Power-On State dpID 14  - Channel 14
    setChannelType 14 OffOnRemember
    setChannelLabel 14 "Power-On State"
    // linkTuyaMCUOutputToChannel dpId verType tgChannel
    linkTuyaMCUOutputToChannel 14 enum 14
    
    
  • #23 21706850
    p.kaczmarek2
    Moderator Smart Home
    Hmm I was going to recommend SetButtonTimes but I see you already found it.

    Okay, do you have TuyaMCU queue enabled in the flags? It is supposed to help with stability by making sure that there are no two packets sent in one go...
    Helpful post? Buy me a coffee.
  • #25 21706862
    p.kaczmarek2
    Moderator Smart Home
    This is a flag, not a command. It's listed in flags file:
    https://github.com/openshwprojects/OpenBK7231T_App/blob/main/docs/flags.md

    what do you mean not reflected? It may be a bug...
    Helpful post? Buy me a coffee.
  • #26 21706870
    sp4rk1e
    Level 10  
    I meant I can't set this flag with a command, right? Because I would prefer to collect any configuration in one place aka autoexec.bat in our case.

    I've now seen I can set this flag at least using the GUI Config->Configure Flags

    But even when I tick [ Flag 43 - [TuyaMCU] Use queue ] there, the 'flags" field in config of web application (looking at 'Export Current Template' there) stays on 0:
    
    {
      "vendor": "Tuya",
      "bDetailed": "0",
      "name": "Full Device Name Here",
      "model": "enter short model name here",
      "chip": "BK7231N",
      "board": "TODO",
      "flags": "0",
      "keywords": [
        "TODO",
        "TODO",
        "TODO"
    [...]


    toggling other flags like e.g [ Flag 10 - [MQTT] Broadcast self state on MQTT connect ] work though.
  • #27 21706887
    p.kaczmarek2
    Moderator Smart Home
    Command SetFlag should work. If this flag is not saved to template, then it's a bug.
    Helpful post? Buy me a coffee.
  • #28 21707334
    sp4rk1e
    Level 10  
    I made some more tests with OpenBK7231N_1.18.185.rbl

    current autoexec.bat:
    
    // because standard S1 functionality allows only switching but not dimming
    // we replace S1 by a push button connected between P28 of the
    // WIFi module and ground
    
    // short press now switches on/off
    // long press is dimming either up or down
    // double press toggles dim direction up/down
    
    startdriver tuyamcu
    tuyaMcu_setBaudRate 115200
    tuyaMcu_defWiFiState 4
    
    //SetButtonTimes 10 3 3     // appears to be too much for the module? dflt: 10 3 5
    SetFlag 43 1                // Flag 43 - [TuyaMCU] Use queue 
    SetFlag 10 0                // Flag 10 - [MQTT] Broadcast self state on MQTT connect DONT CLUTTER LOG
    
    // P28 connected to the push button
    SetPinChannel 28 35
    SetPinRole 28 Btn
    // define dim stepsize
    SetChannel 34 3
    addEventHandler OnClick    28 toggleChannel 1
    // clamping appears to refer to GUI view of values
    addEventHandler OnHold     28 addChannel  2  $CH34 0 100 1
    // reverse direction on double click
    addEventHandler OnDblClick 28 setChannel 34 -$CH34
    
    // Power On/Off dpID 1  - Channel 1
    setChannelType 1 toggle
    setChannelLabel 1 "CH1 On/Off"
    // linkTuyaMCUOutputToChannel dpId verType tgChannel
    linkTuyaMCUOutputToChannel 1 bool 1
    
    // Brightness dpID 2  - Channel 2
    setChannelType 2 Dimmer
    //Set hardware dimmer range (is mapped to 0, 100 in GUI)
    tuyaMcu_setDimmerRange  90 600
    // linkTuyaMCUOutputToChannel dpId verType tgChannel
    linkTuyaMCUOutputToChannel 2 val 2
    
    startDriver httpButtons
    
    //Switch Type dpId=6 Enum V=<seconds>
    setChannelType 6 Textfield
    setChannelLabel 6 ":non-persistent countdown in seconds to power ON. Set 0 to cancel."
    // linkTuyaMCUOutputToChannel dpId verType tgChannel
    linkTuyaMCUOutputToChannel 6 val 6
    
    // Power-On State dpID 14  - Channel 14
    setChannelType 14 OffOnRemember
    setChannelLabel 14 "Power-On State"
    // linkTuyaMCUOutputToChannel dpId verType tgChannel
    linkTuyaMCUOutputToChannel 14 enum 14


    the only changes compared to my previous one is setting Flag 43 - [TuyaMCU] Use queue

    observations:
    - flags are correctly shown on GUI home->config->configure flags
    - flags are incorrectly shown on GUI home->launch web application->config
    - brightness flicker during dimming up or down sporadically still happens

    as the log shows us, the hardware does not follow exactly our commands. Are odd/even brightness values not permitted?
    I later will have a closer look at that

    log when dimming (with some comments):
    
    Info:GEN:28 Button_OnInitialPressDown
    Info:GEN:28 Button_OnLongPressHoldStart
    Info:GEN:28 Button_OnLongPressHold
    Info:EVENT:EventHandlers_FireEvent: executing command addChannel  2  $CH34 0 100 1
    Info:GEN:CHANNEL_AddClamped channel 2 has changed to 91
    Info:GEN:CHANNEL_Set channel 2 has changed to 91 (flags 0)
    Info:MQTT:Channel has changed! Publishing 91 to channel 2 
    Info:TuyaMCU:Received: 55 AA 03 07 00 08 02 02 00 04 00 00 02 2A 45 
    Info:TuyaMCU:ProcessIncoming[v=3]: cmd 7 (State) len 15
    Info:TuyaMCU:ParseState: id 2 type 2-val len 4
    Info:TuyaMCU:ParseState: int32 554
    Info:GEN:CHANNEL_Set channel 2 has changed to 90 (flags 0)
    
    # <== jumps 91 -> 90 why that?
    
    Info:MQTT:Channel has changed! Publishing 90 to channel 2 
    Info:GEN:28 Button_OnLongPressHold
    Info:EVENT:EventHandlers_FireEvent: executing command addChannel  2  $CH34 0 100 1
    Info:GEN:CHANNEL_AddClamped channel 2 has changed to 93
    
    # <== 90 -> 93 added 3 correctly
    
    Info:GEN:CHANNEL_Set channel 2 has changed to 93 (flags 0)
    Info:MQTT:Channel has changed! Publishing 93 to channel 2 
    Info:TuyaMCU:Received: 55 AA 03 07 00 08 02 02 00 04 00 00 02 34 4F 
    Info:TuyaMCU:ProcessIncoming[v=3]: cmd 7 (State) len 15
    Info:TuyaMCU:ParseState: id 2 type 2-val len 4
    Info:TuyaMCU:ParseState: int32 564
    Info:GEN:CHANNEL_Set channel 2 has changed to 92 (flags 0)
    
    # <== jumps 93 -> 92 why that?
    
    Info:MQTT:Channel has changed! Publishing 92 to channel 2 
    Info:GEN:28 Button_OnLongPressHold
    Info:EVENT:EventHandlers_FireEvent: executing command addChannel  2  $CH34 0 100 1
    Info:GEN:CHANNEL_AddClamped channel 2 has changed to 95
    
    # <== 93 -> 95 added 3 correctly
    
    Info:GEN:CHANNEL_Set channel 2 has changed to 95 (flags 0)
    Info:MQTT:Channel has changed! Publishing 95 to channel 2 
    Info:TuyaMCU:Received: 55 AA 03 07 00 08 02 02 00 04 00 00 02 3E 59 
    Info:TuyaMCU:ProcessIncoming[v=3]: cmd 7 (State) len 15
    Info:TuyaMCU:ParseState: id 2 type 2-val len 4
    Info:TuyaMCU:ParseState: int32 574
    Info:GEN:CHANNEL_Set channel 2 has changed to 94 (flags 0)
    
    # <== jumps 95 -> 94 why that?
    
    Info:MQTT:Channel has changed! Publishing 94 to channel 2 
    Info:TuyaMCU:Received: 55 AA 03 00 00 01 01 04   
    Info:TuyaMCU:ProcessIncoming[v=3]: cmd 0 (Hearbeat) len 8
    Info:TuyaMCU:Received: 55 AA 03 07 00 08 02 02 00 04 00 00 02 3E 59 
    Info:TuyaMCU:ProcessIncoming[v=3]: cmd 7 (State) len 15
    Info:TuyaMCU:ParseState: id 2 type 2-val len 4
    Info:TuyaMCU:ParseState: int32 574
    Info:GEN:No change in channel 2 (still set to 94) - ignoring
    
  • #29 21707377
    p.kaczmarek2
    Moderator Smart Home
    I can see two possible issues here.
    1. maybe you are right, try to replicate with setChannel
    2. maybe tuyamcu sends feedback from previous set and this feedback sets back mcu value? Maybe I could add a little flag/setting for you, that tells OBK to "ignore all dimmer values sent by tuyamcu"
    Helpful post? Buy me a coffee.
  • #30 21707470
    sp4rk1e
    Level 10  
    p.kaczmarek2 wrote:
    try to replicate with setChannel

    do you mean to replace
    
    addChannel  2  $CH34 0 100 1
    

    with equivalent 'setChannel' construct?

    p.kaczmarek2 wrote:
    "ignore all dimmer values sent by tuyamcu"

    fine. If it's not too much effort for you. This flag makes sense for other devices too, when the Beken chip takes over some tasks of the MCU.
📢 Listen (AI):

Topic summary

The discussion focuses on the Avatto DMS16-W1 1-channel dimmer smart switch featuring a CBU module communicating with a Puya PY32F002A MCU (TSSOP-20). Users explore flashing the device with OpenBeken firmware, identifying and mapping Tuya dpIDs for channel control, and configuring autoexec.bat scripts for proper operation. Key findings include dpID assignments for power on/off, brightness control, brightness range, switch type, power-on status, and timer functions, with variations noted in similar models like the Avatto DMS16-Y1 and 2-channel versions. Contributors share firmware dumps, flashing experiences, and configuration examples, including setting dimmer ranges, linking TuyaMCU outputs to channels, and enabling HTTP button drivers. The conversation also references tools and resources for sniffing dpIDs, restoring original firmware, and improving UI via REST pages. Overall, the thread provides practical insights into customizing and controlling Avatto dimmer switches using OpenBeken firmware and Puya MCU integration.
Summary generated by the language model.
ADVERTISEMENT