
Here I will show how you can easily use a TuyaMCU device (dimmer) with my
OpenBeken and connect it to
Home Assistant . OpenBeken is an alternative, open source software for IoT devices, offering, among others independence from the manufacturer's cloud, compatibility with many ecosystems, configurability and support for various platforms, including BK7231T, BK7231N, XR809 and BL602.
For more information about OpenBK, please see:
[BK7231T] My HTTP server, configurator, MQTT support from Home Assistant
For more information about BL602 support:
Tasmota replacement for BL602, programming, pairing with Home Assistant.
What is TuyaMCU?
TuyaMCU is a communication protocol used between the microcontroller and the WiFi module present in Tuya products:

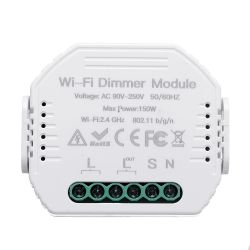
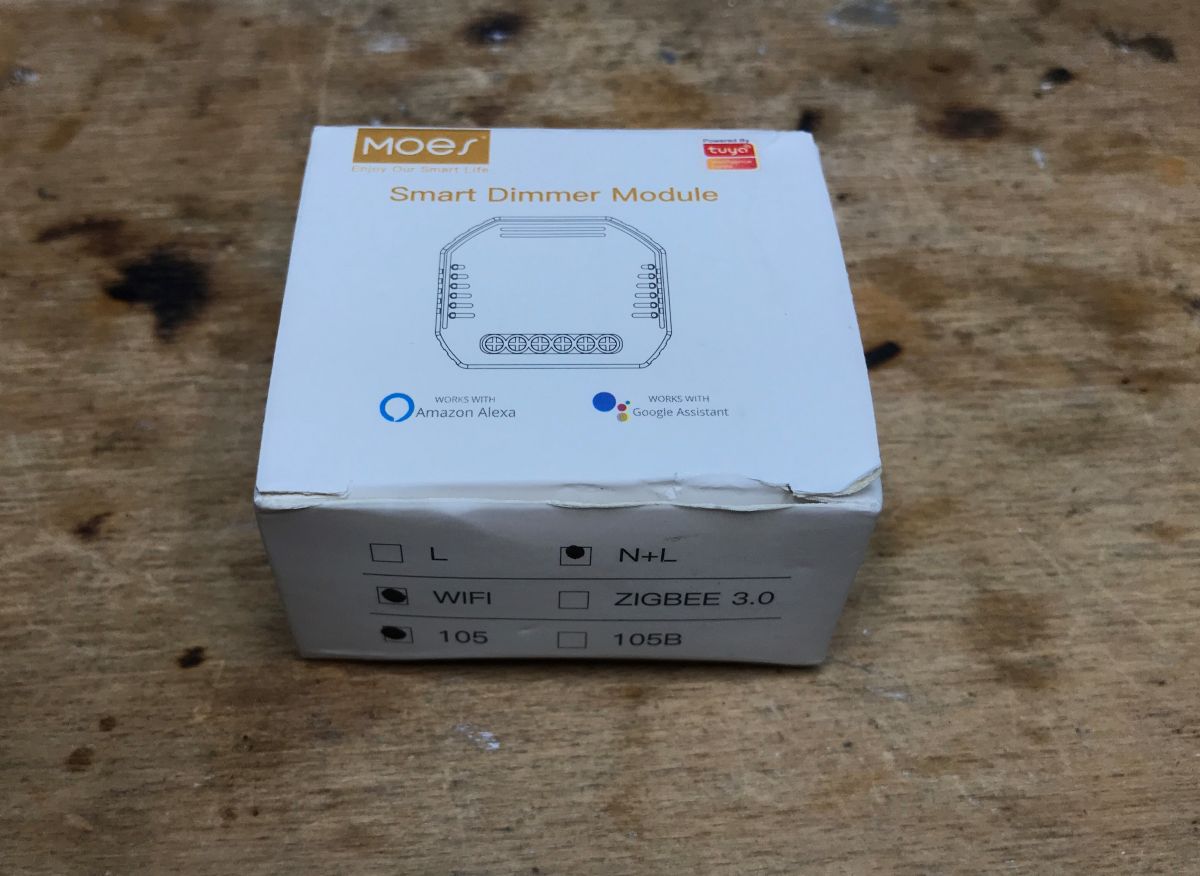
 Purchase of a dimmer
I bought the product some time ago. It can be found by searching for
MoesHouse DIY Smart WiFi Light LED Dimmer Switch Smart Life / Tuya APP Remote Control 1 Way Switch Works With Alexa Google Home - 1pcs . Now its price has probably increased a bit, but you can also find it cheaper on various websites:

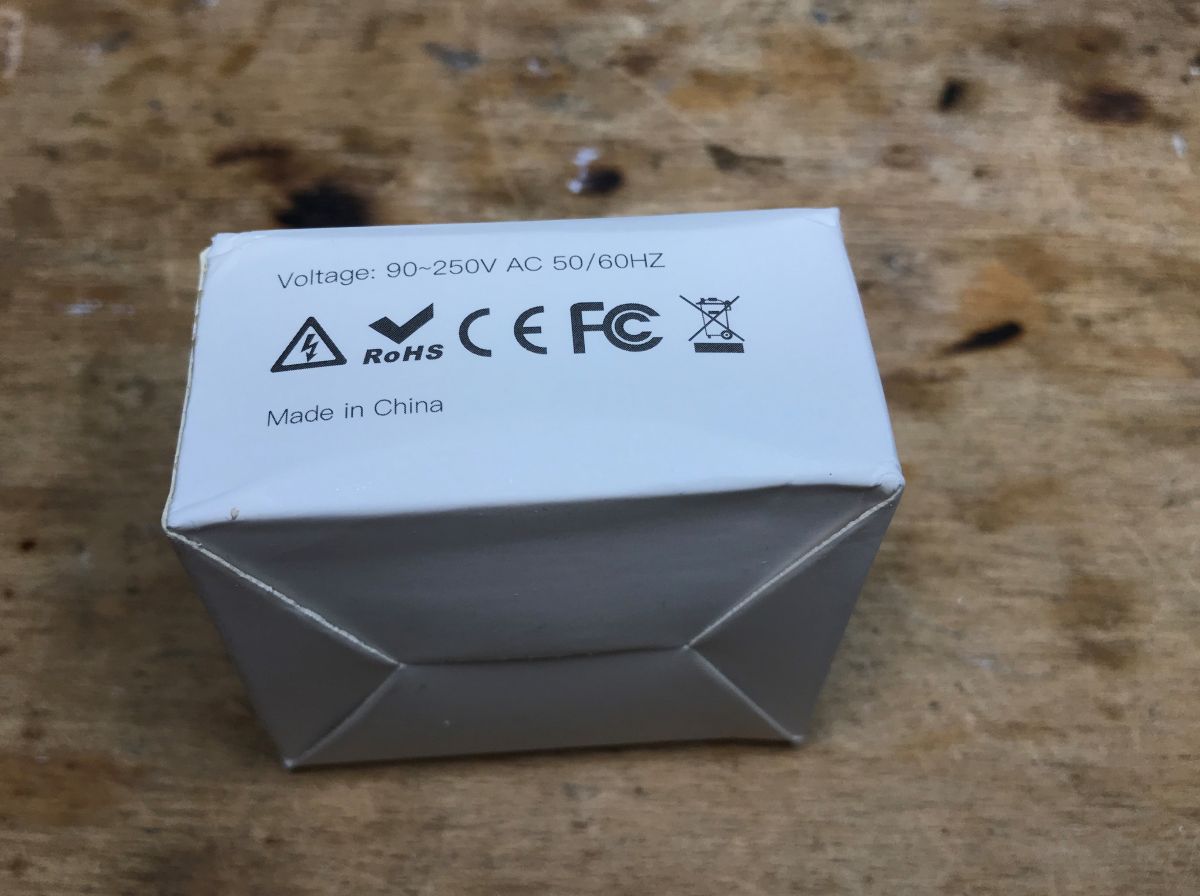
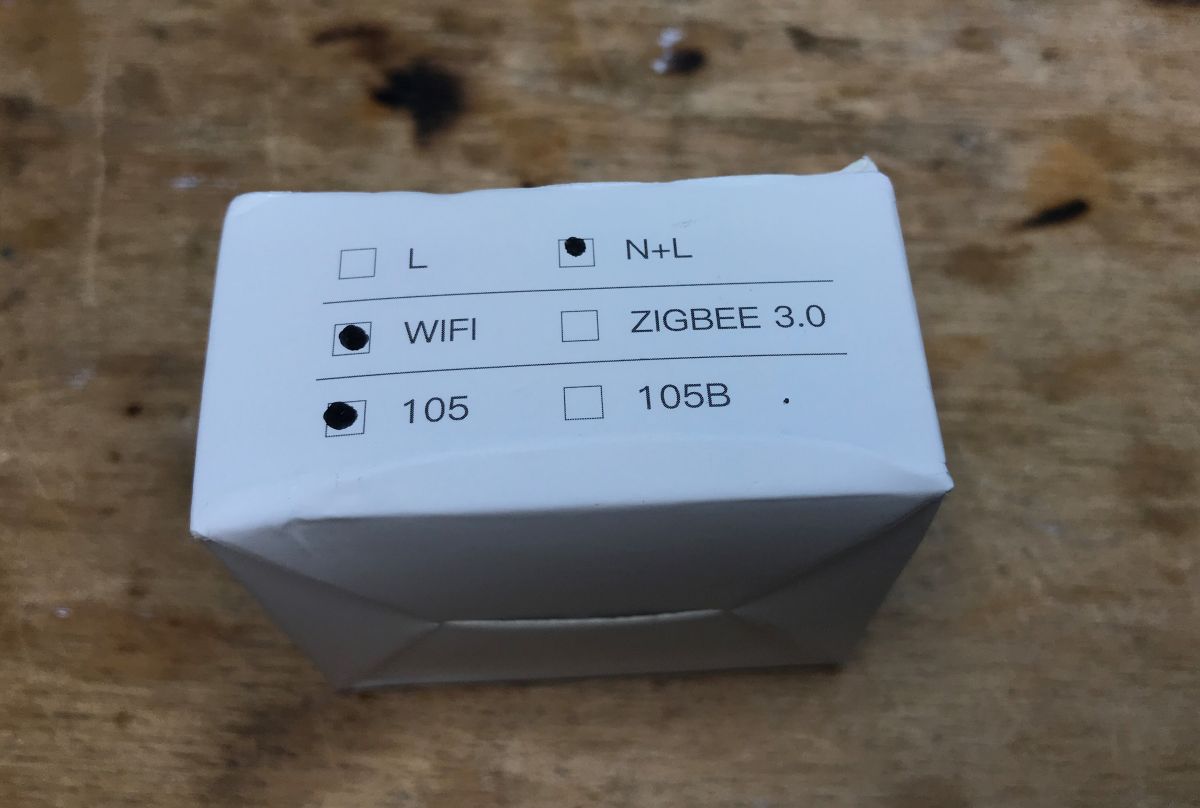
The maximum power of lighting for this dimmer is 150W. The WiFi standard is 2.4GHz 802.11 b/g/n. It works with Tuya Smart / Smart Life applications. Its size is 51x46x22mm.
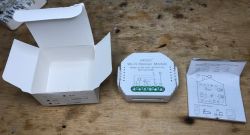
The set also includes instructions:


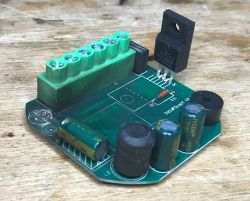
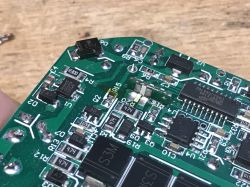
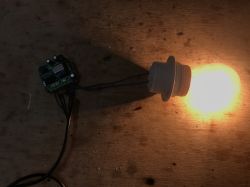
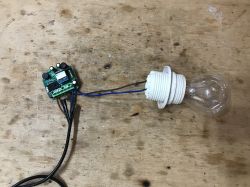
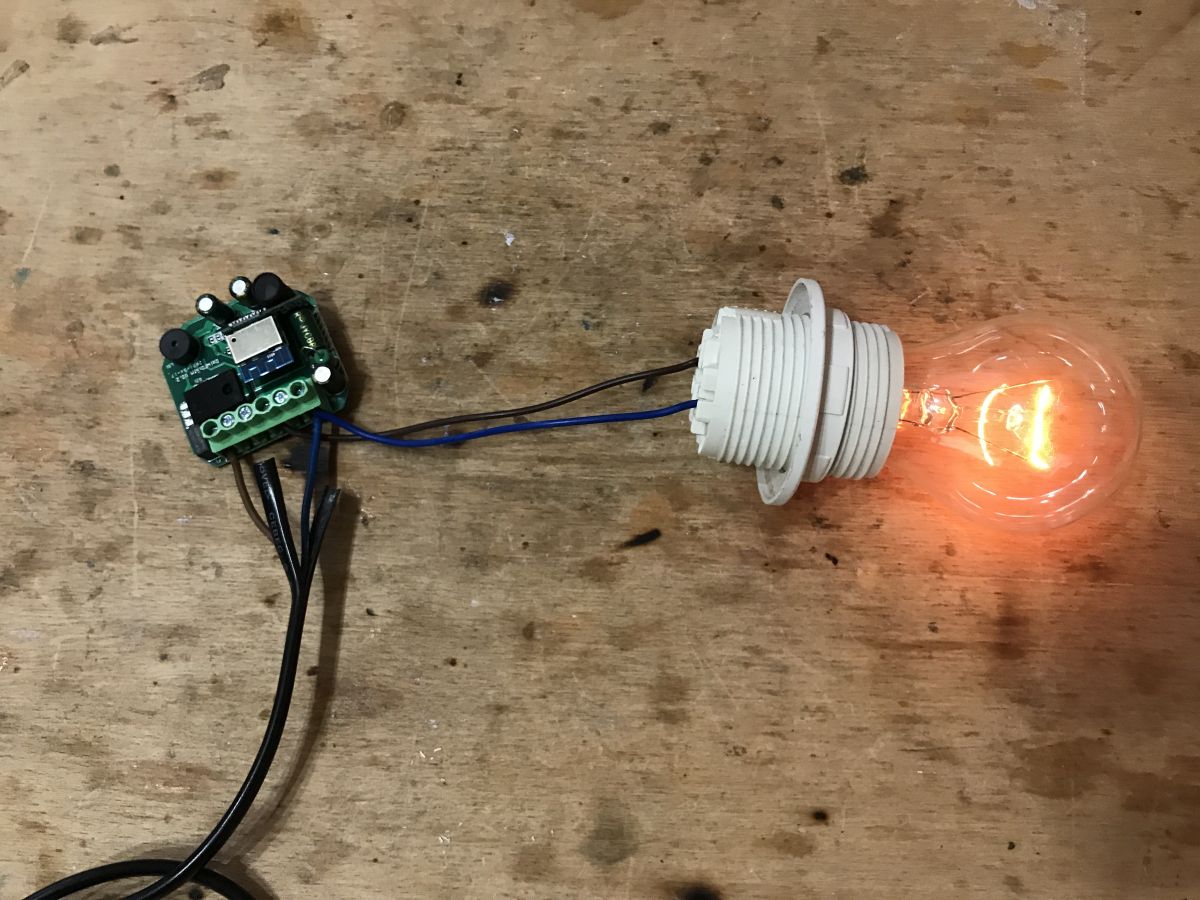
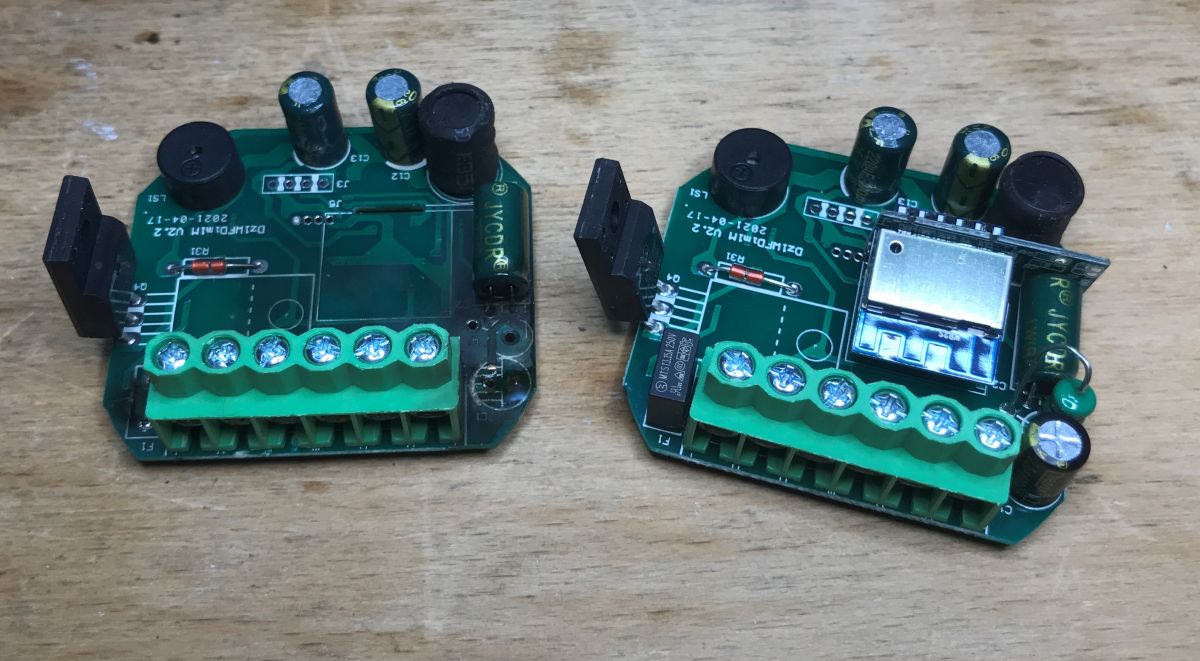
 The interior of the dimmer
Now it's time to look inside.
It is really easy to remove the casing.
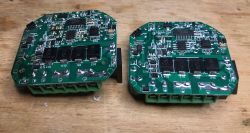
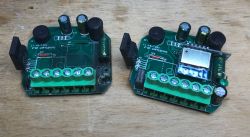
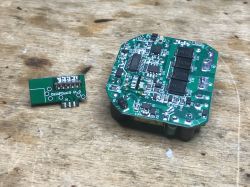
Here, the photo gallery will be a bit unusual, because I also have the same dimmer damaged, I got it from one of our users, so I will put both in the photos

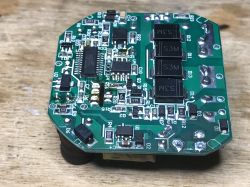
Two dimmers next to each other, functional and damaged:
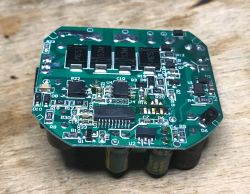
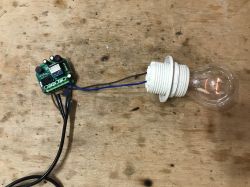
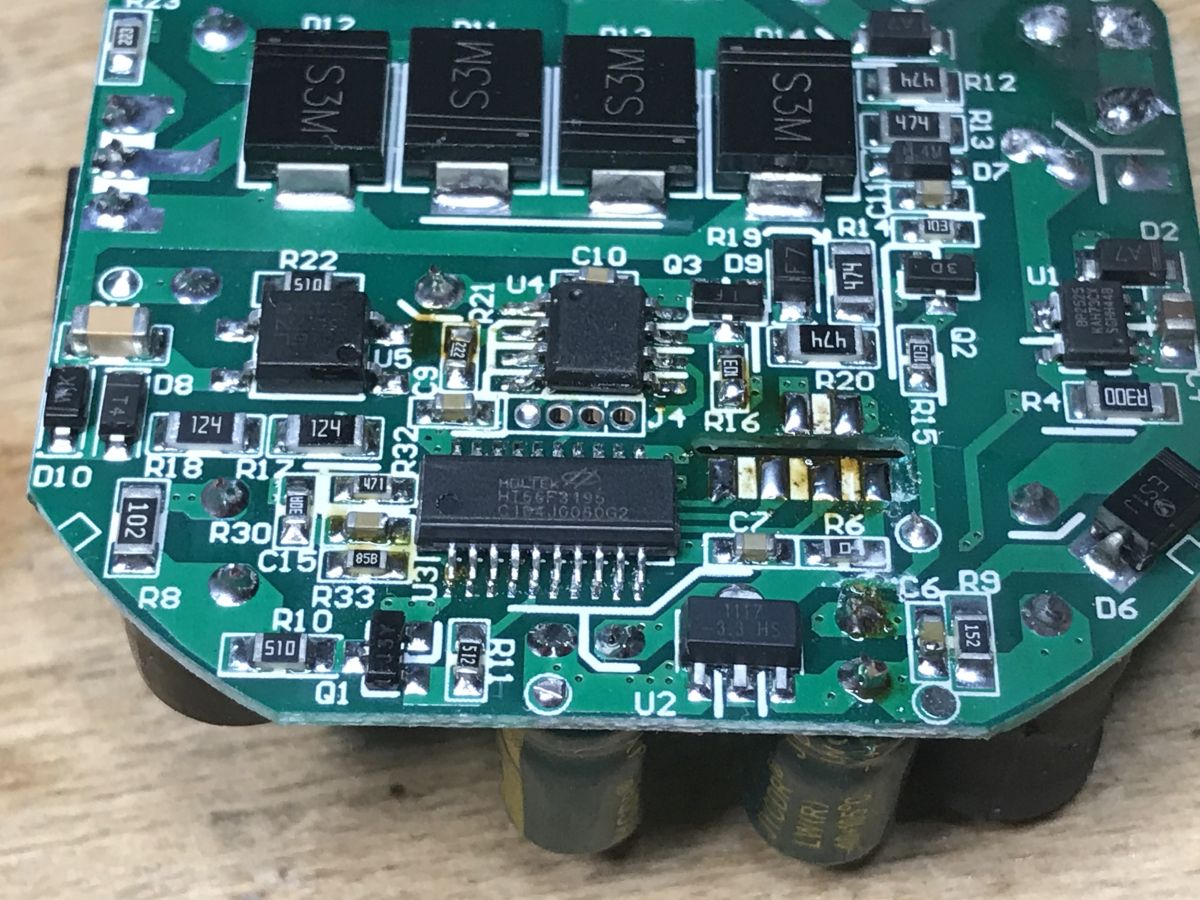
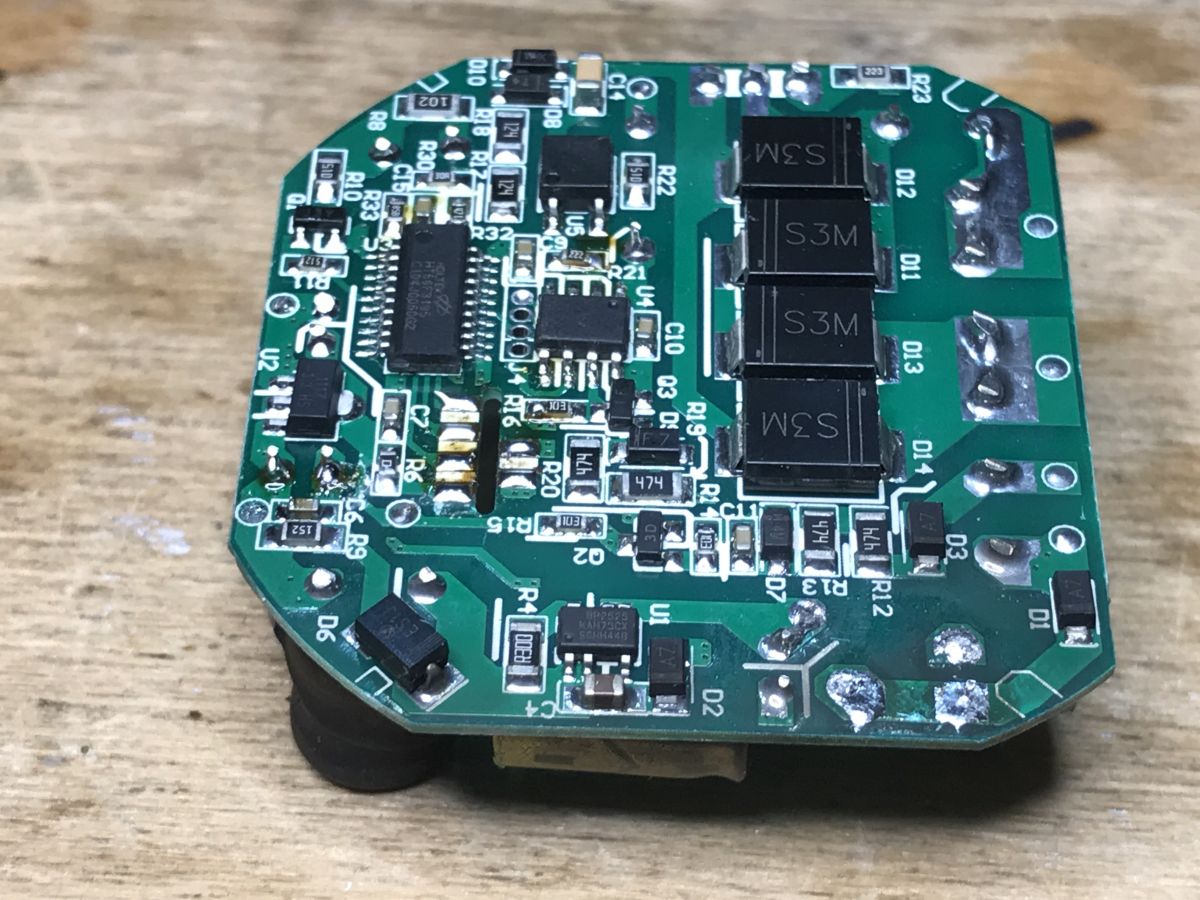
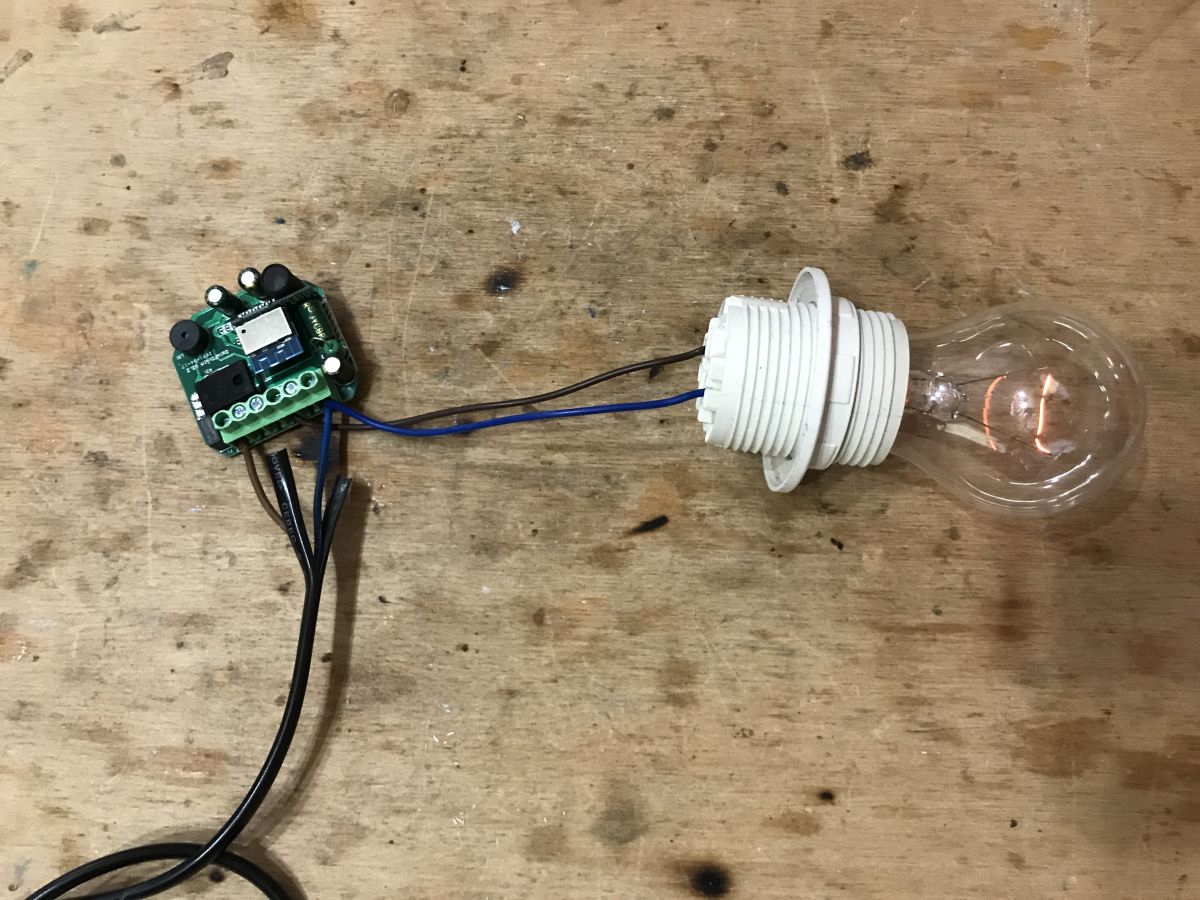
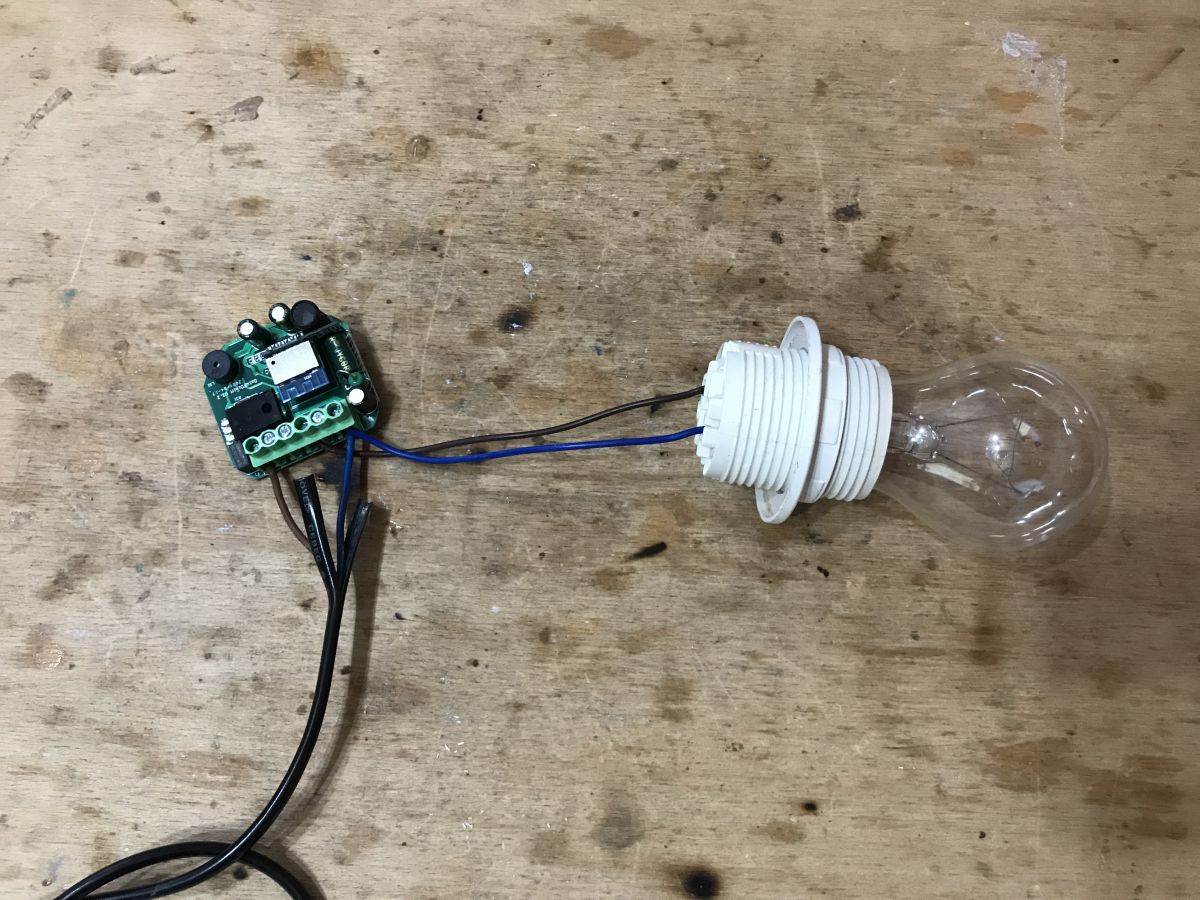
What does the dimmer have inside? First of all, the WB2S WiFi module + Holtek HT66F3195 microcontroller. They communicate via UART.
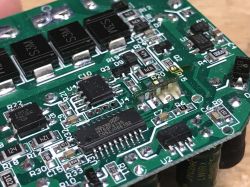
They are powered by BP2525 (transformerless power supply), and next to it we have a whole circuit associated with a dimmer (S3M rectifier diodes), an optocoupler to detect the sine cycle, an unmarked controller circuit and ... SIF12N65F. Originally I was expecting a triac here, but this is an N-channel MOSFET (Vds = 650V, RdsOn = 0.6Ohm, Id = 12A). This explains these four rectifier diodes. This dimmer apparently rectifies the mains voltage and then keyed it with a transistor.
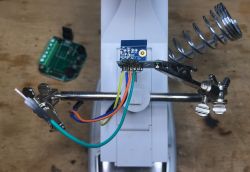
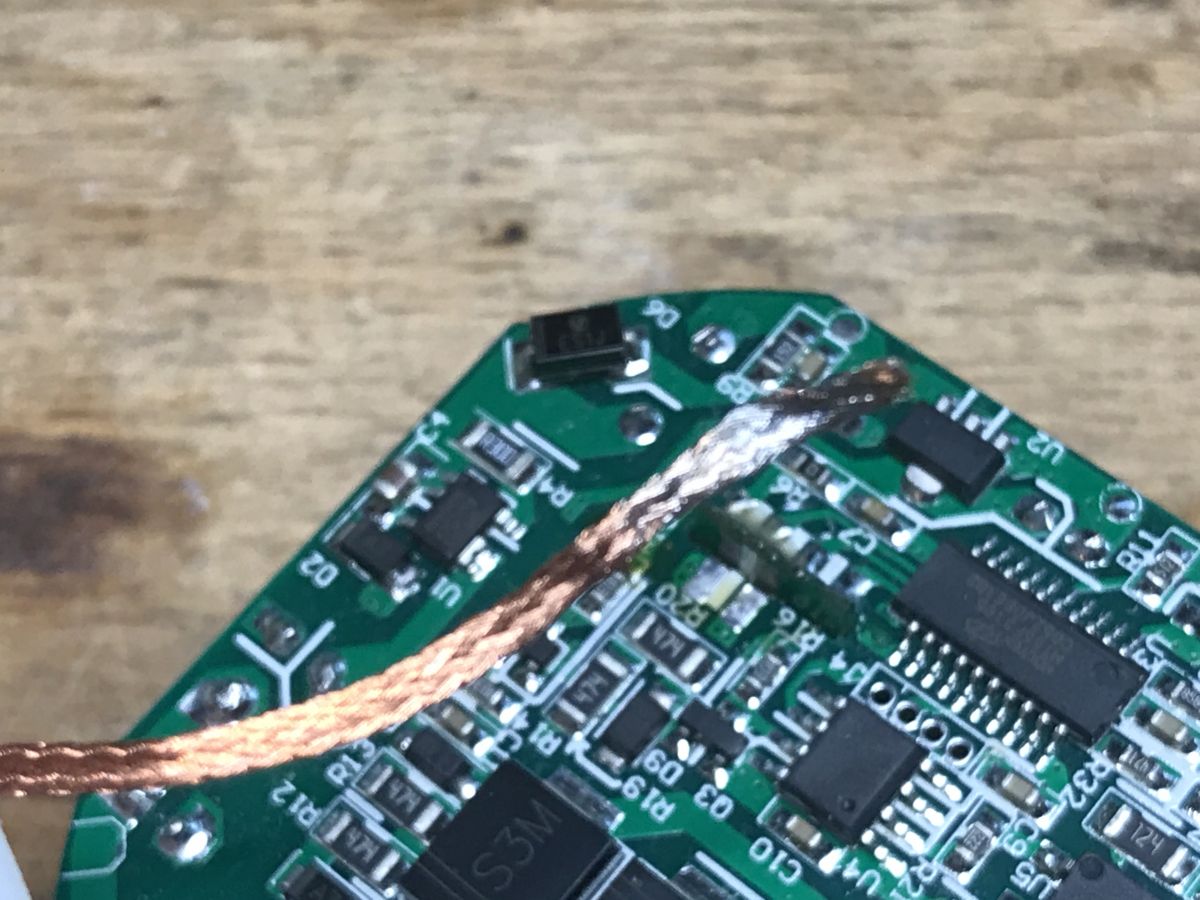
WB2S programming
I did the flashing just like in the previous topics in the series, by bkWriter 1.60.
I desoldered the WB2S from the board using a flux and a soldre wick. It's the easiest way for me because it makes sure that nothing on the RX / TX line will interfere with the loading of the firmware.

After that, you can run the OBK according to these topics:
Qiachip Smart Switch - BK7231N / CB2S - interior, programming
Light switch from the USA - Gosund Smart Switch SW5-A-V2.1 - BK7231T
Garden Tuya CCWFIO232PK Double Relay - BK7231T - Programming
OpenBeken configuration
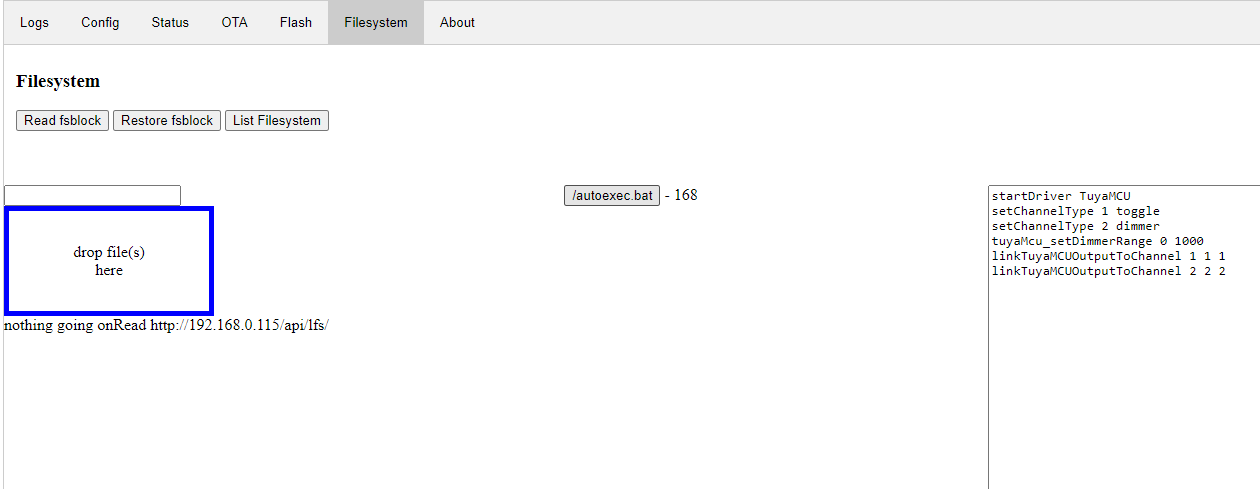
After the basic configuration that I discussed in the previous topics in the series, prepare a startup script (a file named autoexec.bat with the following content):
And in the App panel, drag it to the OBK file system:
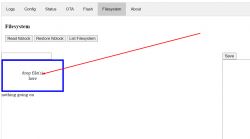
This script will execute after device boot. After dragging itself, it will not be executed, you have to restart device manually (e.g. with a button from the WWW panel).
After uploading:
Meaning of individual commands:
-
startDriver TuyaMCU - runs the TuyaMCU driver
-
setChannelType 1 toggle - set the type of channel number 1 to On / Off
-
setChannelType 2 dimmer - sets the type of channel number 2 on the dimmer
-
tuyaMcu_setDimmerRange 0 1000 - sets the value range of the TuyaMCU dimmer (for GUI it is from 0 to 100 always, to 0 to 1000 it is converted only for MCU)
-
linkTuyaMCUOutputToChannel 1 bool 1 - connects TuyaMCU dpID number 1 with bool type channel number 1
-
linkTuyaMCUOutputToChannel 2 val 2 - connects dpID number 2 of TuyaMCU with channel number 2 of value type
The dpID values can be different for different kinds of devices. If we want to add support for something new, we need to get to know it, e.g. by listening for packages. The dpID values can also be taken from the descriptions of devices intended for Tasmota, because Tuya often only changes the WiFi module and the rest remains the same.
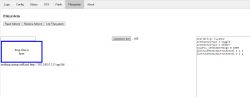
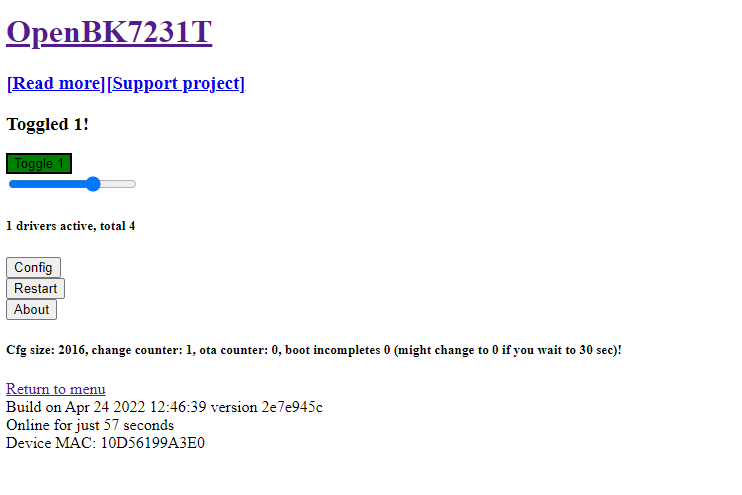
After a restart in the OpenBK panel, we have a separate switch and dimmer:
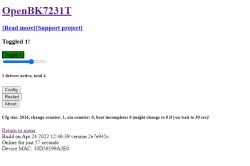
This is how the different levels of brightness look like:
 How does the button work?
At first glance, you might think that the button is not supported by OpenBeken. But nothing could be more wrong!
In this product, the button is connected to the TuyaMCU, not to the module with WiFi. This TuyaMCU supports the button. We have everything ready. We connect the button to the appropriate pin (S for switch):

Both bistable and monostable buttons can be used. The button works in such a way that after switching on the brightness gradually increases and we can choose what level we want by simply switching it again. If, on the other hand, the light is on, the quick switching on and off of the button will turn it off completely. All of this is done by HT66F3195.
Home Assistant support
Pairing with Home Assistant is very simple, all thanks to the automatic mapping of OpenBeken channels to TuyaMCU variables. The TuyaMCU dimmer is operated from the HA level in the same way as an ordinary PWM-based dimmer. Here is a sample Yaml code:
We have two separate channels - one determines the state of the device (on / off), the other - the brightness level.
Final application test:
[movie: 9a87cdbc15]
https://filmy.elektroda.pl/95_1654602681.mp4 [/ movie: 9a87cdbc15]
Final button test:
[movie: 9a87cdbc15]
https://filmy.elektroda.pl/4_1654602765.mp4 [/ movie: 9a87cdbc15]
What is noticeable in the movies? First of all, a step-by-step animation of the brightness shift that comes from Holtek's layout and cannot be changed. This is why the Home Assistant slider "clicks".
Also, there is a slight delay in reporting the status, but that's normal.
Support for scripts and commands over HTTP
OpenBeken supports sending Tasmota-style commands via the so-called "Tasmota HTTP". You can even send them via an ordinary browser.
This command will turn the lamp on at full brightness:
http://192.168.0.115/cm?cmnd=backlog%20setChannel%201%201;%20setChannel%202%20100
The one at 50% brightness:
http://192.168.0.115/cm?cmnd=backlog%20setChannel%201%201;%20setChannel%202%2050
It will turn it off after 5 seconds:
http://192.168.0.115/cm?cmnd=addRepeatingEvent%205%201%20setChannel%201%200
(addRepeatingEvent syntax: repetition period, number of repetitions, command)
There are also commands that add a value to the current brightness value, for example, but more on that another time.
Related topic
TuyaMCU is used in many devices, it also can be found in WiFi / RF433MHz fan controller. I recommend reading the topic:
QIACHIP Universal WIFI Ceiling Fan Light Remote Control Kit - BK7231N - CB2S
Summary
It seems that TuyaMCU is already well supported. Everything works well with MQTT and Home Assistant (along with both-way communication and status updates), and even allows you to script simple automations within OpenBeken itself.
Soon I will test more devices from TuyaMCU and also add more possibilities for the command interpreter (maybe possibility to execute simple scripts).
PS: And if you are interested in a slightly different dimmer with a different UART protocol (no longer TuyaMCU, but a different text protocol), please read
this topic .


Comments
@ p.kaczmarek2 As always, great job. I suggest an idea / challenge. Chip Beken BK7252. Cheap but noteworthy camera with AE. The thread working it out to HA in Py. Maybe you would lean in and do your own... [Read more]
A very interesting suggestion. Thanks, I haven't seen this before. The only thing I do not like is that under the BK7252 password in Google, this topic from the HA forum is second and there is some... [Read more]
@ p.kaczmarek2 Super. I see you put in a lot of effort, there are results and you share them! - You like SoC Beken :) It is known that producers are looking for savings. BK is cheaper than Realtek and... [Read more]
Have you heard of something like Supla? I recently bought a Nous A1 socket. It was supposed to be a gosund sp111 clone on the ESP8266 / 8285 and there was a BK chip in the middle. What are the differences... [Read more]
Ever tried it with the two channel dimmer? Trying to get that to work, but can't figure out how to configure it correctly. [Read more]
Well, then you should create two separate channels for two separate fnIds. What kind of dimmer do you have? [Read more]
Moe's WM-105B-MS... https://www.moeshouse.com/products/diy-smart-wifi-light-led-dimmer-switch-module-relay-switch-mart-life-tuya-app-remote-control-1-2-way-switch . The 2 Gang version. [Read more]
Well, I think there should be no problems, but do you know the dpIds of each of two dimmer channels? You need something like that: startDriver TuyaMCU setChannelType 1 toggle setChannelType 2... [Read more]
Hi, I have a GIRIER Tuya 1 Channel Dimmer like the posted here: https://github.com/arendst/Tasmota/discussions/14506 Only difference is that it came with a CB3S module. I sucessfully flashed OpenBeken... [Read more]
Is there a way to determine those? I don't know them... The tasmota config is {"NAME":"WM-105","GPIO":[0,2272,0,2304,0,0,0,0,0,0,0,0,0,0],"FLAG":0,"BASE":54,"CMND":"TuyaMCU... [Read more]
I think you might be correct here. Please try. Remember that you can also just look at the logs in OpenBeken console, maybe enable debug logging (type loglevel 7 in console and then ALSO change the... [Read more]
What are the 3 variables for linkTuyaMCUOutputToChannel? The documentation doesn't actually specify what they are. [Read more]
@efaden nice spot, it was indeed missing from readme, although in this very topic it was said what they are: https://obrazki.elektroda.pl/3154244100_1666879917_thumb.jpg Still, thank you for reporting.... [Read more]
Totally missed that. Thanks! [Read more]
If you can see something else missing from the readme on git, please also report it to me. This readme should be complete. [Read more]
Will do. The config that is built in for the Moe's 4 Gang also has some issues. The pins weren't assigned correctly. I think I figured out the correct ones though. Not sure if you wanted to look at... [Read more]
After a bit of UART sniffing, it seems that the MCU is not responding. WiFi module keep sending hearbeat but MCU doesnt respond. I flashed OpenBeken withou disconnect MCU from CB3S, it possible that... [Read more]
Did you figure out the correct setup for the 2 gang dimmer ? [Read more]
Not yet. Had to fix some other stuff and it got put on the back burner for a minute [Read more]