logo elektroda
logo elektroda
X
logo elektroda

Exploring the WiFi + RF Curtain Module [BK7231N] from Aliexpress: Features & Installation

atomphil 4236 25
ADVERTISEMENT
  • I bought a Wifi module with additional 433 MHz RF remote control from Aliexpress to be able to control our sunblind with HA.
    In contrast to the even cheaper models, it has eight instead of six terminals, so you don't need any additional connectors for the neutral conductor (and phase if you want to use the hardware buttons). This allows simpler, cleaner and safer cabling.

    WiFi+RF 433 MHz Module for Blinds with Remote on AliExpress

    The following was delivered w/o a box:
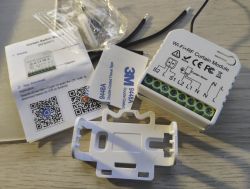
    Wi-Fi+RF curtain module with manual and accessories.

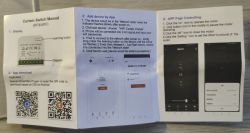
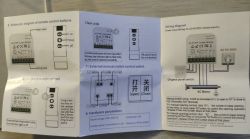
    Manual:

    Wi-Fi and RF curtain control module instruction manual Manual for WiFi module with RF 433 MHz remote control for blind operation.

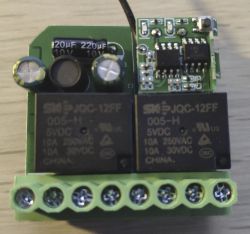
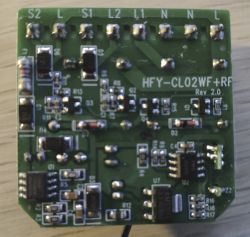
    The module from the outside and inside:
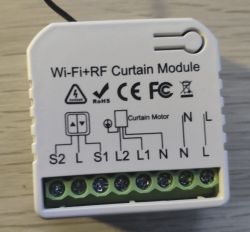
    Wi-Fi and RF curtain control module with visible connectors and labels. WiFi module with additional terminals and capacitors on the circuit board. Close-up of the PCB board of the HFY-CL02WF+RF Rev 2.0 module showing electronic components.

    Labelling on the board: HFY-CL02WF+RF Rev 2.0
    The radio modules are stacked with a jumper board. The Wifi module is under the RF module, from the side it is visible that it is a CB2S.

    Close-up of an electronic module showing the label CBE, circled in red.

    The module does not have to be desoldered to flash OBK, the contacts are easily accessible on the jumper board. Flashing with BK7231Flasher.exe is very easy, even all GPIOs are recognised correctly.
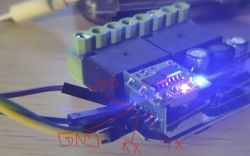
    Close-up of a WiFi module with RF 433 MHz remote, showing GND, VDD, RX, and TX labels.
    The Pin layout is as follows:
    PinSetting
    6Relais 1
    7Relais 3
    10WifiLED
    23Button 2
    24Button 1
    26Button 3


    Configuration:
    Code: JSON
    Log in, to see the code


    I have entered the following autoexec.bat (I have copied the script from here):

    
    startDriver SSDP
    PowerSave 1
    
    // P6  - Relay 1 Close
    // P7  - Relay 3 Open
    // P24 - Btn   1 Close
    // P23 - Btn   2 Stop
    // P26 - Btn   3 Open
    
    // 10  - Wifi LED
    
    // description
    SetChannelLabel 1 Close
    SetChannelLabel 2 Stop
    SetChannelLabel 3 Open
    
    // logic
    alias Reset_Stop_Close backlog SetChannel 2 0; SetChannel 1 0
    alias Reset_Stop_Open backlog SetChannel 2 0; SetChannel 3 0
    alias Reset_Close_Open backlog SetChannel 1 0; SetChannel 3 0
    
    addChangeHandler Channel1 == 1 Reset_Stop_Open
    addChangeHandler Channel1 == 1 backlog startScript autoexec.bat resetCloseAfterMinute
    addChangeHandler Channel2 == 1 Reset_Close_Open
    addChangeHandler Channel2 == 1 backlog startScript autoexec.bat resetStopAfterSecond
    addChangeHandler Channel3 == 1 Reset_Stop_Close
    addChangeHandler Channel3 == 1 backlog startScript autoexec.bat resetOpenAfterMinute
    
    // do not proceed
    return
    
    // Scripts
    
    resetCloseAfterMinute:
    // wait 30 seconds
    delay_s 30
    // stop opening
    SetChannel 1 0
    // done
    return
    
    resetStopAfterSecond:
    // wait 1 second
    delay_s 1
    // disable button
    SetChannel 2 0
    // reset all scripts
    stopAllScripts
    // done
    return
    
    resetOpenAfterMinute:
    // wait 30 seconds
    delay_s 30
    // stop opening
    SetChannel 3 0
    // done
    return


    Everything has worked wonderfully so far, the RF remote control works on the three buttons, so it can also be used. The control times in the script still need to be adapted to the respective roller shutter.

    I still have to work on a nice integration in Home Assistant. If anyone has any good advice on this, I would be happy to hear it.
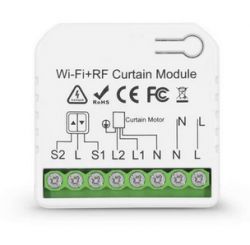
    Wi-Fi + RF curtain module with eight terminals and labels.

    Cool? Ranking DIY
    About Author
    atomphil
    Level 10  
    Offline 
    atomphil wrote 30 posts with rating 16, helped 4 times. Been with us since 2023 year.
  • ADVERTISEMENT
  • #2 20910126
    rodionzhitomirsky
    Level 2  
    Hi!

    Your post was very helpful in exploring the same device on my side! Thanks!

    I went a bit further and fully integrated it into the HA. Here is my autoexec.bat (it also sets up the Channels, but in a little bit different fashion):

    
    clearIO
    // ====== CONFIG ======
    // Used to hold the delay value in millis for sleeping during closing or opening loop
    // Play with your curtain and find the right value for this delay
    
    SetChannel 8 100
    
    // Delay to wait (millis) before starting to move the curtain after we close both relays
    // maybe it is not necessary, but I prefer it to be to ensure we do not have
    // both open and close relays powered simultaneously:
    SetChannel 7 500
    
    // MQTT stuff
    MqttClient lr_curtain_2
    MqttHost <YOUR_HA_MQTT_HOST>
    MqttUser <YOUR_HA_MQTT_USER>
    MqttPassword <YOUR_HA_MQTT_PASSWORD>
    
    // ====== END OF CONFIG ======
    
    // set channels 7, 8 and 9 to be private, so that we do not spend resources to publish their values:
    SetChannelPrivate 7 1
    SetChannelPrivate 8 1
    SetChannelPrivate 9 1
    
    // We start the main opening/closing loop with a delay
    // and than immediately have a calibration delay
    // so, let's decrement the calibration delay to not have them both
    // at the beginning of the loop:
    
    addChannel 7 -$CH8 0 5000
    
    PowerSave 1
    startDriver ntp
    
    // set pins and channels
    
    // Pin 6 is connected to opening relay
    SetPinRole 6 Rel
    // we also connect it to channel 1
    SetPinChannel 6 1
    SetChannelLabel 1 "Up"
    
    // Pin 6 is connected to closing relay
    SetPinRole 7 Rel
    // we also connect it to channel 3
    SetPinChannel 7 3
    SetChannelLabel 3 "Down"
    
    // 23 - stop button (virtual button emitted when open or close buttons are pressed for some time and then released)
    SetPinRole 23 Btn
    // 24 - opening button
    SetPinRole 24 Btn
    // 26 - closing button
    SetPinRole 26 Btn
    
    // CH9 - saved position for reboot
    // CH10 - current position
    // CH11 - target position
    
    SetChannelLabel 9 "Saved Position"
    setChannelType 9 Dimmer
    SetChannelLabel 10 "Current Position"
    setChannelType 10 Dimmer
    SetChannelLabel 11 "Target Position"
    setChannelType 11 Dimmer
    
    SetStartValue 9 -1
    
    // read position saved before reboot:
    SetChannel 10 $CH9
    SetChannel 11 $CH9
    
    // Setup LED:
    SetPinRole 10 LED
    SetPinChannel 10 4
    
    // ============= MQTT ============
    
    // Let it shine when MQTT connection is established:
    addEventHandler MQTTState 1 SetChannel 4 1
    addEventHandler MQTTState 0 SetChannel 4 0
    
    // [2] Always set MQTT Retain flag to all published values;
    // [7] Broadcast self state every N seconds:
    // [10] Broadcast self state on MQTT connect
    flags 1156
    
    // Inform HA about our values every 30 seconds, publish 2 values per second
    mqtt_broadcastInterval 30
    mqtt_broadcastItemsPerSec 2
    
    alias Set_Stop backlog setChannel 3 0; setChannel 1 0
    alias Start_Opening backlog stopAllScripts; startScript autoexec.bat openSkylight
    alias Start_Closing backlog stopAllScripts; startScript autoexec.bat closeSkylight
    alias Stop_All backlog stopAllScripts; startScript autoexec.bat stopSkylight
    alias Open_To_Target backlog stopAllScripts; startScript autoexec.bat openSkylightToTarget
    
    alias Stop_Clicked backlog Set_Stop; Stop_All
    
    // Click and fast release will effect in fully closing or opening.
    // If during this process we click on the same button again, it stops 
    addEventHandler OnClick 26 if $CH03==1 then Stop_Clicked else Start_Closing
    addEventHandler OnClick 24 if $CH01==1 then Stop_Clicked else Start_Opening
    addEventHandler OnClick 23 Stop_Clicked
    
    return
    
    // === OPEN TO GIVEN PERCENTAGE ===
    openSkylightToTarget:
    	Set_Stop
    	delay_ms $CH7
    openSkylightToTarget_again:
    	delay_ms $CH8
            if $CH10<$CH11 then goto continue_opening
            if $CH10>$CH11 then goto continue_closing
    
    	// we are done, we reached our target
    	// If we were opening or closing fully, we let the motor
    	// run for 3 seconds for the case we are uncalibrated:
    	if $CH10==0 then goto calibrate
    	if $CH10==100 then goto calibrate
    	goto openSkylightFinished
    continue_opening:
            // Unset_Close
    	setChannel 3 0
            // Set_Open
    	setChannel 1 1
    	// increment:
            addChannel 10 1 0 100
    	goto openSkylightToTarget_again
    
    continue_closing:
            // Unset_Open
    	setChannel 1 0
            // Set_Close
    	setChannel 3 1
    	// decrement:
            addChannel 10 -1 0 100
    	goto openSkylightToTarget_again
    
    calibrate:
    	delay_ms 3000
    	Set_Stop
    	SetChannel 9 $CH10
    	return
    openSkylightFinished:
    	Set_Stop
    	SetChannel 9 $CH10
    	return
    
    // === CLOSE ===
    closeSkylight:
    	SetChannel 11 0
    	goto openSkylightToTarget
    return
    
    // === OPEN ===
    openSkylight:
    	SetChannel 11 100
    	goto openSkylightToTarget
    return
    
    // === STOP ===
    stopSkylight:
    	Set_Stop
    	SetChannel 11 $CH10
    	SetChannel 9 $CH10
    return


    Here is my configuration.yaml:
    
    mqtt:
      sensor:
        - name: "lr_curtain_2_target"
          unique_id: "lr_curtain_2_target"
          state_topic: "lr_curtain_2/11/get"
          expire_after: 80
          entity_category: diagnostic
    
        - name: "lr_curtain_2_open_by"
          unique_id: "lr_curtain_2_open_by"
          state_topic: "lr_curtain_2/10/get"
          expire_after: 80
          entity_category: diagnostic
    
        - name: "lr_curtain_2_opening"
          unique_id: "lr_curtain_2_opening"
          state_topic: "lr_curtain_2/1/get"
          expire_after: 80
          entity_category: diagnostic
    
        - name: "lr_curtain_2_closing"
          unique_id: "lr_curtain_2_closing"
          state_topic: "lr_curtain_2/3/get"
          expire_after: 80
          entity_category: diagnostic
    
    cover:
      - platform: template
        covers:
          lr_curtain_2:
            unique_id: lr_curtain_2
            device_class: blind
            friendly_name: "Living Room Blind 2"
            value_template: "{% set cover_id = this.entity_id.split('.')[1]  %} {% if (states('sensor.' + cover_id + '_opening')|int(default = -1)) == 1 %} opening {% elif (states('sensor.' + cover_id + '_closing')|int(default = -1)) == 1  %} closing {% else %} None {% endif %}"
            position_template: "{% set cover_id = this.entity_id.split('.')[1]  %}{{ states('sensor.' + cover_id + '_open_by')|float|int }}"
            availability_template: "{% set cover_id = this.entity_id.split('.')[1]  %} {{ states('sensor.' + cover_id + '_opening') != 'unavailable' }}"
            open_cover:
              service: script.mqtt_cover_set_position
              data:
                position: 100
                device_entity_id: "{{ this.entity_id }}"
            close_cover:
              service: script.mqtt_cover_set_position
              data:
                position: 0
                device_entity_id: "{{ this.entity_id }}"
            stop_cover:
              service: script.mqtt_cover_stop
              data:
                device_entity_id: "{{ this.entity_id }}"
            set_cover_position:
              service: script.mqtt_cover_set_position
              data:
                position: "{{ position }}"
                device_entity_id: "{{ this.entity_id }}"


    scripts.yaml:

    
    mqtt_cover_stop:
      alias: MQTT Cover Stop
      mode: single
      sequence:
      - variables:
          cover_id: '{{ device_entity_id.split(''.'')[1] }}'
      - service: mqtt.publish
        data_template:
          qos: '1'
          topic: cmnd/{{cover_id}}/Stop_All
    mqtt_cover_set_position:
      alias: MQTT Cover Set Position
      mode: single
      sequence:
      - variables:
          cover_id: '{{ device_entity_id.split(''.'')[1] }}'
      - service: mqtt.publish
        data_template:
          qos: '1'
          topic: cmnd/{{cover_id}}/SetChannel
          payload: 11 {{position}}
      - wait_template: '{{ (states(''sensor.'' + cover_id + ''_target'')|int(default=-1)) == position }}'
        continue_on_timeout: false
        timeout:
          seconds: 5
      - service: mqtt.publish
        data_template:
          qos: '1'
          topic: cmnd/{{cover_id}}/Open_To_Target


    Hope this helps. Shall you have any ideas for improvement, let me know!
  • ADVERTISEMENT
  • #3 20913624
    p.kaczmarek2
    Moderator Smart Home
    That's a very nice script. We've also had some detailed scripting attempt presented here:
    Teardown of a Smart Life Curtain (Shutter) switch, Flashing, Configuring and setting up with HA
    Helpful post? Buy me a coffee.
  • #4 20913739
    rodionzhitomirsky
    Level 2  
    Thank you!

    The thread you mentioned was my inspiration :). I just wanted to go further and have a possibility to somehow calibrate the roller and have possibility to open it to certain percentage.
  • #5 20932845
    dawsonlebrown
    Level 3  
    Thanks for this. I have just bought the same module, and was relieved to find this thread.

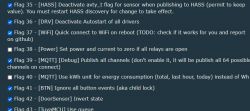
    I have implemented your scripts, and the module is working mostly correctly when triggering it through HA, but the physical buttons to open/close the shutter are not working. After digging a bit, I saw that the Flag 41 - [BTN] Ignore all button events (aka child lock) is being set each time the module reboots.

    I noticed that your autoexec.bat sets flags to 1156 - I assume this is a bitmap of flags 2,7 and 10, which are also set - so I'm not sure what is setting the other flags:
    Screenshot showing a list of flags with settings related to module operation and publication in a home automation system.

    When I turn off Flag 41 and click the submit button, the physical switches now work, but after a reboot, flag 41 is turned back on.

    I'm new to OBK, and hope that someone here will be able to help me understand what it is that I've not set up correctly.

    Added after 1 [hours] 36 [minutes]:

    Hi Again,

    A bit more playing around and I saw that when I flashed the module, I used an older firmware: OpenBK7231N_QIO_1.17.308, after upgrading to OpenBK7231N_QIO_1.17.427 - Flag 41 is no longer set, so the buttons are working after a reboot of the module.

    Thanks again for your work on this module.
  • #6 20933040
    p.kaczmarek2
    Moderator Smart Home
    That's a very strange issue.
    I tried to replicate that in a self test:
    
    flags 1156
    

    here:
    https://github.com/openshwprojects/OpenBK7231...mmit/620df5ffe055e9e951d5bf2b5d323d3a0d28993b
    but it seems to work correctly. Only the expected flags are set. Can you provide more information how to reproduce your issue?
    Helpful post? Buy me a coffee.
  • ADVERTISEMENT
  • #7 20933371
    dawsonlebrown
    Level 3  
    Sure, what I did was:
    using BK7231Flasher.exe 1.1.6 and with an identical "curtain module as in the OP", I clicked the "Do backup and flash new" button without having first downloaded the latest firmware and selecting it in the drop down list. The first fimware I downloaded was OpenBK7231N_QIO_1.17.308.bin - so each time I open the application, this is the default firmware selected in the "Select firmare:" drop down. ( perhaps it would be more useful if this defaulted to the most recent instead of the oldest firmware in the folder? - i'll raise an issue on github in case the devs agree with me :) )

    From memory, the steps I then followed were:
    Connected to the wifi hotspot of the board
    I then copy/pasted the json config from the OP - but as best as I can remember, I couldn't see how to upload this JSON to the module, so I selected the (Tuya) WiFi + RF Curtain Module (HFY-CL02WF+RF) option in the Devices list and used the Copy Device Settings button then Save Pins button to save the config to the module.
    I created an autoexec.bat file and copy/pasted the contents from the OP
    To configure it in HA, I then updatd my mqtt.yaml, scripts.yaml and config.yaml based on the followup post by rodionzhitomirsky. I had renamed my components from skylight to shutters, so after getting it to the point where the HA buttons would trip the relays, I installed the module - but could now only control the shutters by HA, and not the switch.
    I switched over to the autoexec.bat file supplied by rodionzhitomirsky - but could still only control by HA
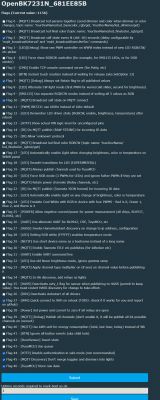
    When I saw Flag 41 set, I tested unsetting it and straight-away the physical switch was working, but after rebooting the device, either by cycling power or by using the restart button in the web interface, the flag was reset - I also noticed that Flag 39 was set and indeed was sending a lot of noise to my MQTT broker.

    By the way, as you will have noticed in the pic I uploaded, Flags 35,36,37,39,41,42 and 43 were all set and seem to be automatically reset after each reboot. With the latest firmware now installed, flags 37,44,45 and 46 are all set and in the same manner are reset autmatically at each reboot.

    By the way, at the top of the flags screen, the current value is shown as 1156, even though these extra flags are shown as set further down the page - this was the same with the older firmware:
    Screenshot of flag settings for OpenBK7231N.
  • #8 20935106
    Angel0fDeath
    Level 13  
    I found the same issue and reported here:
    https://www.elektroda.com/rtvforum/topic4022907-60.html
    However by me that occurs after issuing flags 0 command (to clear all flags)
    If I clear them manual,y, save and reboot they are not set back. Used firmware is 1.17.432

    About number in the flags page - also already reported. The number is counting only the first 32 flags. With all flags there will be overflow of int variable. Still not fixed. My suggestion was just to list active flags, since to decode this number you will need calculator, especially when few flags are set
  • #9 21242292
    cikaybe
    Level 2  
    Is there any rf remote configuration that is needed?
  • ADVERTISEMENT
  • #10 21242422
    rodionzhitomirsky
    Level 2  
    No. Rf functionality is implemented by other hardware apparently. So, you still can bind a remote and it will act as the native buttons.
  • #11 21352802
    GAAD
    Level 17  
    The controllers work, but I have a problem as above with
    flags 1156

    I also cannot calibrate the shutters with a longer operating time.
    Can someone describe the calibration process step by step?
    If I know the time the roller needs to close, can I save it in autoxec? I know that this causes incorrect percentage readings because the downward movement is faster than the upward movement, but it is more important that the roller opens and closes completely.
  • #12 21353003
    p.kaczmarek2
    Moderator Smart Home
    autoexec.bat script was not made by me and may not be perfect.

    If you have some time and will, we could try to chat together and come up with a better driver, but you would have to do the testing and planning, I will do the implementation (programming), you don't have to program. You see, I don't have such shutters, but maybe we could somehow overcome it, if you specify exactly what kind of behaviour do you need from OBK...
    Helpful post? Buy me a coffee.
  • #13 21353191
    GAAD
    Level 17  
    Of course I would be very happy to thank you for wanting to help.

    First problem - configuration as a roller shutter as in Tasmota, which automatically excludes the activation of both relays - if I remember correctly SetOption80. Blind switches exclude such a situation but not everyone has to have them, they are more expensive than a double momentary switch, additionally, both relays can be activated from the HA level or the website.

    The measurement procedure shown in Tasmota is too complicated. The controller measures time, not distance, so it is much easier to measure time.

    The simple option like in Tuya is to indicate the time, preferably opening the blind in seconds. Most blinds have adjustable limiters, so it is enough to set the time in the controller to be slightly longer and the blind will always close or open. This has a disadvantage because the percentage readings will never show the correct position of the blind because the first few seconds are for the lamels opening and after then the blind starts.

    Therefore, for more demanding users, we need more time parameters: (2 maybe 4)
    1 - time for clearance before the bottom of the blind starts to rise
    2 - time formoving up and counting the percentage opening
    similarly down
    2 - moving down and counting the %
    1 - time for closing.

    This second version should correctly show percentage readings and ensure correct closing/opening.
    Since the opening movement is slower, calibration should always be started on a closed blind.
    We can also use 4 different time intervals, but this probably only makes sense for very long blinds when the up and down movement is very different.

    So the simplest calibration based on one time could be done with the keys.

    For example, a long 5 or 10 second press of the down button starts the calibration - we can use the diode's flashing as a signal to turn it on. Then we open the blind with a short press up and finish with a short press up too when it opens completely.
    A simple procedure based on the Tuya original.

    For the perfect, time measurement and entering the results via the website - for me, faster, more convenient and much more precise.

    Wojtek
  • #14 21353218
    p.kaczmarek2
    Moderator Smart Home
    I see... now, how should it be implemented in OBK? Can you make a draft (in Paint or on paper) of OBK web panel for shutter controller?

    What if there is a power outage during opening/closing? Should OBK remember current % and state in flash? Or should it somehow "reset" on reboot?

    Added after 9 [minutes]:

    GAAD wrote:
    because the first few seconds are for the lamels opening and after then the blind starts.


    GAAD wrote:

    1 - time for clearance before the bottom of the blind starts to rise

    GAAD wrote:
    1 - time for closing.

    So this extra time is only when shutters either begin to open or finish to close? And not when they stop opening and start closing...

    Added after 5 [minutes]:

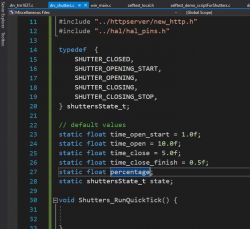
    I've did such draft so far:
    Screenshot of source code in an editor showing shutter state definition and default values for opening and closing times.
    Helpful post? Buy me a coffee.
  • #15 21353788
    GAAD
    Level 17  
    p.kaczmarek2 wrote:
    What if there is a power outage during opening/closing? Should OBK remember current % and state in flash? Or should it somehow "reset" on reboot?


    I think it's better for it to remember the state before the restart.

    p.kaczmarek2 wrote:
    So this extra time is only when shutters either begin to open or finish to close? And not when they stop opening and start closing...


    Exactly. This is the time to start opening and finish closing.

    We also need to exclude switching on during restart after incorrect flag writing. I don't know why but sometimes despite setting
    
    flags 1156
    

    they are not saved correctly and both relays switch on during restart.
    Wojtek
  • #16 21362566
    gliga69
    Level 1  
    Hi,

    I’m trying to enhance the autoexec.bat file mentioned above. I’d like to add three buttons to the web interface that work in sync with the physical buttons, and I also want the physical buttons to affect the slider. My code is almost working, but I can’t get the stop button to synchronize with the end stops.
    Please help me solve this issue. See my autoexec below.

    Thank you in advance,

    Peter

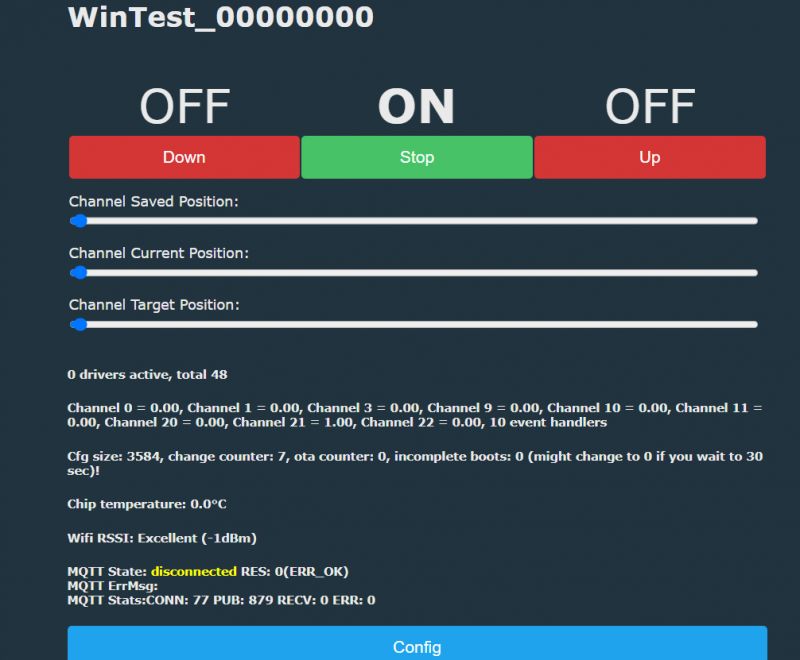
    User interface for managing curtain positions with three buttons: Down, Stop, and Up.


    clearIO
    // ====== CONFIG ======
    // Used to hold the delay value in millis for sleeping during closing or opening loop
    // Play with your curtain and find the right value for this delay
    
    SetChannel 8 100
    
    // Delay to wait (millis) before starting to move the curtain after we close both relays
    // maybe it is not necessary, but I prefer it to be to ensure we do not have
    // both open and close relays powered simultaneously:
    SetChannel 7 0    //500
    
    // MQTT stuff
    //MqttClient lr_curtain_2
    //MqttHost <YOUR_HA_MQTT_HOST>
    //MqttUser <YOUR_HA_MQTT_USER>
    //MqttPassword <YOUR_HA_MQTT_PASSWORD>
    
    // ====== END OF CONFIG ======
    
    // set channels 7, 8 and 9 to be private, so that we do not spend resources to publish their values:
    SetChannelPrivate 7 1
    SetChannelPrivate 8 1
    SetChannelPrivate 9 1
    
    // HIde relays from GUI
    setChannelVisible 1 0
    setChannelVisible 3 0
    
    // We start the main opening/closing loop with a delay
    // and than immediately have a calibration delay
    // so, let's decrement the calibration delay to not have them both
    // at the beginning of the loop:
    
    addChannel 7 -$CH8 0 5000
    
    PowerSave 1
    //startDriver ntp
    
    // set pins and channels
    
    // Pin 6 is connected to opening relay
    SetPinRole 6 Rel
    // we also connect it to channel 1
    SetPinChannel 6 1
    SetChannelLabel 1 "Up_Relay"
    
    // Pin 6 is connected to closing relay
    SetPinRole 7 Rel
    // we also connect it to channel 3
    SetPinChannel 7 3
    SetChannelLabel 3 "Down_Relay"
    
    setChannelType 20 Toggle
    SetChannelLabel 20 "Down"
    setChannelType 21 Toggle
    SetChannelLabel 21 "Stop"
    SetChannel 21 1
    setChannelType 22 Toggle
    SetChannelLabel 22 "Up"
    
    // 23 - stop button (virtual button emitted when open or close buttons are pressed for some time and then released)
    SetPinRole 23 Btn
    // 24 - opening button
    SetPinRole 24 Btn
    // 26 - closing button
    SetPinRole 26 Btn
    
    // CH9 - saved position for reboot
    // CH10 - current position
    // CH11 - target position
    
    SetChannelLabel 9 "Saved Position"
    setChannelType 9 Dimmer
    SetChannelLabel 10 "Current Position"
    setChannelType 10 Dimmer
    SetChannelLabel 11 "Target Position"
    setChannelType 11 Dimmer
    
    SetStartValue 9 -1
    
    // read position saved before reboot:
    SetChannel 10 $CH9
    SetChannel 11 $CH9
    
    // Setup LED:
    //SetPinRole 10 LED
    //SetPinChannel 10 4
    
    // ============= MQTT ============
    
    // Let it shine when MQTT connection is established:
    //addEventHandler MQTTState 1 SetChannel 4 1
    //addEventHandler MQTTState 0 SetChannel 4 0
    
    // [2] Always set MQTT Retain flag to all published values;
    // [7] Broadcast self state every N seconds:
    // [10] Broadcast self state on MQTT connect
    //flags 1156
    
    // Inform HA about our values every 30 seconds, publish 2 values per second
    //mqtt_broadcastInterval 30
    //mqtt_broadcastItemsPerSec 2
    
    alias Set_Stop backlog setChannel 3 0; setChannel 1 0
    alias Start_Opening backlog SetChannel 22 1; stopAllScripts; startScript autoexec.bat openSkylight
    alias Start_Closing backlog SetChannel 20 1; stopAllScripts; startScript autoexec.bat closeSkylight
    alias Stop_All backlog stopAllScripts; startScript autoexec.bat stopSkylight
    alias Open_To_Target backlog stopAllScripts; startScript autoexec.bat openSkylightToTarget
    
    alias Stop_Clicked backlog Set_Stop; Stop_All; SetChannel 21 1
    
    // Click and fast release will effect in fully closing or opening.
    // If during this process we click on the same button again, it stops 
    
    addEventHandler OnHoldStart 26 if $CH03==1 then Stop_Clicked else Start_Closing
    addChangeHandler Channel20 == 1 if $CH03==1 then Stop_Clicked else Start_Closing
    
    addEventHandler OnHoldStart 24 if $CH01==1 then Stop_Clicked else Start_Opening
    addChangeHandler Channel22 == 1 if $CH01==1 then Stop_Clicked else Start_Opening
    
    addEventHandler OnClick 23 backlog Stop_Clicked
    
    addEventHandler OnRelease 24 backlog Stop_Clicked
    addEventHandler OnRelease 26 backlog Stop_Clicked 
    
    addChangeHandler Channel20 == 1 backlog SetChannel 21 0; SetChannel 22 0
    addChangeHandler Channel21 == 1 backlog SetChannel 20 0; SetChannel 22 0
    addChangeHandler Channel22 == 1 backlog SetChannel 20 0; SetChannel 21 0
    
    return
    
    // === OPEN TO GIVEN PERCENTAGE ===
    openSkylightToTarget:
       Set_Stop
       delay_ms $CH7
    openSkylightToTarget_again:
       delay_ms $CH8
            if $CH10<$CH11 then goto continue_opening
            if $CH10>$CH11 then goto continue_closing
    
       // we are done, we reached our target
       // If we were opening or closing fully, we let the motor
       // run for 3 seconds for the case we are uncalibrated:
       if $CH10==0 then goto calibrate
       if $CH10==100 then goto calibrate
       goto openSkylightFinished
    continue_opening:
            // Unset_Close
       setChannel 3 0
            // Set_Open
       setChannel 1 1
       // increment:
            addChannel 10 1 0 100
       goto openSkylightToTarget_again
    
    continue_closing:
            // Unset_Open
       setChannel 1 0
            // Set_Close
       setChannel 3 1
       // decrement:
            addChannel 10 -1 0 100
       goto openSkylightToTarget_again
    
    calibrate:
       delay_ms 3000
       Set_Stop
       SetChannel 9 $CH10
       return
    openSkylightFinished:
       Set_Stop
       SetChannel 9 $CH10
       return
    
    // === CLOSE ===
    closeSkylight:
       SetChannel 11 0
       goto openSkylightToTarget
    return
    
    // === OPEN ===
    openSkylight:
       SetChannel 11 100
       goto openSkylightToTarget
    return
    
    // === STOP ===
    stopSkylight:
       Set_Stop
       SetChannel 11 $CH10
       SetChannel 9 $CH10
    return
    
  • #17 21376628
    GAAD
    Level 17  
    It seems to me that it would be necessary to make one universal script for all roller shutter control modules.
    The declared parameters are:
    1. flag in General Flag: curtain switch - automagically 2 buttons: UP, DOWN or 3: UP, STOP, DOWN with exclusion of switching on both directions simultaneously.
    2) In autoexec: pins of relays and buttons, i.e. 4 parameters
    3. on the OBK home page: time of the complete opening of the roller shutter in seconds.

    These basic parameters will allow the operation of any roller shutter controller after uploading the OBK for roller shutters with limit switches, as the limit switch will stop the motor in the extreme positions anyway and the relay can switch off after a second or two as closing takes a minimum of time.
    There is no point in configuring LEDs and an additional internal button because these controllers end up in cans in the wall anyway and the less they light the less they heat up and the can is quite cramped and there is no risk of accidentally activating the button.

    An option for the discerning:
    additional parameters:
    - separate times for unsealing / opening / closing / resealing the roller shutter
    - percentage channels, which only record the position of the roller shutter for opening and closing to make 50% close.

    This would require adding more channels and including them in the HA. Whether the channels will be as declared variables or fixed is up to the authors how much it complicates the programme. If they are fixed, they have to be changed if one has the whole configuration of roller shutters in HA, if they are variable and configurable, one can declare them as they already are in HA.
  • #18 21480072
    antonioriosarroyo
    Level 4  
    rodionzhitomirsky wrote:
    Hi!

    Your post was very helpful in exploring the same device on my side! Thanks!

    I went a bit further and fully integrated it into the HA. Here is my autoexec.bat (it also sets up the Channels, but in a little bit different fashion):

    
    clearIO
    // ====== CONFIG ======
    // Used to hold the delay value in millis for sleeping during closing or opening loop
    // Play with your curtain and find the right value for this delay
    
    SetChannel 8 100
    
    // Delay to wait (millis) before starting to move the curtain after we close both relays
    // maybe it is not necessary, but I prefer it to be to ensure we do not have
    // both open and close relays powered simultaneously:
    SetChannel 7 500
    
    // MQTT stuff
    MqttClient lr_curtain_2
    MqttHost <YOUR_HA_MQTT_HOST>
    MqttUser <YOUR_HA_MQTT_USER>
    MqttPassword <YOUR_HA_MQTT_PASSWORD>
    
    // ====== END OF CONFIG ======
    
    // set channels 7, 8 and 9 to be private, so that we do not spend resources to publish their values:
    SetChannelPrivate 7 1
    SetChannelPrivate 8 1
    SetChannelPrivate 9 1
    
    // We start the main opening/closing loop with a delay
    // and than immediately have a calibration delay
    // so, let's decrement the calibration delay to not have them both
    // at the beginning of the loop:
    
    addChannel 7 -$CH8 0 5000
    
    PowerSave 1
    startDriver ntp
    
    // set pins and channels
    
    // Pin 6 is connected to opening relay
    SetPinRole 6 Rel
    // we also connect it to channel 1
    SetPinChannel 6 1
    SetChannelLabel 1 "Up"
    
    // Pin 6 is connected to closing relay
    SetPinRole 7 Rel
    // we also connect it to channel 3
    SetPinChannel 7 3
    SetChannelLabel 3 "Down"
    
    // 23 - stop button (virtual button emitted when open or close buttons are pressed for some time and then released)
    SetPinRole 23 Btn
    // 24 - opening button
    SetPinRole 24 Btn
    // 26 - closing button
    SetPinRole 26 Btn
    
    // CH9 - saved position for reboot
    // CH10 - current position
    // CH11 - target position
    
    SetChannelLabel 9 "Saved Position"
    setChannelType 9 Dimmer
    SetChannelLabel 10 "Current Position"
    setChannelType 10 Dimmer
    SetChannelLabel 11 "Target Position"
    setChannelType 11 Dimmer
    
    SetStartValue 9 -1
    
    // read position saved before reboot:
    SetChannel 10 $CH9
    SetChannel 11 $CH9
    
    // Setup LED:
    SetPinRole 10 LED
    SetPinChannel 10 4
    
    // ============= MQTT ============
    
    // Let it shine when MQTT connection is established:
    addEventHandler MQTTState 1 SetChannel 4 1
    addEventHandler MQTTState 0 SetChannel 4 0
    
    // [2] Always set MQTT Retain flag to all published values;
    // [7] Broadcast self state every N seconds:
    // [10] Broadcast self state on MQTT connect
    flags 1156
    
    // Inform HA about our values every 30 seconds, publish 2 values per second
    mqtt_broadcastInterval 30
    mqtt_broadcastItemsPerSec 2
    
    alias Set_Stop backlog setChannel 3 0; setChannel 1 0
    alias Start_Opening backlog stopAllScripts; startScript autoexec.bat openSkylight
    alias Start_Closing backlog stopAllScripts; startScript autoexec.bat closeSkylight
    alias Stop_All backlog stopAllScripts; startScript autoexec.bat stopSkylight
    alias Open_To_Target backlog stopAllScripts; startScript autoexec.bat openSkylightToTarget
    
    alias Stop_Clicked backlog Set_Stop; Stop_All
    
    // Click and fast release will effect in fully closing or opening.
    // If during this process we click on the same button again, it stops 
    addEventHandler OnClick 26 if $CH03==1 then Stop_Clicked else Start_Closing
    addEventHandler OnClick 24 if $CH01==1 then Stop_Clicked else Start_Opening
    addEventHandler OnClick 23 Stop_Clicked
    
    return
    
    // === OPEN TO GIVEN PERCENTAGE ===
    openSkylightToTarget:
       Set_Stop
       delay_ms $CH7
    openSkylightToTarget_again:
       delay_ms $CH8
            if $CH10<$CH11 then goto continue_opening
            if $CH10>$CH11 then goto continue_closing
    
       // we are done, we reached our target
       // If we were opening or closing fully, we let the motor
       // run for 3 seconds for the case we are uncalibrated:
       if $CH10==0 then goto calibrate
       if $CH10==100 then goto calibrate
       goto openSkylightFinished
    continue_opening:
            // Unset_Close
       setChannel 3 0
            // Set_Open
       setChannel 1 1
       // increment:
            addChannel 10 1 0 100
       goto openSkylightToTarget_again
    
    continue_closing:
            // Unset_Open
       setChannel 1 0
            // Set_Close
       setChannel 3 1
       // decrement:
            addChannel 10 -1 0 100
       goto openSkylightToTarget_again
    
    calibrate:
       delay_ms 3000
       Set_Stop
       SetChannel 9 $CH10
       return
    openSkylightFinished:
       Set_Stop
       SetChannel 9 $CH10
       return
    
    // === CLOSE ===
    closeSkylight:
       SetChannel 11 0
       goto openSkylightToTarget
    return
    
    // === OPEN ===
    openSkylight:
       SetChannel 11 100
       goto openSkylightToTarget
    return
    
    // === STOP ===
    stopSkylight:
       Set_Stop
       SetChannel 11 $CH10
       SetChannel 9 $CH10
    return


    Here is my configuration.yaml:
    
    mqtt:
      sensor:
        - name: "lr_curtain_2_target"
          unique_id: "lr_curtain_2_target"
          state_topic: "lr_curtain_2/11/get"
          expire_after: 80
          entity_category: diagnostic
    
        - name: "lr_curtain_2_open_by"
          unique_id: "lr_curtain_2_open_by"
          state_topic: "lr_curtain_2/10/get"
          expire_after: 80
          entity_category: diagnostic
    
        - name: "lr_curtain_2_opening"
          unique_id: "lr_curtain_2_opening"
          state_topic: "lr_curtain_2/1/get"
          expire_after: 80
          entity_category: diagnostic
    
        - name: "lr_curtain_2_closing"
          unique_id: "lr_curtain_2_closing"
          state_topic: "lr_curtain_2/3/get"
          expire_after: 80
          entity_category: diagnostic
    
    cover:
      - platform: template
        covers:
          lr_curtain_2:
            unique_id: lr_curtain_2
            device_class: blind
            friendly_name: "Living Room Blind 2"
            value_template: "{% set cover_id = this.entity_id.split('.')[1]  %} {% if (states('sensor.' + cover_id + '_opening')|int(default = -1)) == 1 %} opening {% elif (states('sensor.' + cover_id + '_closing')|int(default = -1)) == 1  %} closing {% else %} None {% endif %}"
            position_template: "{% set cover_id = this.entity_id.split('.')[1]  %}{{ states('sensor.' + cover_id + '_open_by')|float|int }}"
            availability_template: "{% set cover_id = this.entity_id.split('.')[1]  %} {{ states('sensor.' + cover_id + '_opening') != 'unavailable' }}"
            open_cover:
              service: script.mqtt_cover_set_position
              data:
                position: 100
                device_entity_id: "{{ this.entity_id }}"
            close_cover:
              service: script.mqtt_cover_set_position
              data:
                position: 0
                device_entity_id: "{{ this.entity_id }}"
            stop_cover:
              service: script.mqtt_cover_stop
              data:
                device_entity_id: "{{ this.entity_id }}"
            set_cover_position:
              service: script.mqtt_cover_set_position
              data:
                position: "{{ position }}"
                device_entity_id: "{{ this.entity_id }}"


    scripts.yaml:

    
    mqtt_cover_stop:
      alias: MQTT Cover Stop
      mode: single
      sequence:
      - variables:
          cover_id: '{{ device_entity_id.split(''.'')[1] }}'
      - service: mqtt.publish
        data_template:
          qos: '1'
          topic: cmnd/{{cover_id}}/Stop_All
    mqtt_cover_set_position:
      alias: MQTT Cover Set Position
      mode: single
      sequence:
      - variables:
          cover_id: '{{ device_entity_id.split(''.'')[1] }}'
      - service: mqtt.publish
        data_template:
          qos: '1'
          topic: cmnd/{{cover_id}}/SetChannel
          payload: 11 {{position}}
      - wait_template: '{{ (states(''sensor.'' + cover_id + ''_target'')|int(default=-1)) == position }}'
        continue_on_timeout: false
        timeout:
          seconds: 5
      - service: mqtt.publish
        data_template:
          qos: '1'
          topic: cmnd/{{cover_id}}/Open_To_Target


    Hope this helps. Shall you have any ideas for improvement, let me know!


    Hi, does anyone know if this .bat file still works in the new version? I have the simulator, and I configure the pinouts, create the autoexec.bat, save, and restart. The buttons don't appear correctly, nor do the maneuvers work. I'm a complete novice and would appreciate any help or guidance. Thanks.
  • #19 21480083
    p.kaczmarek2
    Moderator Smart Home
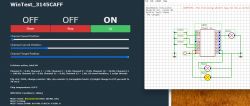
    Hey I've checked with latest simulator and I guess buttons appears for me?
    I am referring to this autoexec.bat:
    https://www.elektroda.com/rtvforum/topic4015497.html#21362566
    Not the one in earlier post.
    See:
    Screenshot of the WinTest interface with control buttons.
    
    Built on Mar 14 2025 22:27:37 version Win_Test
    Online for 24 minutes and 59 seconds
    Device MAC: BA:DA:31:45:CA:FF
    Short name: WT00000000, Chipset WIN32
    
    Helpful post? Buy me a coffee.
  • #20 21480170
    antonioriosarroyo
    Level 4  
    Thank you so much for responding. That one works for me, but the stop button doesn't. That's why I was trying to use the other one.
  • #21 21482463
    antonioriosarroyo
    Level 4  
    Hi @gliga69 , I've been looking and tweaking things, and it seems to be working now. It's not finished, but I'm leaving it here in case anyone improves it or needs it.

    I have no idea how to program; it's been trial and error. I'm not responsible...


    clearIO
    // ====== CONFIG ======
    // Used to hold the delay value in millis for sleeping during closing or opening loop
    // Play with your curtain and find the right value for this delay
    
    SetChannel 8 100
    
    // Delay to wait (millis) before starting to move the curtain after we close both relays
    // maybe it is not necessary, but I prefer it to be to ensure we do not have
    // both open and close relays powered simultaneously:
    SetChannel 7 0    //500
    
    // MQTT stuff
    //MqttClient lr_curtain_2
    //MqttHost <YOUR_HA_MQTT_HOST>
    //MqttUser <YOUR_HA_MQTT_USER>
    //MqttPassword <YOUR_HA_MQTT_PASSWORD>
    
    // ====== END OF CONFIG ======
    
    // set channels 7, 8 and 9 to be private, so that we do not spend resources to publish their values:
    SetChannelPrivate 7 1
    SetChannelPrivate 8 1
    SetChannelPrivate 9 1
    
    // HIde relays from GUI
    setChannelVisible 1 0
    setChannelVisible 3 0
    
    // We start the main opening/closing loop with a delay
    // and than immediately have a calibration delay
    // so, let's decrement the calibration delay to not have them both
    // at the beginning of the loop:
    
    addChannel 7 -$CH8 0 5000
    
    PowerSave 1
    //startDriver ntp
    
    // set pins and channels
    
    // Pin 6 is connected to opening relay
    SetPinRole 6 Rel
    // we also connect it to channel 1
    SetPinChannel 6 1
    SetChannelLabel 1 "Up_Relay"
    
    // Pin 6 is connected to closing relay
    SetPinRole 7 Rel
    // we also connect it to channel 3
    SetPinChannel 7 3
    SetChannelLabel 3 "Down_Relay"
    
    setChannelType 20 Toggle
    SetChannelLabel 20 "Down"
    setChannelType 21 Toggle
    SetChannelLabel 21 "Stop"
    SetChannel 21 1
    setChannelType 22 Toggle
    SetChannelLabel 22 "Up"
    
    // 23 - stop button (virtual button emitted when open or close buttons are pressed for some time and then released)
    SetPinRole 23 Btn
    // 24 - opening button
    SetPinRole 24 Btn
    // 26 - closing button
    SetPinRole 26 Btn
    
    // CH9 - saved position for reboot
    // CH10 - current position
    // CH11 - target position
    
    SetChannelLabel 9 "Saved Position"
    setChannelType 9 Dimmer
    SetChannelLabel 10 "Current Position"
    setChannelType 10 Dimmer
    SetChannelLabel 11 "Target Position"
    setChannelType 11 Dimmer
    
    SetStartValue 9 -1
    
    // read position saved before reboot:
    SetChannel 10 $CH9
    SetChannel 11 $CH9
    
    // Setup LED:
    //SetPinRole 10 LED
    //SetPinChannel 10 4
    
    // ============= MQTT ============
    
    // Let it shine when MQTT connection is established:
    //addEventHandler MQTTState 1 SetChannel 4 1
    //addEventHandler MQTTState 0 SetChannel 4 0
    
    // [2] Always set MQTT Retain flag to all published values;
    // [7] Broadcast self state every N seconds:
    // [10] Broadcast self state on MQTT connect
    //flags 1156
    
    // Inform HA about our values every 30 seconds, publish 2 values per second
    //mqtt_broadcastInterval 30
    //mqtt_broadcastItemsPerSec 2
    
    alias Set_Stop backlog setChannel 3 0; setChannel 1 0
    alias Start_Opening backlog SetChannel 22 1; stopAllScripts; startScript autoexec.bat openSkylight
    alias Start_Closing backlog SetChannel 20 1; stopAllScripts; startScript autoexec.bat closeSkylight
    alias Stop_All backlog stopAllScripts; startScript autoexec.bat stopSkylight
    alias Open_To_Target backlog stopAllScripts; startScript autoexec.bat openSkylightToTarget
    
    alias Stop_Clicked backlog Set_Stop; Stop_All; SetChannel 21 1
    
    // Click and fast release will effect in fully closing or opening.
    // If during this process we click on the same button again, it stops 
    
    addEventHandler OnHoldStart 26 if $CH03==1 then Stop_Clicked else Start_Closing
    addChangeHandler Channel20 == 1 if $CH03==1 then Stop_Clicked else Start_Closing
    
    addEventHandler OnHoldStart 24 if $CH01==1 then Stop_Clicked else Start_Opening
    addChangeHandler Channel22 == 1 if $CH01==1 then Stop_Clicked else Start_Opening
    
    addEventHandler OnClick 23 backlog Stop_Clicked
    
    addEventHandler OnRelease 24 backlog Stop_Clicked
    addEventHandler OnRelease 26 backlog Stop_Clicked 
    
    addChangeHandler Channel20 == 1 backlog SetChannel 21 0; SetChannel 22 0
    addChangeHandler Channel21 == 1 backlog SetChannel 20 0; SetChannel 22 0;startScript autoexec.bat stopSkylight
    addChangeHandler Channel22 == 1 backlog SetChannel 20 0; SetChannel 21 0
    
    return
    
    // === OPEN TO GIVEN PERCENTAGE ===
    openSkylightToTarget:
       Set_Stop
       delay_ms $CH7
    openSkylightToTarget_again:
       delay_ms $CH8
            if $CH10<$CH11 then goto continue_opening
            if $CH10>$CH11 then goto continue_closing
    
       // we are done, we reached our target
       // If we were opening or closing fully, we let the motor
       // run for 3 seconds for the case we are uncalibrated:
       if $CH10==0 then goto calibrate
       if $CH10==100 then goto calibrate
       goto openSkylightFinished
    continue_opening:
            // Unset_Close
       setChannel 3 0
            // Set_Open
       setChannel 1 1
       // increment:
            addChannel 10 1 0 100
       goto openSkylightToTarget_again
    
    continue_closing:
            // Unset_Open
       setChannel 1 0
            // Set_Close
       setChannel 3 1
       // decrement:
            addChannel 10 -1 0 100
       goto openSkylightToTarget_again
    
    calibrate:
       delay_ms 3000
       Set_Stop
       SetChannel 9 $CH10
       SetChannel 20 0
       SetChannel 22 0
       return
    openSkylightFinished:
       Set_Stop
       SetChannel 9 $CH10
       
       return
    
    // === CLOSE ===
    closeSkylight:
       SetChannel 11 0
       goto openSkylightToTarget
    return
    
    // === OPEN ===
    openSkylight:
       SetChannel 11 100
       goto openSkylightToTarget
    return
    
    // === STOP ===
    stopSkylight:
       Set_Stop
       SetChannel 11 $CH10
       goto openSkylightToTarget
    return
    
  • #22 21484623
    antonioriosarroyo
    Level 4  
    Hello, very good, just thank @rodionzhitomirsky and @gliga69 for your code. I modified it and it works very well. Both the physical and web buttons work correctly, and the blind percentage seems great. I have it on a Loratap SC400W-EU, but don't trust the PINs; each Loratap is unique.

    I'm leaving the code here, with a comment on where to put your PINs, in case anyone is interested.

    Translated with Google, in case it's not clear.
    
    clearIO
    // ====== CONFIG ======
    // Used to hold the delay value in millis for sleeping during closing or opening loop
    // Play with your curtain and find the right value for this delay
    
    SetChannel 8 100
    
    // Delay to wait (millis) before starting to move the curtain after we close both relays
    // maybe it is not necessary, but I prefer it to be to ensure we do not have
    // both open and close relays powered simultaneously:
    SetChannel 7 500
    
    // MQTT stuff
    MqttClient lr_curtain_2
    MqttHost <YOUR_HA_MQTT_HOST>
    MqttUser <YOUR_HA_MQTT_USER>
    MqttPassword <YOUR_HA_MQTT_PASSWORD>
    
    // ====== END OF CONFIG ======
    
    // set channels 7, 8 and 9 to be private, so that we do not spend resources to publish their values:
    SetChannelPrivate 7 1
    SetChannelPrivate 8 1
    SetChannelPrivate 9 1
    
    // HIde relays from GUI
    setChannelVisible 1 0
    setChannelVisible 3 0
    
    // We start the main opening/closing loop with a delay
    // and than immediately have a calibration delay
    // so, let's decrement the calibration delay to not have them both
    // at the beginning of the loop:
    
    addChannel 7 -$CH8 0 5000
    
    PowerSave 1
    //startDriver ntp
    
    // set pins and channels
    
    // Pin 7 is connected to opening relay
    SetPinRole 7 Rel
    // we also connect it to channel 1
    SetPinChannel 7 1
    SetChannelLabel 1 "Up"
    
    // Pin 6 is connected to closing relay
    SetPinRole 6 Rel
    // we also connect it to channel 3
    SetPinChannel 6 3
    SetChannelLabel 3 "Down"
    // crea los botones
    setChannelType 20 Toggle
    SetChannelLabel 20 "Down"
    setChannelType 21 Toggle
    SetChannelLabel 21 "Stop"
    SetChannel 21 1
    setChannelType 22 Toggle
    SetChannelLabel 22 "Up"
    // 23 - stop button 
    SetPinRole 26 Btn
    // 24 - opening button
    SetPinRole 9 Btn
    // 26 - closing button
    SetPinRole 24 Btn
    
    // CH9 - saved position for reboot
    // CH10 - current position
    // CH11 - target position
    
    SetChannelLabel 9 "Saved Position"
    setChannelType 9 Dimmer
    SetChannelLabel 10 "Current Position"
    setChannelType 10 Dimmer
    SetChannelLabel 11 "Target Position"
    setChannelType 11 Dimmer
    
    SetStartValue 9 -1
    
    // read position saved before reboot:
    SetChannel 10 $CH9
    SetChannel 11 $CH9
    
    // Setup LED:
    //SetPinRole 10 LED
    //SetPinChannel 10 4
    
    // ============= MQTT ============
    
    // Let it shine when MQTT connection is established:
    addEventHandler MQTTState 1 SetChannel 4 1
    addEventHandler MQTTState 0 SetChannel 4 0
    
    // [2] Always set MQTT Retain flag to all published values;
    // [7] Broadcast self state every N seconds:
    // [10] Broadcast self state on MQTT connect
    flags 1156
    
    // Inform HA about our values every 30 seconds, publish 2 values per second
    mqtt_broadcastInterval 30
    mqtt_broadcastItemsPerSec 2
    
    alias Set_Stop backlog setChannel 3 0; setChannel 1 0
    alias Start_Opening backlog SetChannel 22 1; stopAllScripts; startScript autoexec.bat openSkylight
    alias Start_Closing backlog SetChannel 20 1; stopAllScripts; startScript autoexec.bat closeSkylight
    alias Stop_All backlog stopAllScripts; startScript autoexec.bat stopSkylight
    alias Open_To_Target backlog stopAllScripts; startScript autoexec.bat openSkylightToTarget
    
    alias Stop_Clicked backlog Set_Stop; Stop_All; SetChannel 21 1
    
    // Click and fast release will effect in fully closing or opening.
    // If during this process we click on the same button again, it stops 
    // EDIT PINS..............................................................................................................................................
    addEventHandler OnClick 24 if $CH03==1 then Stop_Clicked else Start_Closing
    addChangeHandler Channel20 == 1 if $CH03==1 then Stop_Clicked else Start_Closing
    addEventHandler OnClick 9 if $CH01==1 then Stop_Clicked else Start_Opening
    addChangeHandler Channel22 == 1 if $CH01==1 then Stop_Clicked else Start_Opening
    addEventHandler OnClick 26 Stop_Clicked
    addChangeHandler Channel21 == 1 if $CH02==1 then Stop_Clicked else Stop_Clicked
    //..............................................................................................................................................................................
    
    addChangeHandler Channel20 == 1 backlog SetChannel 21 0; SetChannel 22 0
    addChangeHandler Channel21 == 1 backlog SetChannel 20 0; SetChannel 22 0
    addChangeHandler Channel22 == 1 backlog SetChannel 20 0; SetChannel 21 0
    return
    
    // === OPEN TO GIVEN PERCENTAGE ===
    openSkylightToTarget:
       Set_Stop
       delay_ms $CH7
    openSkylightToTarget_again:
       delay_ms $CH8
            if $CH10<$CH11 then goto continue_opening
            if $CH10>$CH11 then goto continue_closing
    
       // we are done, we reached our target
       // If we were opening or closing fully, we let the motor
       // run for 3 seconds for the case we are uncalibrated:
       if $CH10==0 then goto calibrate
       if $CH10==100 then goto calibrate
       goto openSkylightFinished
    continue_opening:
            // Unset_Close
       setChannel 3 0
            // Set_Open
       setChannel 1 1
       // increment:
            addChannel 10 1 0 100
       goto openSkylightToTarget_again
    
    continue_closing:
            // Unset_Open
       setChannel 1 0
            // Set_Close
       setChannel 3 1
       // decrement:
            addChannel 10 -1 0 100
       goto openSkylightToTarget_again
    
    calibrate:
       delay_ms 3000
       Set_Stop
       SetChannel 9 $CH10
       return
    openSkylightFinished:
       Set_Stop
       SetChannel 9 $CH10
       return
    
    // === CLOSE ===
    closeSkylight:
       SetChannel 11 0
       goto openSkylightToTarget
    return
    
    // === OPEN ===
    openSkylight:
       SetChannel 11 100
       goto openSkylightToTarget
    return
    
    // === STOP ===
    stopSkylight:
       Set_Stop
       SetChannel 11 $CH10
       SetChannel 9 $CH10
    return
    
  • #23 21555957
    io2345
    Level 7  
    >>21484623 Can anyone please guide me how to do the time calibration for up and down cycles? My blinds stop not even halfway up/down. They take 31 seconds for closing and 34 seconds for opening.
    Where do I have to set which of the three sliders? Or is it about some button push combination?


    One more problem that I have: I have the stop button only in GUI, but no hardware button. They are push-button types, one for UP, one for DOWN. To stop the blinds inbetween when they are moving (before they reach the outmost slider position), I have to press the same button again. But in the GUI this button then remains activated (green), rather than the STOP button. I can't press the same button again to go a little bit further in the same direction.

    How can this be improved?
  • #24 21563315
    antonioriosarroyo
    Level 4  
    >>21555957
    I don't remember exactly where the time was set. But to pause the upload or download, press the upload or download button again. I have the pause button set to 50%. I'll check tomorrow.
  • #25 21563330
    io2345
    Level 7  
    >>21563315 Thank you for responding. It is the "SetChannel 8" value. The correct value for me was 2400.
    But I don't use the script actualy, as I had some problems with this "chinese circuit" model. It does not set the buttons channel to 1 when pressed, but rather is normally 1 and goes to 0 when pressed. Causes some timing problems when configured as dInput.
    Instead I use it with a comparingly simple script, which let's me configure it as Btn:
    // P7 - Relay 1 Close
    // P23 - Relay 3 Open
    
    // Beschreibung
    SetChannelLabel 1 Close
    SetChannelLabel 6 Open
    
    // Logik
    addChangeHandler Channel1 == 1 backlog SetChannel 6 0; startScript autoexec.bat resetCloseAfterMinute
    addChangeHandler Channel6 == 1 backlog SetChannel 1 0; startScript autoexec.bat resetOpenAfterMinute
    
    // Nicht fortfahren
    return
    
    // Scripts
    
    resetCloseAfterMinute:
    // warte 31 Sekunden
    delay_s 31
    // Close abschalten
    SetChannel 1 0
    return
    
    resetOpenAfterMinute:
    // warte 34 Sekunden
    delay_s 34
    // Open abschalten
    SetChannel 6 0
    return
    

    The rest of the logic is instead in a much longer control script, which runs on my home automation system. I did post that here: Link
  • #26 21563823
    antonioriosarroyo
    Level 4  
    >>21563330
    Fantastic, great work, I have a bad habit of not commenting on scripts and then what happens, happens.

Topic summary

The discussion revolves around the WiFi + RF Curtain Module (HFY-CL02WF+RF) purchased from Aliexpress, which allows for the control of sunblinds via Home Assistant (HA). Users appreciate the module's design, featuring eight terminals for easier wiring without additional connectors. Several participants share their experiences with integrating the module into HA, including scripting for channel control and addressing issues with physical button functionality. A recurring problem involves the module resetting certain flags upon reboot, affecting the operation of physical buttons. Users discuss troubleshooting steps, firmware versions, and the lack of required RF remote configuration, confirming that the RF functionality is inherently supported by the hardware.
Summary generated by the language model.
ADVERTISEMENT