
Thanks for this thread. I have been successful, too.
This is square 2-gang version.


This is square 2-gang version.
Code: JSON


Czy wolisz polską wersję strony elektroda?
Nie, dziękuję Przekieruj mnie tam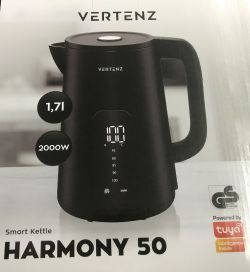


divadiow wrote:Known as W601 BLE


p.kaczmarek2 wrote:Do you have RF Remote? This device should still have RF working I guess. RF is connected to the SOIC chip.


divadiow wrote:... but I guess anything is possible.
Pete0815 wrote:Can you say if for the T34 these needel/clamps can work?
rufus4 wrote:Pete0815 wrote:Can you say if for the T34 these needel/clamps can work?
There is no free part of the legs on a T34 to hook in with anything.
The needle technique from @divadiow would be the way to go.


{
  "vendor": "Tuya",
  "bDetailed": "0",
  "name": "wifi 2 Gang Wall switch ",
  "model": "Wifi-W6B",
  "chip": "BK7231N",
  "board": "T34",
  "flags": "0",
  "keywords": [
    "T34",
    "W6B"
  ],
  "pins": {
    "7": "WifiLED_n;56",
    "8": "Btn;1",
    "9": "Rel;2",
    "16": "Btn;2",
    "17": "Rel;1"
  },
  "command": "powersave 1",
  "image": "https://obrazki.elektroda.pl/1549683800_1719574436.jpg",
  "wiki": "https://www.elektroda.com/rtvforum/topic_YOUR_TOPIC.html"
}Dave_S wrote:
Is there a way to point openbeken to a local NTP server on my network ?


pins
24: Rel;1
26: Btn;1
28: WifiLED;0

command: startDriver NTPTL;DR: 480 °C hot-air, 921 600 bps UART and a steady hand let users flash Tuya T34 wall switches; “This is the most pro way of flashing I’ve ever seen” [Elektroda, p.kaczmarek2, post #20968230] Success rate rises to 100 % once VCC is power-cycled during upload [Elektroda, t2004dd, post #21007722]
Why it matters: The right method turns a €1.87 cloud-locked switch into fully local Home-Assistant hardware.
• Chipset: BK7231N / T34, QFN32, 0.6 mm pitch [Elektroda, CameronDev, post #20968165] • Stock firmware: Tuya 1.3.10 (Cloudcutter-patched) [Elektroda, CameronDev, post #20968165] • Reliable upload speed: 921 600 bps HID-Download or BK7231GUI [Elektroda, t2004dd, post #21007722] • Reflow window: 400–480 °C, <60 s with narrow nozzle [Elektroda, CameronDev, post #20985028] • Typical cost: €1.87 per switch on AliExpress [Elektroda, t2004dd, post #21008716]
startDriver DHT11 Pxx. DS18B20 is not yet merged into OpenBeken codebase [Elektroda, p.kaczmarek2, post #21060852]