logo elektroda
logo elektroda
X
logo elektroda

How to flash LN882H with open source Tasmota/Esphome style firmware - backup procedure included

p.kaczmarek2 44955 297
ADVERTISEMENT
  • LN882H module with visible electronic components on a yellow background.
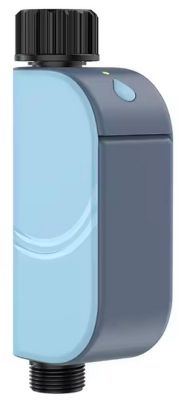
    Here I will show you how you can easily flash the new LN882 modules via UART, just like you would flash ESP8266. Flashing those modules will soon allow you to free them from the cloud and connect them to Home Assistant. I've already covered some of the more technical details in the LN882H datasheet topic, so here I will only present the firmware change guide.


    2025.01.04 UPDATE:
    Please see this topic for latest discussion and YOUTUBE LN882H tutorial.


    Hardware preparation
    You will need an USB to UART converter and a reliable 3.3V power supply. Powering directly from 3.3V pin on USB to UART converter may not work.
    The procedure is very similiar to ESP8266 and BK7231, so watch our flashing tutorials here:
    https://www.youtube.com/@elektrodacom
    But basically, in case of LN882, you need to connect:
    - Module TX -> UART RX
    - Module RX -> UART TX
    - Module GND -> UART GND
    - Module 3V3 -> UART 3V3 (make sure your USB UART supports and is in 3V3 mode if it is selectable)
    - Module BOOT/GPIOA9 -> GND
    GPIOA9 must remain LOW during whole flashing process (do not disconnect it!.
    Then, once all connections are done, connect USB to UART converter to your PC.

    NOTE: if you try to flash and it fails, or you want to flash again, make sure to disconnect and reconnect USB to UART converter from your PC, while keeping BOOT signal low.

    Soldering tips
    If you are new to soldering, you can watch some of our BK7231 flashing guides, BK7231 is a different module but soldering method is the same. For example:


    Module can be easily desoldered with some flux, some extra Pb solder, and solder wick.
    Here is desoldered module:
    WiFi module with Lightning LN882H chip on a wooden surface. LN882H module with visible pads and pin labels.
    In order to solder wires easily, first add some flux:
    LN882 module with visible solder points and markings TX, RX, and BOOT.
    Then add some Pb solder to the pads (also tin the wires):
    PCB with pins labeled 3V3, GND, RX, TX, A1, A0, and BOOT.
    Then, solder wires:
    Image of LN882 module with soldered wires.
    And, finally, here is my circuit - it's an USB to UART converter in 3.3V mode with an extra AMS1117-3.3V / TC1264-3.3V LDO on proto board so I can get reliable 3.3V current source:
    Breadboard with connected wires and USB to UART converter on a wooden table.

    Making original firmware backup
    Extract both archives to single directory, like:
    Screenshot of the LN882H_Flash_Dumper directory on Windows.
    Navigate to it in CMD, install Python if you're missing it, change COMx to your COM port name, like COM15, run the command:
    
    python LN882H_Flash_Dumper.py COMx flashdump
    

    NOTE: You must have in the same directory as Python script! Otherwise, you will get this error:
    Screenshot of a Python error during an attempt to flash dump using LN882H Flash Dumper.
    If you have connected something incorrectly, or swapped RX and TX, you will get:
    Screenshot of an error when running LN882H Flash Dumper.
    Otherwise, the slow and long flash dump procedure will begin:
    Screenshot showing flash memory dump process in terminal.
    Flash read will continue until it hits the end of the flash, it will end with following message:
    Screenshot showing error message Error: Fail. Command execution error.
    This is not an error! Dump files will be created here:
    View of LN882H_Flash_Dumper directory with various files.

    Flashing new firmware

    First, get new firmware for NL882H platform, it should be available here, either check link or Releases tab:
    https://github.com/openshwprojects/OpenBK7231T_App/blob/main/docs/LN882H.md
    https://github.com/openshwprojects/OpenBK7231T_App
    Navigate to the dir, just like when doing flash backup, then use:
    
    LN882H_CMD_Tool.exe COMx download flash 921000 0x0 flashimage.bin
    

    It should flash in few moments:
    Console screenshot showing the LN882H module flashing process.
    To run firmware, disconnect everything from power, disconnect BOOT from ground, and reconnect power:
    Screenshot of Wi-Fi connection to the OpenLN882H network.
    Connect to the access point, open page at 192.168.4.1 and configure your device like you'd configure any other OpenBeken/OpenBL602/OpenW600/OpenW800/OpenXR809/Tasmota device.
    OpenLN882H interface with configuration buttons.
    For mode OBK tips, please see our channel:
    https://www.youtube.com/@elektrodacom
    For a generic IoT devices teardowns list and guides list, see:
    https://openbekeniot.github.io/webapp/devicesList.html

    Download
    Here are tools used for flashing, as described in this topic:
    LN882H_Too...1.0.16.zip Download (4.36 MB)
    LN882H_Fla...Dumper.zip Download (1.15 kB)

    Summary
    LN882H is very easily flashable via UART, just like ESP. You need to solder 5 wires: 3.3V, ground, RX, TX and boot signal, boot must be pulled low for bootloader to work. Remember to power off/on whole module after each flashing cycle, this is mandatory. The flashing procedure will allow you to flash our multiplatform firmware so your devices can work with Home Assistant and be free from the cloud.
    PS: At the time of the posting this topic, LN882H port is still WIP, so please wait patiently for Release to be posted on Github.

    Cool? Ranking DIY
    Helpful post? Buy me a coffee.
    About Author
    p.kaczmarek2
    Moderator Smart Home
    Offline 
    p.kaczmarek2 wrote 12358 posts with rating 10229, helped 584 times. Been with us since 2014 year.
  • ADVERTISEMENT
  • #2 20908199
    ferbulous
    Level 18  
    Which oem/smart home device using this chip?
    Haven’t seen this one yet
  • ADVERTISEMENT
  • #3 20908213
    p.kaczmarek2
    Moderator Smart Home
    We have mentioned few devices with this chip in our datasheet topic:
    https://www.elektroda.com/rtvforum/topic4027545.html
    Futhermore, soon our devices list will be updated to include LN882H:
    https://openbekeniot.github.io/webapp/devicesList.html
    Helpful post? Buy me a coffee.
  • #4 20919316
    p.kaczmarek2
    Moderator Smart Home
    2024-01-20 UPDATE
    Now OpenBeken OTA on OpenLN882H is working. Futhermore, builds are now public, see:
    https://github.com/openshwprojects/OpenBK7231T_App/releases
    Screenshot of a file list for OTA and UART Flash updates for LN882H, highlighting OpenLN882H_1.17.419_OTA.bin and OpenLN882H_1.17.419.bin options.

    OTA can be done via Web App, OTA tab, just drag and drop OTA file on the field and click start button.
    Helpful post? Buy me a coffee.
  • #5 20923751
    voodoopt
    Level 9  
    Is it possible to flash the chip without removing it from the PCB?
    ATTENTION it is not connected to 220v
  • #6 20923772
    p.kaczmarek2
    Moderator Smart Home
    It should be, but keep in mind that you need to have access to BOOT pin, and you also have to make sure that RX and TX are not connected on your board, because, if for example, there is a button with a debouncing capacitor on RX or TX, it may interfere with programming. Then you can resort to cutting PCB trace or removing the capacitor. We have already discussed similiar situation on our BK7231N CB2S flashing video:


    In general, LN882H flashing is very similiar to ESP8266 flashing. BOOT is like IO0. What kind of LN882 device do you have, @voodoopt ?
    Helpful post? Buy me a coffee.
  • #8 20924030
    p.kaczmarek2
    Moderator Smart Home
    If you have the same switch as me, then it may be hard to access BOOT without desoldering the module. Futhermore, are RX/TX used for some purpose on your board?
    Helpful post? Buy me a coffee.
  • ADVERTISEMENT
  • #10 20924105
    p.kaczmarek2
    Moderator Smart Home
    Fair point, but it may require some tricky soldering. I have the same device as you @divadiow (as you probably know) and I'm halfway in the process of making YT video for that.
    Helpful post? Buy me a coffee.
  • #11 20924109
    divadiow
    Level 35  
    True. A little tricky! You have to be careful once soldered. I ripped the pad off boot on my first LN-02 mini switch not moving it around delicately enough 😳
  • ADVERTISEMENT
  • #12 20933016
    voodoopt
    Level 9  
    I can't flash the chip, try with 3 different programmers
    -> Arduino Nano with CH340
    -> Prolific USB-to-Serial Comm Port (USB to TTL)
    -> ESP programer (USB-SERIAL CH340)
    I use with AMS1117 3.3 800mah for separate power with capacitors
    I can check through Putty that it gives output but I can't get anything readable. (even used different speeds)
    In applications I cannot read or write with any of bk7231flasher_1.1.6 or LN882H_CMD_TOOL or even bk_writer1.60
    When I try to use the BOOT with GND pin it doesn't do anything.
    Even when I use putty output.
    It's easier to restart with the USB cable source
    What am I doing wrong?
  • #13 20933023
    p.kaczmarek2
    Moderator Smart Home
    How your setup looks like?
    voodoopt wrote:

    In applications I cannot read or write with any of bk7231flasher_1.1.6 or LN882H_CMD_TOOL or even bk_writer1.60

    Why are you trying to flash LN882H with BK7231 flasher or bkWriter? It's not a BK7231. It will not work. You need to use the tool I mentioned in the flashing guide.
    Helpful post? Buy me a coffee.
  • #14 20933028
    voodoopt
    Level 9  
    C:\temp\LN882H_CMD_TOOL>python LN882H_Flash_Dumper.py COM23 flashdump
    LN882H flash dump tool v1.0
    Loading RAMCode...
    Error: Fail. Could not go in download mode.

    I've already checked the pins and tested the opposite

    Added after 2 [minutes]:

    C:\temp\hid_download_py-master>flash.bat
    C:\temp\hid_download_py-master>python uartprogram C:\temp\hid_download_py-master\OpenLN882H_1.17.427.bin -d com23 -w
    UartDownloader....
    programm....
    Cannot get bus. : | |[ ?k/s]
    C:\temp\hid_download_py-master>
  • #15 20933029
    p.kaczmarek2
    Moderator Smart Home
    Do you know that after every attempt, even if it fails, you need to disconnect whole setup from power, while keeping boot on GND all the time?

    If you try to flash, and it fails, then it will lock itself up until you do power off/on again.
    Helpful post? Buy me a coffee.
  • #16 20933989
    voodoopt
    Level 9  
    Thank you, the first step is done and I know that the programmer is working.
    Now you can dump
    ------------------------------------------------
    C:\temp\LN882H_CMD_TOOL>LN882H_Flash_Dumper.py COM21 flashdump
    LN882H flash dump tool v1.0
    Loading RAMCode...
    Flash RAMCode loaded OK.
    Dumping flash OTP to flashdump_otp.bin:
    ....
    complete.
    Dumping flash (size: 0xffffffff) to flashdump_flash.bin:
    .............................................................................................................................................................................................................................................................................................................
    -------------------------
    but when I try to write it won't let me, it always gives me this error

    C:\temp\LN882H_CMD_TOOL>LN882H_CMD_Tool.exe COM21 download flash 2000000 0x0 OpenLN882H_1.17.427.bin
    Fail. Error downloading file.

    I already named the smaller file, changed it to the root of c:
    nothing always the same problem
  • #17 20934181
    p.kaczmarek2
    Moderator Smart Home
    Do you power off/on after doing the dump? It's required after every operation.
    Helpful post? Buy me a coffee.
  • #18 20934215
    divadiow
    Level 35  
    and unplug/replug the USB-TTL with GND/BOOT still connected to the LN-02 before powering up from external 3.3v. I did a LN882H/WL2S last night. I also shortened my cables after moving the USB-TTL closer to the pogo pins, to ensure successful operation. Close-up of a USB-TTL module connected to a board with multiple wires.
  • #19 20942445
    voodoopt
    Level 9  
    I've tried everything, I always get the error
    with and withtou admin command line
    C:\temp\LN882H_CMD_TOOL>LN882H_CMD_Tool.exe COM21 download flash 2000000 0x0 c:\temp\LN882H_CMD_TOOL\OpenLN882H.bin
    Fail. Error downloading file.
    C:\temp\LN882H_CMD_TOOL>
    Breadboard with various connections and wires connected to USB ports.
  • #20 20942455
    p.kaczmarek2
    Moderator Smart Home
    I'd start with shortening the wires. We already had cases where BK7231 flashing was failing due to the too long wires between USB to UART converter and WiFi module.
    Helpful post? Buy me a coffee.
  • #22 20942661
    divadiow
    Level 35  
    are you unplugging and replugging the USB-TTL adaptor as well as the power? you have to disconnect both before starting a flash or dump
  • #24 20942710
    p.kaczmarek2
    Moderator Smart Home
    You have two large capacitors on the board. Are you really sure that they can discharge fully after you unplug the device?

    WiFi module in the flashing module can take a very low power, and those capacitors can keep the charge for long time.
    Helpful post? Buy me a coffee.
  • #26 20943785
    divadiow
    Level 35  
    What are the capacitors for? I've never used any...
  • #27 20954724
    eikclan
    Level 3  
    Same problem here, when I try to flash the chip I get "Fail. Error downloading file.".
    Any ideas on how to fix this issue?
  • #28 20955839
    voodoopt
    Level 9  
    I can dump with and without capacitors
    only with an AMS1117 3.3v
    Now writing I always have the same error "Fail. Error downloading file."
  • #29 20955856
    p.kaczmarek2
    Moderator Smart Home
    Can you please provide step by step information how do you get to that error?

    I've tried on two devices so far and it worked literally on the first try.

    Things to keep a note for:
    - choose the correct binary file for flashing, not the OTA file!
    - try running flasher as admin
    - make sure that the binary file is in the same directory where you are
    - keep wires short
    - flashing procedures work ONLY ONCE after reboot with boot pin set, after every failure or anything, you HAVE TO disconnect and reconnect power again, preferrably whole circuit, because it's possible for circuit to "power itself" without VDD via UART lines (! ! !)
    Helpful post? Buy me a coffee.
  • #30 20955951
    voodoopt
    Level 9  
    reboot computer
    all stuff are disconnected
    connect UART usb to check COM port
    open CMD with administrator
    go to my location c:\temp\LN882H_CMD_TOOL
    Windows command prompt screen showing a list of files in the C:\temp\LN882H_CMD_TOOL directory.
    Disconnect USB UART and External power USB with AMS1117 3.3v
    wait 1 min for discharge everyting
    than run command on Command line with administrator
    LN882H_CMD_Tool COM21 download flash 2000000 0x0 OpenLN882H_1.17.457.bin
    blink RX 4seg then TX 1seg then stop everithing
    after some secons get error
    "Fail. Error downloading file."

Topic summary

The discussion focuses on flashing LN882H modules with open-source firmware similar to Tasmota/Esphome, enabling cloud-free operation and integration with Home Assistant. Flashing requires a USB to UART converter with reliable 3.3V power supply, connecting module TX to UART RX, RX to TX, GND to GND, and 3.3V to 3.3V. Users report challenges including access to the BOOT pin, interference from board components on RX/TX lines, and the necessity of short wiring to ensure stable flashing. Various USB to UART converters (CH340, FT232RL, PL2303, CP2101) have differing success rates; CH340 and CP2101 are recommended over some FTDI and PL2303 adapters. Correct baud rate (115200) and running the flashing tool from non-system drives (e.g., D:) improve success. The LN882H_CMD_Tool is used for flashing and dumping firmware; flashing requires power cycling and keeping BOOT grounded during operations. Users successfully dumped firmware but often encountered "Fail. Error downloading file" during flashing, resolved by adjusting baud rate, shortening cables, and using compatible USB-UART adapters.

Power-saving features are under active development; enabling PowerSave mode reduces power consumption and device temperature but may cause WiFi connection issues in some firmware versions. PowerSave commands can be set via startup commands or command tool, with better effect when applied directly via command tool. Temperature monitoring shows LN882H devices run hot (up to 74°C) without load, improved by PowerSave mode. Integration with energy metering (BL0937) is affected by PowerSave due to interrupt handling. Static IP assignment is currently unimplemented in firmware. DHT sensor support is partially implemented; drivers require manual start commands, and pin mapping must be correct. NTP client requires manual driver start and supports server IP configuration via commands. Safe mode can be triggered by power cycling to reset device settings. Firmware and tools are evolving with ongoing commits addressing power management, filesystem (LittleFS), and device stability.

Overall, flashing LN882H modules demands careful hardware setup, compatible USB-UART adapters, correct flashing parameters, and power cycling. Firmware features like power saving, sensor support, and network configuration are improving but still have limitations. Community contributions and testing continue to enhance LN882H open-source firmware usability and integration.
Summary generated by the language model.
ADVERTISEMENT