logo elektroda
logo elektroda
X
logo elektroda

WBR2, WBR3, WBRU, W701-VA2-CG pinout, datasheet, flashing for Home Assistant

p.kaczmarek2 10266 84
ADVERTISEMENT
📢 Listen (AI):
  • #61 21564542
    robshd2
    Level 4  
    Hi, have followed the instructions to flash the WBR3S in my M515EGWT and soldered it back in, but am slightly at a loss on how to proceed further, since the Flash Tool did not offer a backup option that I could feed into the BK7231GUIFlashTool to get the config.

    So on the WebApp,

    ```
    startDriver TuyaMCU
    ```

    makes the red LED flash and this stops when sending

    ```
    tuyaMcu_defWiFiState 4
    ```

    Which I presume is a good sign? But playing around with the channels yielded no results so far, neither opening the blinds nor closing, and there seems to be no ready-made recipe out there to achieve this. If you could give me some pointers how to arrive at a working config, it would be much appreciated!
  • ADVERTISEMENT
  • #62 21564545
    divadiow
    Level 35  
    hello again :)

    if you run tuyaMcu_sendQueryState in the command line in web app what do you get returned?
  • ADVERTISEMENT
  • #63 21564552
    robshd2
    Level 4  
    >>21564545

    Thanks for the quick reply! I get the following:

    Debug:CMD:cmd [tuyaMcu_sendQueryState]
    Info:CMD:[WebApp Cmd 'tuyaMcu_sendQueryState' Result] OK
    Info:TuyaMCU:Received: 55 AA 03 07 00 05 01 04 00 01 01 15
    Info:TuyaMCU:ProcessIncoming[v=3]: cmd 7 (State) len 12
    Info:TuyaMCU:ParseState: id 1 type 4-enum len 1
    Info:TuyaMCU:ParseState: byte 1
    Info:TuyaMCU:Received: 55 AA 03 07 00 05 07 04 00 01 00 1A
    Info:TuyaMCU:ProcessIncoming[v=3]: cmd 7 (State) len 12
    Info:TuyaMCU:ParseState: id 7 type 4-enum len 1
    Info:TuyaMCU:ParseState: byte 0
    Debug:TuyaMCU:ApplyMapping: id 7 (val 0) not mapped
    Info:TuyaMCU:Received: 55 AA 03 07 00 08 02 02 00 04 00 00 00 00 19
    Info:TuyaMCU:ProcessIncoming[v=3]: cmd 7 (State) len 15
    Info:TuyaMCU:ParseState: id 2 type 2-val len 4
    Info:TuyaMCU:ParseState: int32 0
    Debug:TuyaMCU:ApplyMapping: id 2 (val 0) not mapped
    Info:TuyaMCU:Received: 55 AA 03 07 00 05 05 01 00 01 00 15
    Info:TuyaMCU:ProcessIncoming[v=3]: cmd 7 (State) len 12
    Info:TuyaMCU:ParseState: id 5 type 1-bool len 1
    Info:TuyaMCU:ParseState: byte 0
  • #64 21564567
    divadiow
    Level 35  
    ok.
    I'm wondering if we can get your product ID somehow. Did you manage to capture the factory fw boot log?
  • #65 21564575
    robshd2
    Level 4  
    >>21564567

    I have this output: {"p":"t6ief6k56sapz1ey","v":"1.0.0","m":2}

    Which only gives me this thread if I look for the ID: https://github.com/make-all/tuya-local/issues/924

    Might or might not help.

    Testing some more, channel 2 moves between 0 and 100 if I press the buttons on device, with the curtain. Will need to figure out how to map this to the channels etc. next.

    Edit:

    Alright, this gives me minimal control already, no idea what the other values might be for, but continuing to explore:

    startDriver TuyaMCU
    tuyaMcu_setBaudRate 9600
    tuyaMcu_defWiFiState 4
    setChannelType 2 dimmer
    linkTuyaMCUOutputToChannel 2 2 2
  • #66 21564603
    p.kaczmarek2
    Moderator Smart Home
    Welcome to forum. I see you have a very interesting device, we'll try to help you with getting it to work. I can see you are already receiving dpIDs, so it should be only the matter of figuring out what they mean.
    The usual approach is here: https://www.elektroda.com/rtvforum/topic4021129.html
    but we do it BEFORE flashing.

    Now that you've flashed it, can you provide us information on what kind of features Tuya app had for this device?

    I've checked the link you provided. @divadiow do those ids match dpIDs of TuyaMCU?

    Here is text formatted by ChatGPT:
    Code: JSON
    Log in, to see the code


    Would that mean that dpID 1 is:
    
                  "description": "[Required] Used to control motor: open, pause, close. The enum values for this data point (DP) cannot be modified, added, or removed.",


    I think I can add required channel types to firmware for you, we just need to check if that dpIDs are matching.
    Helpful post? Buy me a coffee.
  • #67 21564609
    divadiow
    Level 35  
    Query device details

    Code: JSON
    Log in, to see the code


    query things data model

    Code: JSON
    Log in, to see the code


    Code: JSON
    Log in, to see the code


    Added after 45 [seconds]:

    lol. beat me to it

    Added after 12 [minutes]:

    we seem to match. you handily included translated descriptions :)
  • ADVERTISEMENT
  • #68 21564641
    p.kaczmarek2
    Moderator Smart Home
    Do you have Home Assistant to test @divadiow ? I will go through those dpIDs and add required channel types if needed
    Helpful post? Buy me a coffee.
  • #70 21564750
    robshd2
    Level 4  
    Alright, here is what I know so far:

    dpId 1 is certainly Open (0), Stop (or something else, 1), Close (2). Seems to be digital triggers for the buttons.
    dpId 2 is percentage control and reporting for the state, 0 = Fully open, 100 = Fully closed.

    The rest in the docs you shared seems plausible. Having used the device in Tuya for a bit, the functions reflect the options given there. Is there a way to transfer this document to an autoexec.bat? Webapp > Import > Template is not the place for it, is it?

    If not, I am already mostly happy with having dpId 1 and 2. I just can't seem to get them onto Home Assistant through MQTT, is there a trick to that? Flag 19, "Always publish channels used by TuyaMCU", does not seem to do it.

    Once I have the full thing working and a better understanding, I might try my hand at the calibration dpids.

    My current autoexec.bat is still:

    startDriver TuyaMCU
    tuyaMcu_setBaudRate 9600
    tuyaMcu_defWiFiState 4
    setChannelType 1 LowMidHigh
    linkTuyaMCUOutputToChannel 1 4 1
    setChannelType 2 dimmer
    linkTuyaMCUOutputToChannel 2 2 2
  • #71 21564801
    p.kaczmarek2
    Moderator Smart Home
    I'll do MQTT check on my side in one hour and get back to you, I will edit my post.

    What kind of UI do we need for OpenStopClose? In OBK, and in HA?

    Added after 5 [minutes]:

    For HA discovery, add this to end of autoexec.bat:
    
    scheduleHADiscovery 5
    

    This will do discovery 5 seconds after mqtt connect. Of course, this can be also done manually, but maybe it's easier with command.

    When doing big changes, you may need to remove manually device from HA first.

    Some of channel types may not be discoverable yet, but I can add what's missing

    Added after 1 [hours] 42 [minutes]:

    I'm working on it

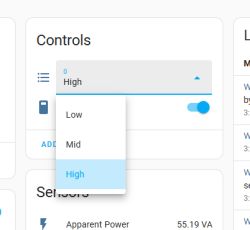
    Dropdown menu with three levels: Low, Mid, and High in the Controls section of the user interface.

    Added after 17 [minutes]:

    I will add release soon.
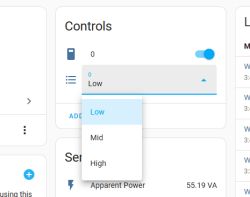
    Sample:
    
    setChannelType 2 LowMidHigh
    scheduleHADiscovery 1
    

    Result:
    Control panel with dropdown menu for selecting power level; options are Low, Mid, High.
    
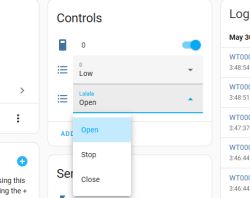
    setChannelType 2 LowMidHigh
    setChannelLabel 3 Lalala
    setChannelType 3 OpenStopClose
    scheduleHADiscovery 1
    

    Screenshot of a user interface showing a dropdown menu with Open, Stop, and Close options in the Controls section.

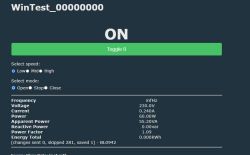
    Control panel WinTest_00000000 with speed selection (Low, Mid, High), mode options (Open, Stop, Close), Toggle 0 button, and device electrical data.
    Helpful post? Buy me a coffee.
  • #72 21565307
    robshd2
    Level 4  
    >>21564801

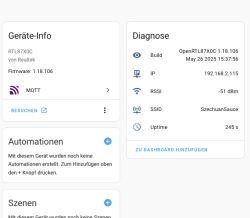
    Thanks for the help! This works through the UI and through the HTTP endpoint now, but no matter how often I reset, reboot or remove the device from HA, it comes up without Controls or Sensors:

    Diagnostics panel for RTL87X0C device showing firmware, connection, and Wi-Fi status.

    Any idea why this might be the case?
  • ADVERTISEMENT
  • #73 21565310
    p.kaczmarek2
    Moderator Smart Home
    So you have this radio buttons on OBK UI, but not in HA?

    Wait... do you REALLY have those new types on UI?

    I added them today, and your build is from 26 may. Hmm. Maybe you need to update?

    Just to be sure, is OpenStopClose channel type really working for you? Do you have it on OBK UI?

    @divadiow , do you have physical device with the same platform as @robshd2 ? Can you check do you get OpenStopClose in HA?

    ENABLE_ADVANCED_CHANNELTYPES_DISCOVERY seems to be enabled on RTL...

    I can also see you're SSID may be a Rick and Morty reference.
    Helpful post? Buy me a coffee.
  • #74 21565324
    robshd2
    Level 4  
    >>21565310

    I still run it with LowMidHigh for now, as the others seemed to error. I had hoped for either the buttons of Channel 2 to show up. Let me update and report back, if it makes a difference for discovery.

    Re: SSID: You would be correct ;)

    EDIT:

    Holy holy, it looks like the update did the trick! Thank you very much, my detachment from the Tuya Cloud seems to be complete!

    To get an understanding of the internals: The channels are exposed based on their type, which is why things like the dimmer on channel 2 would not be visible?

    Current config:

    startDriver TuyaMCU
    tuyaMcu_setBaudRate 9600
    tuyaMcu_defWiFiState 4
    setChannelType 1 OpenStopClose
    setChannelLabel 1 Commands
    linkTuyaMCUOutputToChannel 1 4 1
    setChannelType 2 dimmer
    setChannelLabel 2 ClosingState
    linkTuyaMCUOutputToChannel 2 2 2
    scheduleHADiscovery 5
  • #75 21565330
    divadiow
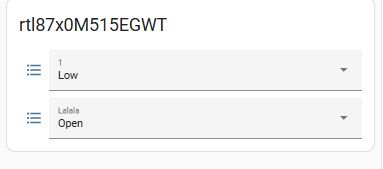
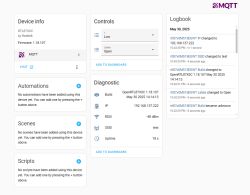
    Level 35  
    Screenshot of a panel with two dropdown lists set to Low and Open.

    Code: Text
    Log in, to see the code


    Control panel of RTL87X0C device by Realtek with diagnostics and logbook on the MQTT platform.
  • #76 21565333
    robshd2
    Level 4  
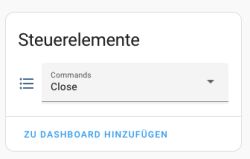
    Control panel with Close command and a button to add to dashboard.

    And a screenshot of the working toggle. Updated the message above with an edit. Thanks again!
  • #77 21565336
    p.kaczmarek2
    Moderator Smart Home
    Dimmer channel type is special, because it's used to create light entity. I think I will just create a separate channel type with HASS discovery for you tomorrow.

    So, what kind of channel type do we need? Does it have to be read and write, or read only?
    
    
                {
                  "abilityId": 2,
                  "accessMode": "rw",
                  "code": "percent_control",
                  "description": "If the curtain motor can monitor its current position (e.g., 50% open), this DP allows precise position control. If selected, percentage display must be enabled. The value range for this DP cannot be modified, added, or removed.",
                  "extensions": {
                    "iconName": "icon-dp_power"
                  },
                  "name": "Percentage Control",
                  "typeSpec": {
                    "max": 100,
                    "min": 0,
                    "scale": 0,
                    "step": 1,
                    "type": "value",
                    "typeDefaultValue": 0,
                    "unit": "%"
                  }
                },
    

    It seems it's rw, so both read and write. Ok, so do you have any suggestions which HA entity should we use for that?

    Alternatively, once we get this fully working, we can check HA for dedicated shutter entity, maybe it would be even more useful.

    Added after 1 [hours] 4 [minutes]:

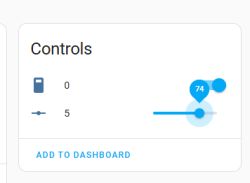
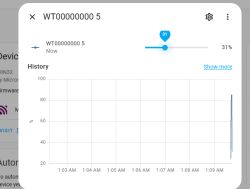
    maybe something like that:

    A control panel with a battery icon showing 0 and a slider set to 74.

    Added after 5 [minutes]:


    History chart of the device WT00000000 5 with a current value of 31%.
    Helpful post? Buy me a coffee.
  • #78 21599261
    ghorvat87
    Level 1  
    Hi guys, I had some luck with flashing WBR3 thanks to very detailed guide by @p.kaczmarek2 .

    Got this Tuya IR blaster that is now running Open RTL87X0C 1.18.130, however, I notice that the firmware build for RTL87X0C does not have the IR driver? Is this in the pipeline to be developed? I will he happy to publish the template for this device as soon as I get it working.

    Thanks!

    WBR2, WBR3, WBRU, W701-VA2-CG pinout, datasheet, flashing for Home Assistant WBR2, WBR3, WBRU, W701-VA2-CG pinout, datasheet, flashing for Home Assistant
  • #79 21599380
    p.kaczmarek2
    Moderator Smart Home
    It just need 50us (if I remember correctly) timer ported and then both IR libraries we have can work, more or less
    Helpful post? Buy me a coffee.
  • #80 21599998
    vinibali
    Level 7  
    >>21393106
    hi!
    it seems, this SP1 with RTL8710C has two different layouts.
    I double checked the pinouts for the BL097, but I couldn't make it work.
    
    {
      "vendor": "Tuya",
      "bDetailed": "0",
      "name": "Full Device Name Here",
      "model": "enter short model name here",
      "chip": "RTL87X0C",
      "board": "TODO",
      "flags": "1024",
      "keywords": [
        "TODO",
        "TODO",
        "TODO"
      ],
      "pins": {
        "2": "WifiLED;0",
        "3": "LED_n;0",
        "4": "Btn;0",
        "11": "Rel;0"
      },
      "command": "",
      "image": "https://obrazki.elektroda.pl/YOUR_IMAGE.jpg",
      "wiki": "https://www.elektroda.com/rtvforum/topic_YOUR_TOPIC.html"
    }
  • #81 21609784
    vinibali
    Level 7  
    >>21599998
    This was maybe not obvious, but I wanted to point out as the pinout for the LEDs, button and relay are different.
  • #83 21610405
    colgate1one
    Level 2  
    Hello from Germany,

    sorry that my first Post is directly a search for help.

    STORY (long):
    ---
    I bought 4 Wifi Smart Plugs (Power Meter) from Amazon.
    They are called Avatar AWP16L - sadly I started TASMOTA compatibility research only after they were here.
    I found a Blog (I am not sure yet if Posting Links to other Websites is allowed - will read the guidelines for this), lets say its the second hit on google for "awp16l tasmota" from 2021.
    It seemed that this will work, since the board look really similar.
    After some hours I found that the Pinout does not match and I have a different chip - WBR2.
    Discovering that they seem not be compatible with TASMOTA, I found this Thread, which is by the way awesome!
    For a first time UART Flash user it was not sometimes not obvious what to do, but manageable (booting into flash mode had me for some time).
    ---

    Questions starts here:
    Now I have two of the four Plugs flashed with OpenBK7231T_App (OpenRTL87X0Cxxxxx.bin).
    On TASMOTA how To´s now would be the Part where I copy a Template to the config?
    Like this one here? https://templates.blakadder.com/AWP16L.html ({"NAME":"AWP16L","GPIO":[0,0,320,0,0,2720,0,0,2624,32,2656,224,0,0],"FLAG":0,"BASE":45})
    If I understand correctly, this will set the Pinout from the ESP to the mainboard on the plug?
    But on OpenBK Website I was not able to find a template for my plug.
    Did I miss something? Is there maybe a config that I can use?
    I understand, that if not I may need to learn to Pinout myself - is there any good guideline?
    Would be nice to get a headstart, so I can finally finish this project =)

    Sorry for the long post and have fun ready about my stupidity.

    See ya.
  • #84 21610410
    p.kaczmarek2
    Moderator Smart Home
    We don't currently have automatic remap of ESP TYWE2S to WBR2 pins, and it most likely wouldn't help, because manufacturer may change pin roles in a meantime. I think the simplest way now for you would be to just use GPIO doctor to find LED, Relay and button. Then we can think about power metering, as it's also supported by this plug?
    https://www.elektroda.com/rtvforum/topic3976371.html
    Helpful post? Buy me a coffee.
  • #85 21610546
    colgate1one
    Level 2  
    [postid:5713d156a2][/postid:5713d156a2]
    Thank you very much!
    I think I got the PINs:
    Code: JSON
    Log in, to see the code

    I am able to Toggle the Realy and the LED in the Menu now.
    The power measurement is still missing.
    I tryed the Powere Meeter Too, but it says "Unknown command"
    Hopefully it is as comfortable as finding out the PINs, to activate the Measument funktion =)


    Goof Evening.


    //EDIT:
    OK, now I know that I had to start the driver for Power Metering.
    startDriver BL0942 9600
    And I tryed guessing the 3 Sensors:
    "pins": {
    "12": "dInput;51",
    "13": "LED_n;50",
    "15": "BL0937CF;0",
    "17": "Rel;46",
    "18": "BL0937SEL;0",
    "19": "BL0937CF1;0"
    },
    Now I was able to read the Volt and Amps and also calibrate them.
    But Power ist still not showing and I cannot calibrate - "Last status: ERROR: Command found but returned error (undefined)"
    What am I missing? I thought that maybe one of the PINs ist not corret, but if I remove one, then I get only zeros.
    (I was not able to find out how the BL937 CF CF1 and SEL corelate to one another. Is it like, one is for A one for V and one for W?
    Normaly I would say, that the W would just be calculated?)
📢 Listen (AI):

Topic summary

The discussion centers on flashing and integrating Tuya modules based on the RTL8720CF chip (W701-VA2-CG), including WBR1, WBR2, WBR3, WBR2L, WBR3L, and WBRU, for cloud-free operation with Home Assistant (HA) using the AmebaZ2 PG Tool and OpenBK7231T (OBK) firmware. Detailed pinouts, flashing jigs, and boot logs are shared, highlighting the need to access specific pins (A0, A15, A16) often located on the PCB underside, sometimes requiring desoldering. Users report successful flashing on devices like Kasa HS200, Gosund SP1 (BL097), and Tapo P110, with calibration support for BL0937 power monitoring chips. Challenges include reading and backing up firmware, especially system and calibration data, which may be stored in efuse or inaccessible flash areas. The community collaborates on templates for device configuration, MQTT integration, and HA discovery, including channel type mappings (e.g., OpenStopClose, LowMidHigh, dimmer) for TuyaMCU protocols. OTA updates and UART communication are tested, with ongoing development of tools and firmware support for these Realtek-based modules. Additional discussion covers the similarity between WBR3 and WBRU modules for firmware transplantation and the presence of Tuya config partitions. The thread also touches on related devices like thermostats (WT50-WH-3A, WT100-WH-3A, WT200-16A-W, HY609-WE) and the FR8016HA MCU in some modules. Overall, the topic provides a comprehensive guide and collaborative troubleshooting for flashing, configuring, and integrating RTL8720CF-based Tuya modules with open-source firmware and Home Assistant.
Summary generated by the language model.
ADVERTISEMENT